


This recipe for how to make sauerkraut in a crock is easy enough for beginners and yields the most delicious homemade sauerkraut! This probiotic rich condiment is perfect for storing throughout the Fall and Winter months and is made with just two ingredients: cabbage and salt.
I've been fermenting for over 10 years now, and looking back it's hard to believe it's been that long. My first forays into fermenting were filled with successes, failures, and plenty of questions.
Thankfully, like all skills, you build over time. You start out wondering, hoping, and praying that your sauerkraut will turn out after weighing, measuring, and obsessing over it for weeks. 10 years later you're throwing things together in your kitchen with your eyes closed, not giving a single thought as to whether it will turn out or not - of course it will, and if it doesn't, it will the next time.
I say this to encourage you that fermentation success - even if it feels like a steep mountain to climb, will come to you. Although weighing your cabbages and salt feels like an insurmountable feat at first, eventually it will become second nature and you will be able to enjoy the fruits of your labor.
I'm sharing this recipe/method for how to make sauerkraut in a crock because I believe it to be a simple, straightforward way to learn how to make your own sauerkraut. Although it does require some special equipment (a fermentation crock, which is an investment piece), it's great for beginners to learn this new skill. If you're not ready to invest in a crock, check out my fermented red cabbage recipe. That one uses a mason jar and can be made with either red cabbage or standard green cabbage.
Reasons to Make Your Own Sauerkraut
- It's cheaper - Store-bought Lacto-fermented sauerkraut is a great convenience, but it's much pricier than making your own! In fact, for the price of a single tiny jar, you could have gallons of homemade sauerkraut.
- You have control of the quality of ingredients used - meaning you can make choices based on your personal preferences (i.e. organic/local cabbage and unrefined salt).
- It contains beneficial, gut-friendly bacteria. While this can be found in store-bought brands (like Wildbrine), it's very rare as most are processed for shelf storage.
- A great way to use homegrown cabbages or farmer's market finds, by preserving them and amplifying the nutrients.
Ingredients
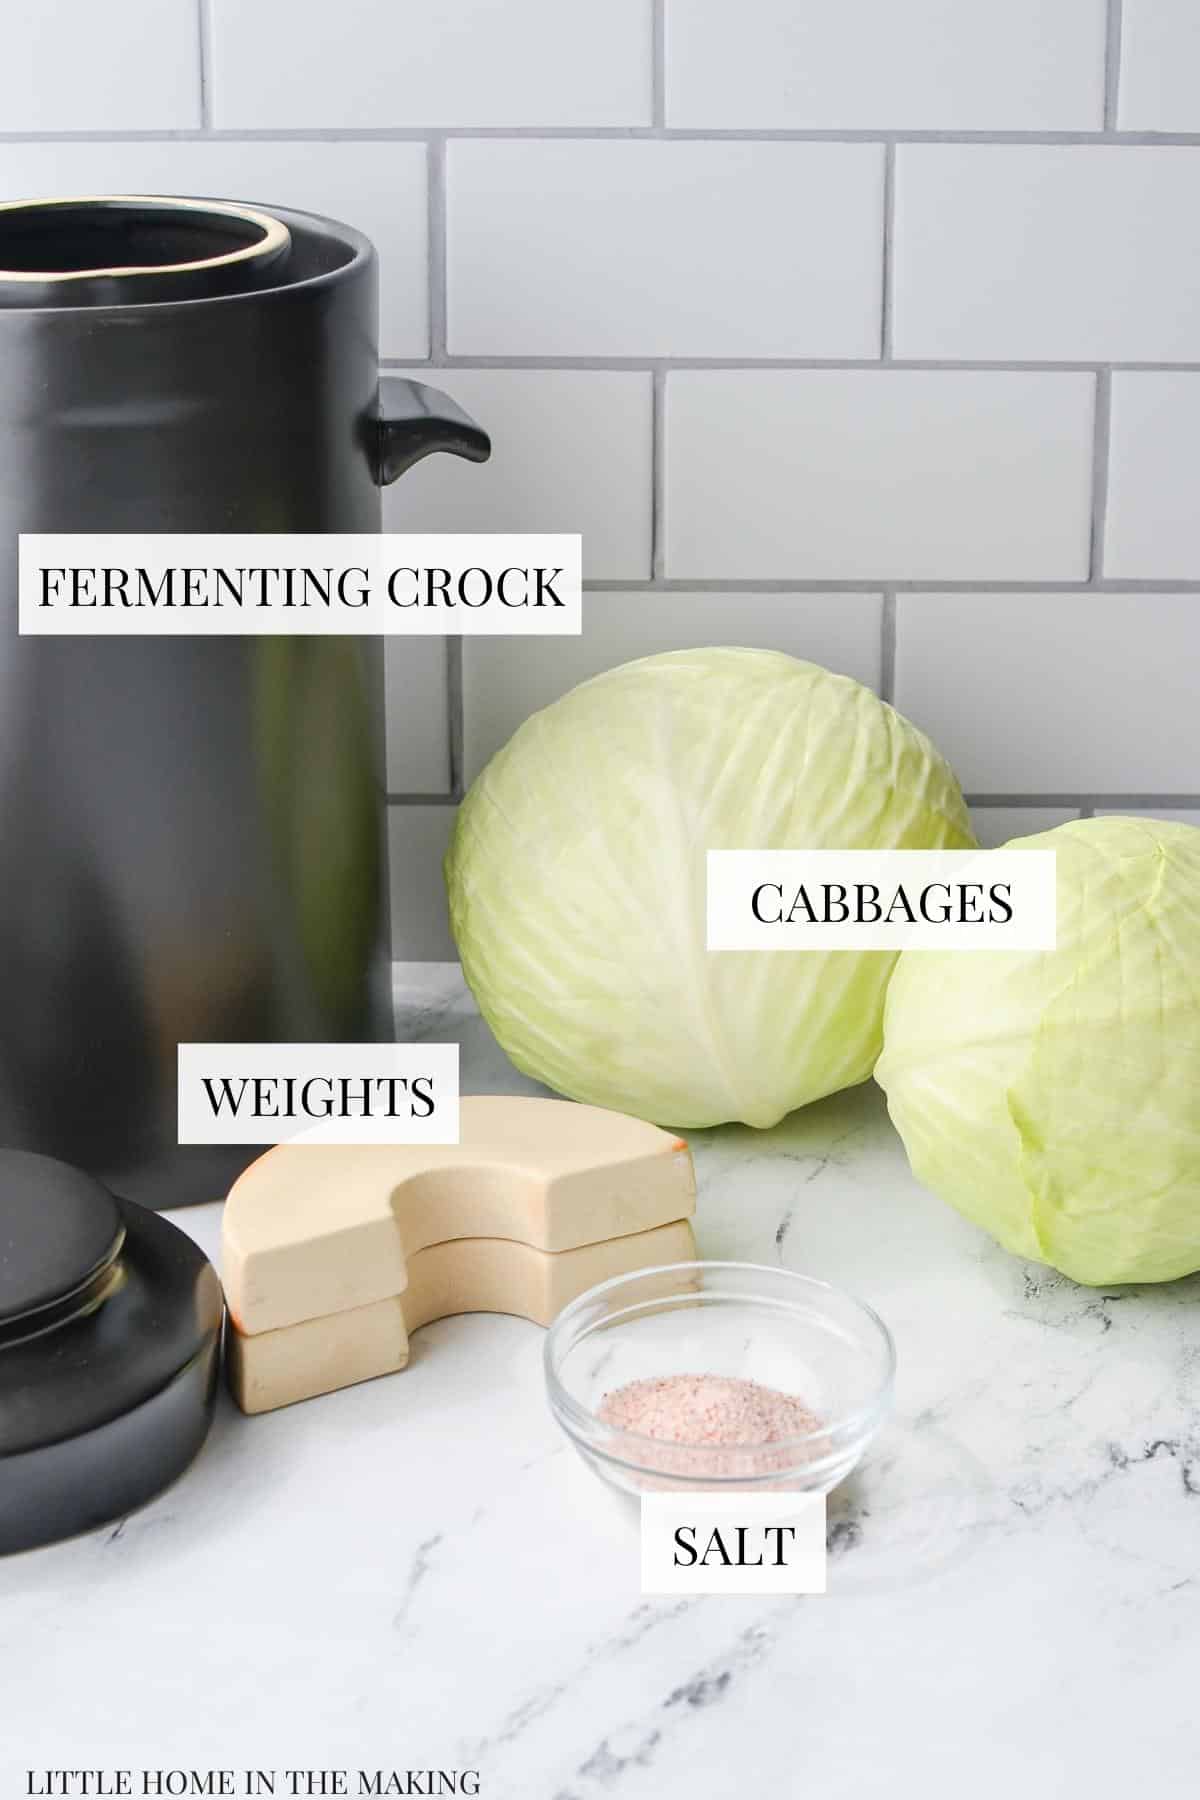
- Cabbages: Seek out fresh, good quality cabbages that release water when pierced with a fingernail (if possible). Select organic cabbages when available, but no worries if you need to purchase conventional ones.
- Salt: Select an unrefined salt (I use Redmond Real Salt) that is pinkish in color and uniodized.
- Water: If your cabbages do not produce enough brine after being salted, you'll need to add some water or prepared brine. This should be drinkable quality and free from chlorine.
Equipment:
- Digital scale: This makes weighing your cabbages and salt effortless. It's also essential if you plan on venturing into the world of sourdough. Amazon basics makes a model that is under $10.
- Fermentation crock: There are many styles of fermentation crocks (see below). I use this one and loved the results!
- Fermentation weights: If you purchase a fermentation crock, it will most likely come with fermentation weights fitted for the opening. If you're using an old crock with a lid, you may need to purchase your own. I recommend these glass lids with handles (I use them for many of my mason jar projects).
Different Types of Fermentation Crocks
- Water seal crock: This is the style that I used, and I prefer it because it keeps a very tight seal AND blocks out the light. It also comes with custom fermentation weights, which increase your chance of having a successful fermentation.
- Classic stoneware: These are either open, come with a stoneware lid, OR (in rare cases) come with additional fermentation equipment like weights and a more secure fitting lid. They are the classic fermenting crock that you often see at antique shops, although there are many modern replicas.
- Glass crock: These are also sealed with water, but they are clear. This is great for seeing what is going on inside of the crock, but I personally prefer the taste of Sauerkraut that has fermented in the dark.
How to Make Sauerkraut in a Crock
First, Soak the Fermentation Weights
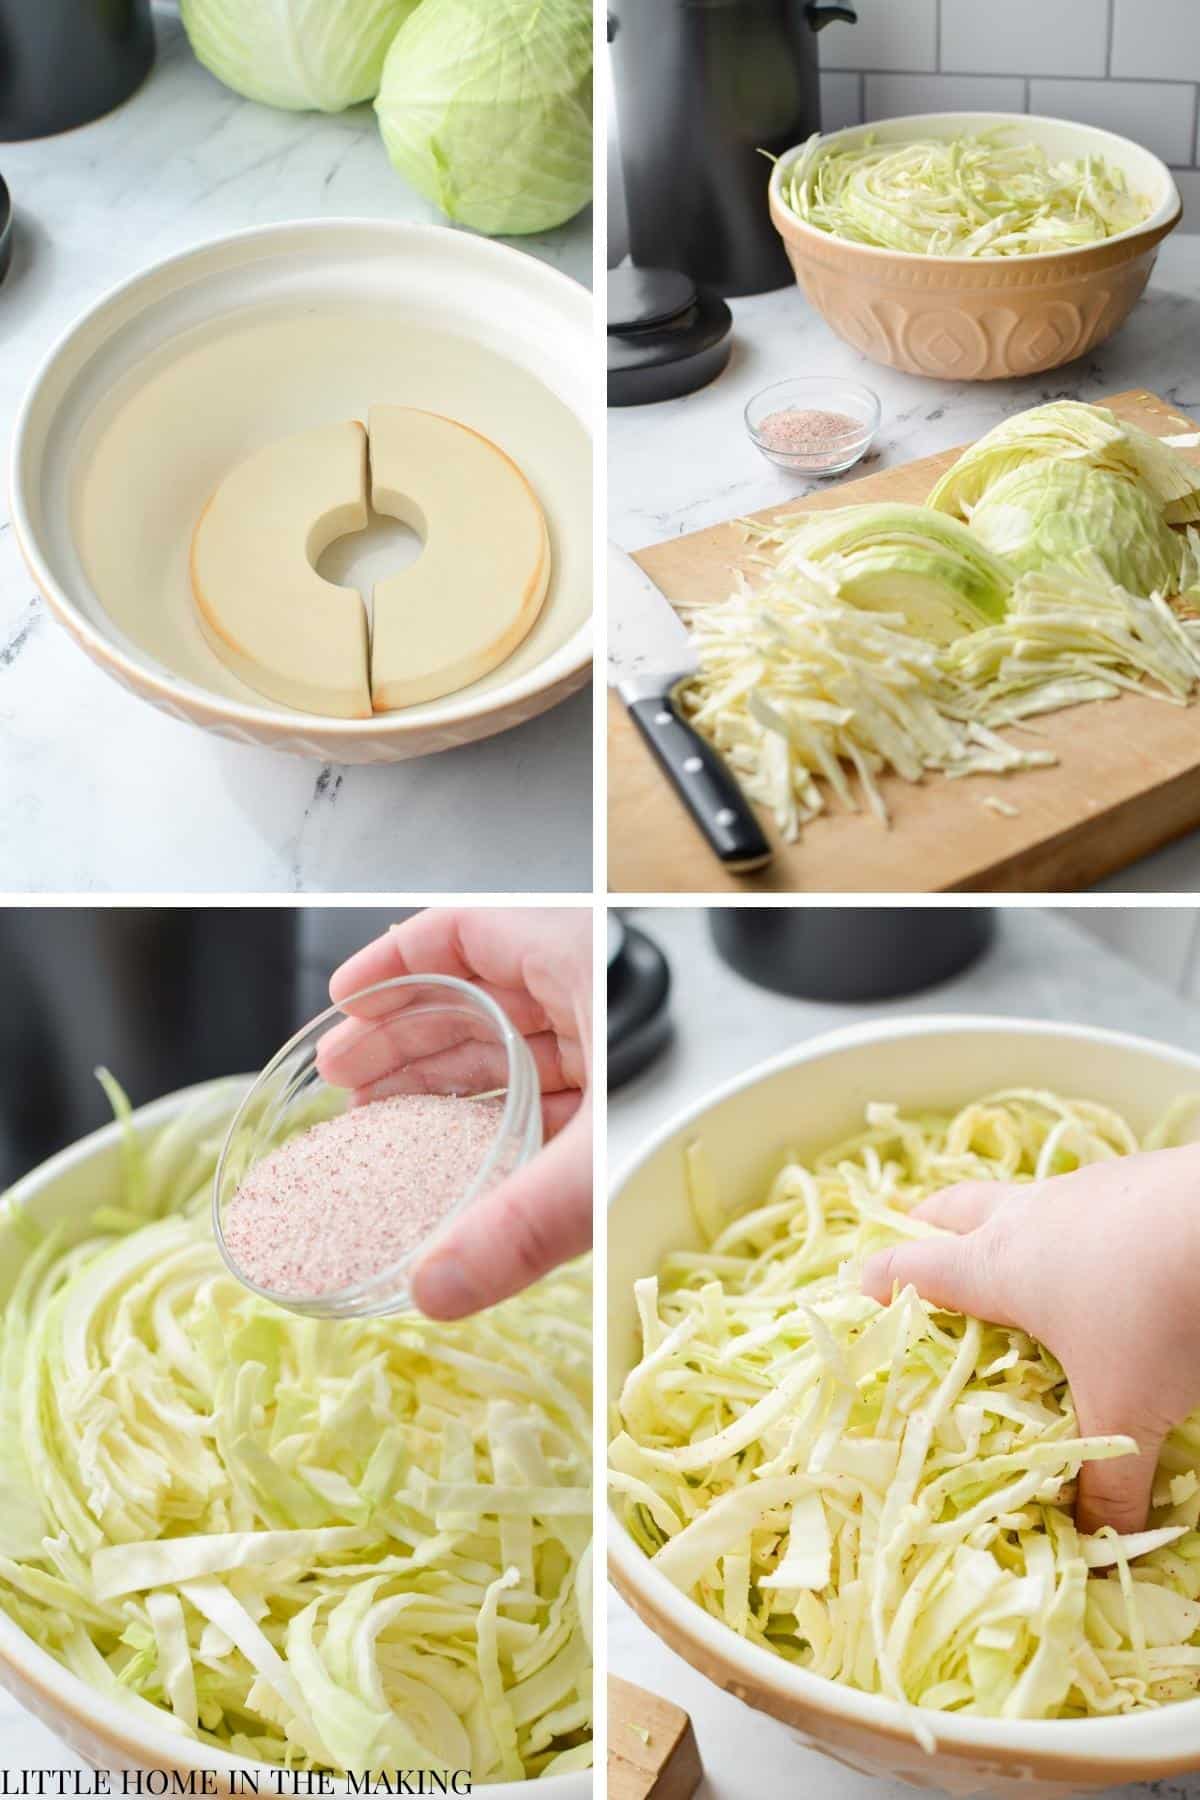
If your crock came with weights that are unglazed, you'll have to give them a quick soak in some warm water. Just fill a bowl about halfway and gently submerge the weights. Allow them to soak while you prep the cabbage, or up to several hours in advance if you prefer.
If your weights are glazed or glass, this step isn't necessary. Just make sure they are clean, dry, and ready to go!
Preparing the Cabbage
- If your cabbage is organic, you can generally use any outer leaves to prepare your sauerkraut. If not, make sure you remove the first 1-2 layers of outer leaves. I personally do this - organic or not - as I find the outer leaves can hold a bit of a bitter flavor.
Once the outer leaves are removed, slice the cabbages in half and remove the core from each side by cutting a triangle around it. Discard, give to your chickens, or compost it.
- Then cut the cabbage into very thin slices (about ⅛ - ¼") using a sharp knife.
- You can use a box grater or a food processor, but I recommend the slicing method.
- This gives a crisp, firm cabbage that ferments at a good pace. Finely shredded cabbages tend to ferment too quickly (especially in the heat) and can be a bit on the mushy side. For the best results, I recommend doing things the old-fashioned way!
Adding the Salt
Once all of your cabbage has been shredded, add it to a bowl that is large enough to accommodate its size (or several medium-sized bowls).
Sprinkle the cabbage with the required amount of salt (2-3% by weight, or 4% if your cabbages are old) and massage the salt in using your hands, the end of a wooden spoon, or a kraut pounder.
Once the salt is worked in, allow the cabbage to rest for 30 minutes to an hour to pull out as much liquid as possible - this will create the brine needed for the fermentation to take place.
How Much Salt Do I Need to Use?
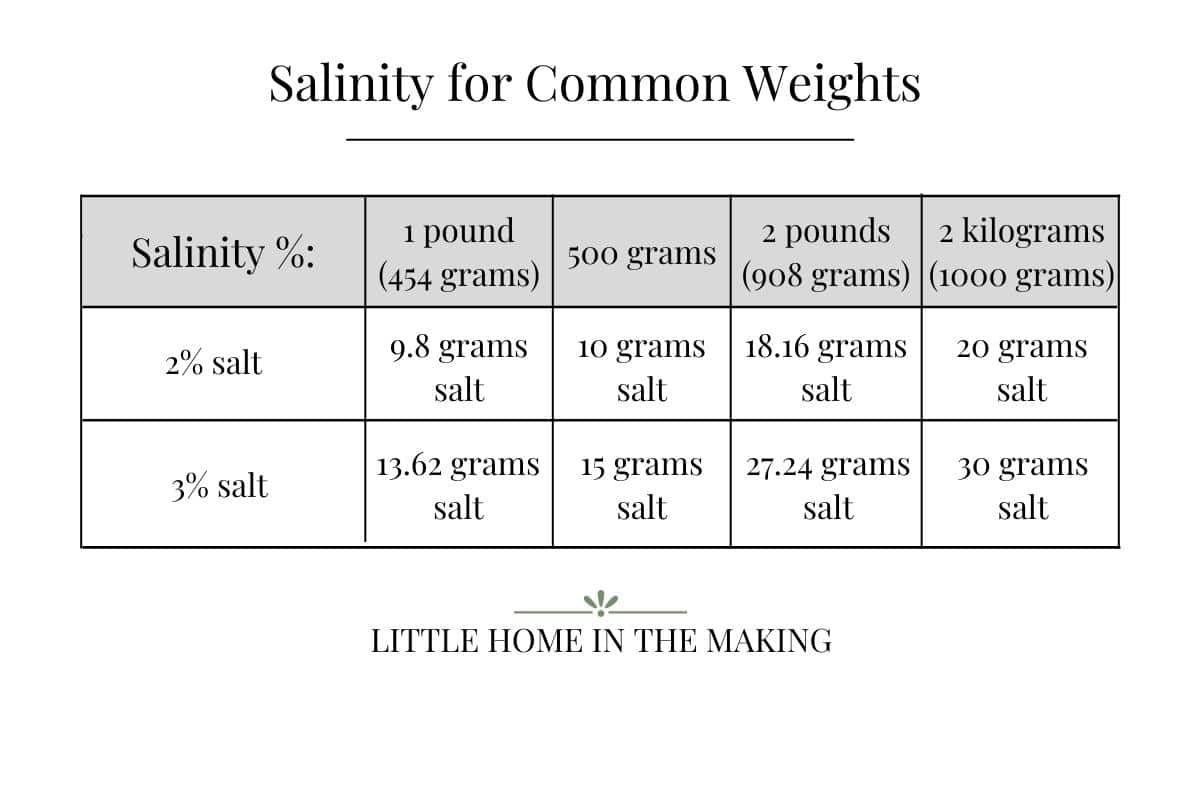
The minimum amount of salt you can use for a successful ferment is about 2% (you can go a little lower if you have a starter culture). For beginners and for this recipe, I recommend going with 3% or even 4% salt. This is calculated by using a simple equation:
Weight in grams x 2% = grams in salt required OR weight in grams x 3% = grams in salt required.
If your cabbages are on the “dry” side you will need to add some water or brine to the ferment. You will know they are dry if they don't seep out water when you pierce the outer leaves with your fingernail.
I like to add water to my sauerkraut (it's a touch easier than mixing up brine), so I recommend aiming for a 3% salinity (or even 4% if your cabbages have been in cold storage). This gives you some margin and won’t dilute the ferment below 2% when you add the water.
If you don't have a scale, you can use 1 ½ – 2 teaspoons of salt for every 1 pound of cabbage. The lower number will give you roughly 2% salinity and the higher one roughly 3% salinity. If you purchased your cabbage you should be able to check your receipt for the weight.
There is a little bit more information on this topic in my post for Fermented Red Cabbage, so if you want to learn more about calculating the salt needed, be sure to check out the post.
Making Sauerkraut in a Crock
Once your cabbage has rested for at least 30 minutes, there should be some liquid pooling at the bottom of the bowl - this acts as your brine for fermentation and will keep your cabbages submerged. If there is not enough brine, you will need to add water or prepared brine (more on that in a minute).
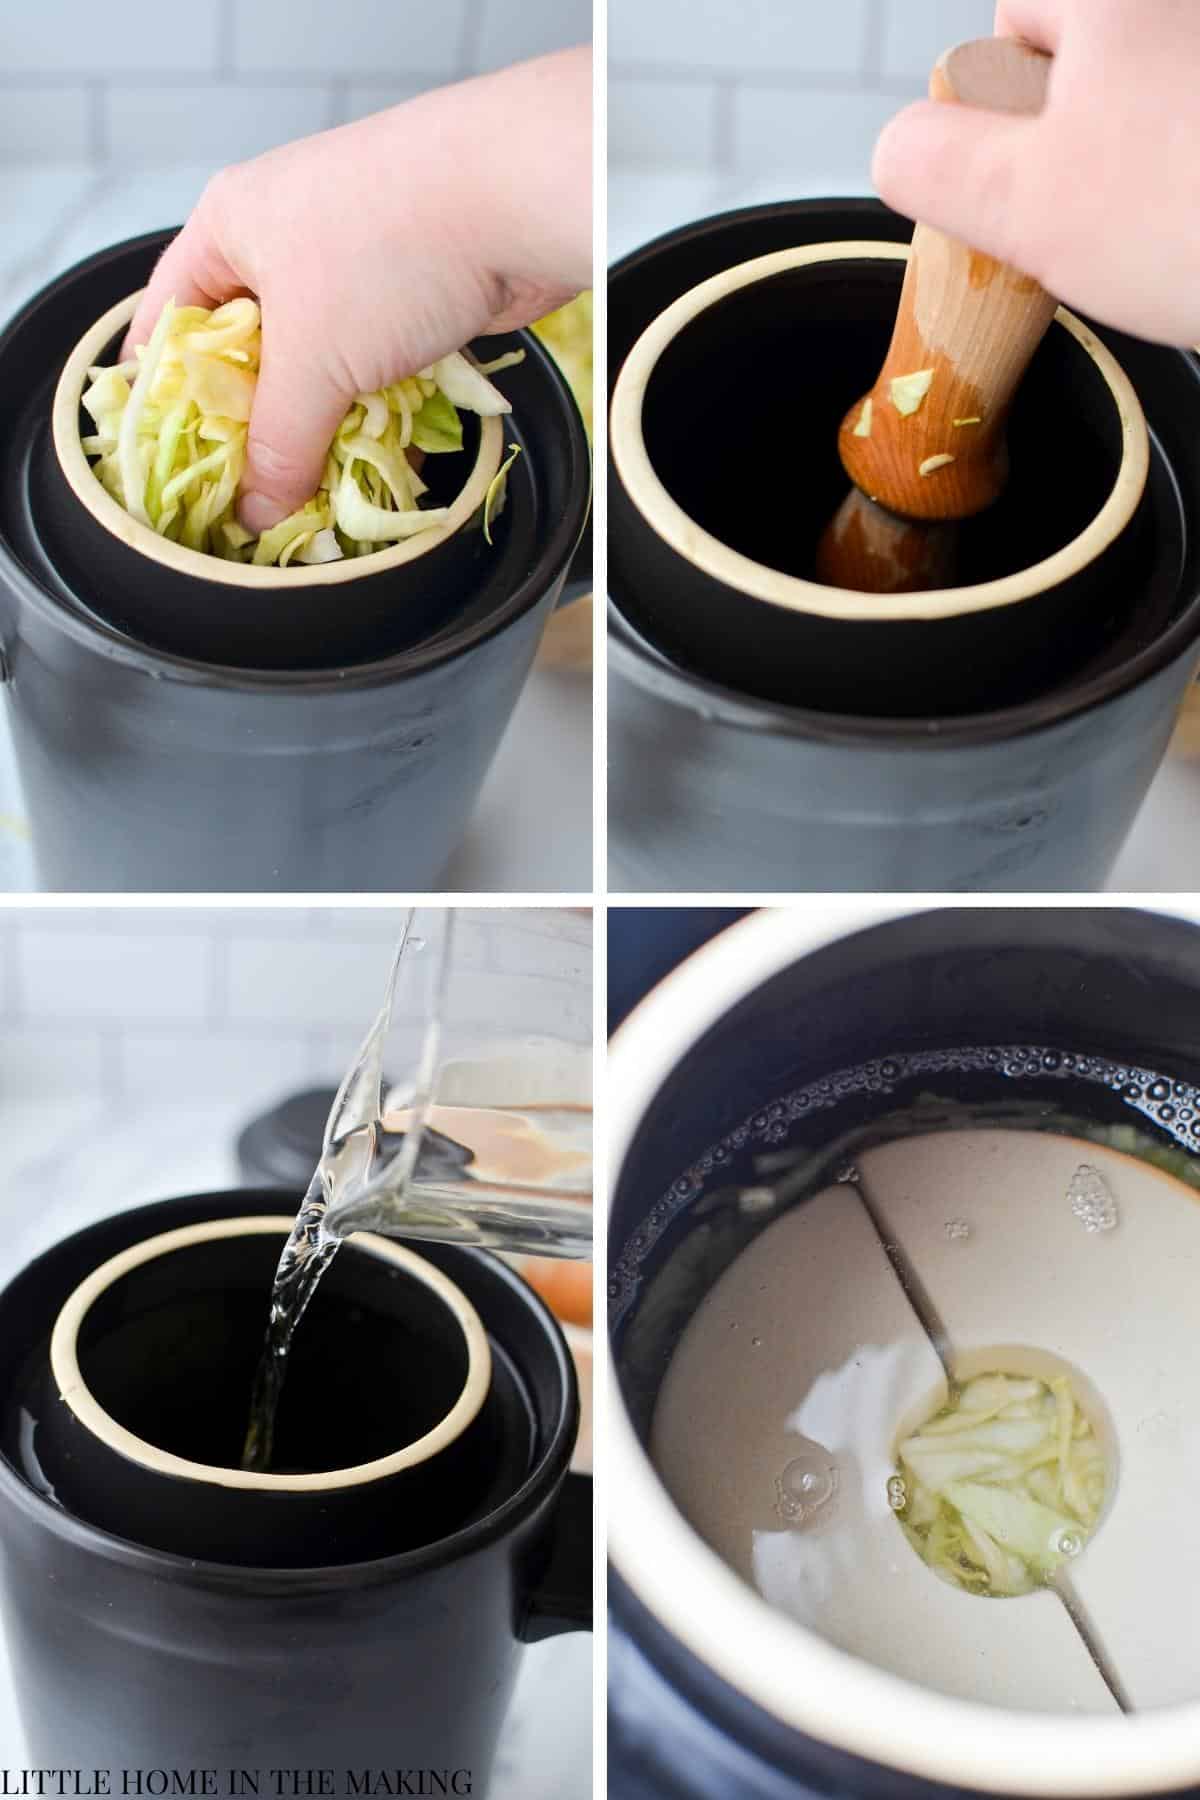
- Add a few handfuls of cabbage to the crock, packing it down tightly after each layer with a kraut pounder. This will also help release additional liquid if there is any remaining in the cabbage.
- Repeat until all of the cabbage has been packed into the crock (or it reaches about 2" from the top), packing it down as you go.
Adjusting the Brine
If your cabbages were very fresh and juicy, you may have enough brine to completely cover your cabbage and keep it submerged during the fermentation process.
To test this, press down on the food packed into the crock with a weight or the end of a mason jar. If the liquid rises up to cover by at least 1", you are good to go! If not, you're going to need to add some water or brine.
- I like to use water because it's just a tiny bit easier. I anticipate needing additional liquid, so I use a 3% (or slightly higher) salt by weight early on in the process and add just enough water. Since the water rarely exceeds ⅓ cup or so, I don't worry about diluting the brine too much.
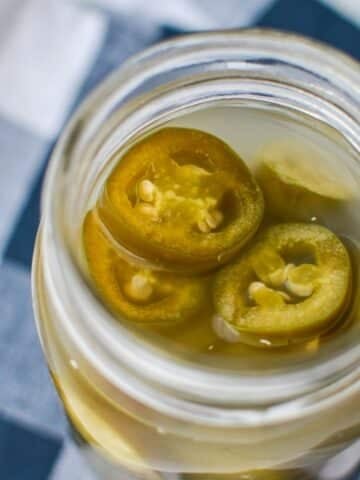
- If you used 2% salt or you're very new to fermentation, try using brine instead. Brine is easy enough to make, and you can use any leftovers for small fermentation projects like making fermented jalapenos.
- If you would like to use brine, simply stir 1 ¾ teaspoons of unrefined salt with 1 cup of room-temperature water. This can be used to top off your sauerkraut, which will provide enough liquid to keep the shredded cabbage submerged at all times.
Once you have enough liquid, add in your fermentation weights and press on them to push the cabbage under the brine.
Adding the Lid to the Fermentation Crock
Different styles of crocks will have different lids. Most crocks have a standard lid without an airtight seal. This is generally completely fine for sauerkraut, but having a tighter seal does seem to prevent any issues with potential mold, and of course fruit flies (which happen to adore actively fermenting foods).
The style of crock that I have uses a water seal. This creates an airtight seal, and I happened to love the results. My sauerkraut retained more brine, and it stayed crisper than when using a standard mason jar and weight system (like I did for my fermented red sauerkraut). I also attribute some of this to it being in a dark environment - which is how sauerkraut has traditionally been made for millennia.

To use a water seal, add drinkable quality water around the edge of the crock (you will see a lip), and then gently lower the lid on top. Some excess water will splash out if you added too much, but it can easily be cleaned with a cloth.
Check your water seal every few days - eventually, the water will start to evaporate and you'll have to add a little more. Take this opportunity to check on your sauerkraut and adjust the weights if needed.
Fermenting: How Long and When is it Done?
Sauerkraut needs to ferment for at least 2-6 weeks, but often takes far longer depending on a variety of factors including:
- The size of the fermentation vessel
- The ambient temperature of the home
- If a starter culture was used
- The time of year
- How small or large the cabbage pieces are
It's very important to go by taste and appearance when it comes to sauerkraut. In larger vessels (like crocks), your fermentation time is going to be extended greatly. That is why traditionally sauerkraut was fermented in large barrels in root cellars - the slow, ongoing fermentation made for a longer storage time and allowed it to be kept without refrigeration.
My crock took about 6 weeks in the warmer months of Summer, but it could have likely gone for longer, especially during the cooler months. More reliable indicators than time are the signs that your fermentation has been successful, and then it's up to your personal tastes to determine when the sauerkraut is ready to be moved to cold storage.
Signs of a successful fermentation:
- A period of bubbling activity with the most activity occurring within the first 3-7 days
- A pleasantly sour smell
- Reduced saltiness
- A crisp texture
- A pleasantly sour taste
- No signs of mold
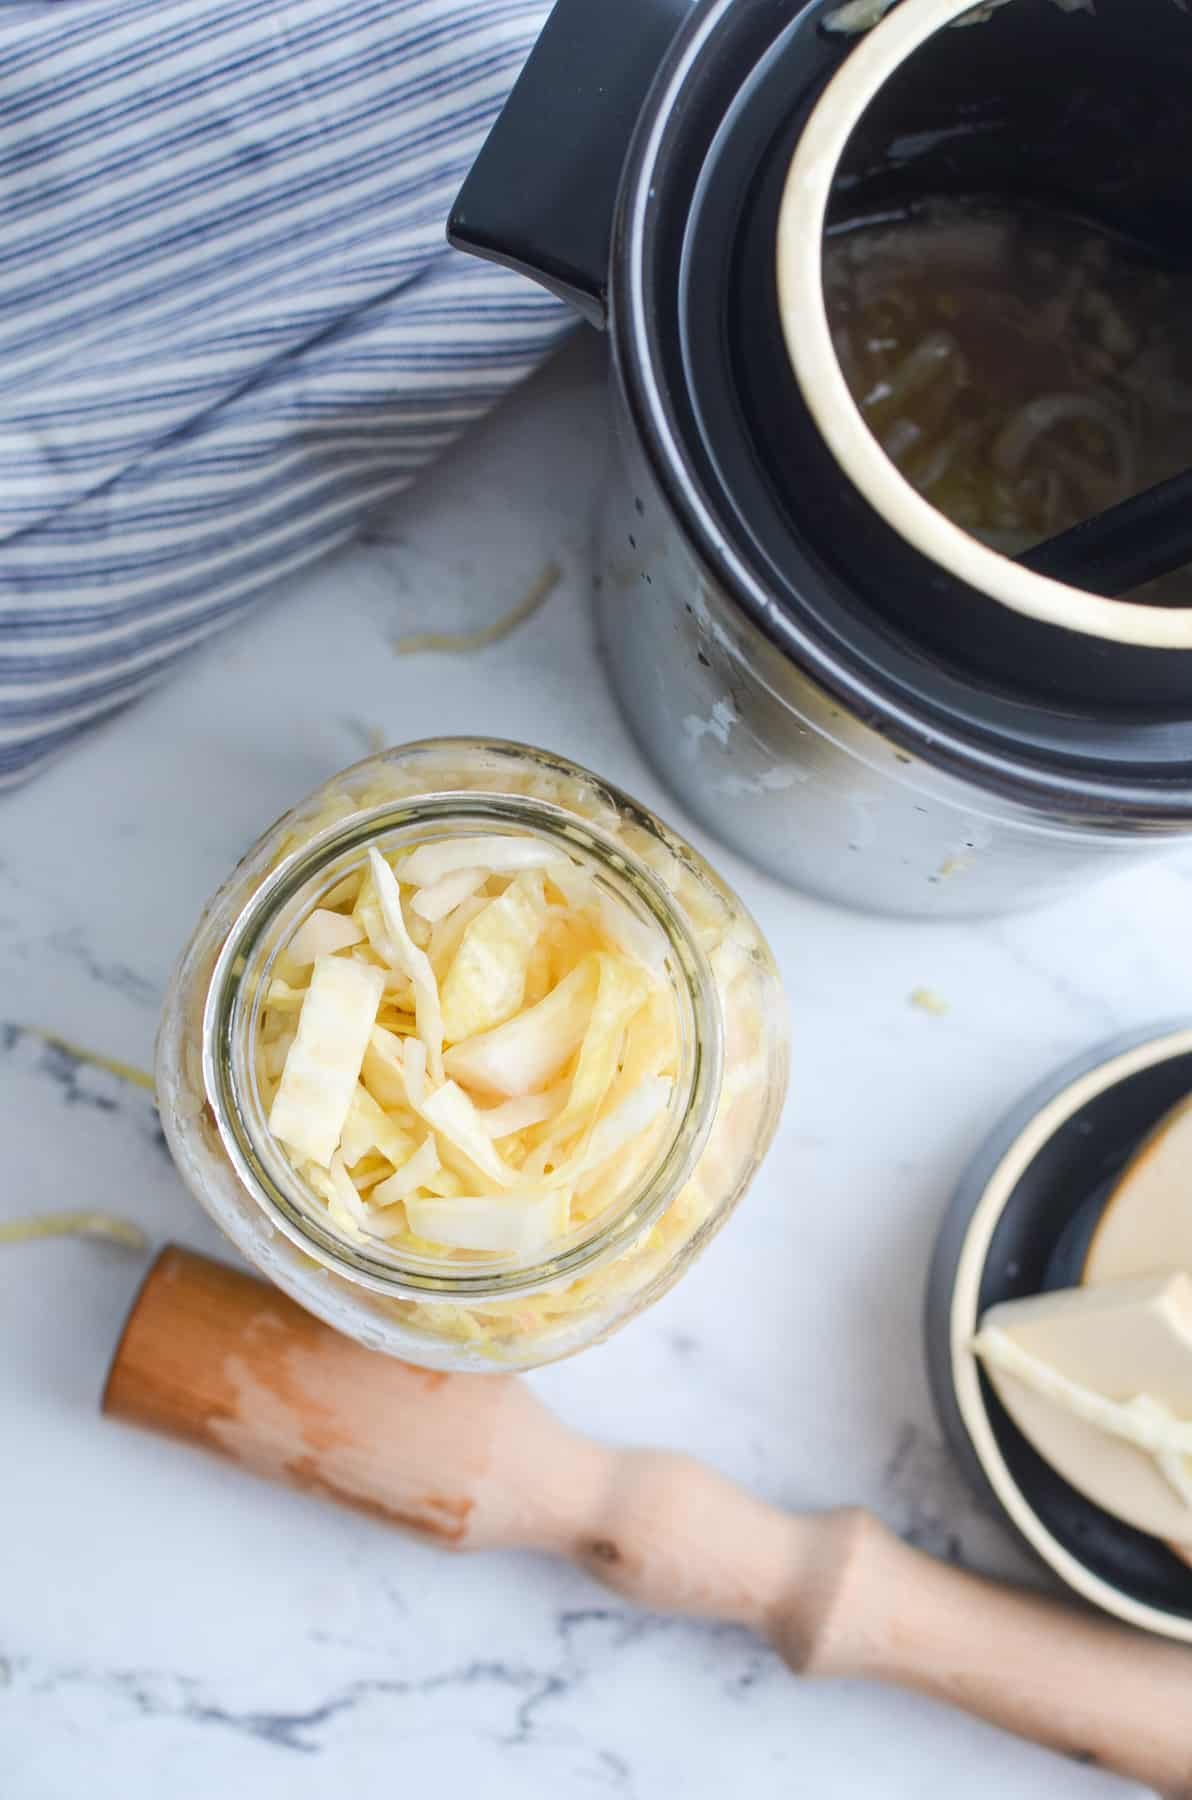
Sauerkraut In a Crock: Transferring it into Jars
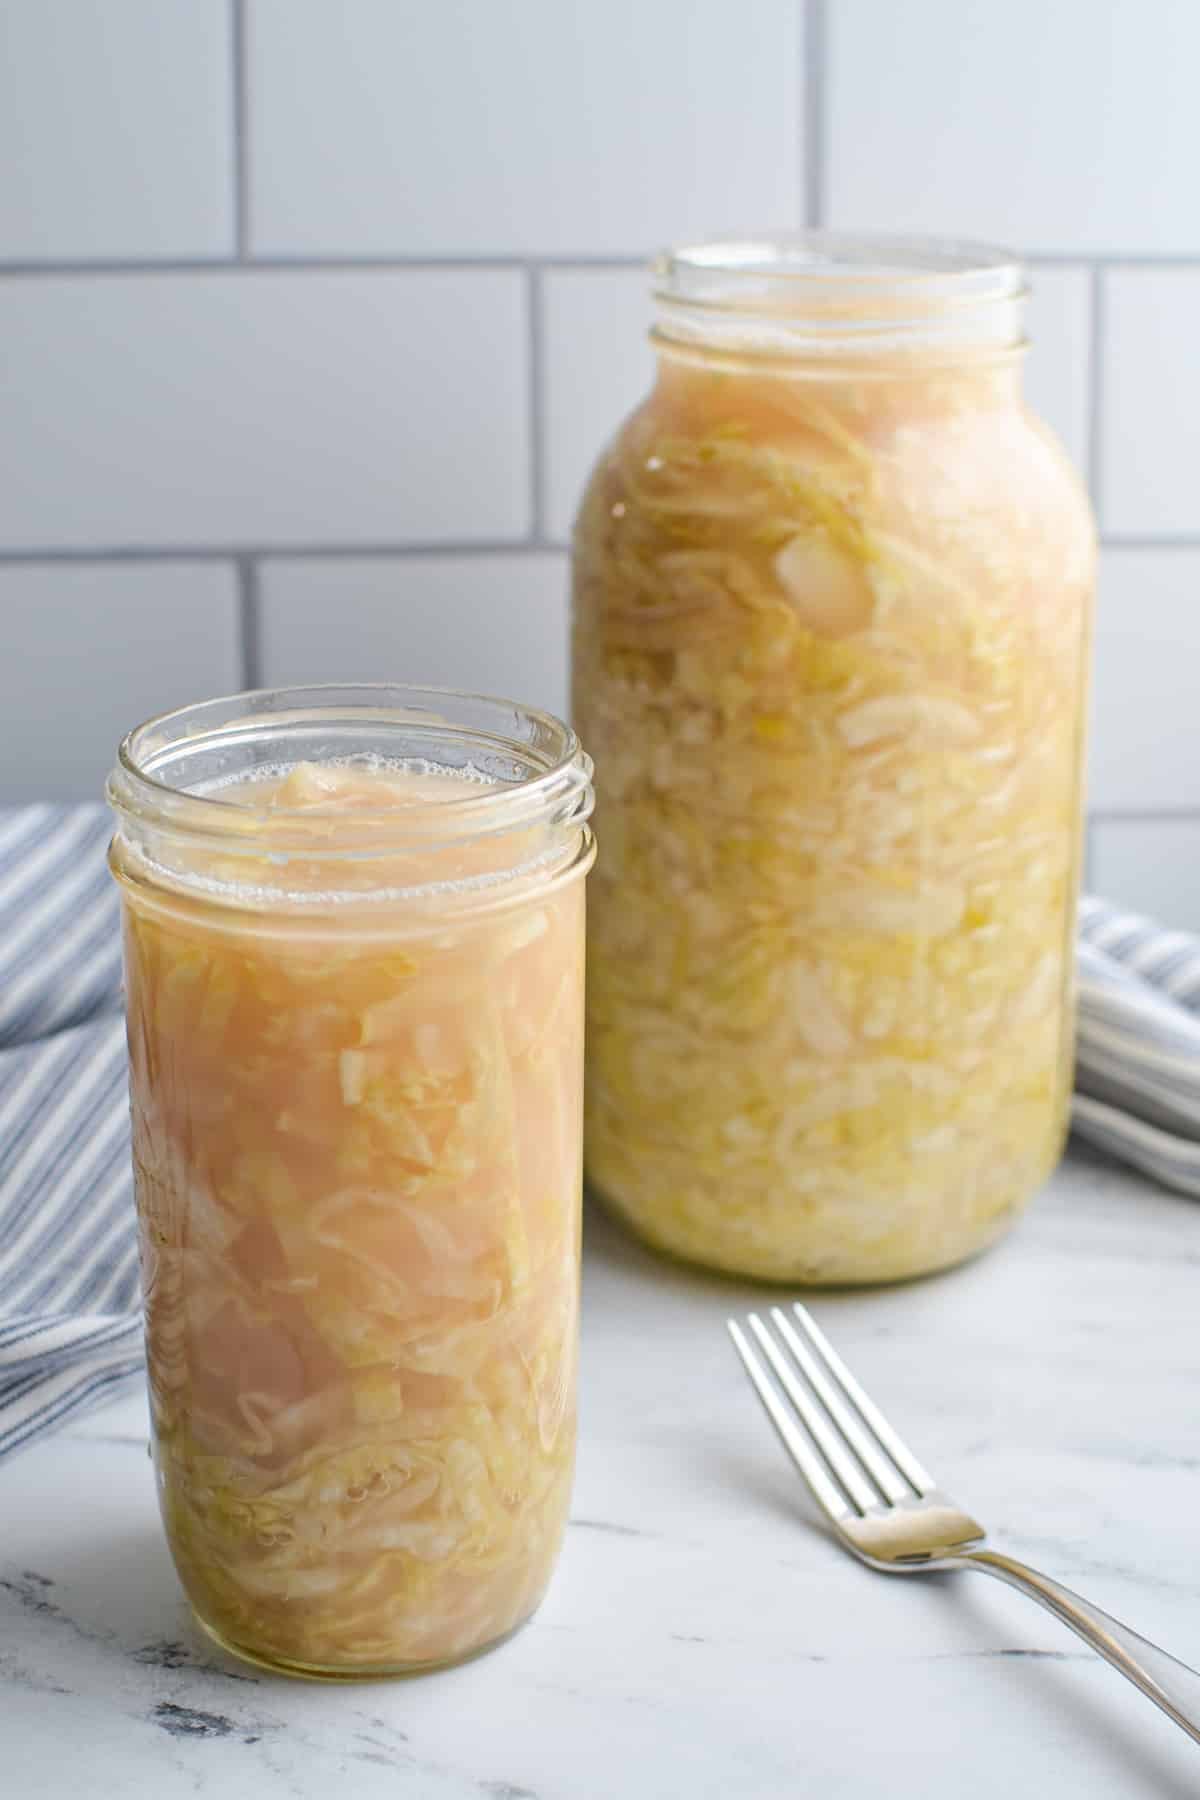
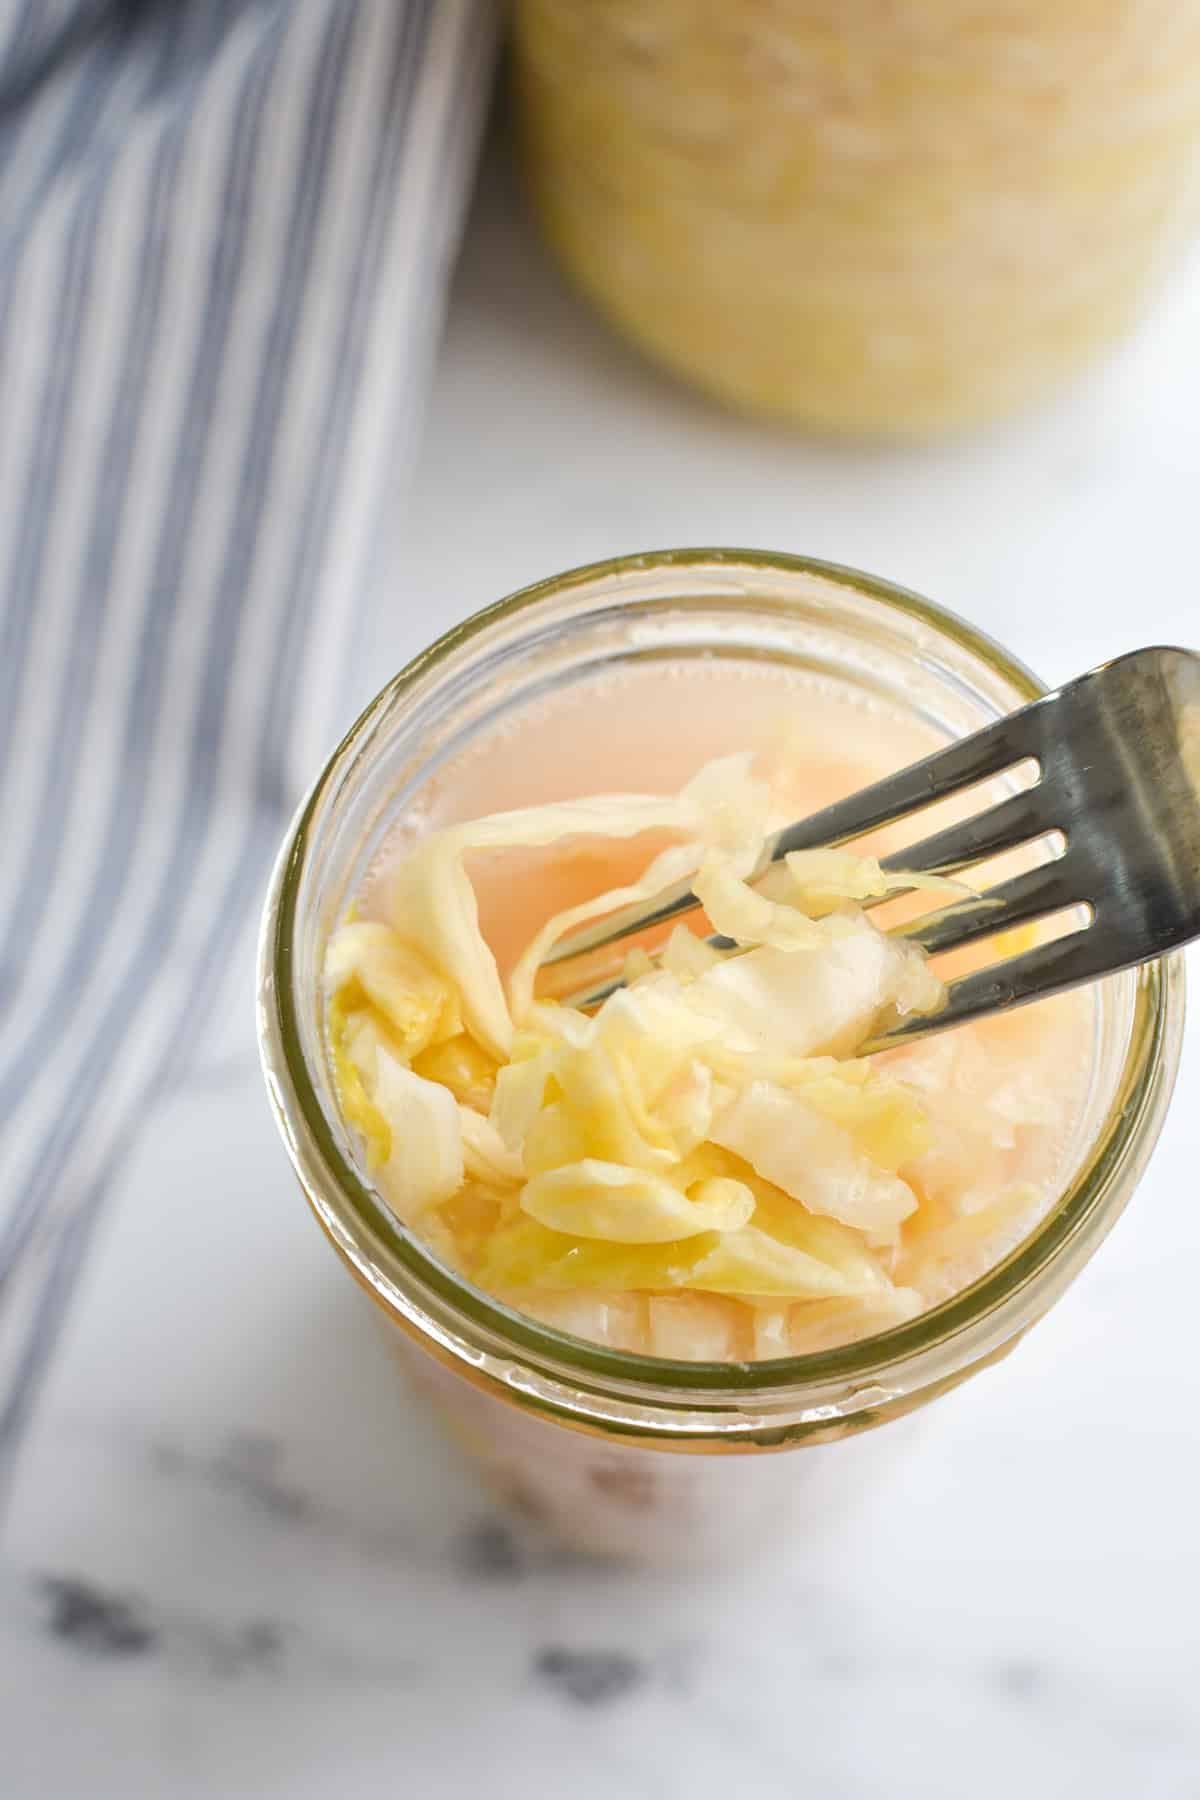
Once your sauerkraut has fermented to your liking, with a pleasantly sour taste, reduced saltiness, and a crisp texture, you're ready to transfer the sauerkraut into jars for storage.
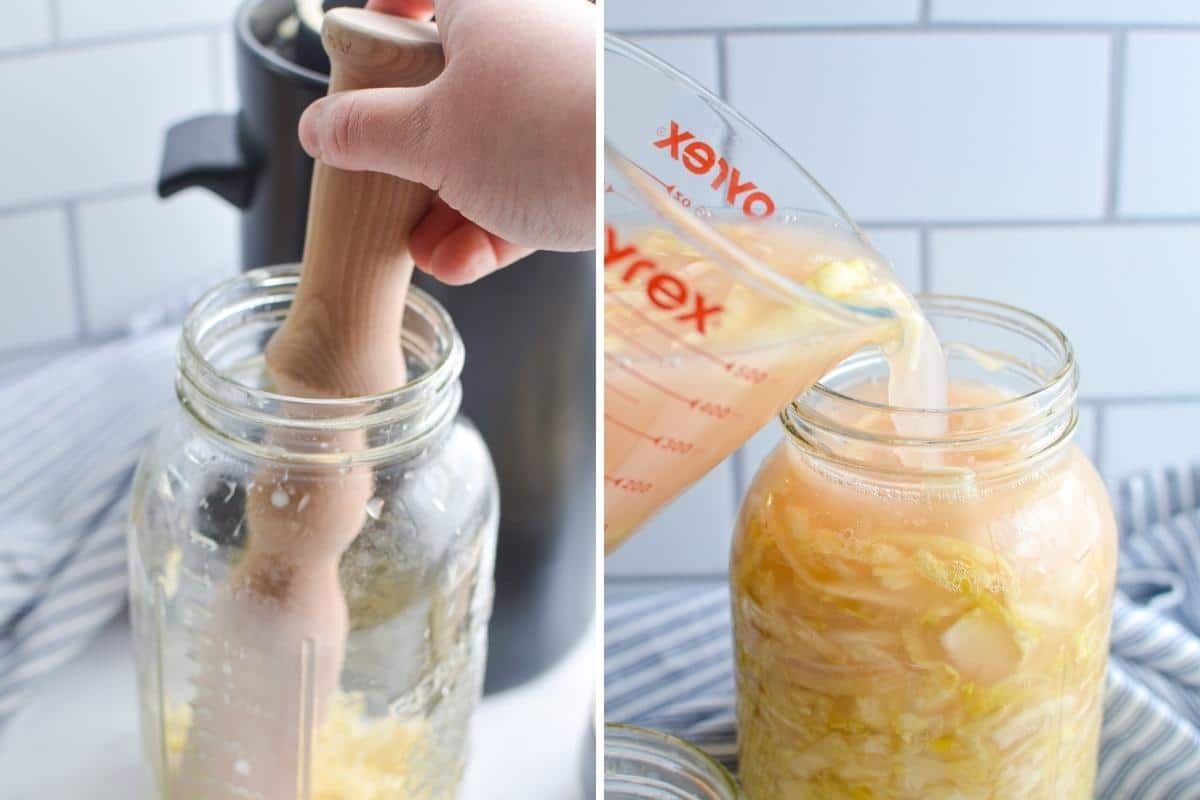
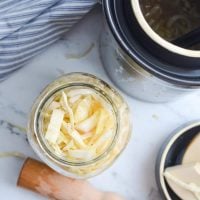
- Pack the cabbage into jars (I used a half-gallon and a 750mL jar), patting each layer down to pack the cabbage in tightly.
- Ladle or pour in some of the sauerkraut brine to adequately cover each jar of sauerkraut, filling to about ½" from the top of the jar.
Note: I store any leftover sauerkraut brine to use as a starter culture for other ferments (and my next batch of sauerkraut). - Then top the jar with a plastic lid (the metal two-piece canning lids tend to rust and corrode when storing fermented foods) and store in the fridge or a cold room.
Storing Your Sauerkraut
Your sauerkraut will store for a long period of time, anywhere from a few months to a year. Fermented foods have a long shelf life, so as long as they are kept cold enough to slow (and/or hault) fermentation and they are not exposed to the air too often, they can last for a very long time.
Signs of spoilage include mold, an off smell, or a slimy texture. If you notice any of these things, discard your sauerkraut and start a new batch.
Best Practices for Fermentation
- Use clean tools and equipment – No need to sterilize, but you should make sure all tools and equipment is clean. This means that they have been thoroughly washed, dried, and inspected for any lingering debris.
- Keep your cabbage submerged – The single best piece of advice I can give you is to ensure you keep your fermenting red cabbage fully submerged. Oxygen is the enemy when it comes to ferments. The brine is there to ensure your vegetables ferment in an oxygen-free environment.
- Taste it – fermentation is a spectrum, and its “doneness” is completely dependent on the particular tastes of the individual crafting it. Don’t be afraid to taste your sauerkraut. Start at the 2-week mark, and keep going until you absolutely love the taste. Then you’re ready to prepare it for cold storage and enjoy!
- Keep away from other ferments – This is more of a cautionary step, but I have heard of other ferments cross-contaminating. This sauerkraut is done in a crock with a lid, so it shouldn’t be able to cross-contaminate with other nearby ferments. I always say it’s better to be safe than sorry. Keep your other ferments (sourdough, kimchi, kombucha, water kefir, etc) at least 4 feet away.
FAQ's About Making Sauerkraut in a Crock
If you're fermenting your sauerkraut in a large vessle (like a 1-3 gallon crock), it's going to take a bit longer than using a mason jar. Start checking your saeurkraut around the 2 week mark, but it will generally take at least 6 weeks. If your kitchen is on the cool side, it may take as long as 8-10 weeks, or just 3-5 weeks if your kitchen is very warm.
If the liquid level is not high enough to keep the cabbage submerged, you may need to add water or brine. Only add water if you used more than the minimum 2% salt by weight, since you do not want to dilute the salinity of the ferment. You can also prepare a brine by combining 1 ¾ teaspoons of unrefined salt with 1 cup of room temperature of water. Stir until mostly dissolved and use to top off your sauerkraut.
You will know your homemade sauerkraut is ready when it tastes pleasantly sour, has reduced in saltiness, has softened in texture (yet remains mostly crispy), and has a pleasantly sour smell. Discard if there are any signs of mold or a fowl smell. Ferment for longer if the desired taste has not been reached yet.


If you loved this sauerkraut recipe, let me know by leaving a 5-star review in the recipe card or comment below! You can also tag me on Instagram @littlehomeinthemaking.
📖 Recipe
Homemade Sauerkraut in a Crock
Equipment
- Fermentation crock
- Kraut pounder (or the bottom of a wooden spoon)
Ingredients
- 2 medium heads cabbage approximately 2kg or 4.4lbs
- 40-60 grams unrefined salt approximately 6-8 ½ teaspoons
- Water
Instructions
Cook Mode- Weigh your cabbages to get an exact weight in grams (2kg=2000 grams). Multiply the total weight by 2% to get the minimal salt in grams, and 3% for the upper range of salt in grams. For 2000 grams of cabbage (4.4 lbs) this will equal 40-60 grams but will vary greatly based on the actual weight of your cabbages.
- Use the upper range of salt if your cabbages are dry or you are a beginner. Use the lower range if you are using a starter culture and are comfortable with fermentation.
- Remove the outer leaves of your cabbage(s) and cut them in half. Then use a sharp knife to remove the core from the middle and discard it.
- Slice the cabbage halves into thin slices, anywhere from ⅛ - ¼" thick. You could also use a food processor or box grater to shred the cabbage, but in my opinion, this style of sauerkraut ferments too quickly and has a less crisp texture.
- Add the cabbage shreds to a very large bowl (or several bowls) and sprinkle the required amount of salt all over the surface.
- Use your hands to gently massage the salt into all of the shredded cabbage leaves. Then, use a kraut pounder to begin to "bruise" the cabbage, helping to release some juices.
- Once the salt has thoroughly been worked into the cabbage, cover it with a lid or damp tea towel and allow it to rest for at least 30 minutes and up to 1 hour. This will give the salt a chance to work and pull any liquid from the shredded purple cabbage.
- After the cabbage has rested check to see the amount of liquid that was produced - if it was a mere few tablespoons, you're going to need to add water or brine to get an adequate amount of liquid.
- Add a few handfuls of cabbage to the crock, packing it down tightly after each layer with a kraut pounder (or a wooden spoon). This will also help release additional liquid if there is any remaining in the cabbage.
- Repeat until all of the cabbage has been packed into the crock (or it reaches about 2" from the top), packing it down as you go. Some brine should rise up to cover the cabbage.
- If the liquid level is not high enough to submerge the cabbage, either add a small amount of water (if you’re using a 3% salt solution and/or a starter culture), OR prepare a fermentation brine (*See notes).
- Pour the water or brine into the crock just enough to submerge the shredded cabbage.
- Once you have enough liquid in the crock, add a fermentation weight on top of the cabbage and press down. This will hold your cabbage under the brine, bringing the liquid level up. If you don’t have a fermentation weight, check the notes** for an alternative.
- Place the lid on the crock, adding water to the lip if you are using a fermentation crock with a water seal.
- Place your sauerkraut in a room temperature (around 68ºF or 20ºC) place in your kitchen and ferment for 4-8+ weeks, or until the bubbling and activity have reduced and the sauerkraut tastes and smells pleasantly sour.
- Once your sauerkraut is fermented to your liking, you're ready to transfer it to storage. Pack it into jars, topping it off with the brine to cover. Place a lid on the jar and transfer it to the fridge or cold storage.
- Store for several months, or up to a year so long as the quality is good. Signs of spoilage include mold, an off smell, or a slimy texture. Discard if any of it has gone bad and start a new batch.
Notes
- A period of bubbling activity with the most activity occurring within the first 3-7 days
- A pleasantly sour smell
- Reduced saltiness
- A crisp texture
- A pleasantly sour taste
- No signs of mold
Nutrition
Please note that some of my blog posts here at Little Home in the Making may contain affiliate links. If you make a purchase through these links, I will get a small commission at no additional cost to you. Please see my Disclaimer for more information.


Thomas Powell says
just got a five gallon crock, water seal can't wait to make my first batch of homemade Sauerkraut, cold weather in Texas doesn't last long so I'm ready to get started as far as water is Spring water good for use if water is needed.
Dolly says
Hi Thomas! If your spring water is drinkable quality, it should be absolutely fine to use. The biggest problem in my experience is municipal/city water that has chlorine and other additives.
I hope your first batch of Sauerkraut goes well!
Leslee says
Greetings! i want to use a large pfaltsgraff cookie jar. will that be a good substitute for a traditional crock 🤔
Dolly | Little Home in the Making says
Hi Leslee! It should be! Just make sure you clean it very well, and use a weight to keep the cabbage below the brine.
Scarlet says
What happened!? My sauerkraut grew lots of mold on top after just a few days.
Dolly | Little Home in the Making says
It sounds like maybe you didn't use enough salt for the amount of cabbage, OR there were existing mold spores in your container.
Steve says
I tried my first batch recently the cabbage I used was a bit older not much juice followed the recipe however I noticed small batches of white mold spores floating on top of the water and it smelled bad I dumped it and am going to try again . I use a water seal crock and noticed that the water had evaporated slightly could air have gotten in and did this to the water?.
Thanks
Dolly | Little Home in the Making says
There may have been mold spores on the cabbage (since it was a bit older). Sauerkraut is traditionally made with the first harvests of cabbage, so they are quite fresh. But you could try increasing the salinity to decrease the risk of mold. You could also make a salt water brine solution to add instead of small amounts of water - this will keep your salinity on the higher side.
Karissa says
Just started my first batch 2 days ago and am so excited to watch how this turns out! I realized I could have done more cabbage. Since I just started 2 days ago, can I add additional batch of cabbage/salt/brine to the existing batch to let it ferment together or should I wait until the first batch is finished? Thank you so much!
Dolly | Little Home in the Making says
I haven't tried adding fresh salted cabbage to a batch that has already started, but in theory I do think it could work. In general, less space at the top of the fermenting vessel (jar, etc) gives the best chance of success.
What I would do if I were you would be to distribute the fresh cabbage throughout the cabbage that has already been fermenting, but use very clean tools to do so to avoid introducing any bacteria.
Holly B. says
This is the best recipe guide for making sauerkraut I have come across to date! And I have read Dozens....
It's funny, because whenI did a first read, I thought your salt was "unionized." Now That is some really SPECIAL salt! LOL
Our family didn't eat sauerkraut growing up here in North Louisiana. And I was THAT child who wouldn't dare try a food with a "funny" name (think sauerkraut, guacamole, rutabaga...) How many years wasted, not knowing how good real food is! 😞
But, I married a man raised in the US by a full German mother. So, I finally got a taste of fermented cabbages. And Now I Am Blessed!
He even taught me the tasty snack of salting the cabbage core and nibbling on it! Thanks again for your hard work and wonderful receipt!
Kim Mueller says
I don't have enough brine to fully cover the finished kraut. Is that ok or should I add water?
Dolly | Little Home in the Making says
Hi Kim! I would first try weighing down the sauerkraut as much as possible, and then you can either add a prepared brine (best option) or some additional water if you used a high salinity 3-4%).