This easy Sourdough Sandwich Bread recipe results in soft and buttery slices every single time - no yeast needed! It’s the perfect recipe for beginner sourdough bakers.
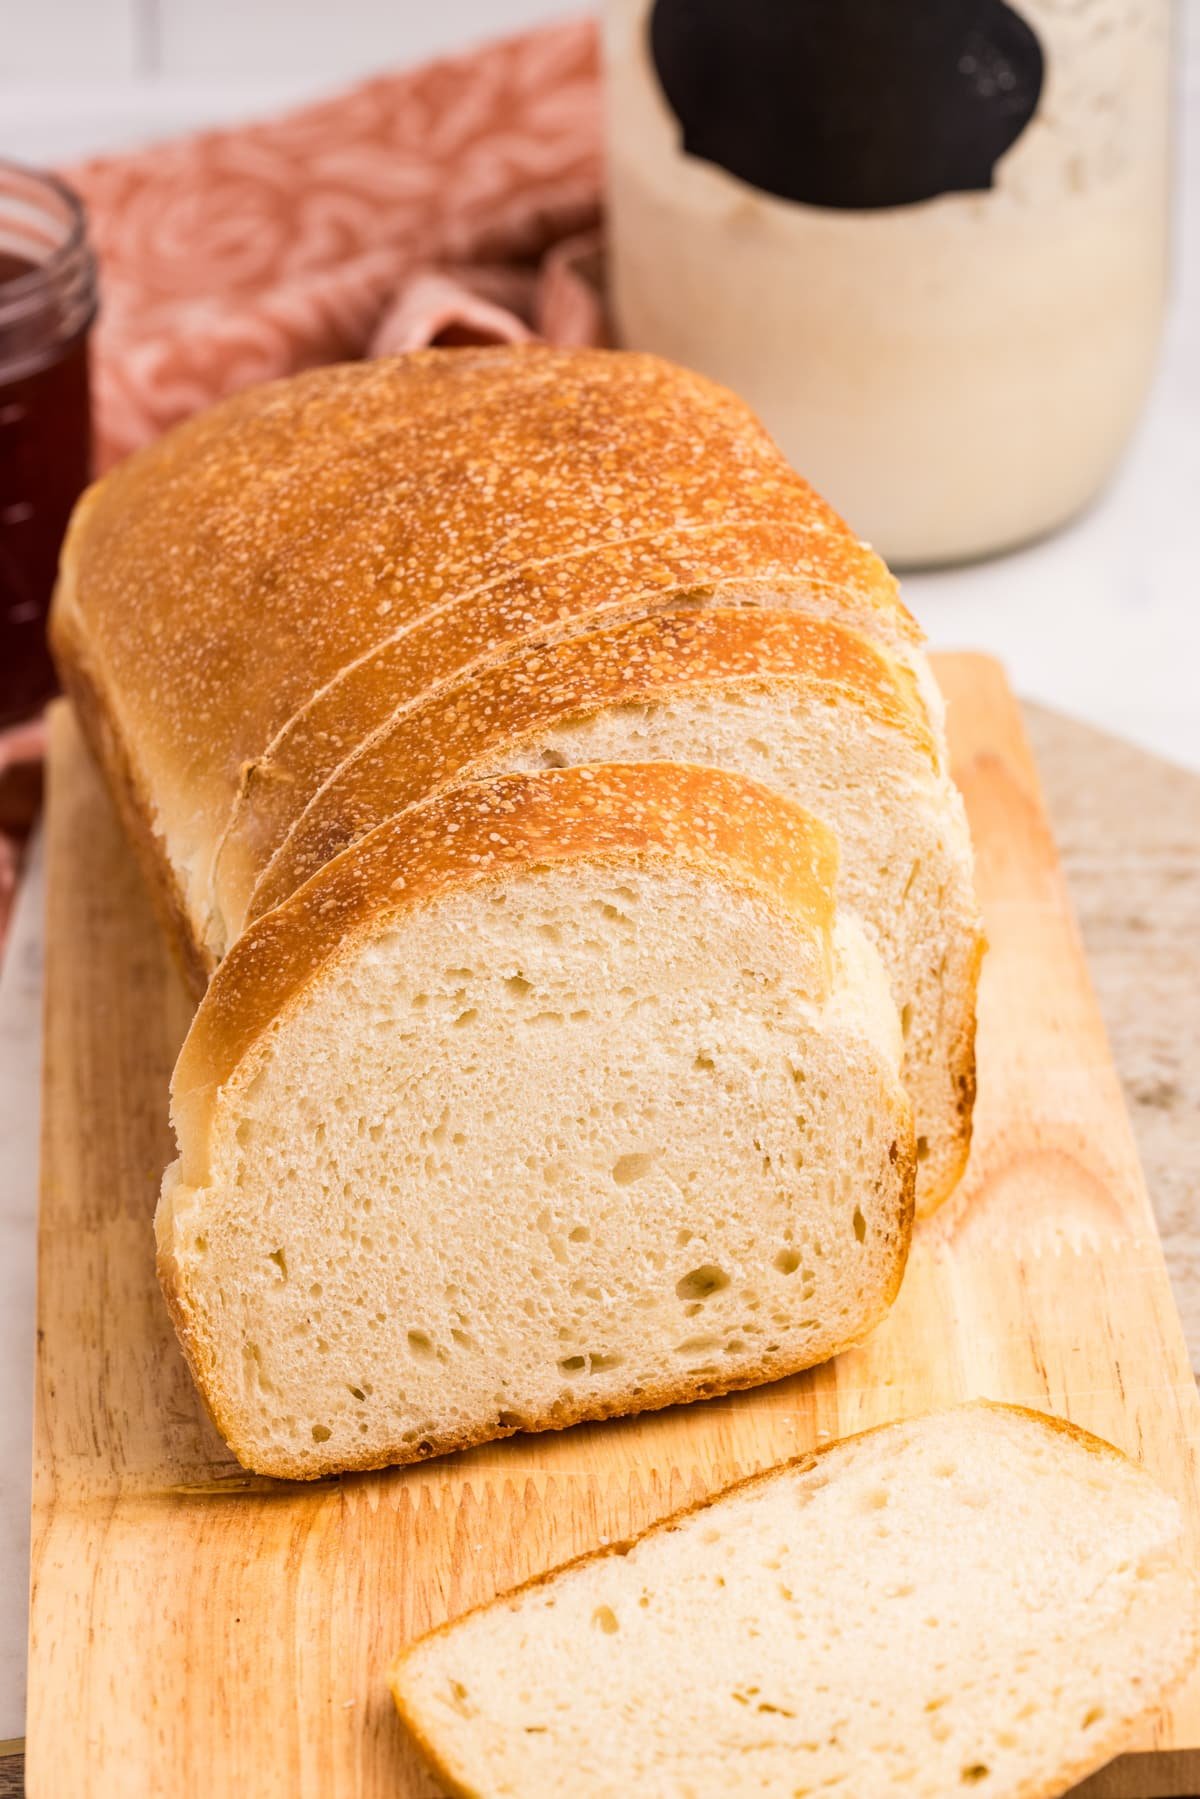
Now that I've shared my dutch oven sourdough bread recipe, I thought it was high time to share my yummy sourdough sandwich bread!
This easy recipe is perfect for your weekly from-scratch restock, and is great for sandwiches (of course), grilled cheese, toast, and all your basics. Whatever you don't eat by the end of 4-5 days can be cubed and made into sourdough croutons (or bread pudding) - so it's also a great way to avoid waste.
My little one (who survives off bread almost entirely) loves sourdough, and he's thrilled every time it comes out of the oven. I have to keep him out of the kitchen until it's ready to slice - the temptation of fresh, warm bread is just too strong!
Why You'll Love It:
- No commercial yeast. This recipe uses active sourdough starter and an 8-12 hour bulk fermentation, making for delicious bread - no yeast needed!
- Soft and buttery. Each slice is soft and pliable; it's perfect for sandwiches!
- A great alternative to store-bought. While a traditional sourdough boule is impressive, it's not exactly a dupe for store-bought bread. This sandwich loaf will convince even the most stubborn of family members to make the switch.
- Cheap. Since there is just a handful of ingredients, this sandwich bread is a budget-friendly recipe. Once you have the method down, it's simple to make your very own bread each week.
Ingredients:
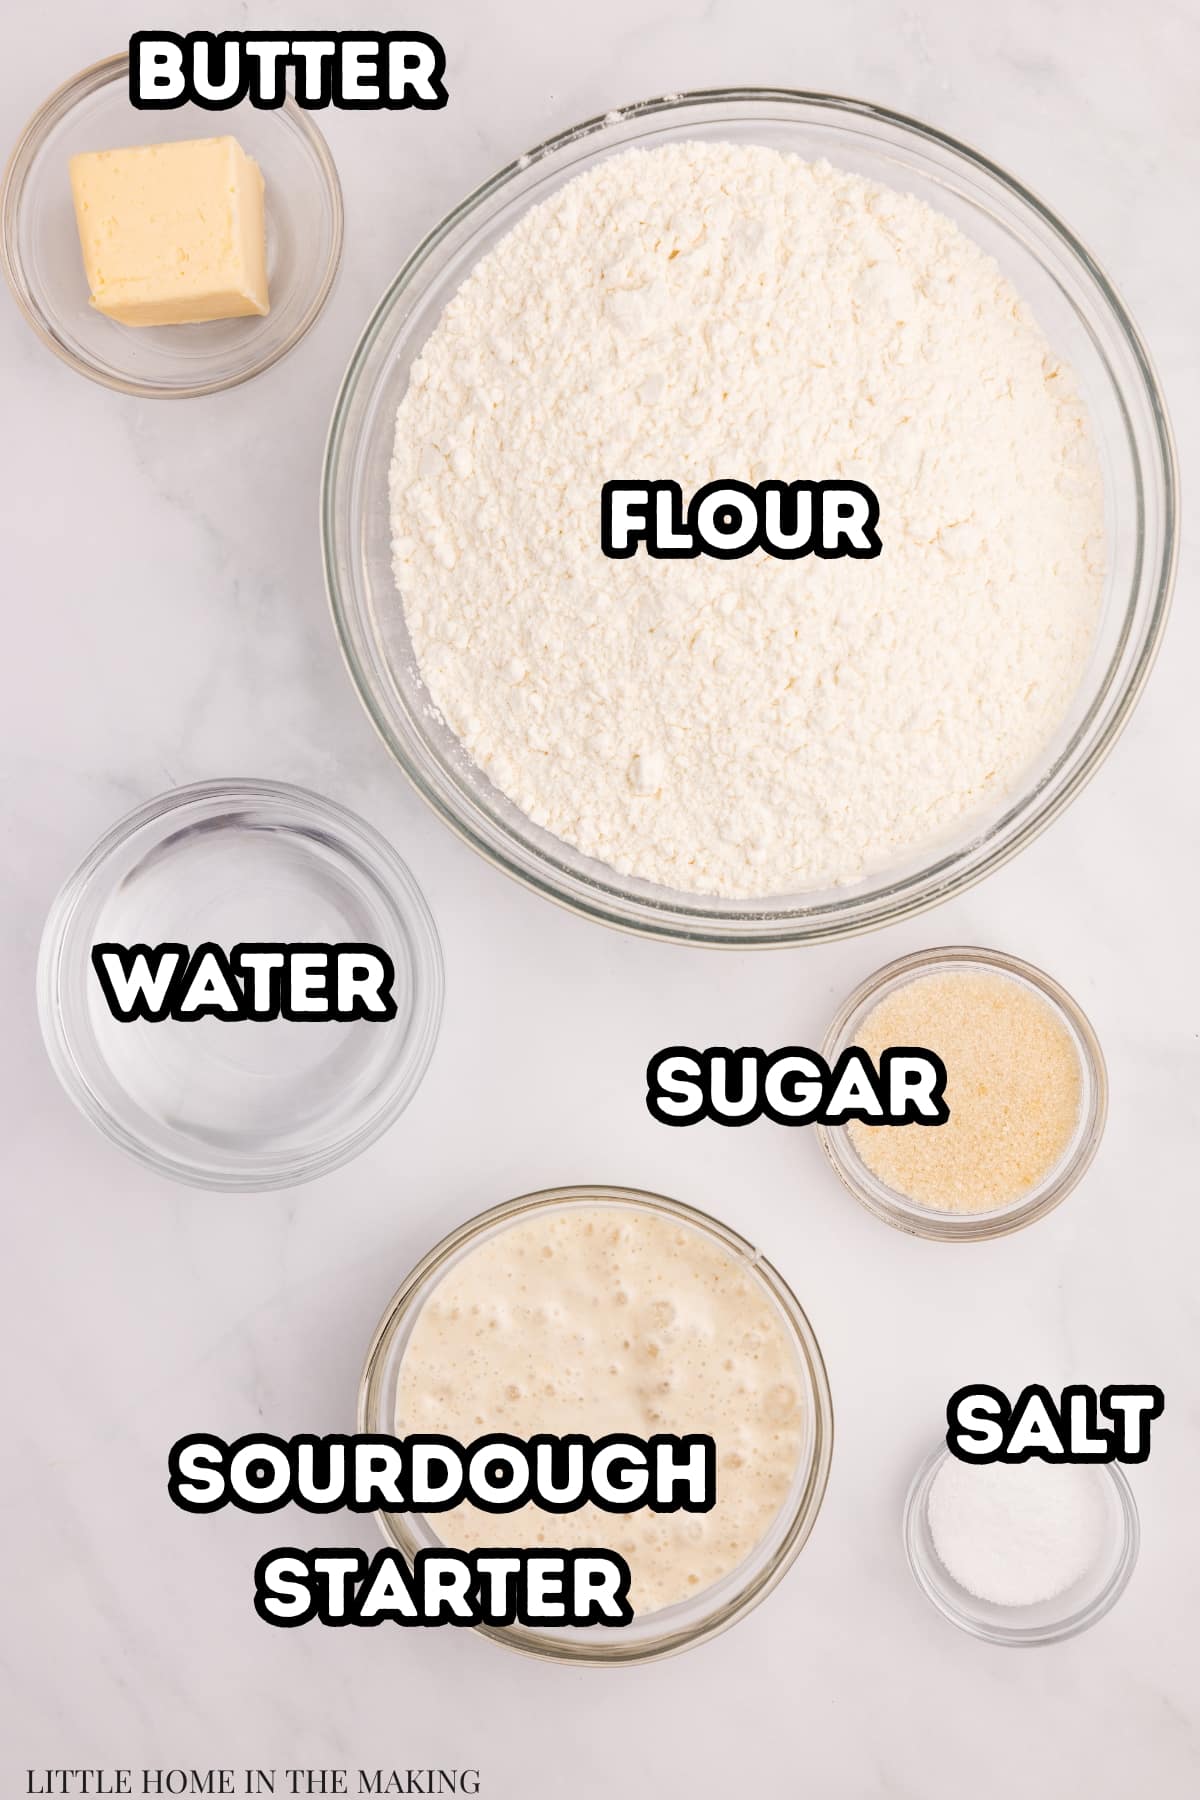
- Flour: You can use any type of all-purpose you like (organic, unbleached, conventional, etc.), or bread flour if you have some on hand.
- Sourdough starter: If you don't want to prepare a separate levain, be sure you have an active and bubbly starter that has recently reached its peak. Your sourdough starter should be at least 2 weeks old before baking an unyeasted bread such as this one.
- Butter: This adds a yummy flavor and soft texture to your bread. If needed, you can swap it out for your favorite neutral-flavored oil (I like avocado oil, but olive oil will work).
- Sugar: You'll need just a few tablespoons, which will help the bread rise nicely and provide just a hint of sweetness. Don't worry - it's not a sweet loaf! If you prefer, you can swap it for brown sugar or honey.
- Salt: Use any fine salt that you have on hand (non-iodized is best). I like to use sea salt or mineral salt (like Redmond's) for my sourdough baking.
- Water: This should be slightly warm, but not so hot that it kills the natural yeast in sourdough starter. I aim for 80-85ºF (27-30ºC).
Note About Loaf Pans:
I recommend using metal baking pans (like USA Pan) for sandwich bread instead of glass or ceramic. Since metal heats up more quickly, the crust is even in color, while glass or ceramic-baked loaves can have a pale and underbaked bottom half.
Before You Get Started
You will need 100 grams of active and bubbly starter. Feed your starter 4-8 hours in advance (using a 1:1:1 ratio), OR prepare a levain (see the recipe card for more details).
How to Make Sourdough Sandwich Bread
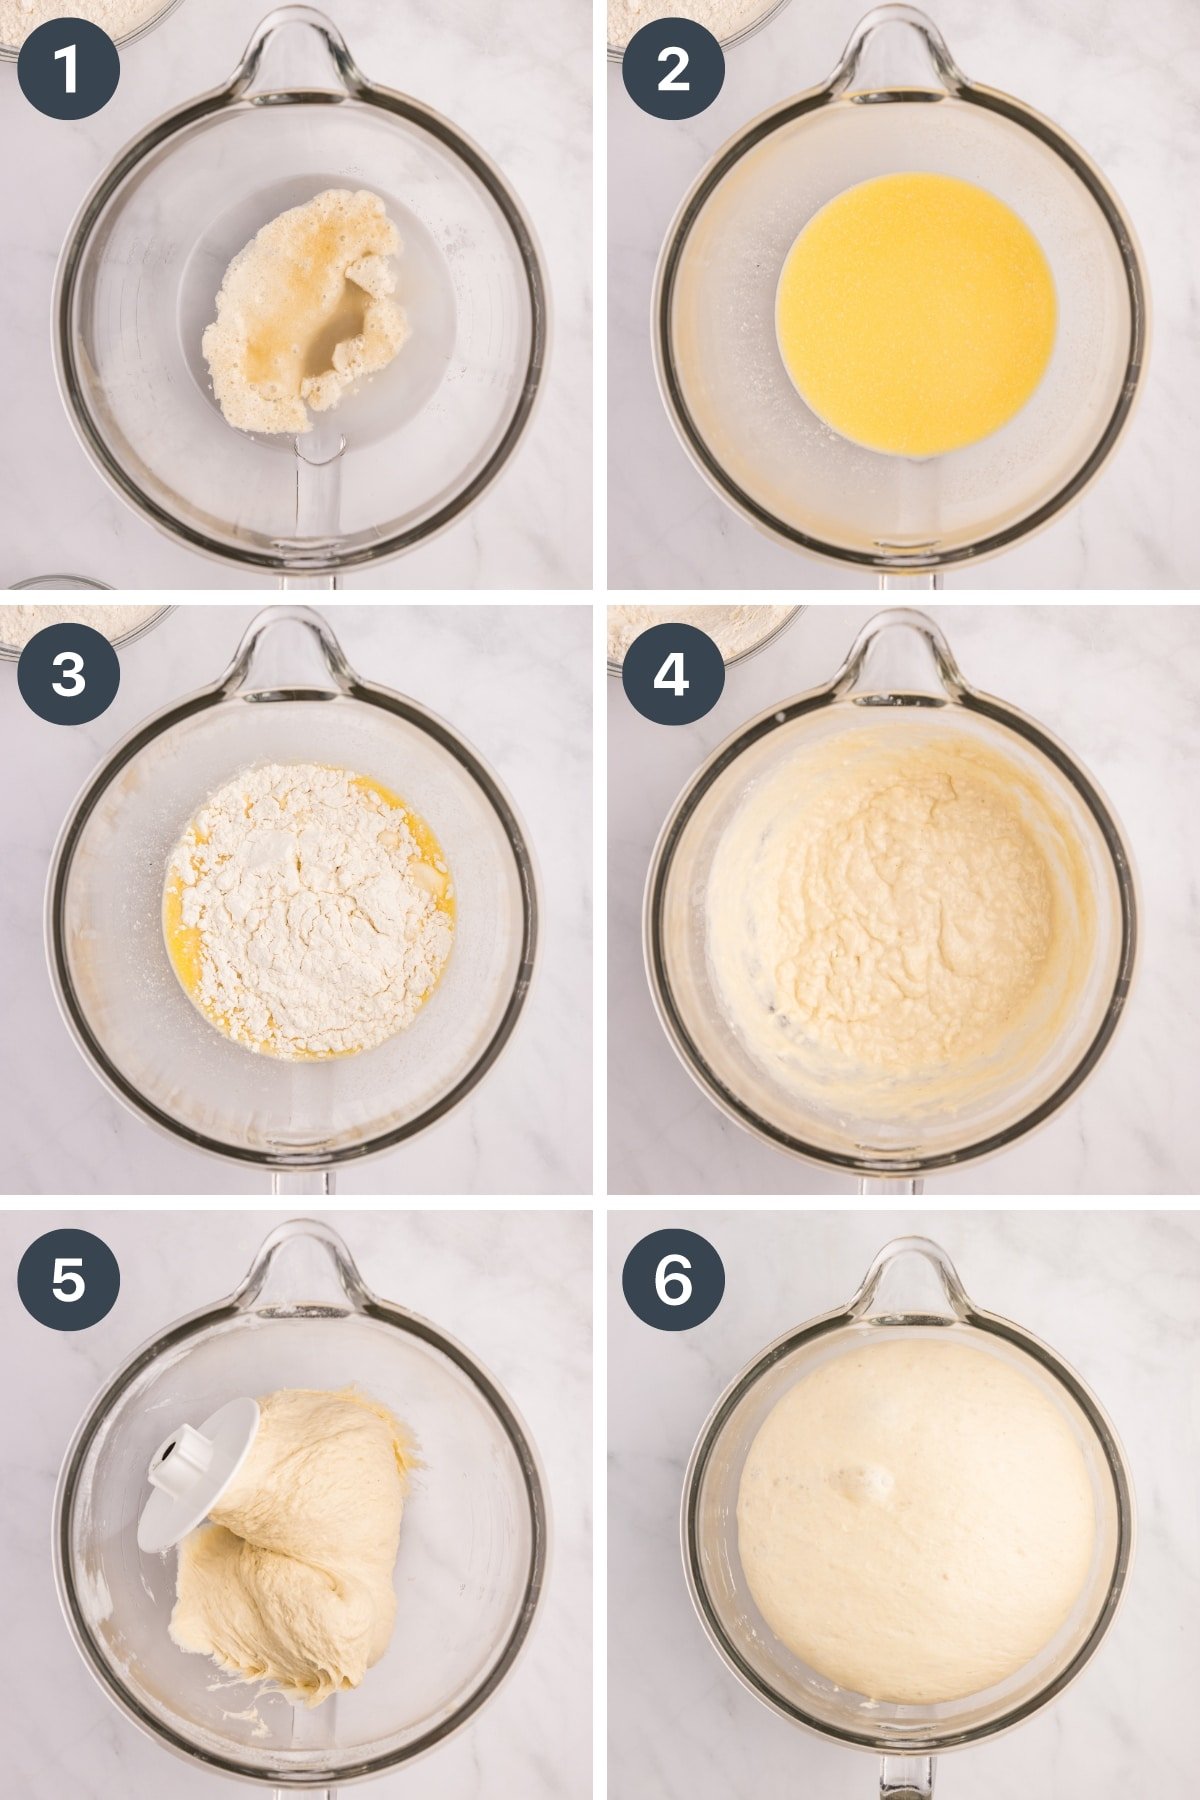
- Add to the bowl of your stand mixer (or a large mixing bowl):
- 240 grams water (about 1 cup)
- 100 grams active sourdough starter
- 24 grams sugar (about 2 tablespoons) (can also use honey or brown sugar)
- 7 grams of salt (about 1 ½ teaspoons)
- Then mix well until milky in color and the sourdough starter has dissolved into the water.
- Slowly add in ¼ cup of melted (and cooled) butter, stirring as it is incorporated.
- Add 2 cups of the flour (about 240 grams) to the wet ingredients, and mix until the flour is moistened.
- Add the flour, ½ cup at a time (about 60 grams), stirring after each addition.
- Add up to 4 ½ cups of flour, or as much is needed to for the dough to come together; it should not be loose or sticky.
- Knead the dough for 2 minutes using the hook attachment of your stand mixer, or 5 minutes by hand.
- Add the dough to a well-oiled boil, and flip it over to coat it in the oil. Cover tightly with plastic wrap and let the dough rise until nearly doubled (about 8-12 hours).
Top Tip: Room Temperature Matters
The ambient temperature of your proofing area, as well as the strength of your starter, will affect how quickly (or slowly) your dough rises. In the Summer months (or if your home is warm), 8 hours is typical, while in the Winter months (or in a cool home) you may need 12 hours (or more) to see ample proofing.
The signs to look for include the dough bouncing back when poked with a finger and nearly doubling in size. It does not need to be exactly doubled, and any more than that and your dough could very easily end up over-proofed (and bake up flat as a result).
Shaping and Baking the Loaf
Once the bulk fermentation is done, you're ready to shape the sandwich loaf, complete a final proofing (about 1 hour), and bake!
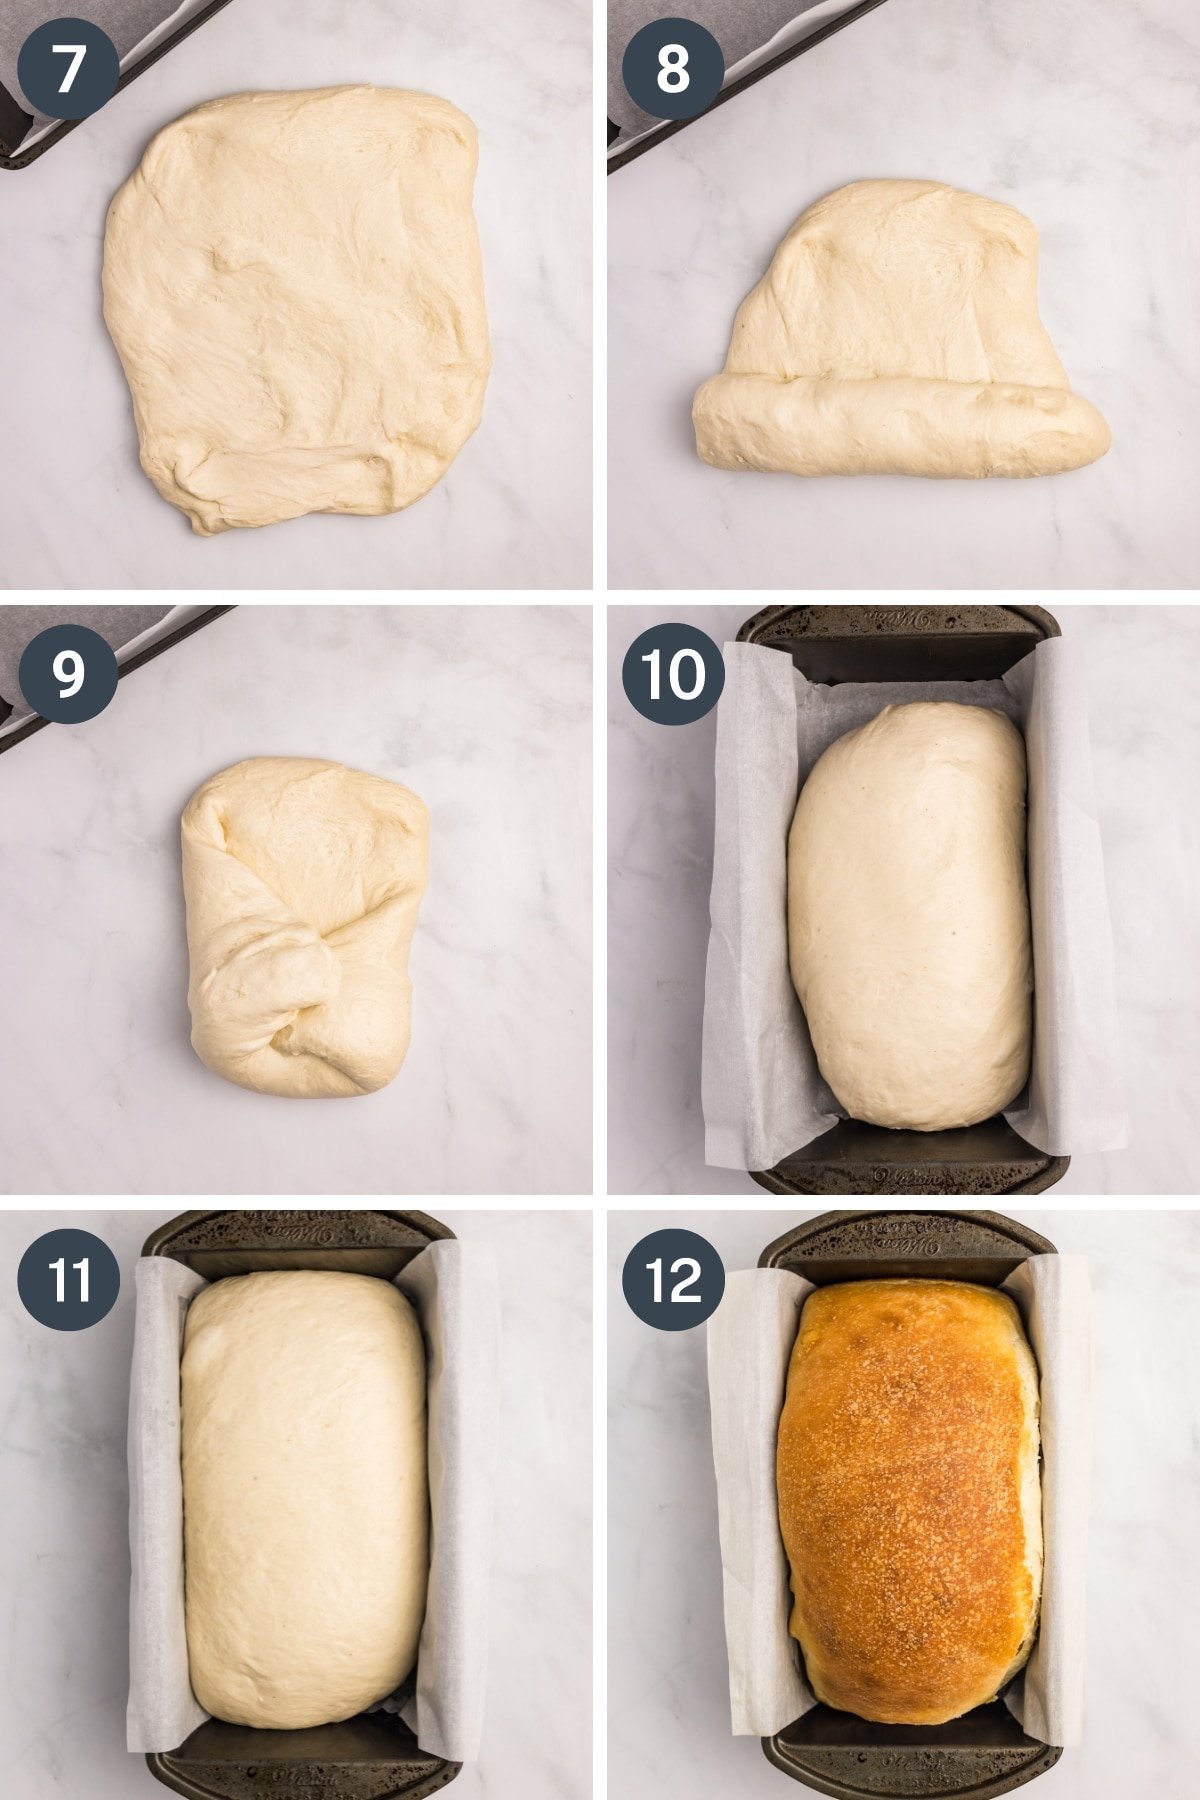
- Turn the dough onto a lightly floured work surface and gently press the dough into a 1" thick rectangle (be careful not to deflate the dough; work with light hands).
- Roll the dough up to the halfway point, then...
- Tuck in the edges and roll it up the rest of the way. Tuck in any remaining ends.
- Place the loaf in a large loaf pan (9x5") that has been lightly oiled and lined with parchment paper.
- Cover and allow to proof in a warm spot for 1-1 ½ hours, or until the dough reaches the edges of the pan.
- Once the second rise is complete, bake the loaf in a 375ºF (190ºC) oven for 40-50 minutes, or until the bread is golden brown, with a minimum internal temperature of 190ºF (88ºC). The bottom of the bread should sound hollow when tapped.
- Allow to cool in the pan for 10 minutes, then remove the loaf and place it on a wire baking rack to cool.
- Cool for at least 30 minutes before slicing, although 2 hours is ideal.
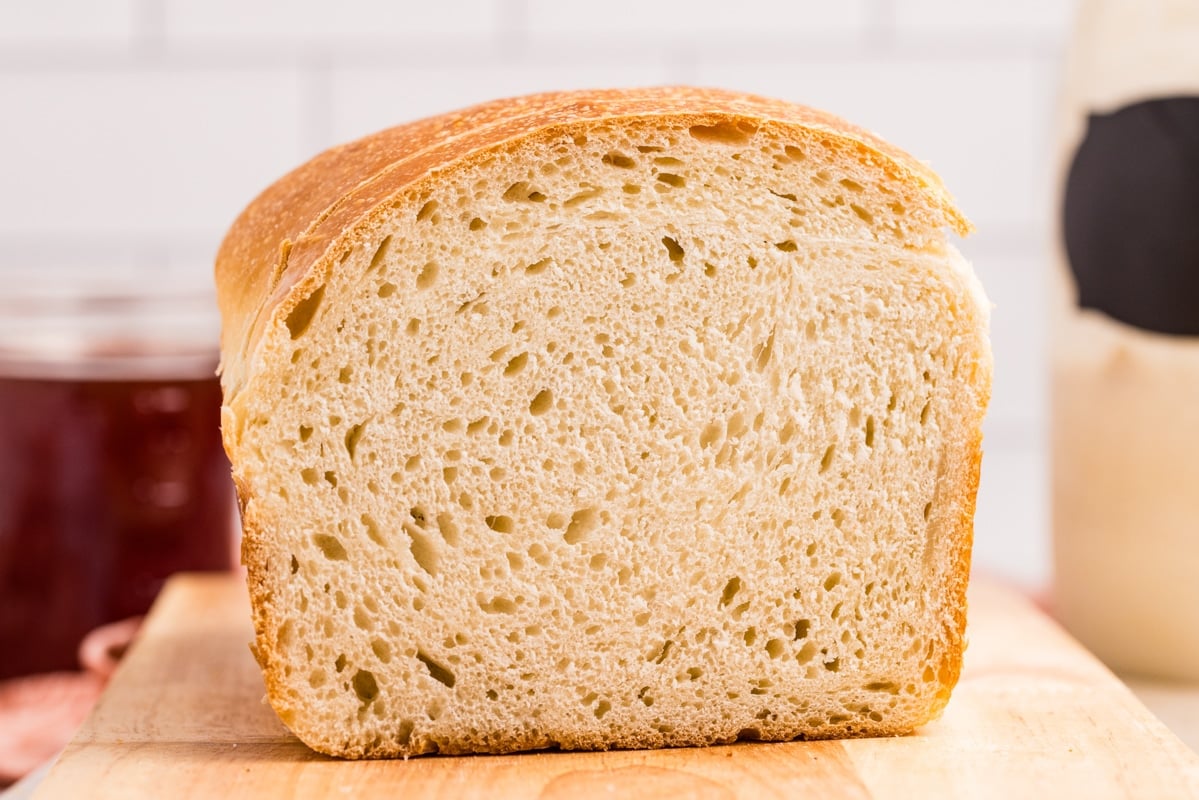
- Slicing into a warm loaf sounds tempting, but can result in doughy loaves that appear underdone. It's worth the wait!
Storing Leftovers
- Allow the bread to cool to room temperature, then wrap it tightly in several layers of plastic wrap (or transfer to a bread bag).
- Store at room temperature for up to 3 days, re-wrapping the bread after each use.
- If desired, you can store it in the refrigerator for 4-7 days, but the bread won't be as soft (it becomes slightly stiff).
- For extended storage freeze your bread and thaw as needed.
Freezing Sourdough Sandwich Bread
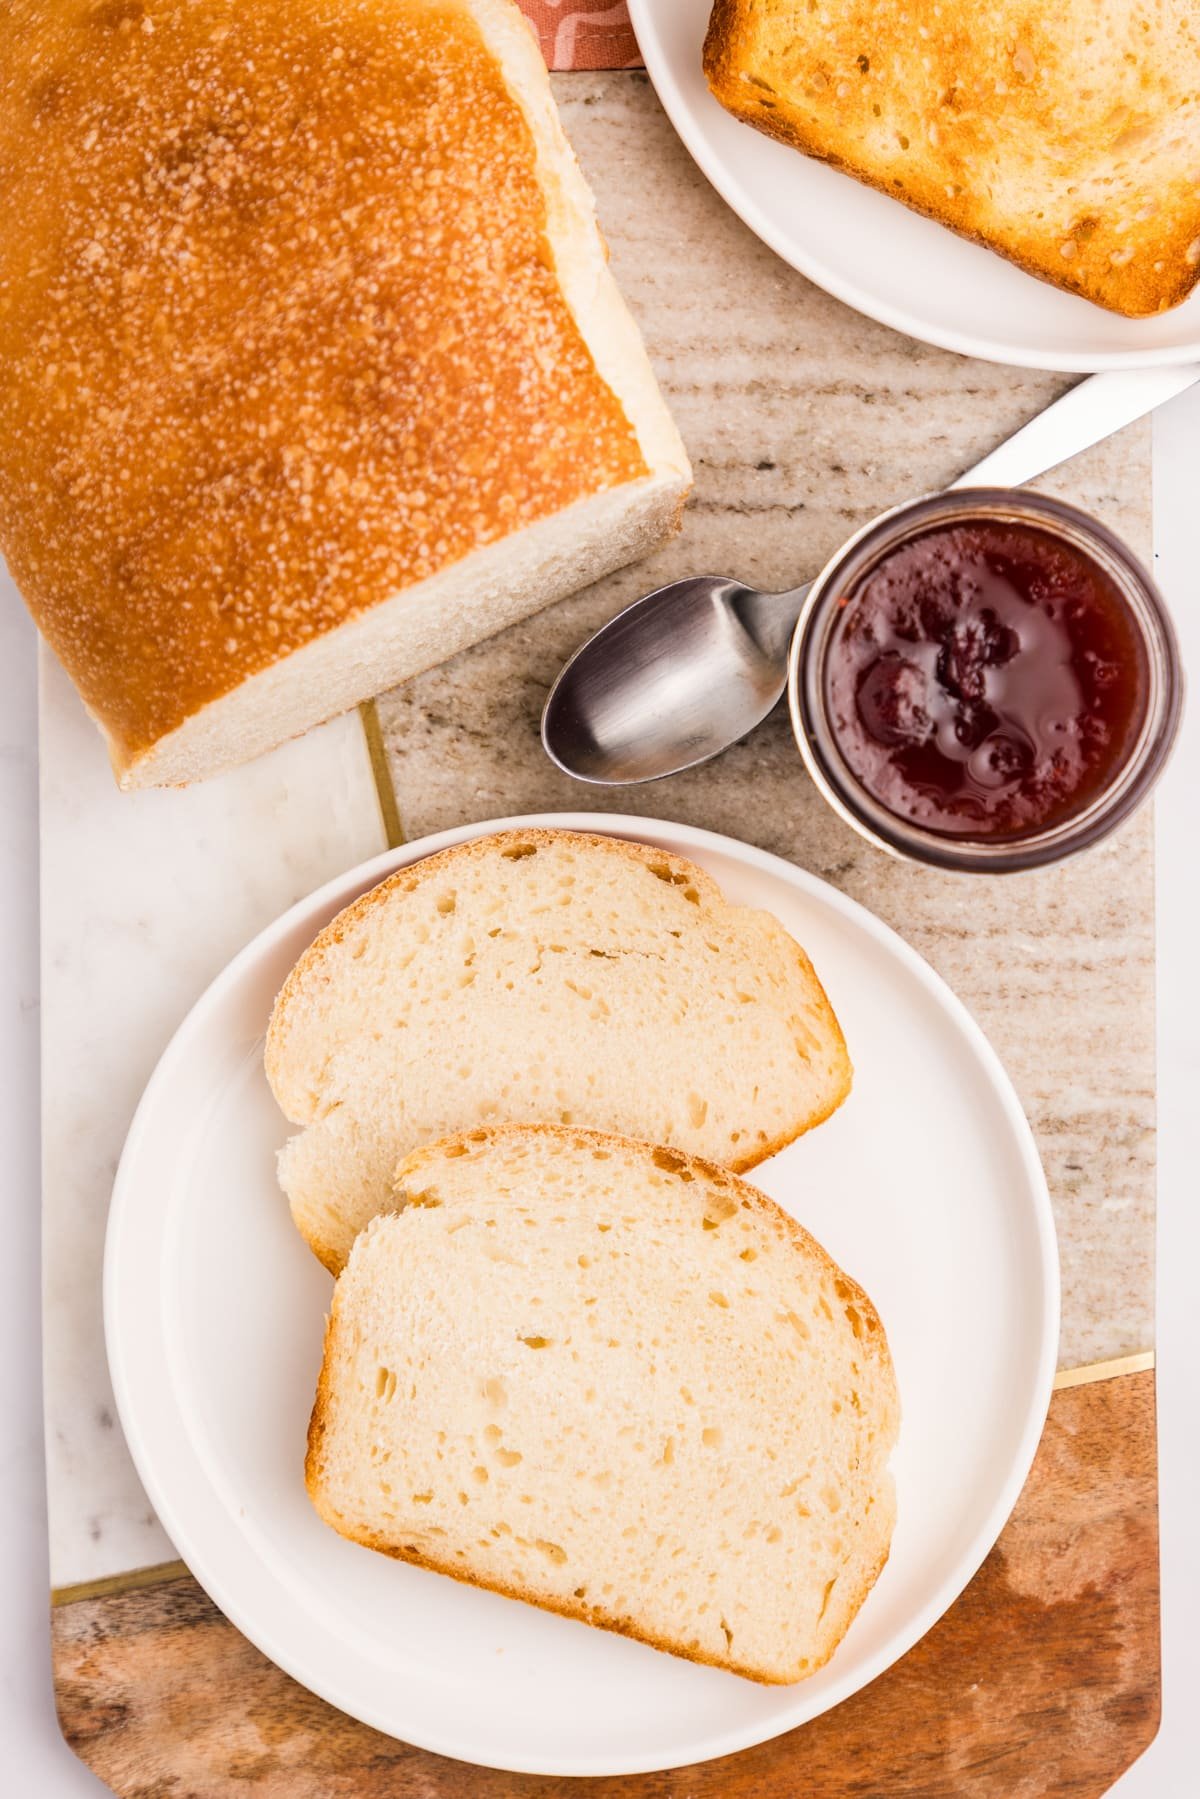
Slice the bread to your desired thickness, then flash-freeze the slices individually. Once the slices are frozen, arrange them together and place them in a freezer-safe loaf bag. Freeze for up to 2 months.
Thaw frozen slices at room temperature for 20-40 minutes (covered) before using.
Expert Tips
- Use a metal loaf pan. These heat more quickly, which allows the bottom part of the crust to form more quickly. Glass pans heat slowly, causing the bottom part of the loaf to be too moist and sometimes under-done.
- Adjust the oven rack. Before baking adjust the baking rack to one slot below the middle spot. This will allow the bottom half of the loaf to cook evenly while preventing the top from becoming too dark.
- Hold off on slicing. I know, fresh bread BEGS to be sliced into while it's still warm, but I promise that if you wait the texture will be so much better in the long run. Slicing the bread too soon can result in a gummy texture, so avoid slicing until 2 hours have passed for the best results.
Variations
Sourdough discard sandwich bread: Substitute the active starter for leftover discard, and instead use 1 package (2 ¼ teaspoons) of INSTANT yeast stirred into the warm water and sourdough discard mixture.
Super soft sandwich bread: Substitute some (or all) of the water for milk that has been warmed to 80-85ºF (27-30ºC); this makes the bread significantly softer. Because it contains milk, I would recommend proofing the dough for 2 hours at room temperature, then transferring it to the fridge to cold proof for 24 hours before shaping and baking.
Quick: If you don't have time for a full ferment, you can add 1 package of yeast (2 ¼ teaspoons) to the dough. If using active dry yeast, add it to the warm water along with 1 teaspoon of sugar to proof. Otherwise, you can use instant yeast, which can be stirred into the other ingredients and doesn't require proofing.
Recipe FAQs
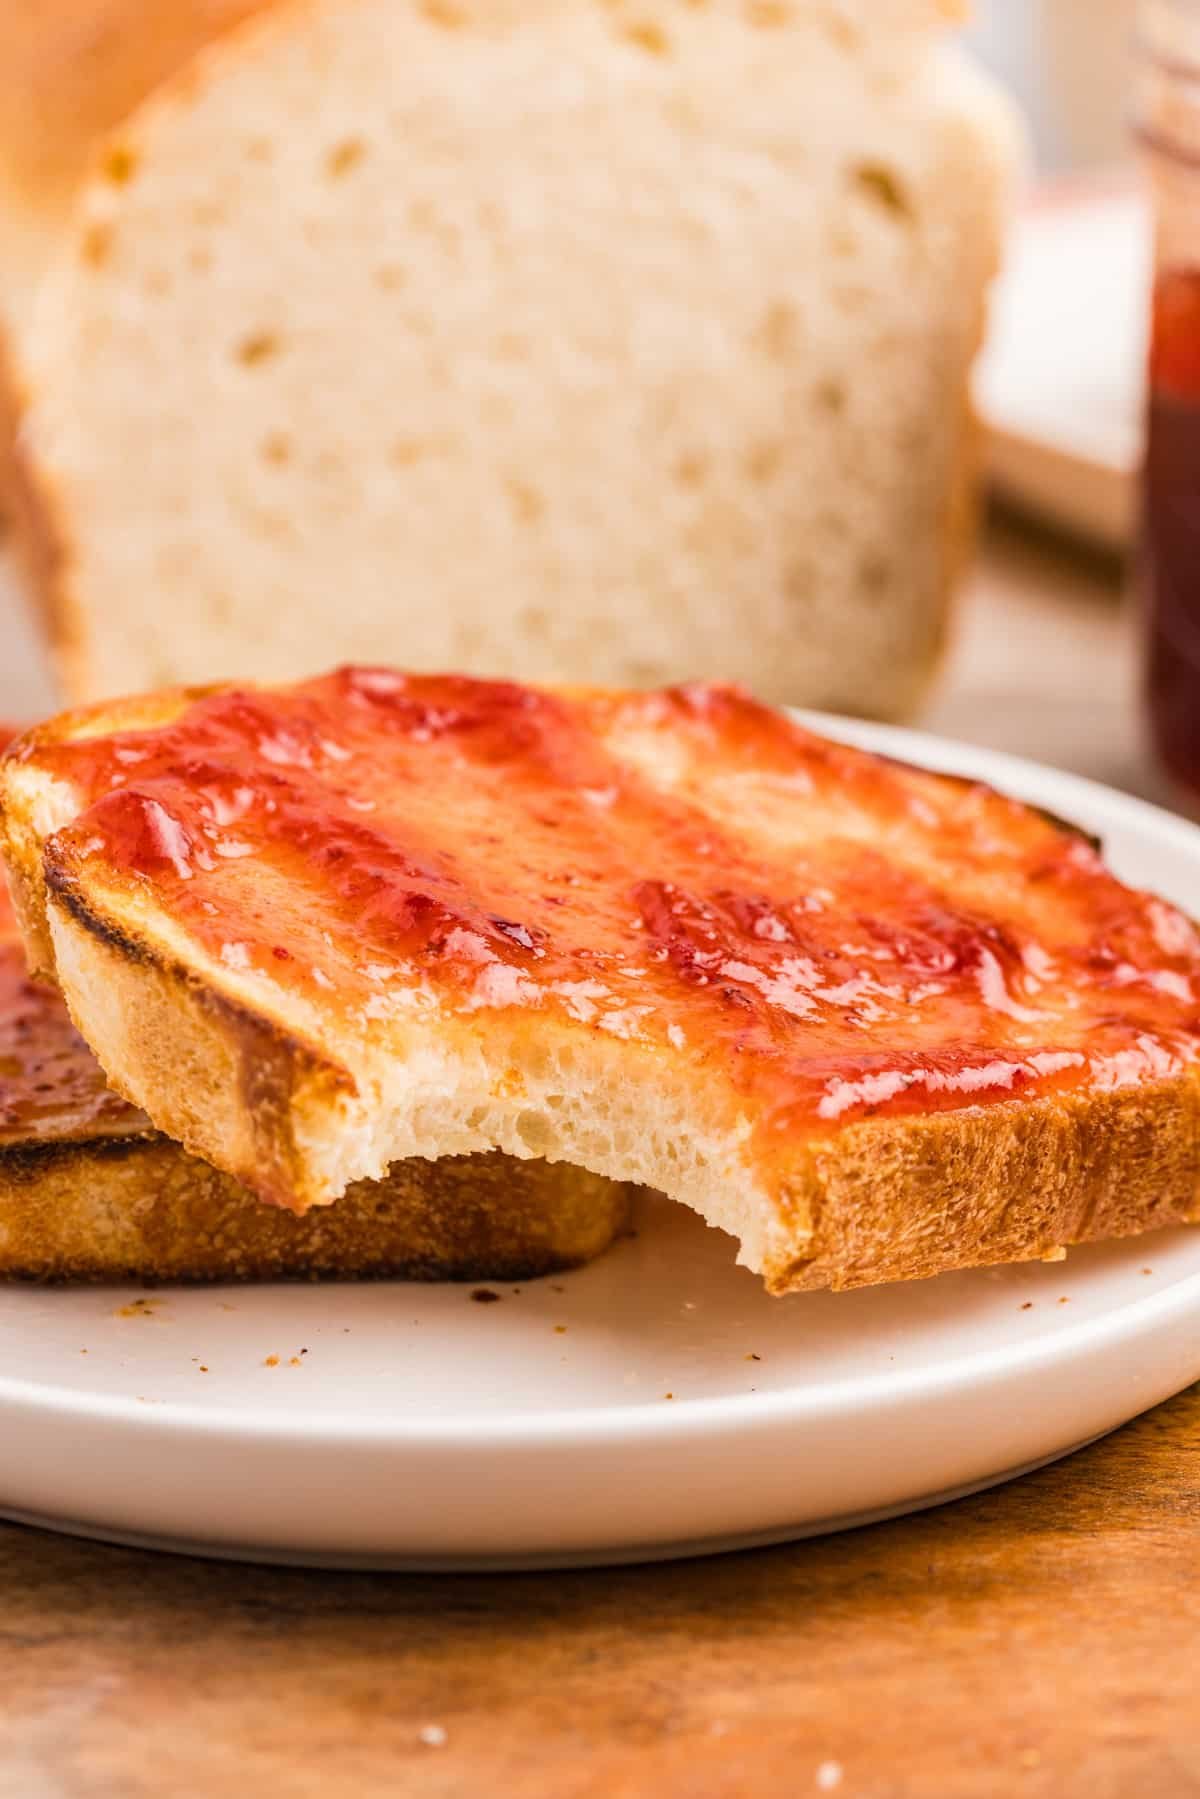
Sourdough sandwich bread is perfect for sandwiches (as the name implies), especially on days 1-2. Once the bread is a few days old, it's great for toast, grilled cheese sandwiches, tuna melts, french toast, etc. Once it's dry you can use the leftovers to make croutons, breadcrumbs, or bread pudding.
If desired, you can substitute the sugar for 2 tablespoons of brown sugar or 1 ½ tablespoons of honey.
If your dough didn’t rise, the most likely culprit is an inactive or immature sourdough starter. Your sourdough starter should be at least 2 weeks old before baking bread without yeast. It should reliably double within 8-12 hours when fed a 1:1 ratio, or 24 hours if fed a 2:1 ratio. Your starter should be bubbly, active, and fragrant.
Sample Bakers Schedule
The Day Before:
- 2-6 PM: Feed your sourdough starter or prepare a levain to yield 100 grams of active starter.
- ~10 PM: The starter should have reached its peak by now, and you're ready to prepare the dough.
- ~10:15 PM: Prepare the dough, and place it in an oiled boil to rise overnight.
The Next Morning:
- 6:15-10:15 AM: Once the dough has nearly doubled in size, it has most likely successfully proofed, and is ready for shaping and a final proof.
- 6:30-10:30 AM: Place the shaped loaf in a prepared loaf pan and cover it before placing it in a warm place to rise.
- 7:30-11:30 AM: The bread is ready to bake when it has risen to fill the loaf pan.
- ~8 AM - 12 PM: Bake the loaf at 375ºF (190ºC) for about 40 minutes, or until it reaches a minimum internal temperature of 190ºF (88ºC)
More Sourdough Bread Recipes:
If you loved this Sourdough Sandwich Bread recipe, let me know by leaving a 5-star review in the recipe card or comment below! You can also tag me on Instagram @littlehomeinthemaking.
📖 Recipe

Sourdough Sandwich Bread
Ingredients
- 100 grams active sourdough starter* about ½ cup
- 24 grams granulated sugar about 2 tablespoons
- 7 grams fine salt about 1 ½ teaspoons
- 240 grams warm water 80-85ºF (about 1 cup)
- ¼ cup unsalted butter melted and cooled (58 g)
- 480 grams all-purpose flour or bread flour (about 4-4 ½ cups)
Instructions
- Levain or active starter. To prepare a levain add 30 grams of active starter to a jar, along with 35 grams of flour and 35 grams of water. Stir, cover, and allow it to sit at room temperature until it has reached its peak (about 4-8 hours). Note: If your home is very warm (or your starter doubles in less than 8 hours), use 14 grams of starter, 43 grams of flour, and 43 grams of water.
Forming the Dough:
- Add the active sourdough starter, sugar, salt, and water to the bowl of a stand mixer (or a large mixing bowl). Using the whisk attachment of your mixer (or a handheld whisk), stir everything together until it appears milky.
- Slowly pour in the cooled melted butter, whisking as you go.
- Add in 2 cups of flour (about 240 grams), and stir until it is incorporated.
- Switch to the dough hook (or if by hand, a dough whisk or rubber spatula), and add the flour about ½ cup (60 grams) at a time, mixing to incorporate it. If doing so without an electric mixer, you may need to switch to doing this by hand (I recommend wetting your hands with warm water to prevent sticking).
- The dough should be sticky, but not loose. Add enough flour that the dough comes together, but not so much that it’s firm.
- Once the flour has been incorporated, knead using the dough hook attachment for 2 minutes. The dough should pull away from the edges; if it is sticking to the bowl, add a little more flour until it comes together. Once the dough is soft and not sticky to the touch it’s ready for the next step. If making by hand: Turn the dough out onto a lightly floured countertop and knead for 5 minutes. You will know the dough is ready when the dough is soft and pliable - not sticky.
Bulk Rise:
- Lightly oil a large glass bowl, and add the dough to the bowl. Turn it over to cover it in the oil.
- Cover the bowl tightly and allow it to rise for 8-12 hours (or until nearly doubled in size). Note: The amount of time it takes to rise will depend on the temperature of the room the dough is rising in and how active your sourdough started out as.
Shaping and Final Proof:
- Lightly oil a loaf pan, and line it with parchment paper (cut to size). Set aside.
- Turn out the proofed dough onto a clean, lightly floured surface.
- Flatten the dough into a large rectangle that’s about 1” thick (this doesn’t need to be precise and you want to avoid removing all of the air from the dough. I gently flatten the dough with my fingers and pull the dough out to create a rectangle).
- Next, roll the dough up about halfway, then turn in each side and finish rolling the dough up into a cylinder. Tuck in any edges.
- Transfer the dough to the prepared loaf pan. Cover (using plastic wrap or a damp tea towel) and allow to rise for 1-1 ½ hours (until the dough fills in the bread pan).
- With about 15 minutes left of the final proof, preheat the oven to 375ºF (190ºC) and position the rack one spot lower than the middle (this will prevent the top from browning too quickly).
- Uncover the dough and place it in the oven. Bake at 375ºF (190ºC) for about 40 minutes. You will know it is done when it reaches a minimum internal temperature of 190ºF (88ºC). The loaf will be golden brown and hollow sounding when it is tapped on the bottom.
- Remove from the oven and allow the bread to cool in the pan for 15 minutes.
- Remove the bread from the loaf pan and place on a cooling rack. Allow the bread to cool for at least 30 minutes before slicing, although 2 hours is ideal.
Notes
- Slicing into a freshly baked loaf of bread right out of the oven is tempting, but you really want to wait at least 2 hours before slicing for the best results. The bread can be doughy in the middle when it is cut too soon. If you really can't wait - try and wait at least 30 minutes.
- If using salted butter, you can omit about ¼ teaspoon of salt from the recipe to account for the increased saltiness.
Nutrition
Please note that some of my blog posts here at Little Home in the Making may contain affiliate links. If you make a purchase through these links, I will get a small commission at no additional cost to you. See our disclaimer for more information.





Huvy
Hi, do you cover the loaf in the oven?
Dolly | Little Home in the Making
Hi Huvy! No need to cover, but if you find the top is browning too much you can cover it with aluminum foil to prevent that (or bake it lower in the oven).
Denise
I like the ease of the recipe and the final product was great! Thx : )
CK
Hello. If the dough goes over 12 hours due to schedule, do you recommend putting in fridge for a few hours or just let it stay at room temp? (Have to take someone to airport around the 8-12 hours mark)
Dolly | Little Home in the Making
I would probably transfer it to the fridge to slow down the ferment so you don't end up with an overfermented (flat) loaf.
CK
hello! I have made this and it’s wonderful. However we will be away 5 hours while it is rising in loaf pan. Can I put it in fridge and bake it when I get home?
Dolly | Little Home in the Making
Yes I think that should be fine! Just let it come to room temperature for 1-2 hours before placing in the oven again.
CK
Thank you for your help. It’s delicious!!