


These fermented blueberries are strong in flavor, sour, salty, and slightly sweet. Great for mixing into smoothies or salad dressing, these lacto-fermented blueberries are a great way to add some probiotic benefits to your favorite seasonal berries!
Where I live in the Northeast, we are surrounded by blueberries. Both cultivated and wild blueberries are a major crop here, and every year the fresh quarts of blueberries arrive at my favorite farm market stands and local grocery stores. We also have a few blueberry plants that are still in their infancy, but produce a bowl or two per season.
When blueberry season comes, it's not uncommon to go picking at a local farm, bringing home a huge box of fresh and fragrant berries. And while I love making up a batch of blueberry jam, or a loaf of Sourdough Blueberry Bread, I'm often wondering what other things I can make with the excess.
These fermented blueberries are the perfect way to add probiotic benefits to this seasonal fruit. And while it doesn't have the same taste as fresh blueberries, it makes a great addition to a variety of recipes that require something sour, salty, and slightly sweet.
Why Ferment Blueberries?
- Short term preservation - fresh blueberries only last a few days in the fridge, but fermenting creates a longer storage time. But remember that these don't taste the same as fresh!
- Probiotic benefits - all fermented foods have healthy bacteria that help boost your gut health.
- Great for using blended in salad dressings or smoothies.
- A fun and easy lacto-fermentation project for beginners.
Ingredients
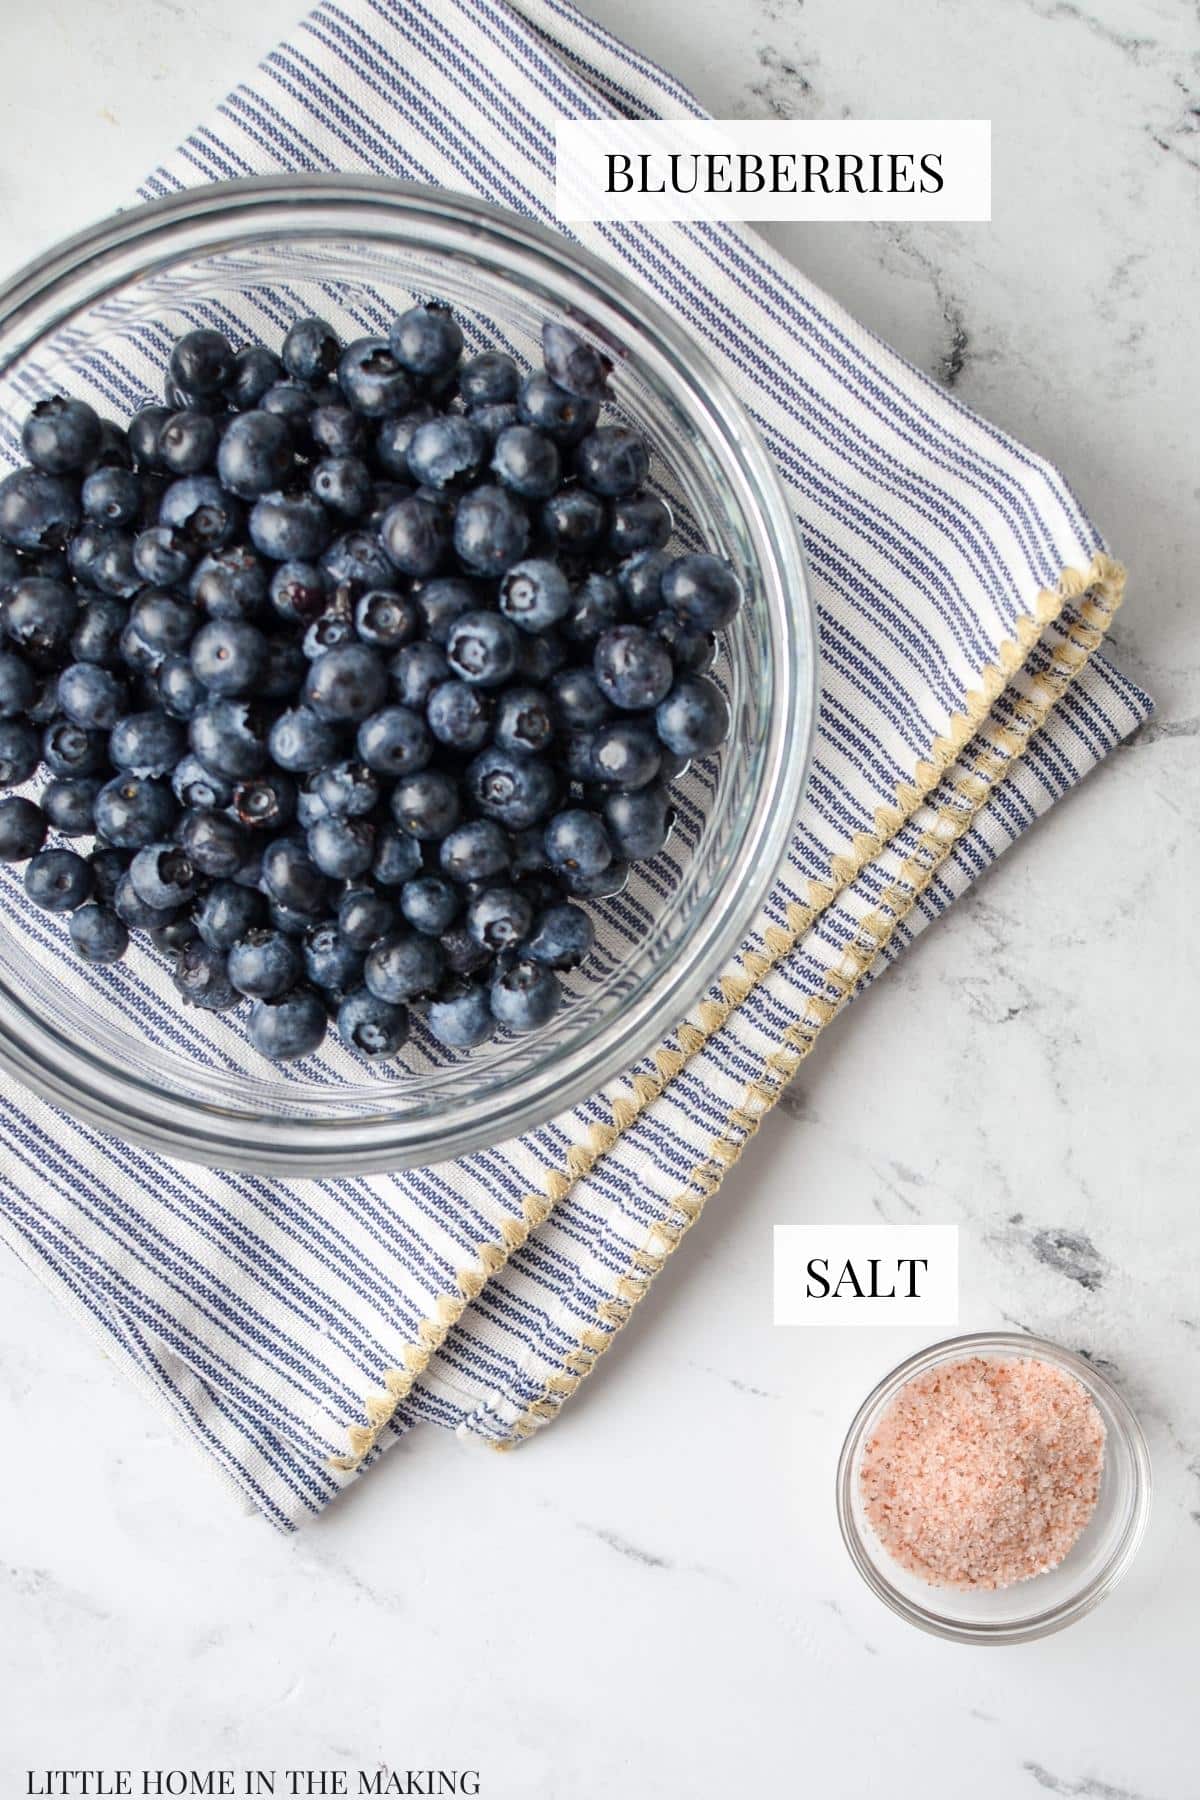
- Blueberries: Select the freshest berries you can, as that will give you the best results. Sort through them to make sure no spoiled berries make it into the ferment. This could cause mold or other issues.
- Salt: Any non-iodized salt will work, but I love to use Redmond Real Salt for my fermentation projects.
- Starter culture (optional): If you have one available, you'll get the best results from using a starter culture. This includes leftover sauerkraut brine, water kefir, kombucha, or whey.
Equipment:
- Jar: Any glass jar will work so long as it is large enough to accommodate your blueberries.
- Lid: You will need a lid that can fit onto the jar. It can be a two piece canning lid OR a plastic lid.
- Pickle pipe or air lock (optional): These make fermentation super easy, and make it so you don't have to "burp" the jar every day. I like to use the pickle pipes because they are simple and can fit on wide mouth or regular mouth mason jars.
- Strainer: A fine mesh strainer will help you strain the juice from the blueberries, allowing them to store just a bit longer.
- Kitchen scale: It's important to have accurate weights for your blueberries and salt in order to have a successful fermentation, so using a kitchen scale is so important. I have one that I paid $15 for and it works great!
How to Ferment Blueberries
To get started, you'll want to give your blueberries a good rinsing and washing to remove any debris or stems.
Then, weigh them on a kitchen scale to get the weight in grams. This will help you determine how much salt you need to use in order to get a successful fermentation. Note the weight on a piece of paper.
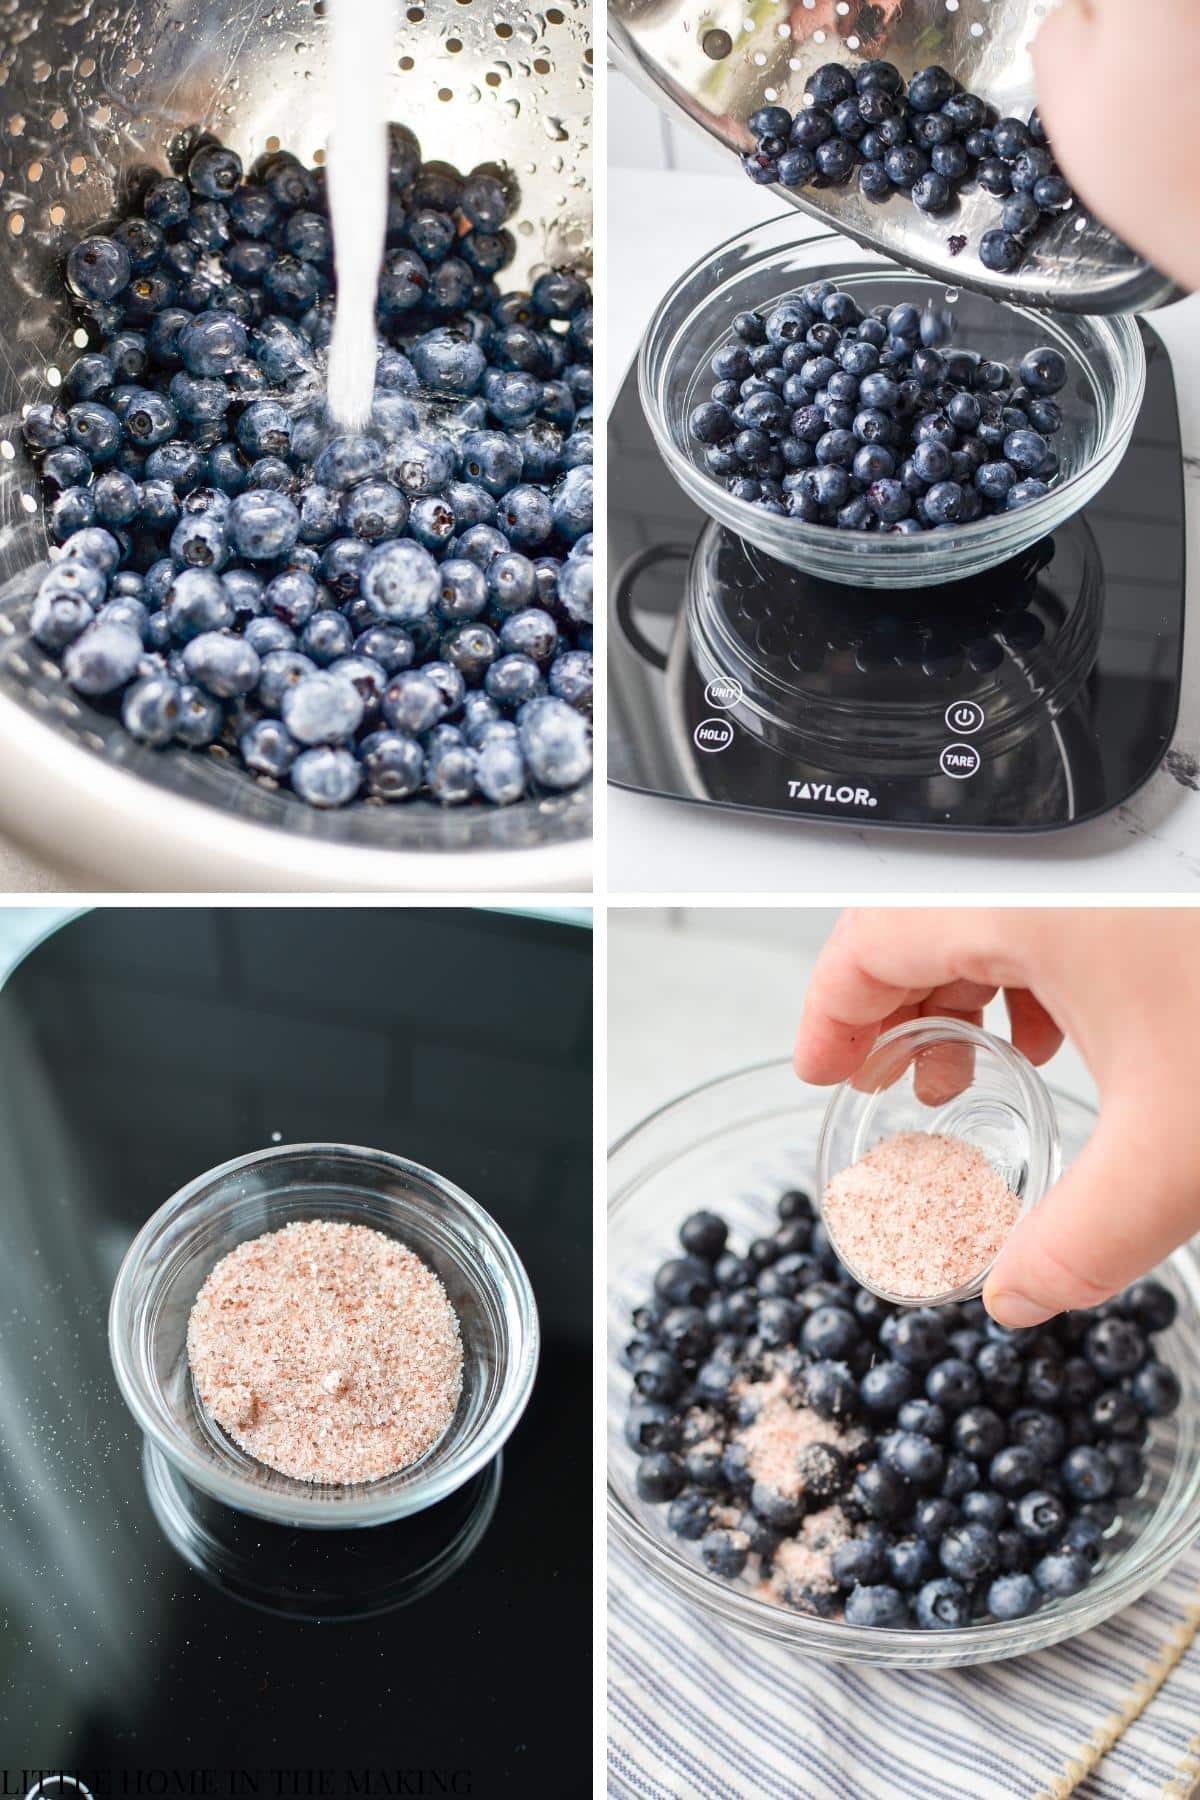
Calculate the weight x 2% and you will get the weight in grams that you will need to use in salt (more on this in a second). Note the amount on a piece of paper, and weigh out the appropriate amount of non-iodized salt (I like to use Redmond Real Salt).
Determining Salinity
As with all forms of fermentation, you will need a 2-3% salt content in order to have a successful lacto-fermentation. The salt inhibits the bad bacteria, while giving the good bacteria an opportunity to grow and overrun any nasties in the bunch. This is why salt is such a crucial aspect of the fermentation process.
In order to accurately determine how much salt you need, you'll need to use a kitchen scale to determine both the weight of your blueberries (or whatever fruit you are fermenting). Then you'll calculate the amount of salt required for fermentation, and weigh that in grams as well.
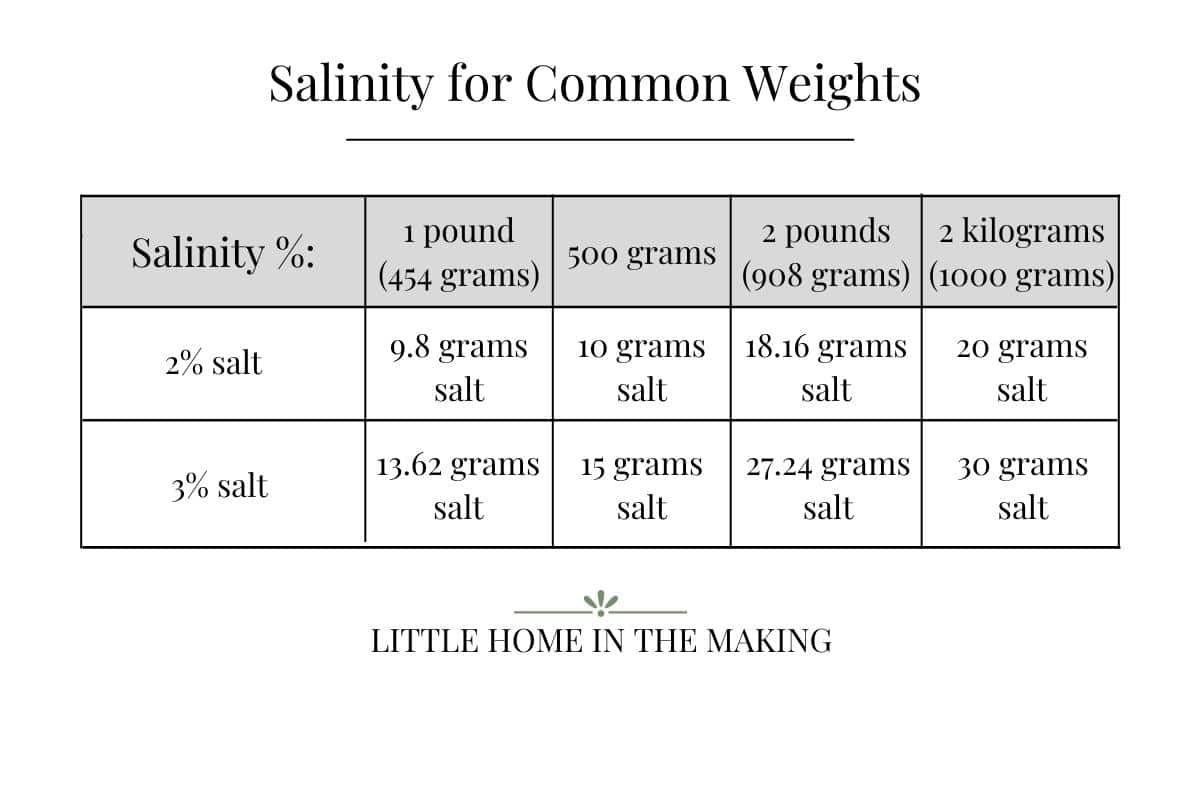
I've provided a chart below showing you some of the most common weights and their corresponding amounts of salt needed to achieve a 2-3% salinity.
The amount of blueberries you have may be far outside the typical ranges, so use the following equation to determine how much salt you'll need to add to your ferment:
Weight in grams x 2% = grams in salt required OR weight in grams x 3% = grams in salt required.
Common weights and the required salt to achieve 2-3% salinity:
Should I use a 2% or 3% salt?
A successful fermentation requires at least 2% be salt, but you can range up to 3% (or even beyond for some ferments). This will largely depend on how comfortable you are with fermentation and how salty you are okay with your fruit being. If you are new to fermentation, using a higher salinity can help put your mind at ease, but it will increase the saltiness of the final product. When it comes to fruit in particular, this can be unpleasant. For that reason I recommend a 2% salt content, but you should do whatever you feel the most comfortable with.
Combining the Salt and the Blueberries
Once you have determined the correct amount of salt, add both the salt and the blueberries in a bowl and stir to combine.
Add the blueberries to a jar that can accommodate them easily, knowing that they will be depressed slightly by the weight. So for example, you will be able to fit 5 cups of blueberries into a quart size (4 cups) jar after pressing down on them lightly.

If using starter culture, add that to the jar as well. Starter cultures include leftover sauerkraut brine, kombucha, water kefir, kefir whey, or whey leftover from yogurt making.
Weigh down the blueberries, squeezing them gently, with a fermentation weight OR a small 4oz canning jar filled with water or brine.
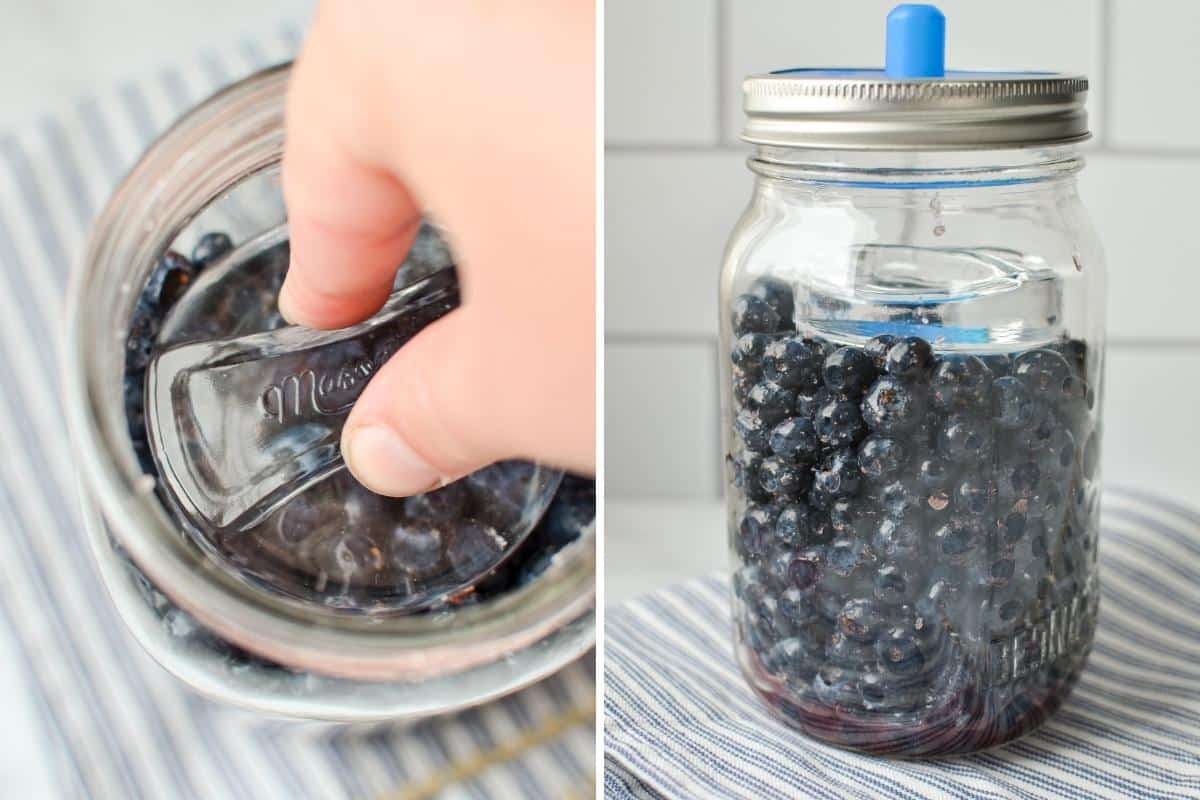
Top the jar with a pickle pipe or airlock lid if you have those available. This will allow the gases to escape easily without having to burp the jar. If you don't have a special lid, use a regular lid and just open the jar to release gasses every day or so.
Fermentation
Allow your blueberries to ferment at room temperature for 4-8 days. Warmer ambient temperatures will make for a quick ferment (think 80ºF and up), while cooler temperatures will make for a slower fermentation (70ºF and below).
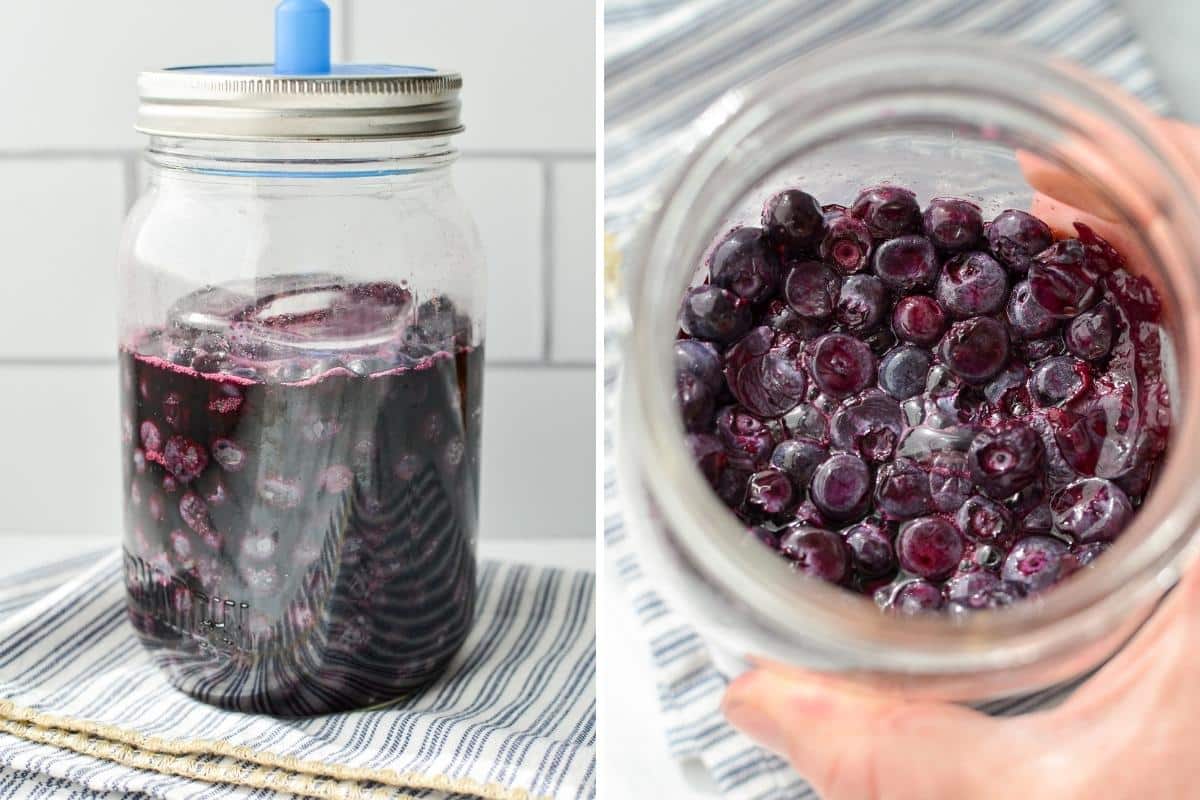
You will know your blueberries are done when they have had several days of bubbly activity and have released almost enough juices to cover the blueberries.
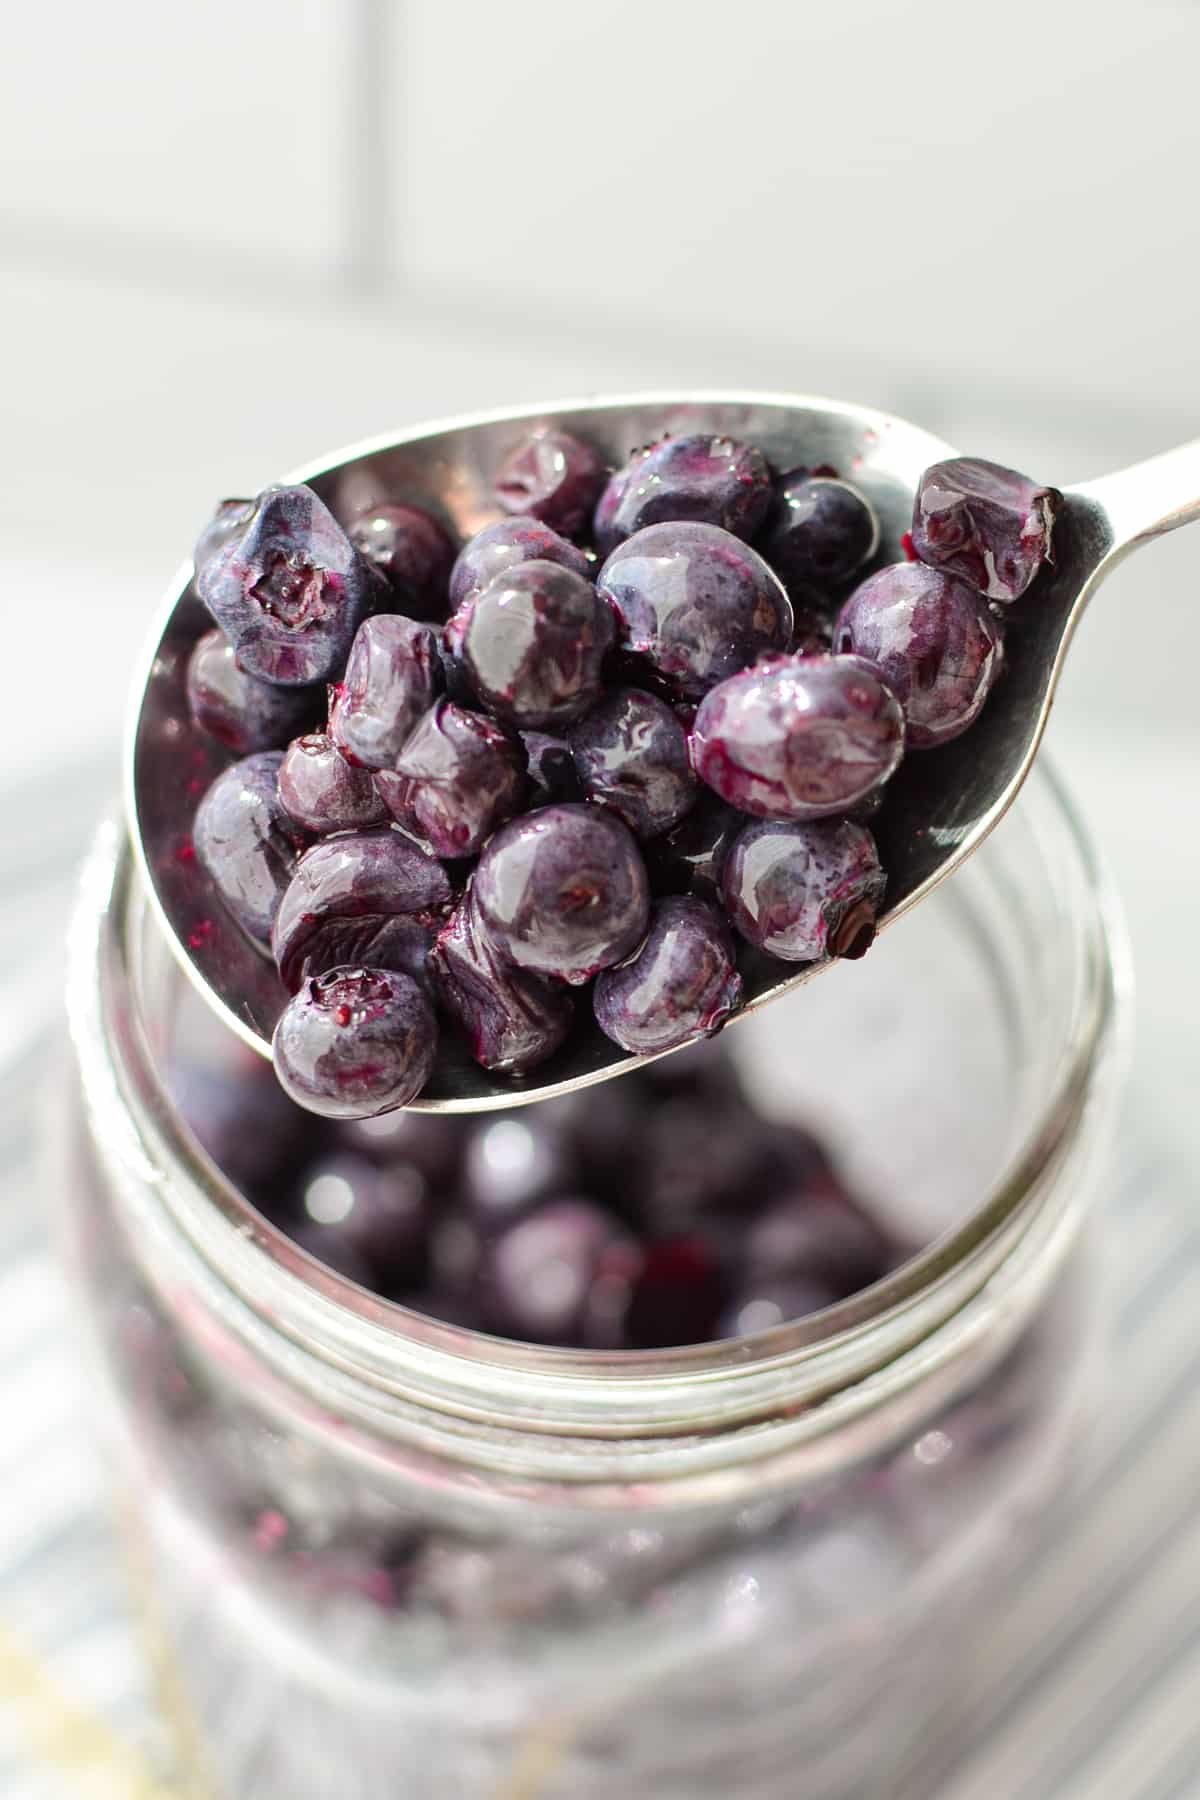
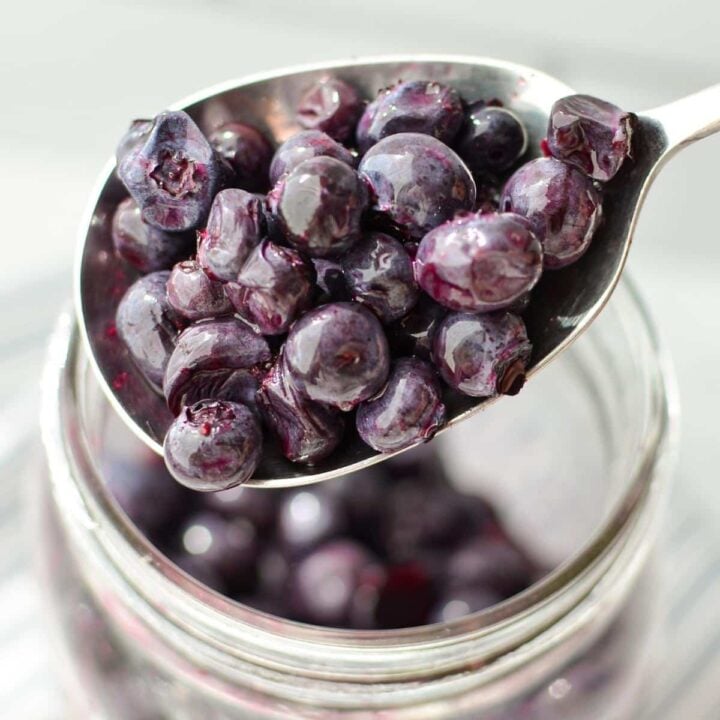
Taste test your blueberries. They should be slightly sweet, sour, and slightly salty. They do not taste like fresh blueberries in the slightest, but they should rather be quite complex.
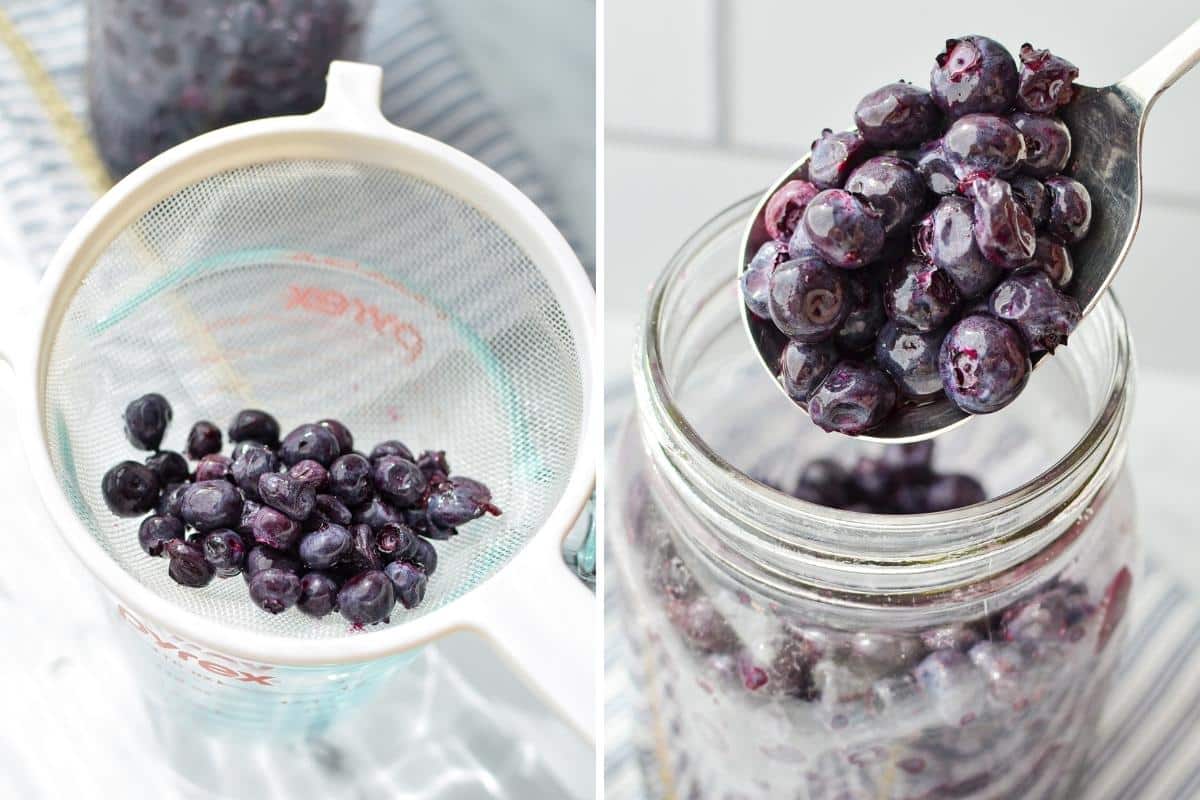
Strain the blueberries from any juice that has collected. You can store the blueberries without their juices for 2-3 days in the refrigerator, or freeze in smaller portions for using as needed to top yogurt, throw into smoothies, or blend into dressings.

Storing
Once your blueberries are strained of their juice, they can be stored in an airtight container in the fridge for 2-3 days, or up to a week if you don't mind the chance in flavor.
For longer storage, portion your blueberries out and freeze them. You can freeze them in silicone molds, ice cube trays, or in small containers. Thaw and use as needed!
Tips for Fermenting Fruit
- If you have one available, use a starter culture. This greatly improves your success rate with fermentation, and can cut some time off and reduce the chance of mold. Starter cultures include sauerkraut juice, kombucha, water kefir, kefir whey, or whey collected from making yogurt.
- Temper your expectations - Fruit that has been lacto-fermented with salt is going to taste much different than the fresh version. It will be sour (like all ferments), salty, and just a bit sweet. You're not going to be able to snack on them like you would their pre-fermented descendants.
- Plan how you'll use it - Before you make fermented blueberries, think about how you'd like to serve them. Otherwise they may end up going to waste.
Ways to Serve Fermented Blueberries
- A small amount served on top of yogurt or ice cream
- In smoothies (with kefir for added benefits!)
- Blended into salad dressings
- Added to other fruits in small amounts - If you want to top your yogurt or ice cream with fresh fruit, slip in a few fermented blueberries. The sweetness of the other fruits will help cover up the sour and salty berries.
- Added to purees - Add a few blueberries to a blend of fruits (or vegetables) that will be made into a puree. This adds a small amount of probiotic benefit without overpowering the taste of the other fruits.

FAQ's
If the blueberries have been fermented on purpose, yes you can! If they were not fermented in a controlled environment, they may not be safe to eat. Blueberries may be fermented in a sweet or salty brine, and so long as the saline or acidity is high enough, they should be perfectly safe to eat.
Blueberries that have been fermented with non-iodized salt taste sour, salty, and slightly sweet. They are quite unlike anything you've likely ever eaten, but add a unique spin to salad dressings and sauces. They are also great when added into smoothies.
When blueberries are fermented, the beneficial bacteria slowly overpowers any bad bacteria, inhibiting the growth of mold. They break down slightly and soften, but are preserved for an additional 2-3 days on top of the initial 1 week of fermentation. Their taste becomes more sour and salty, and only slightly sweet. They taste very different when compared to their fresh counterparts.
Fermented Blueberries
These lacto fermented blueberries are simple, slightly sour, and a great way to explore the process of fermenting foods.
Ingredients
- Blueberries
- Non-iodized salt
- 1 tablespoon Starter culture (optional)
Instructions
- Wash and rinse the blueberries you will be using tNote oroughly, removing any debris or stems.
- Weigh the blueberries using a kitchen scale using grams, noting the weight on a piece of scrap paper.
- Calculate the amount of salt needed by multiplying the weight of the blueberries by 2% (or 3% if you prefer). This will give you the amount of salt needed in grams. Note the amount on a piece of paper.
- Weigh out the amount of salt required and add it to the bowl of blueberries. Stir gently to combine the blueberries and salt.
- Add the blueberries to a jar that can accomodate them (they will be squished slightly, so a 4 cup quart jar should be able to fit 5 cups of blueberries).
- Press the blueberries down gently into the jar, releasing some of the juices, but it's not your goal to do so.
- Add in starter culture (if using, see notes*) and shake the jar gently to distribute.
- Weigh down the blueberries with a fermentation weight, 4oz canning jar filled with water, OR a freezer bag filled with water.
- Top the jar with a fermentation lid (pickle pipe or airlock) if available, or a regular lid if not. If using a regular lid, be sure to "burp" the jar by opening it every day or so. This helps release any excess gasses in the jar.
- Place the jar at room temperature and ferment for 4-8 days, or until bubbly, active, mostly sour, but still slightly sweet. This will take less time in homes that are warm (80ºF or higher) and more time in cooler homes (70ºF and below).
- Once the blueberries have fermented to your liking, drain them of their juice and store in the fridge for 2-3 days (or up to a week if you don't mind the stronger flavor). You can also freeze in small portions for up to 2 months.
Notes
Starter Culture: This is optional, but if you have access to a starter culture, I highly recommend you use it. This includes leftover sauerkraut brine, kombucha, water kefir, and whey from yogurt or kefir. About 1 tablespoon is all you need.
Common weights and required salt (for 2%):
- 1 pound (454g) - 9.08 grams salt
- 500 grams - 10 grams salt
- 2 pounds (908g) - 18.16 grams salt
- 1 kilogram (1000g/2.2 pounds) - 20 grams salt
Nutrition Information:
Yield: 16 Serving Size: 1Amount Per Serving: Calories: 0Total Fat: 0gSaturated Fat: 0gTrans Fat: 0gUnsaturated Fat: 0gCholesterol: 0mgSodium: 36mgCarbohydrates: 0gFiber: 0gSugar: 0gProtein: 0g
Nutrition information is an estimate only.
Please note that some of my blog posts here at Little Home in the Making may contain affiliate links. If you make a purchase through these links, I will get a small commission at no additional cost to you. Please see my Disclaimer for more information.


Debbie says
I make my ones kefir and sometimes it over ferments so this would be great for the whey but I'm not seeing an amount to use. I've read through the whole post, the recipe and the notes. Am I overlooking the amount to use?
Dolly | Little Home in the Making says
Hi Debbie! I did not include an amount, but I'll go ahead and update that! I would recommend about 1 tablespoon of the starter culture of your choice (water kefir, sauerkraut juice, whey, kombucha, or commercial starter).
Zac says
Excellent guide.
Under the header;
"Tips for Fermenting Fruit"
and sub-header;
"Temper Your Expectations"
there is a spelling error.
it says "facto-fermented" instead of "lacto-fermented"
Dorothy Bigelow says
Thanks for letting me know! It's been corrected.
Georgianna says
I made this! I think they're divine. I'll have to freeze some, though, since they won't last as long as it will take me to finish them. Any recipes using these would be awesome.
Dolly | Little Home in the Making says
I don't have any recipes using them yet, but it's something I will look into! So glad you liked them Georgianna!
Rebecca says
why do you need to strain them before refridgerating? wouldnt they last longer in the brine?
Dolly | Little Home in the Making says
They would likely store longer in the brine, but the brine is a bit salty, so I prefer straining them and using them up in a few days. Fruit also ferments quickly (even in the fridge), so the flavor can change too.
Gina says
Can you make this with frozen blueberries?
Dolly | Little Home in the Making says
I haven't tried it, but if you do please let us know how it goes!
Ivy says
Can you use thawed frozen blueberries for this?
Dolly | Little Home in the Making says
I haven't tried it, but it may work as long as you are using a starter culture.