


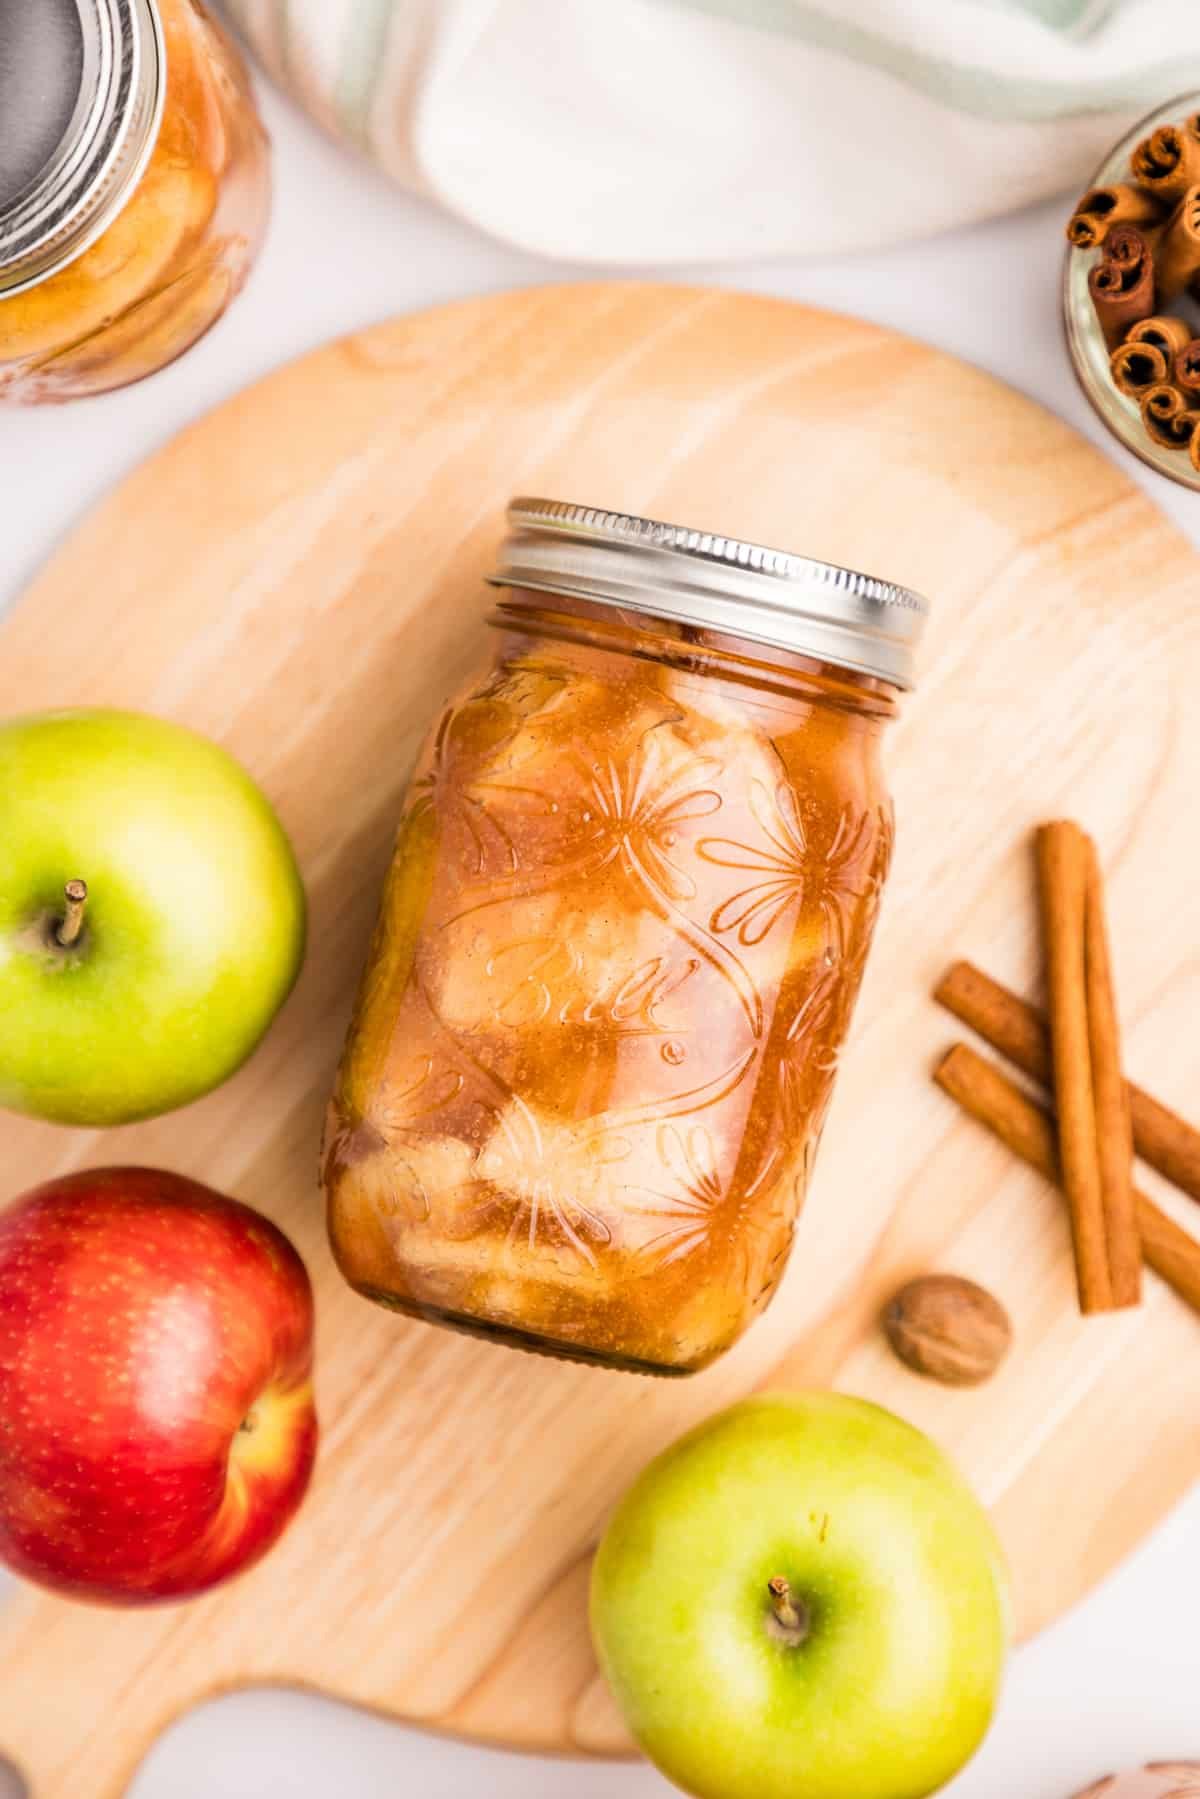
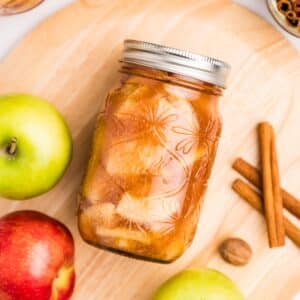
Looking for a way to preserve apples? Try this easy recipe for Canning Apple Pie Filling. Made with just a few simple ingredients, this water bath canning recipe is perfect even for beginners - no pressure canner needed!
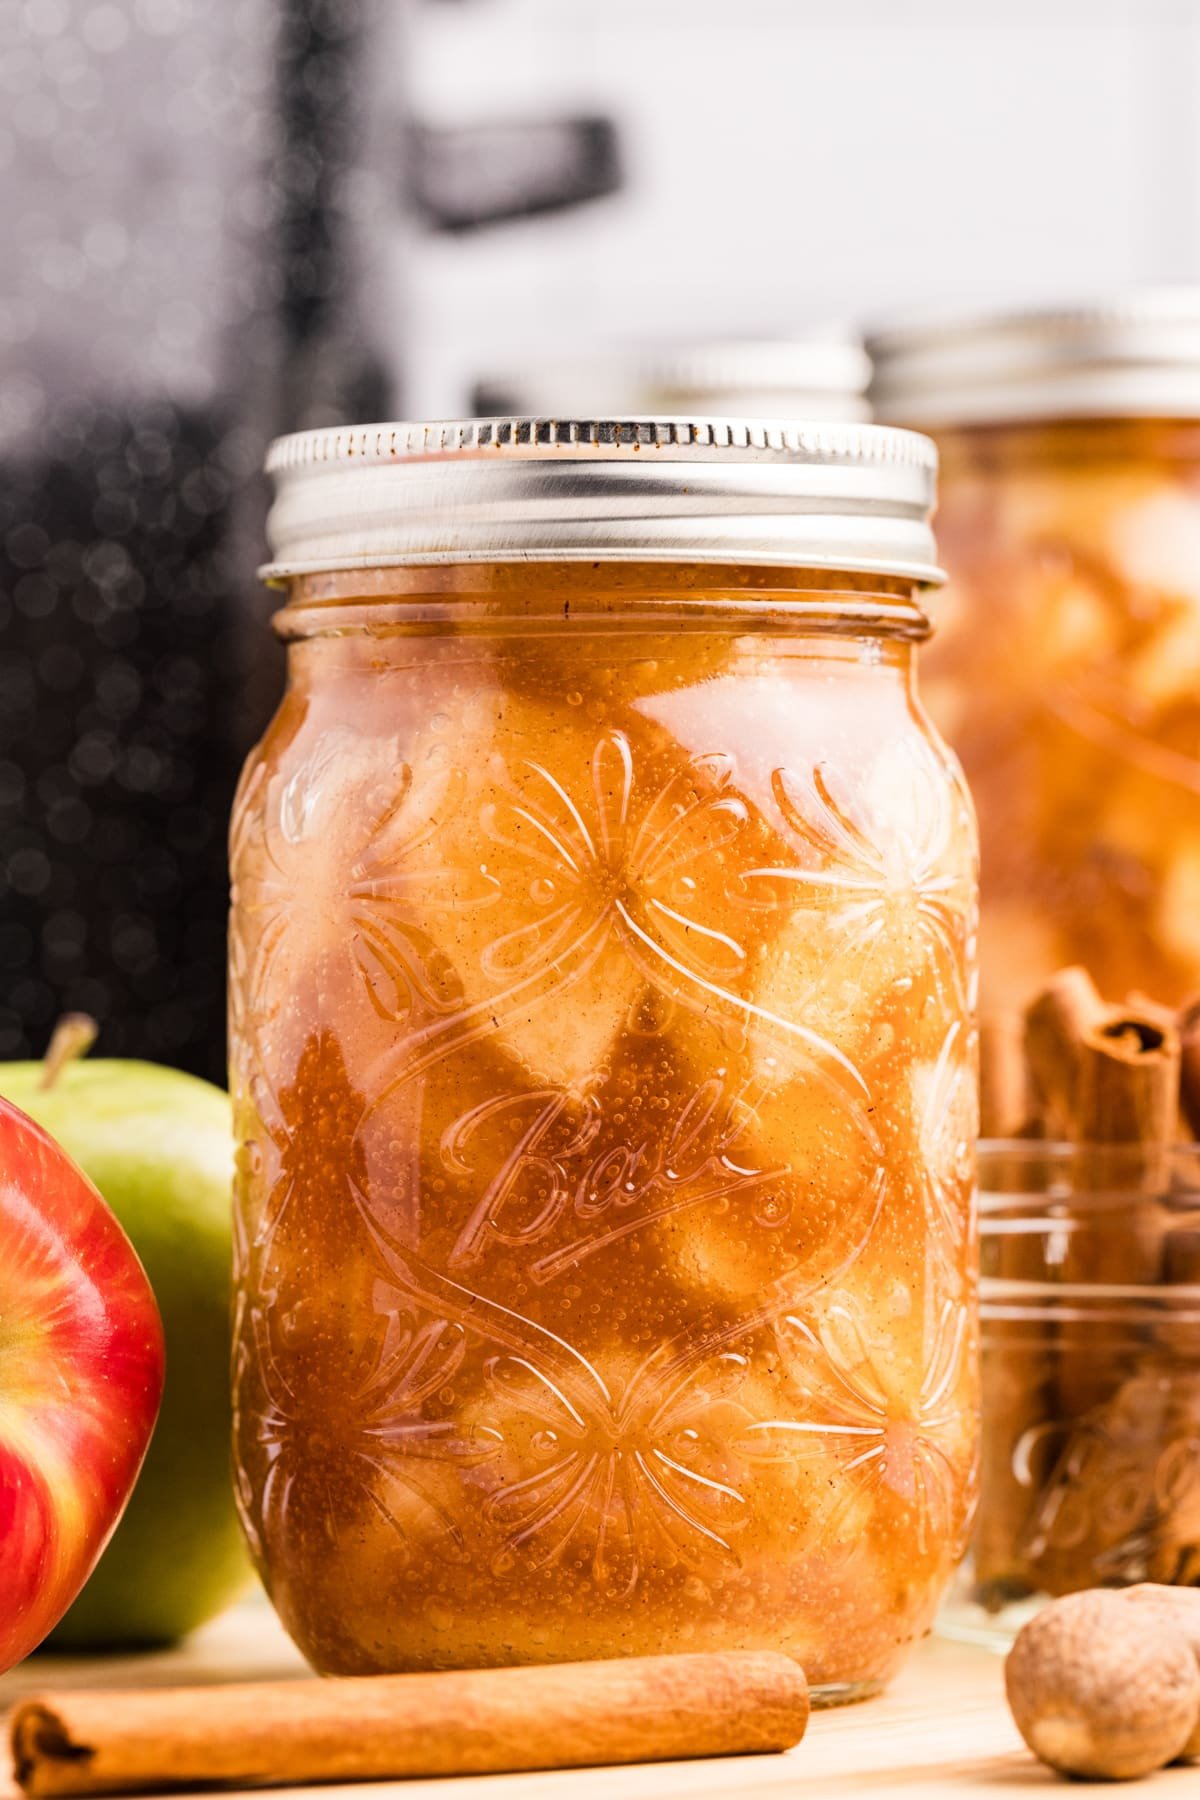
Whether you're new to canning or an experienced pro, this apple pie filling recipe is the perfect way to stock your pantry shelves. Filled with crisp apples, this recipe is a great way to ensure you're only two steps away from hot apple pie at any given moment.
As someone who lives in the heart of apple country and also happens to be a seasoned home canner, apples are a cornerstone of my yearly food preservation plans. Whether it's applesauce, apples in syrup, apple jam, or this apple pie filling, you can be sure the shelves will be stocked well with this seasonal staple.
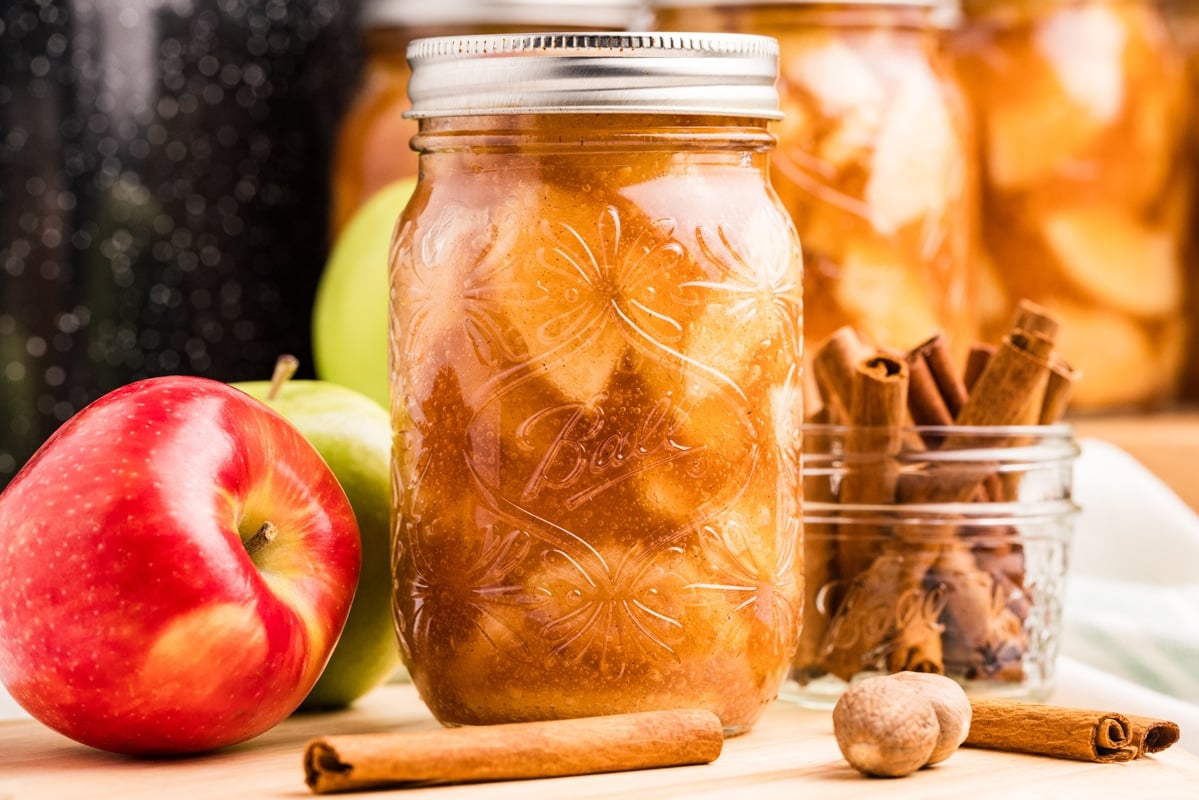
Apple pie filling is one of my favorite things to make since it doesn't require as much prep work as something like applesauce, and just 5 pounds of apples yields up to 7 pints of delicious preserves.
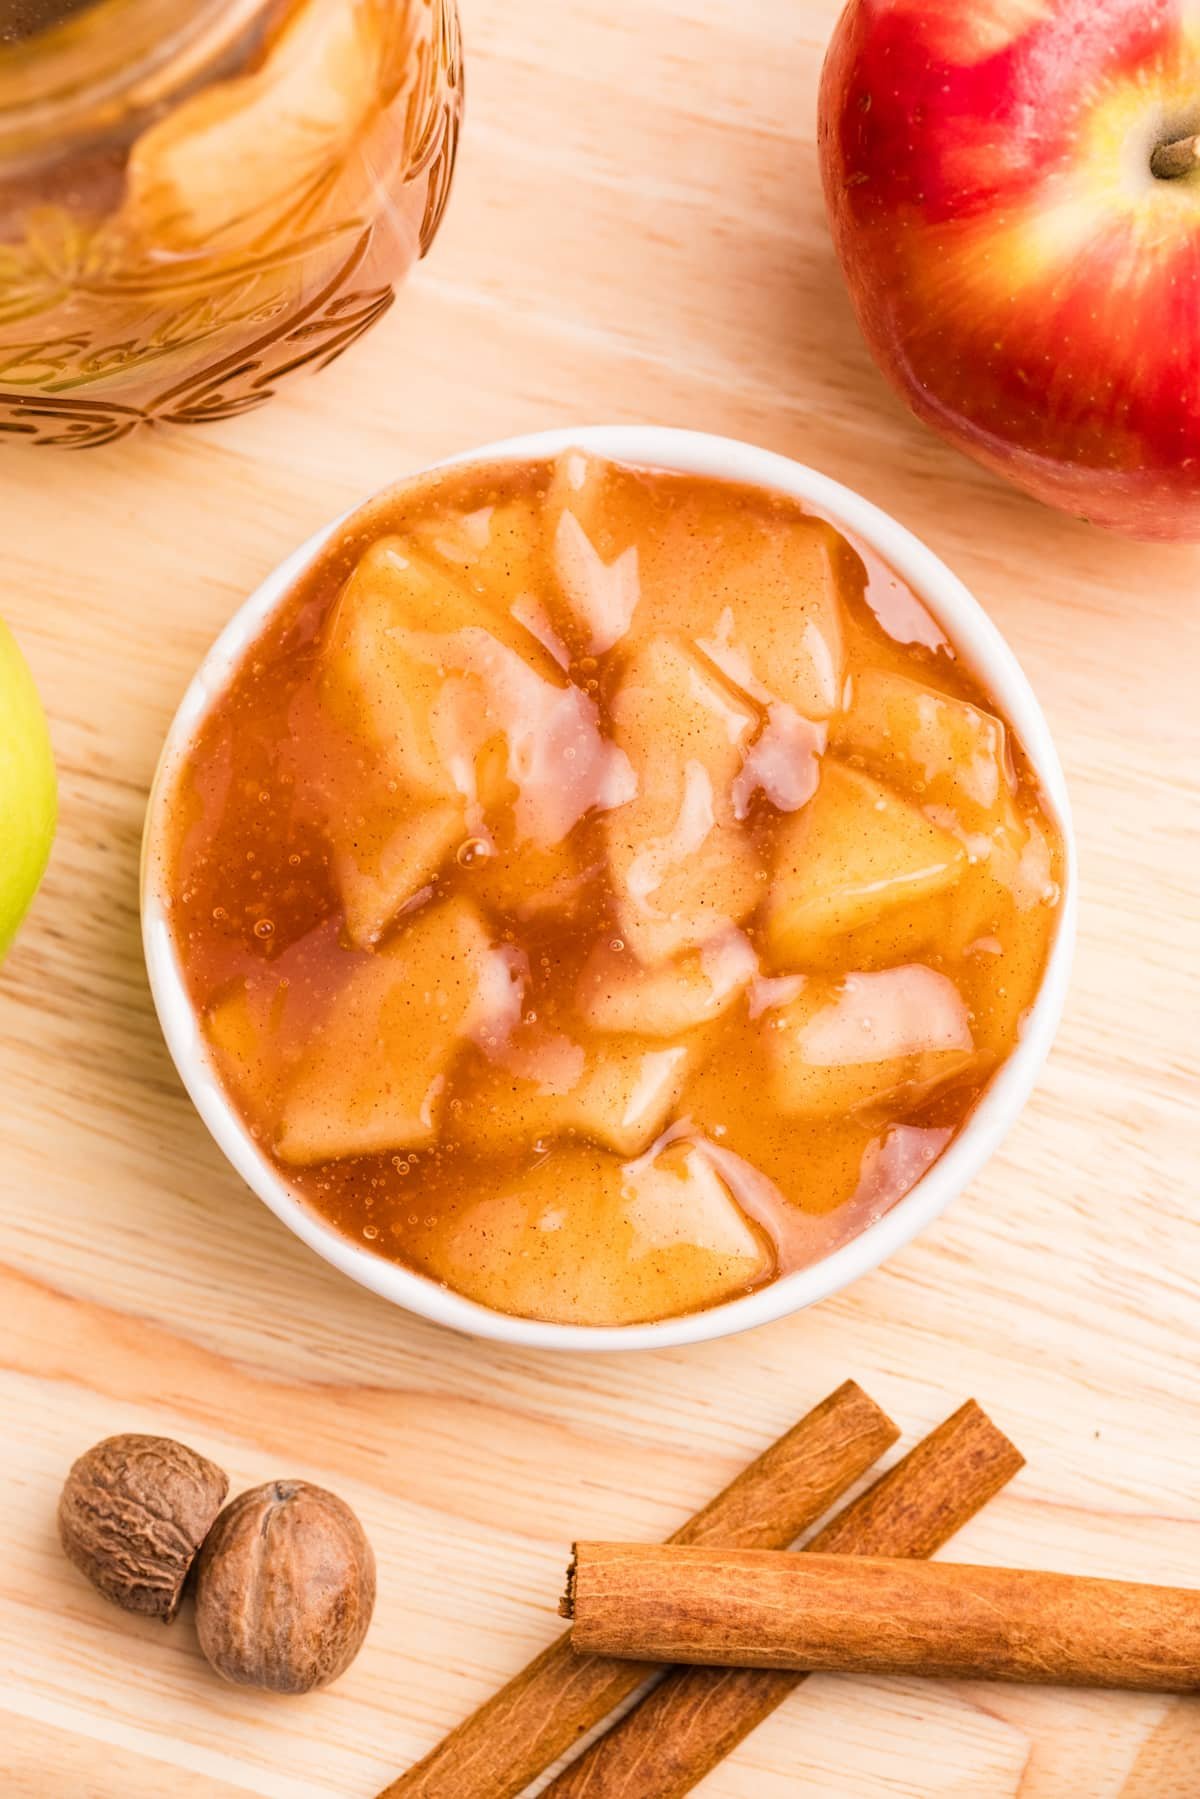
All you have to do is pour it into your favorite pie crust, top, bake, and you're ready with a classic comfort dessert any day of the week.
Ingredients
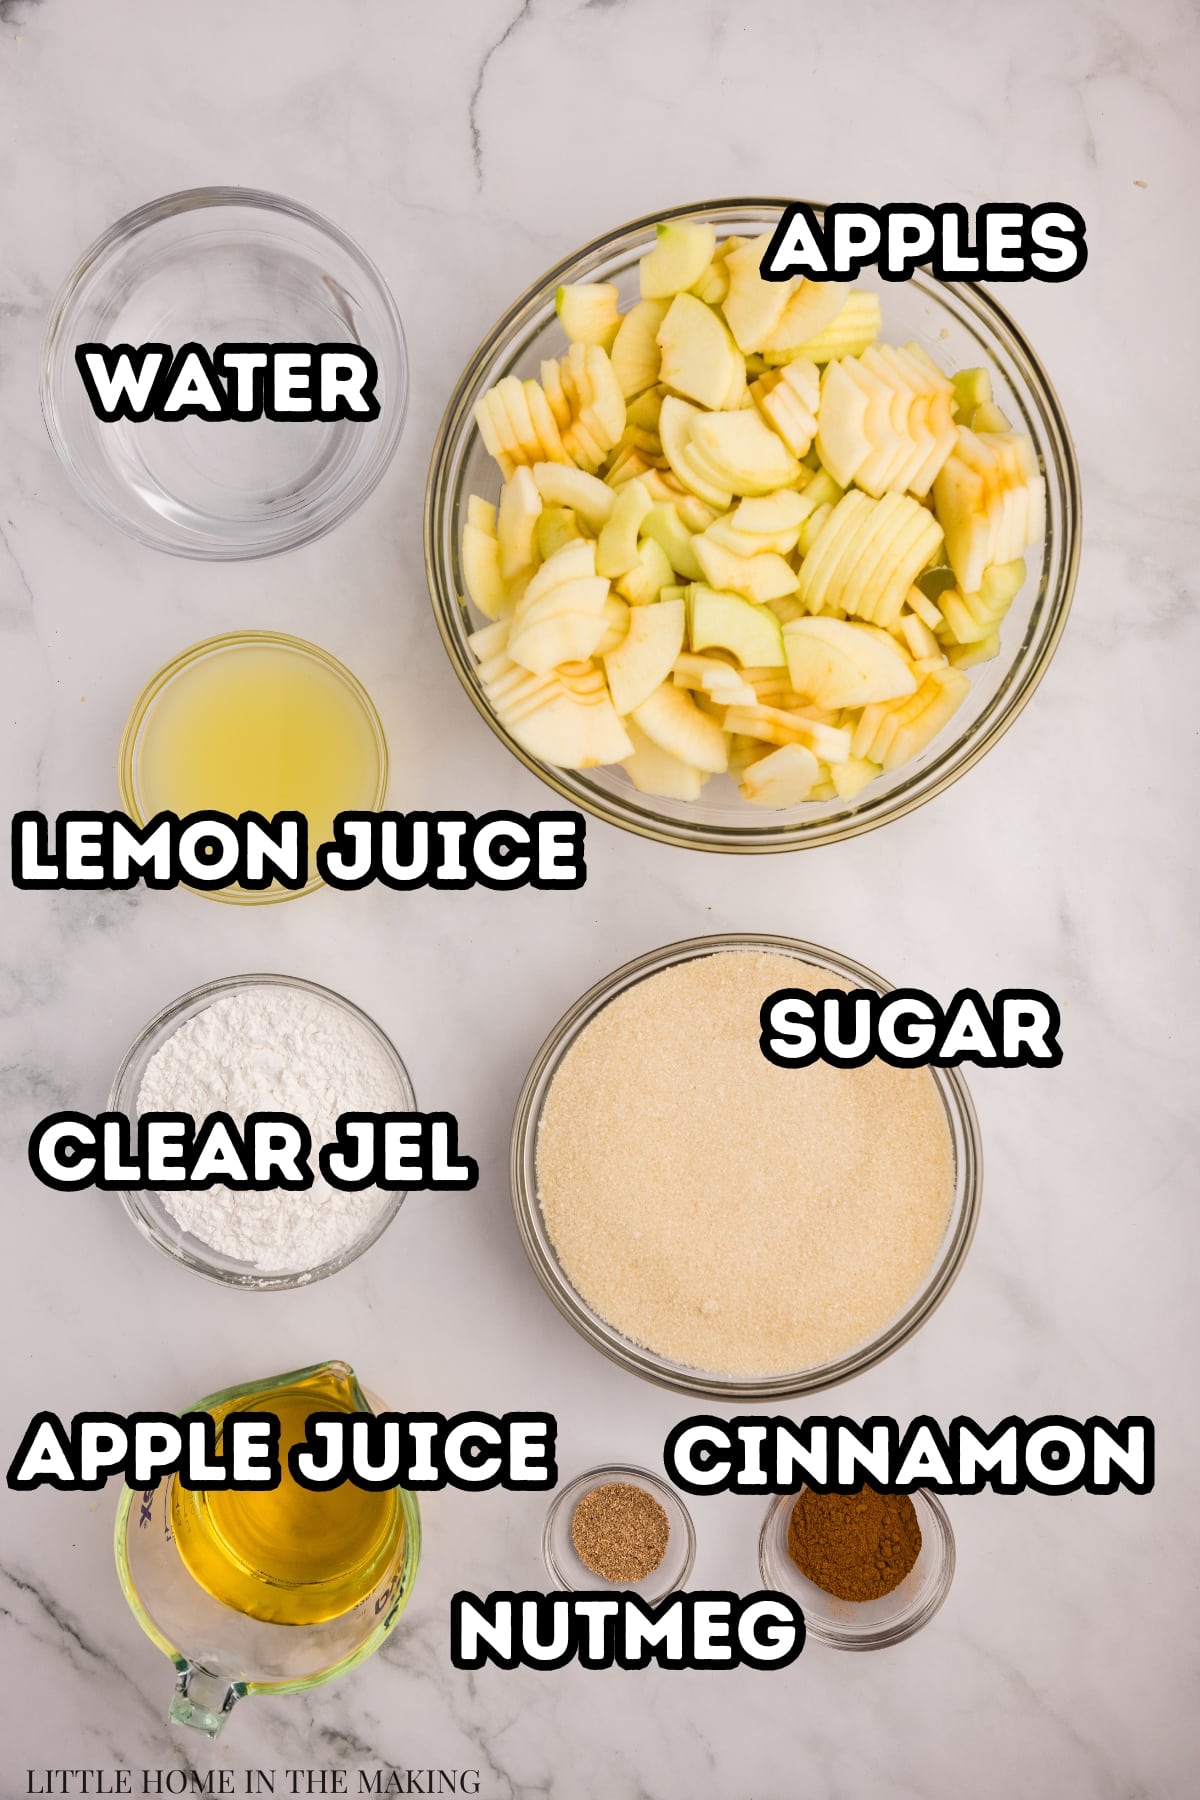
- Apples: You will need 12 cups of sliced apples, which is about 4 ½-5 pounds. I recommend a good quality baking apple that holds up to heat like Granny Smith, or a mix of your favorite baking apples. Don't worry about tartness - the finished pie filling is perfectly sweet even when using tart apples.
- Sugar: Use either regular white granulated sugar or organic sugar for this recipe. Since it's a canning recipe, you cannot make substitutions (like maple syrup or honey) without affecting safety (as recipes are tested and approved with sugar).
- Clear Jel (cook type): ClearJel is a type of modified corn starch that is tested and safe for canning recipes. It helps to thicken foods, while still making them penetrable by heat. Do not substitute this for cornstarch or flour - these ingredients are not safe for canning. You can reduce the amount of Clear jel by about 1-2 tablespoons if you prefer a looser set pie filling.
- Apple juice: This is used instead of a larger quantity of water to provide both flavor and acidity. I recommend using unsweetened juice.
- Spices: You will need some cinnamon and nutmeg. I find that gives the perfect apple pie flavor, but you can add a little more (plus vanilla and/or butter) when you're ready to use the pie filling if you want to.
- Lemon juice: Be sure to use bottled lemon juice (not fresh). Bottled lemon juice has to meet certain criteria for acidity, while freshly squeezed juice varies in acidity. Acidity is an important component of safe canning.
- Water: You will need some cold water; this helps to activate the ClearJel, which thickens the pie filling.
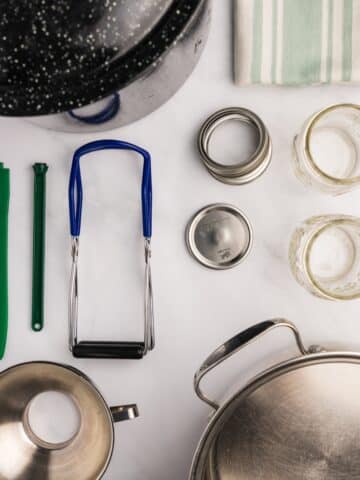
Tools & Equipment
The following tools are what I recommend for canning your own pie fillings. Some may be optional, or there may be alternative options. If you want more information on the specific tools, check out my post on essential water bath canning supplies.
- Water bath canner (also known as boiling water canner)
- Canning jars, lids, and rings (pint-sized jars - 500ml)
- Magnetic lid lifter (optional)
- Headspace checker (optional - can use a clean ruler)
- A debubbling tool (a clean butterknife or chopstick works well)
- Stock pot (or Dutch oven)
- Wide-mouth funnel (optional)
- Ladle and whisk
- Thick kitchen towel
Before You Get Started: Canning Prep
- Wash all the jars, lids, rings, and canning equipment with hot, soapy water. Rinse well.
- Fill the water bath canner with water and bring to a boil.
- Add the canning jars to the boiling water and sterilize for at least 5 minutes.
- Turn the heat to low and allow the jars to rest in the hot water until you're ready to use them.
- Sterilize the rings (optional) in boiling water for 5. Then lower the heat and allow to rest in hot water until needed.
- Warm the canning lids in hot water (not boiling) until needed. I recommend adding them to the pot you used to sterilize the rings, only after the boiling time is up.
How to Make Apple Pie Filling for Canning
Prep tip: Before you get started on your apple pie filling base, make sure you have peeled, cored, and sliced your apples. Keep them in a bowl of cold water (if desired, add lemon juice or citric acid) to prevent browning. Drain them before blanching or adding them to the ClearJel mixture.
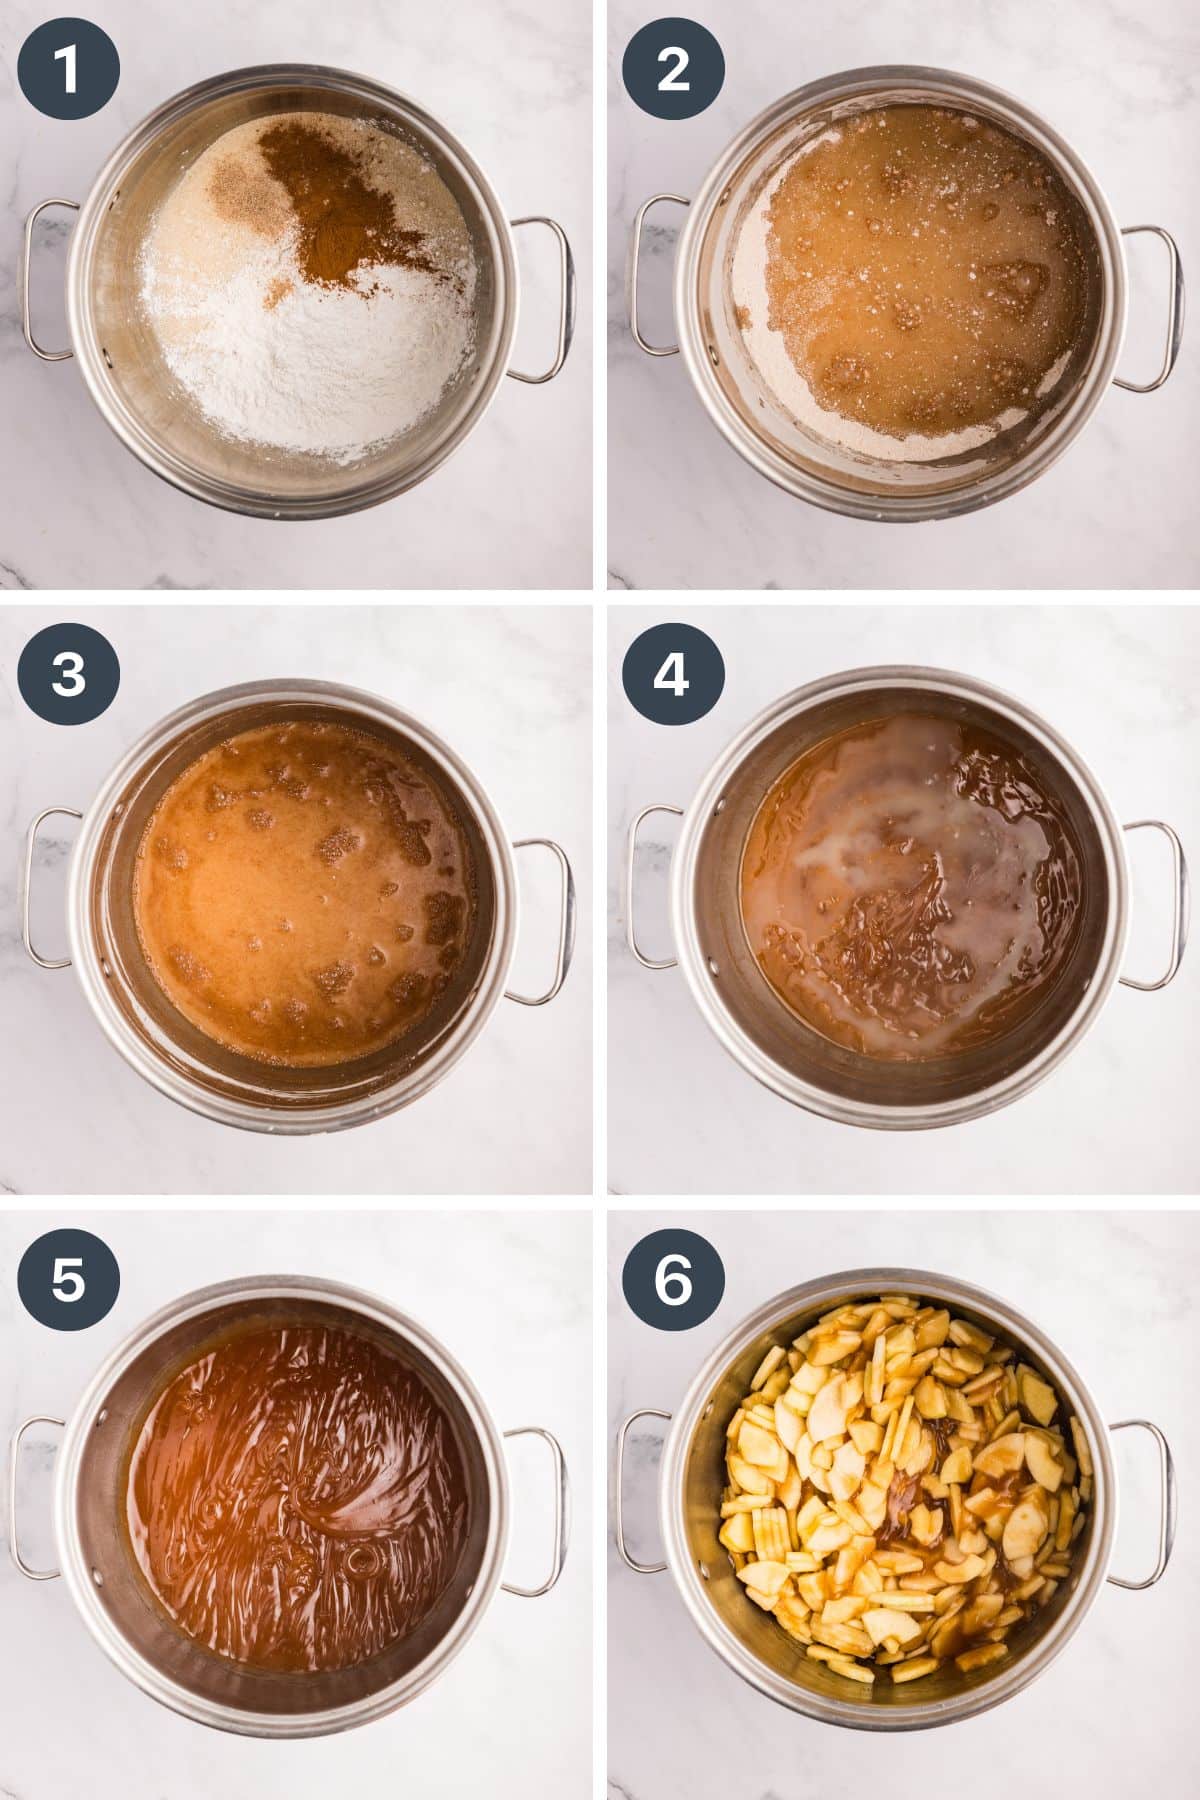
- Combine sugar, ClearJel, cinnamon, and nutmeg in a large stock pot (or Dutch oven.
- Add the cold water and apple juice, and whisk until completely combined.
- Bring to a boil over medium-high heat, making sure to stir constantly to prevent scorching or clumping. As a warning, the mixture will thicken very quickly!
- Once the mixture begins to bubble and has thickened, pour in the bottled lemon juice and whisk until smooth.
- Return to a boil for 1 full minute, whisking almost constantly during this period.
- Remove the stock pot from the heat and immediately add the drained apples (blanched or raw - your choice). Fold them in until completely coated in the pie filling mixture. Return to the heat, reducing it to medium. Cook, stirring often, until the apples are heated through (this should take just a few minutes).
Optional: Blanch the Apples
If you like a softer texture, or if you prefer a higher concentration of apples in each jar, you may consider blanching the slices first.
This is done by bringing a large pot of water to a boil, and adding 4-6 cups of apple slices at a time. Allow them to boil for about 1 minute, then remove them with a slotted spoon and place them in a large covered bowl. Repeat with the remaining apples.
Once the pie filling is ready for the addition of apples, add your blanched apples (drained of excess water) and fold them in until well coated and heated through.
The Water Bath Canning Process
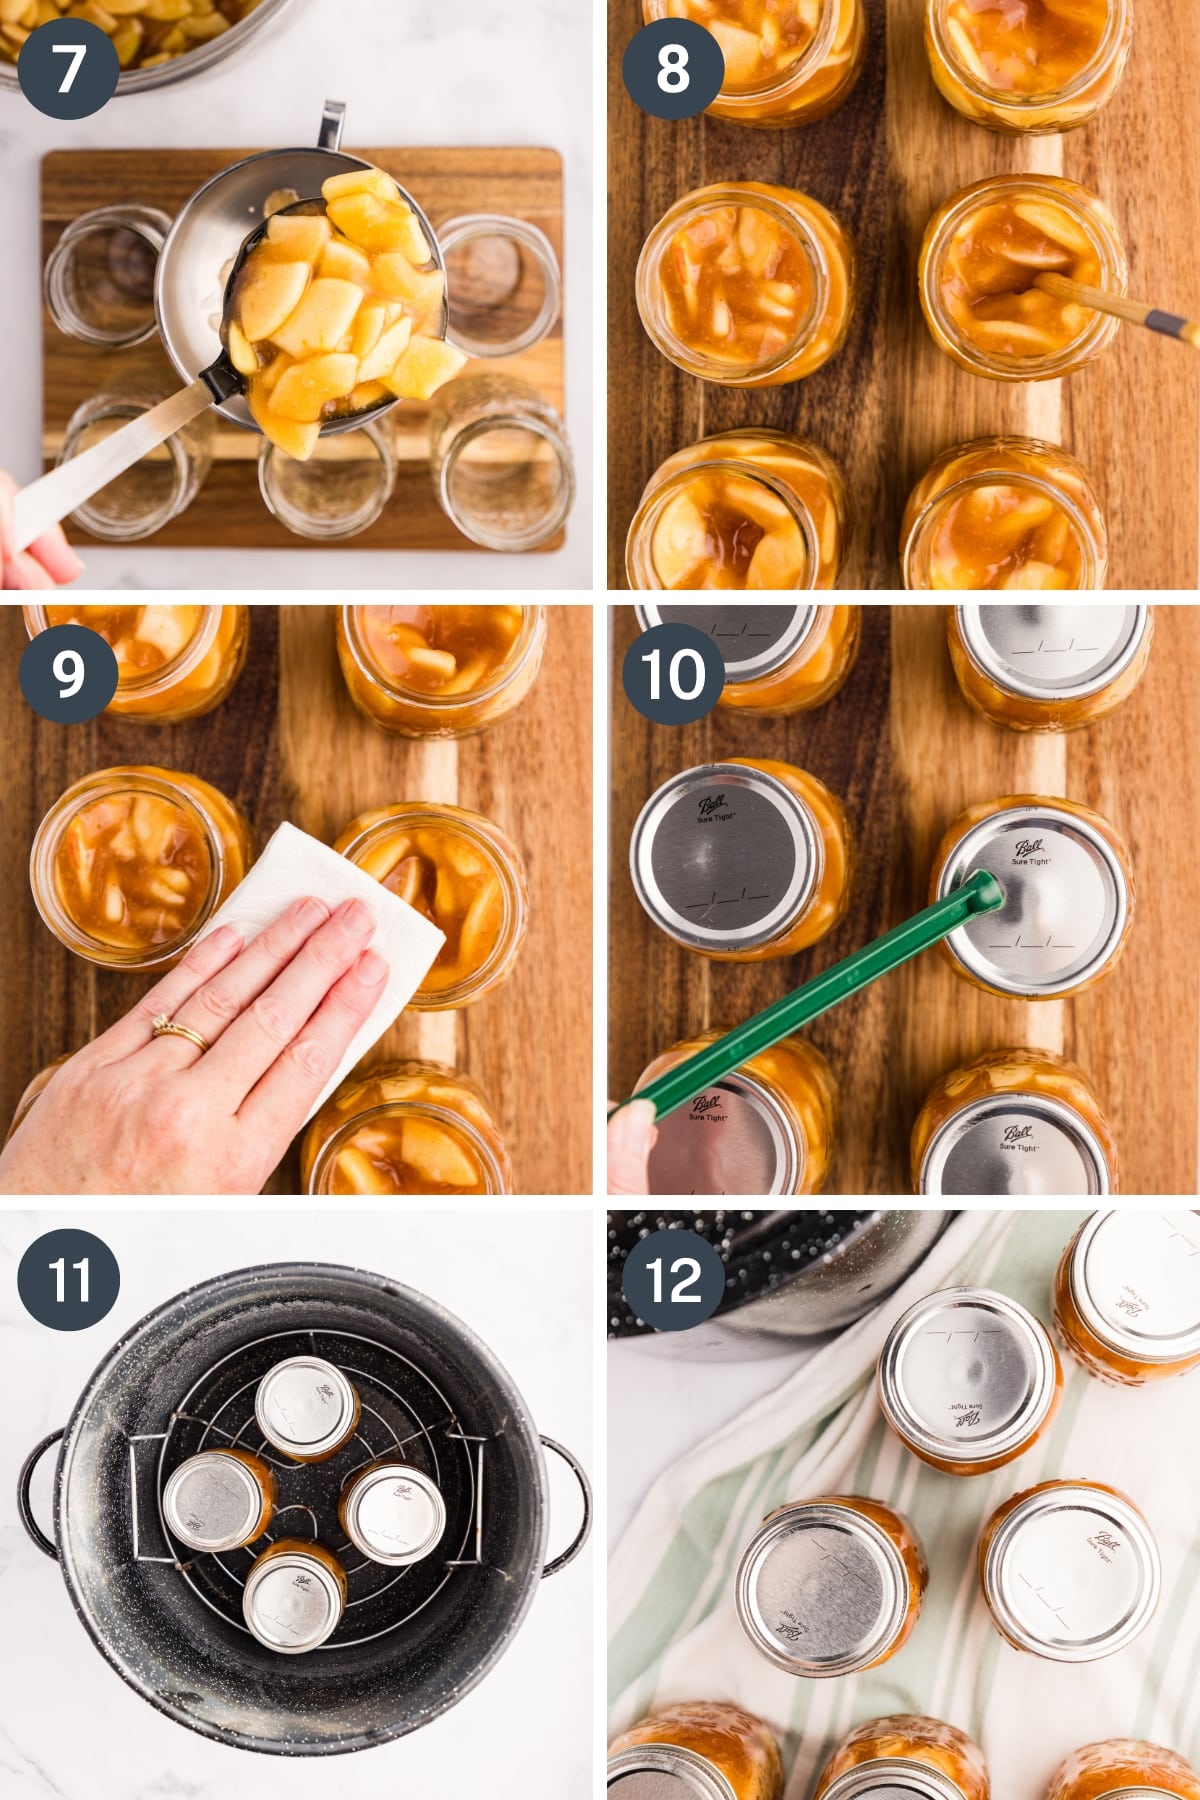
- Ladle the apple pie filling into the hot jars, leaving a generous 1 inch headspace (for wide-mouth jars, or up to 1 ½ inches for regular mouth jars).
- Remove any air bubbles using a debubbler tool, a clean chopstick, or a butter knife. Add more pie filling if needed to maintain the headspace.
- Wipe the rims of the jars with a damp paper towel (or clean kitchen towel).
- Place a warm canning lid on each jar, then a canning ring. Secure the ring just until fingertip tight.
- Place the filled jars in the water bath canner and return to a bubbling boil over high heat with the lid on. Once the water boils, start the processing time. Both pints (500ml) and quarts (1L) need a processing time of 25 minutes (check the elevation chart if you live at 1000+ feet above sea level).
- Follow the post-processing steps below.
Once the processing time is up:
- Turn off the heat.
- Remove the canner from the heat source, and leave the lid on.
- Allow the canner to rest (with the jars inside) for 5 minutes.
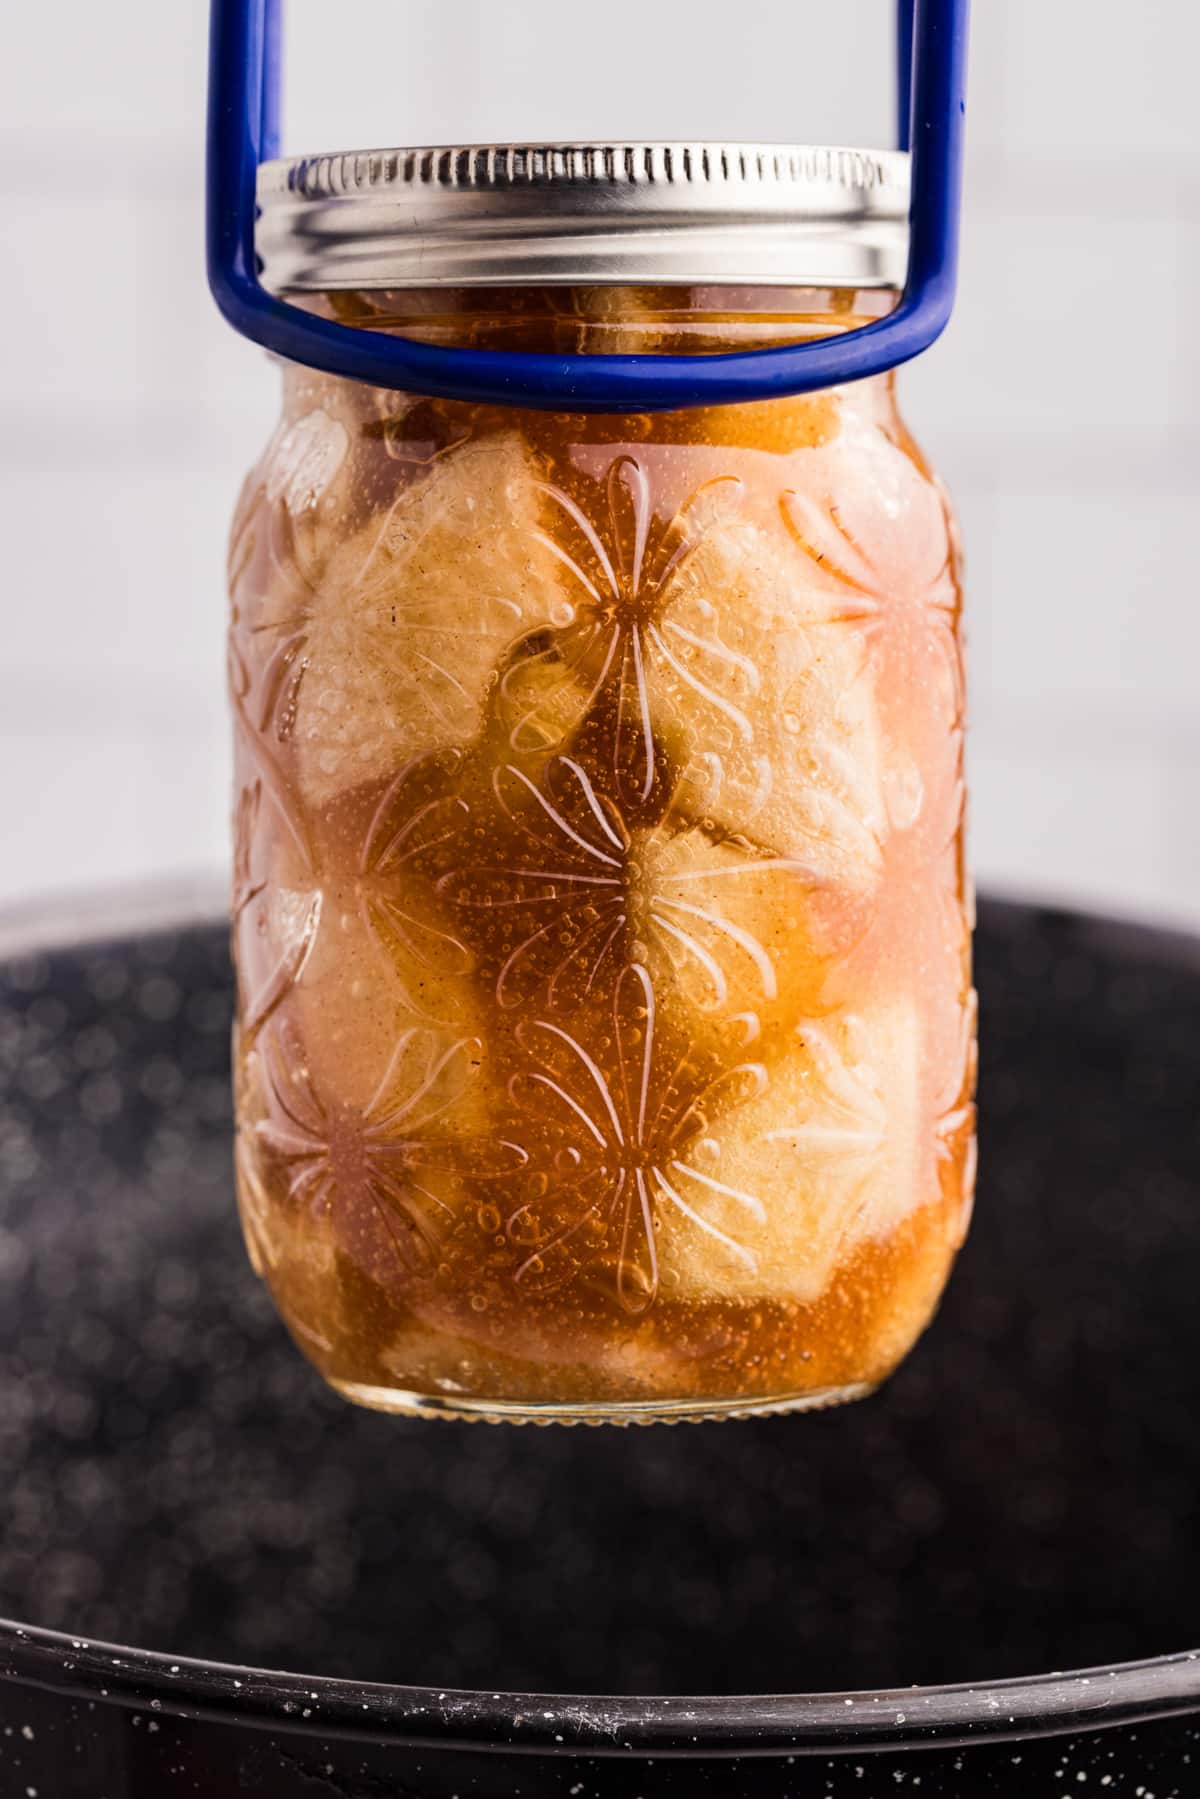
- Remove the lid, then carefully remove the jars using a jar lifter.
- Place the jars on a thick kitchen towel (or a wire rack). Leave them in a place where they can go undisturbed for 24 hours.
- Check the seals. As the jars seal you will hear a loud POP and the center will indent slightly. Most of the jars will seal in the first 1-2 hours, but some may take longer.
- Tip: a good way to check for a proper seal is to remove the canning ring and lift the jar up by the metal lid.
What if the Jars don't seal?
- If any of your jars fail to seal, it may be for a variety of reasons (inadequate headspace, imperfections around the rim of the glass jar, imperfections in the lid seal, etc).
- It's very common to have a failed seal occasionally, so as long as the vast majority of your jars sealed you can be fairly sure you did everything correctly.
- Jars that did not seal do not need to go to waste. Transfer them to the fridge, where they can be stored for up to a week.
Storing Canned Food
- The USDA states that home-canned food (with a true seal) is good for at least 1 year, while most jar manufacturers say the seal is good for at least 18 months.
- Many experienced canners maintain that canned foods are good for many years, but the quality will begin to degrade after 1 year.
- Keep in a cool, dark place (like a basement) for the best results.
- Never store your home-canned goods with the outer ring in place, and discard if the seal is compromised or there is any off smell or growth in the jar.
- ALWAYS inspect your canned foods for signs of spoilage and for a secure seal before consuming. Lift the jar up by the lid; if the lid falls off - discard immediately as the seal has been compromised.
What Types of Apples are Best for Canning?
As a general rule, any type of apple that is ideal for baking is a good fit for canning. You want to select varieties that are firm, ripe, with no bruises, and hold their shape during long cooking times. For more complex flavor, you can use a mix of several varieties.
Here are some of the best varieties for canning:
- Granny Smith (this is my #1 pick)
- Cortland
- Braeburn
- Honeycrisp
- Jonagold
- Jonathan
- Fuji
- Jazz
- Pink lady
Ways to Use Apple Pie Filling
- Homemade apple pie (I have recipes for classic pie crust, Amish pie crust, and even sourdough pie crust)
- As a base for apple cobbler
- To make apple crisp (just add a yummy oatmeal topping)
- As a cheesecake topping
- As an ice cream topping
- Filling for hand pies
- Crepe filling
- For topping pancakes
- Spooned on top of yogurt (try making your own Instant Pot yogurt!)
Expert Tips
- Prevent the apples from browning. As you peel and slice the apples, dropping them into a cold water bath will help prevent them from oxidizing. You can add lemon juice or citric acid to the water if desired, but I find cold water is adequate as long as you're working at a good pace.
- Blanch...if you want to. I like my apple pie filling to have firm apple pieces, so I don't blanch the apples. If you like a softer texture, or want more apples packed into the jars (softer apples pack in better), you can blanch the apples. Add 4-6 cups of the apples to a large pot of boiling water and cook for about 1 minute. Remove them with a slotted spoon, and place in a clean bowl. Repeat with the remaining apples.
- Use an apple peeler and corer. If you have room in the budget and you process a lot of apples every year, you may want to invest in an apple peeler and corer. This spins the apple, removing the core, peeling the skin, and most slice the apples too!
Recipe FAQs
When canning apple pie filling, you may use either pints or quarts safely. Process either pints (500ml) or quarts (1L) for 25 minutes in a boiling water bath canner.
It's important to use bottled lemon juice rather than freshly squeezed lemon juice. Bottled lemon juice needs to meet certain standards for acidity, while freshly squeezed juice varies in acidity. A high acidity is part of what makes a recipe safe for water bath canning, so it’s important to follow the recipe carefully.
Depending on the variety of apple used, you may have a little more or a little less filling than expected. If you have extras, you can transfer it to an airtight container and keep it in the fridge for 7-10 days. Use it to make your favorite baked goods, or add it to pancakes or ice cream.
High Altitude Adjustments
If you're canning at a high altitude, you are probably aware that you need to adjust water bath canning times according to your elevation. The same applies for this apple pie filling recipe.
Here are the processing times based on elevation:
- >1,000 feet: 25 minutes
- 1,001-3,000 feet: 30 minutes
- 3,001-6,000 feet: 35 minutes
- 6,001-8,000 feet: 40 minutes
- 8,001-10,000 feet: 45 minutes
If you loved this recipe for canning apple pie filling, let me know by leaving a 5-star review in the recipe card or comment below! You can also tag me on Instagram @littlehomeinthemaking.
📖 Recipe
Canning Apple Pie Filling
Ingredients
- 12 cups apple slices peeled, cored, and sliced* (about 4.5-5 lbs or about 11-12 large apples)
- 2 ¾ cup granulated sugar
- ¾ cup ClearJel cooking type
- 2 teaspoons ground cinnamon
- ½ teaspoon ground nutmeg
- 2 ½ cups apple juice unsweetened
- 1 ¼ cups water cold
- ½ cup lemon juice bottled**
Instructions
Cook Mode- Prepare equipment. Wash all canning supplies, jars, lids, and rings in hot soapy water. Sterilize if needed.
- Prepare the jars and lids. Fill the canner about ⅔ of the way with water and bring to a boil. Add 7-8 pint jars (or 4 quart jars) filled with hot water and bring to a boil, holding the boil for at least 5 minutes. Turn off the heat and leave in the canner until needed. Add the jar lids to a pot of gently simmering water and keep warm over low heat during the canning process.
- Prepare the apples. Peel, core, and slice the apples. Place them in a bowl of cold water (or treat with lemon juice/citric acid), then drain and measure to ensure you have a full 12 cups. Blanch*** if desired.
- Once the jars have been sterilized, add the sugar, ClearJel, cinnamon, and nutmeg to a very large stainless steel saucepan. Whisk well, then pour in the apple juice and water. Whisk to combine.
- Bring to a boil over medium-high heat, making sure to stir constantly (it’s very important that you watch this carefully and whisk/stir throughout the process).
- Once the mixture begins to bubble and thicken considerably, add the lemon juice. Whisk until combined, then return to a boil for 1 minute (stirring or whisking constantly). Then immediately remove it from the heat.
- Add the apple slices (drain if they are unblanched and holding in water), and fold them into the hot pie filling mixture.
- Return the saucepan to the element and heat over medium heat, stirring often, until the apples are heated through.
- Fit the jar with a canning funnel, and ladle the pie filling into the jar, leaving a generous 1” headspace (up to 1 ½ inches if using a regular mouth jar***). Remove any air bubbles with a clean butter knife or debubbler tool. Adjust headspace if necessary.
- Wipe the rim of the jar with a clean, damp kitchen towel (or paper towels). Using a magnetic lid lifter, center a warm lid on the jar, then secure a canning ring until it is fingertip tight.
- Place the filled jar in the canner, then repeat with the remaining jars until all of the jars are filled (or the pie filling has been used up). You should get 7-8 pints (or 3-4 quarts).
- Place the lid on the canner and bring it back up to a rolling boil over high heat.
- Once a boil has been reached, process for 25 minutes.
- When the 25 minutes are up, turn off the heat and remove the canner from the element. Remove the lid, and wait 5 minutes.
- After the 5 minutes are up, remove the jars with a jar lifter and place them on a thick kitchen towel. Leave them completely undisturbed for 24 hours.
- After 24 hours, check the seals and remove the canning rings. Wipe down the jars and label them. Any jars that have not been sealed should be moved to the fridge to be eaten right away.
Notes
- 1,001-3,000 feet: 30 minutes
- 3,001-6,000 feet: 35 minutes
- 6,001-8,000 feet: 40 minutes
- 8,001-10,000 feet: 45 minutes
The majority of the canning recipes here at Little Home in the Making are adapted from tested recipes from the USDA, National Center for Home Food Preservation (NCHFP), and other trusted sources. Check the recipe card for listed sources and relevant links.
Please note that some of my blog posts here at Little Home in the Making may contain affiliate links. If you make a purchase through these links, I will get a small commission at no additional cost to you. See our disclaimer for more information.

Samantha says
The filling tasted great and I left about an inch and 1/4 headspace. All my jars oozed filling in the water and when I took them out. I dont know what went wrong. I think 2 inches if headspace might be better? The weird thing is that the lids seem to have sealed somehow. There's no bump in the lid and when I push down on the lid there's no pop and I can lift the jars up by the lid. Is it safe to put in in the pantry?
Dolly | Little Home in the Making says
The apples may have cooked down and shrunk in the canning jar. Different types of apples react differently during cooking. Headspace guidelines need to be followed in order to ensure safe canning, but some siphoning (liquid loss, but jar sealed without signs of spoilage or poor seal) is in the range of normal. Keep an eye on the lid seal or any other signs of spoilage, but most canners have encountered what you describe here at some time or another.