


If you're excited to get started for the Spring gardening season, get yourself off to a good start! This post will teach you all about preparing raised beds for spring planting. Learn about soil health, weeding, sheet mulching, and more! Get a head start this gardening season with a well prepared garden bed.
If you've been bitten by the gardening bug, or your brown thumb has slowly (or rapidly) turned green over the last few seasons, you're ready to get out in the garden. Am I right, or am I right!?
The best way to scratch that gardening itch, all while doing something productive is to get started on preparing raised beds for Spring. Not only does this get you out in the garden, dreaming of fresh tomatoes and blooming flowers, but it's actually a great step for your garden's overall health and productivity.
Making sure you have adequately prepared your raised beds for Spring planting is essential. It will go a long way towards ensuring that you have a productive harvest, and can help minimize disease too. I like to find a day that is unseasonably warm in the later Winter months to get started, but you can do it at the close of the season if you're a real keener! Just make sure to cover the bed with some floating row cover to protect it from Winter weeds.
Let's get started!
Materials Needed
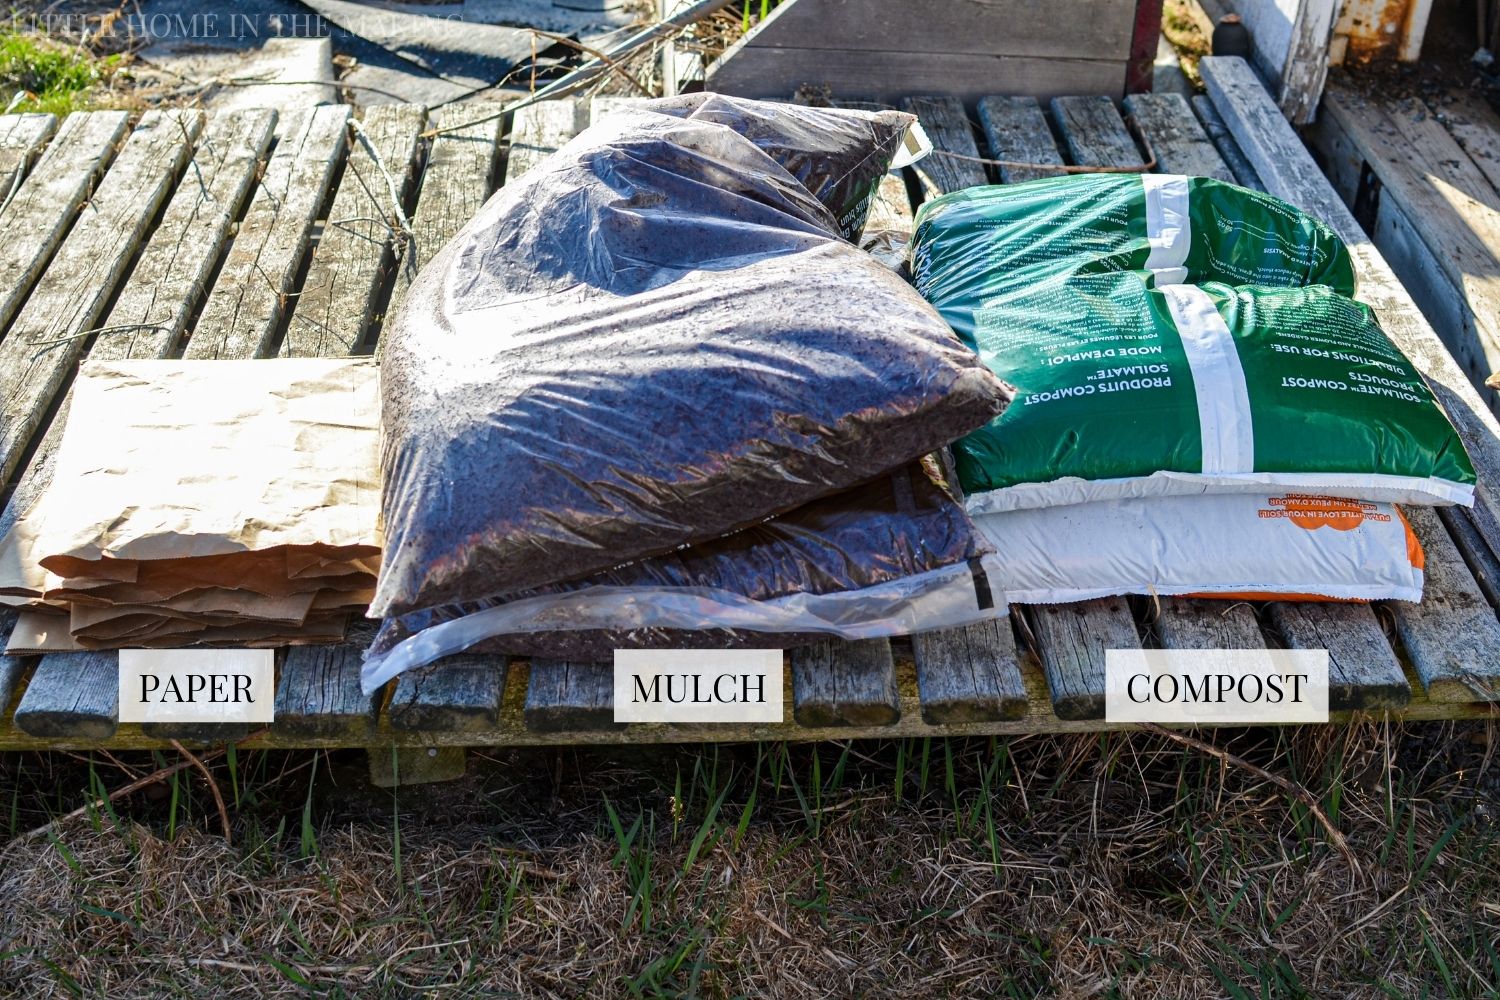
- Compost: You will need enough compost to top dress your raised bed with 1-2" of compost, or more if your bed has been neglected.
- Mulch: Any type of mulch will work, including bark mulch, wood chips, or even plastic mulch if desired.
- Paper or cardboard: Adding a layer of compostable materials will help suppress stubborn weeds and grass. This is optional, but recommended if you need greater weed control in your garden! Newpaper and rolls of kraft paper are recommended for raised beds that will be used within the next few weeks to next few months, but carboard can be used if you are preparing your beds in the late Fall or Winter.
Tools:
- Garden gloves: These are great for protecting your hands, but many gardeners forgo the gloves. Do whatever you feel comfortable with!
- Trowel: This short handled tool is great for wiggling weeds out.
- Garden rake or hoe: This long handled tool allows you to remove weeds without bending over and can be a real back saver!
- Pruners: A standard set of pruners is great for trimming back stubborn, stalky weeds like Canada thistle and goldenrod.
- Garden weasel: This is obviously an optional tool, but I happen to love mine for helping me to remove small bits of weeds and for aerating the soil. You can certainly remove the weed bits by hand and use a garden rake if needed!
How to Prepare Raised Beds
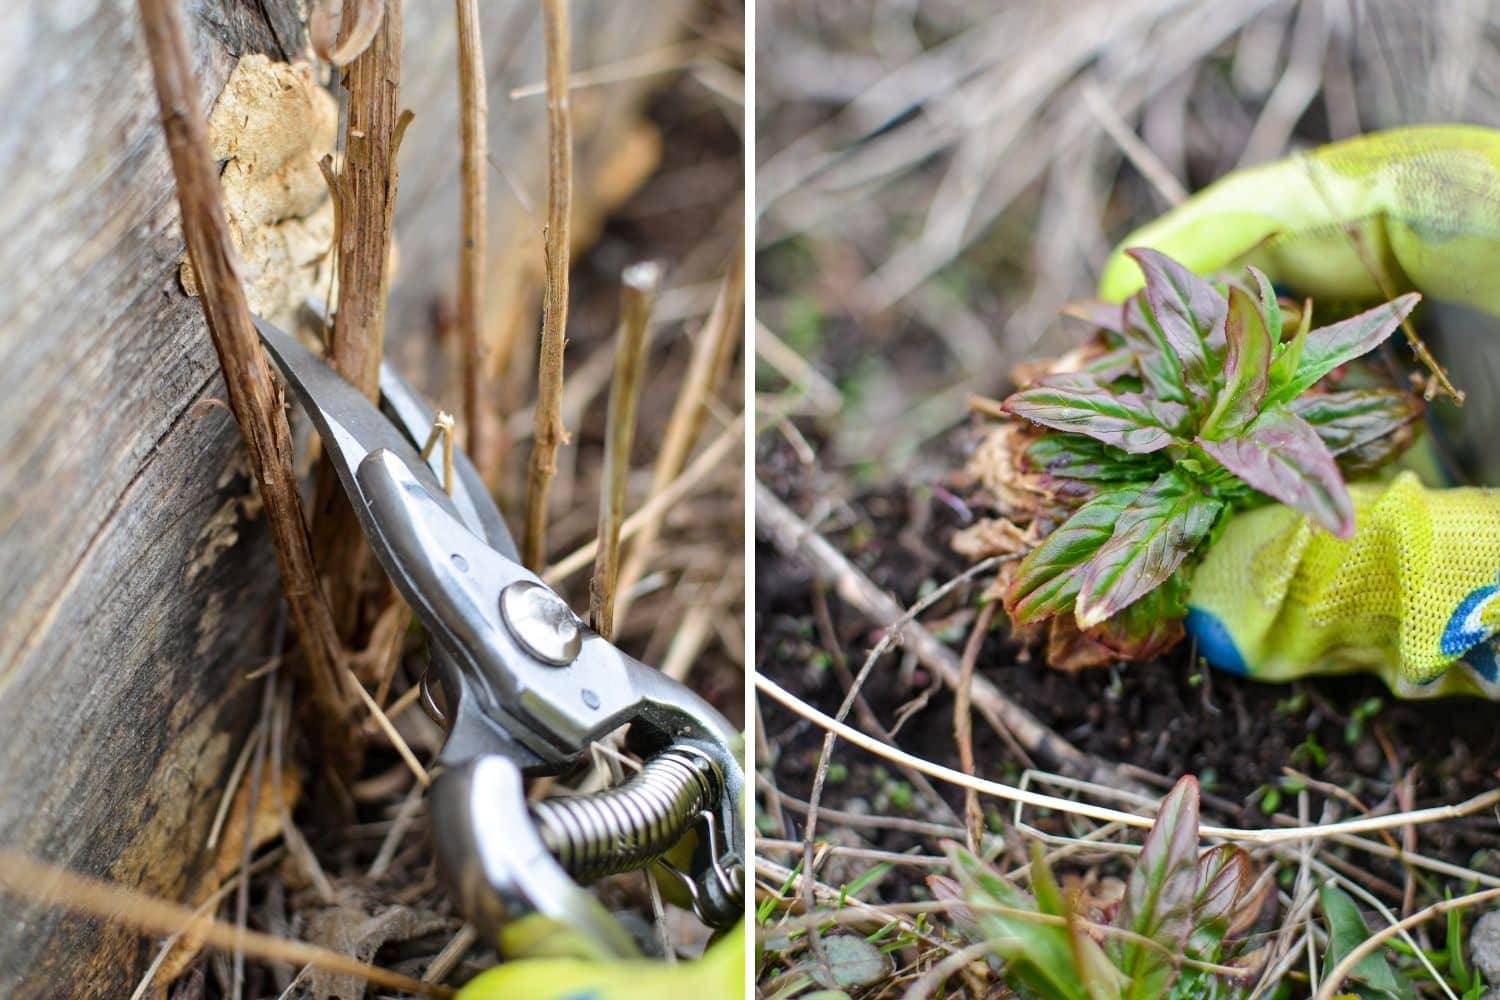
Weeding
To get started, I recommend that you remove any large weeds from around the outside of your garden bed. While this may seem odd, since they aren't actually in the bed itself, you'll thank me later! Large weeds that grow just outside your bed can spread rhizomes or seed into the bed itself, which quickly becomes a problem. This has happened in my own beds with goldenrod and Canada thistle.
Make sure to go back throughout the growing season and cut these weeds back. This will starve the taproot, and eventually they will give up. For weeds like Canada thistle, attempting to remove the root is just going to result in root pieces breaking off and growing more plants.
Once the outside of your garden bed is trimmed back, go ahead and remove the weeds inside of the bed. If your soil is loose, this may be less work than expected. If your soil is hard, you might have to use some elbow grease to get the beds fully weeded. A standard garden hoe will help you easily remove chunks of weeds and break up large clumps of grass.
Have a wheelbarrow handy and throw all of your weeds into it. I have a specific compost pile for weeds, and that's where I add any weeds taken from the garden. When the time comes, I'll finish the compost with a good amount of carbon and monitor the temperature to make sure the weed seeds are killed off.
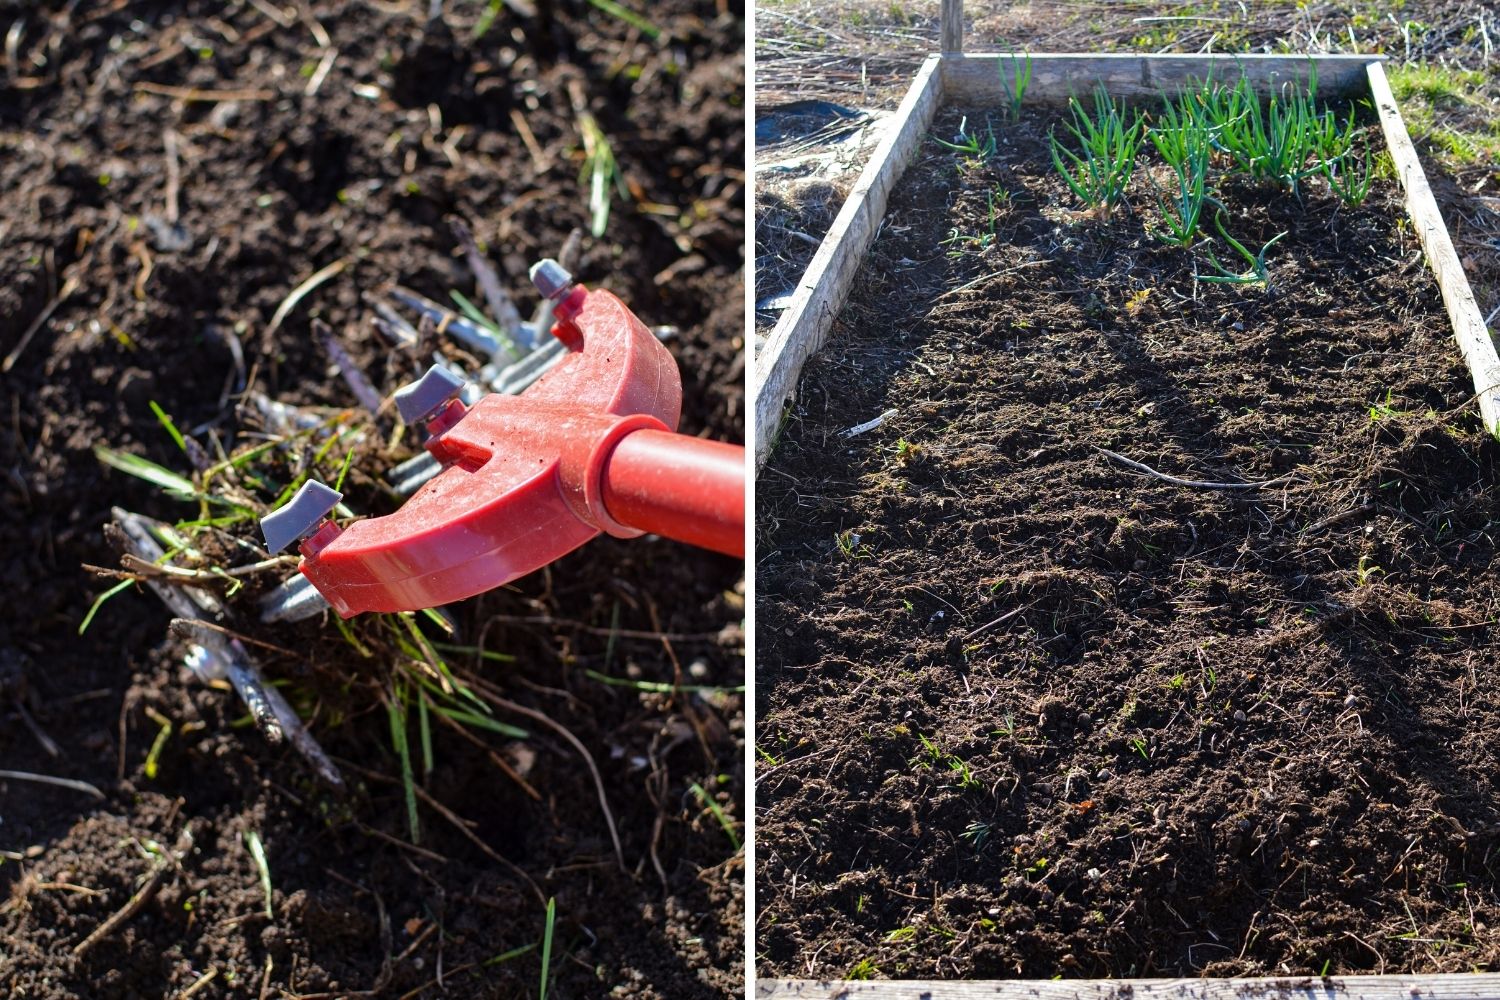
Aerate the Soil
Aerate the soil using a broadfork or, if your soil is not very compact to begin with, a tool like the Garden Weasel. This will help to remove any clumps of grass or weeds that were left behind.
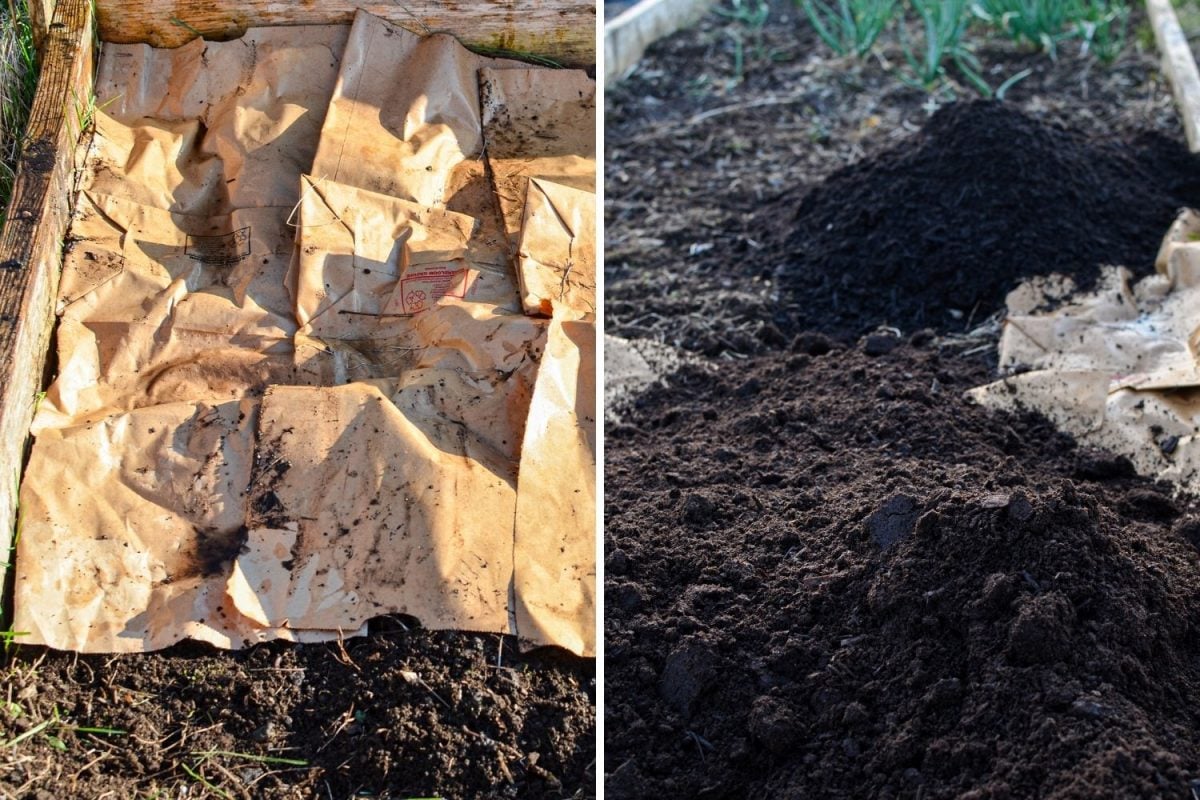
Sheet Mulching
If you have grass growing in your raised bed or VERY persistent weeds, you may want to employ some light sheet mulching to help you regain control of your raised bed.
Simply add a compostable material (like newspaper, paper grocery bags, or a roll of brown kraft paper) on top of the soil. To keep it in place, make sure to wet it first or shortly after placing it in the desired location. You want to overlap your pieces slightly to prevent any light from coming through the paper.
If you will be planting within the next three months or so, you're going to want to use something thin like paper grocery bags or newspaper. If you are preparing your garden beds for the following spring (for example, it's the end of Winter), you can certainly use a layer of cardboard instead. Just make sure it is brown cardboard without a glossy print on it, and all staples and tape have been removed.
Adding Compost to Raised Beds
Once your sheet mulching layer is complete, add on 1-2" of compost. This is a best practice for all sorts of raised beds, and it's a step I recommend taking at least yearly, but twice yearly is even better (once in the Spring and once in the Fall).
You can use any type of composted material such as:
- Cow manure
- Horse manure
- Sheep manure
- Marine compost (shellfish, seaweed, etc)
- Various manures
- Worm castings
- Kitchen scrap compost
- Yard waste compost
- Purchased compost
- Etc.
Note that all of these composts must be fully composted, meaning there should be zero smell and they should have been composted at a high enough temperature to kill off any weed seeds. Manure in particular can be dangerous if it is not composted, as it can burn your plants. If applying manure that has not been composted, it is only safe to apply in the Fall, since it will have the Fall and Winter months to break down further.
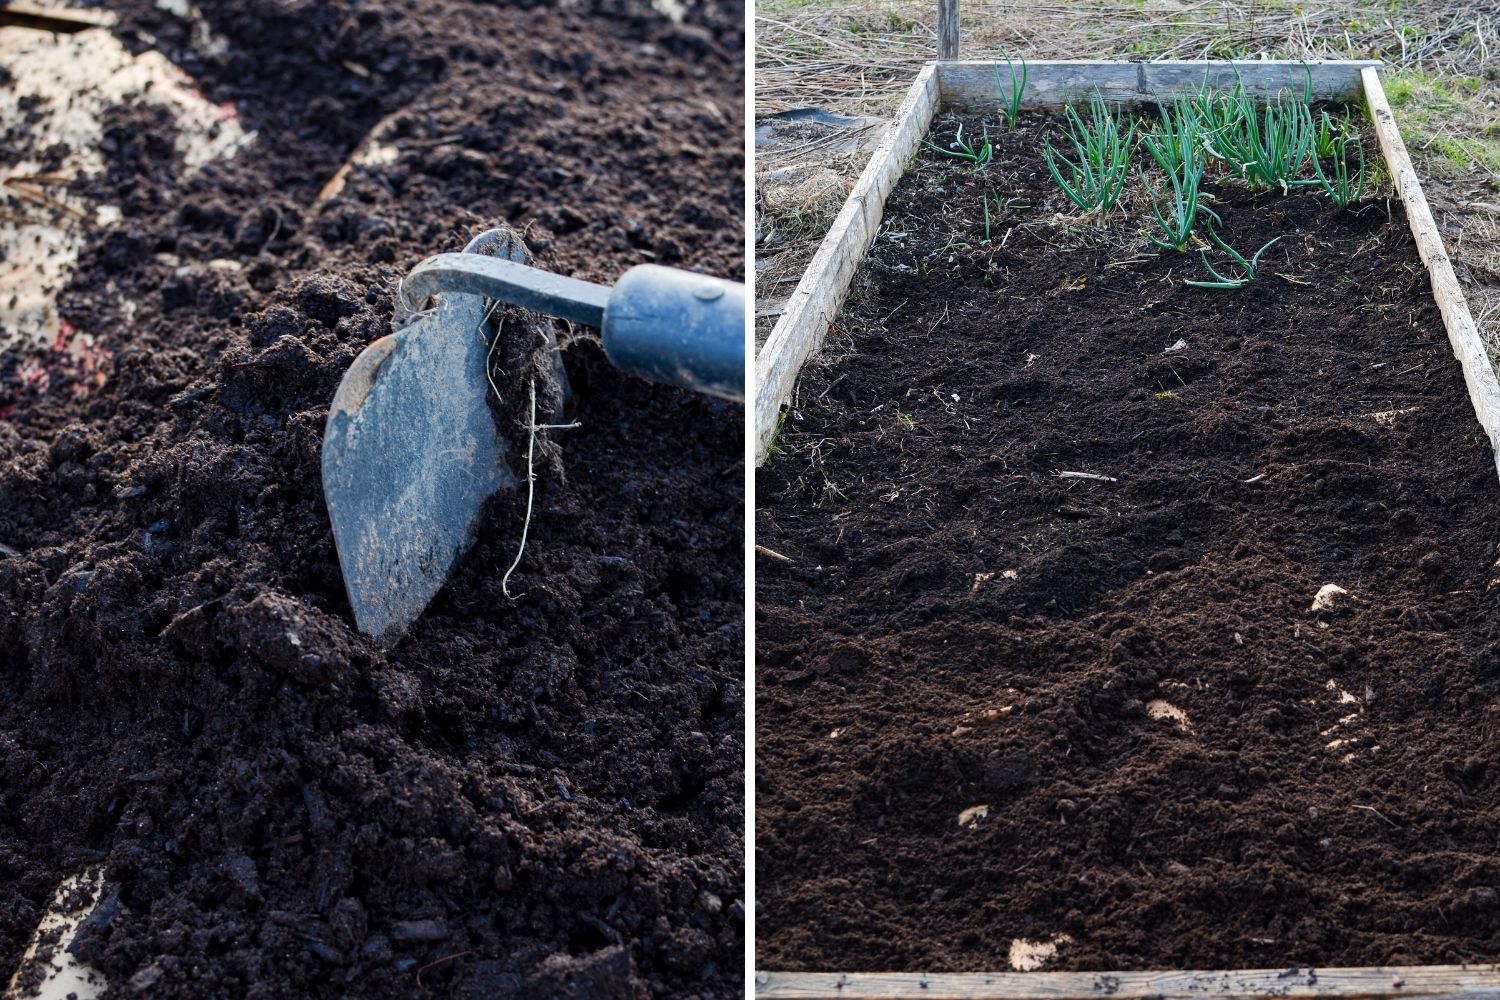
Spreading the Compost
Once your compost is in place, use a garden fork or hoe to spread the compost out in an even layer, aiming to cover any sheet mulch with at least 1-2".
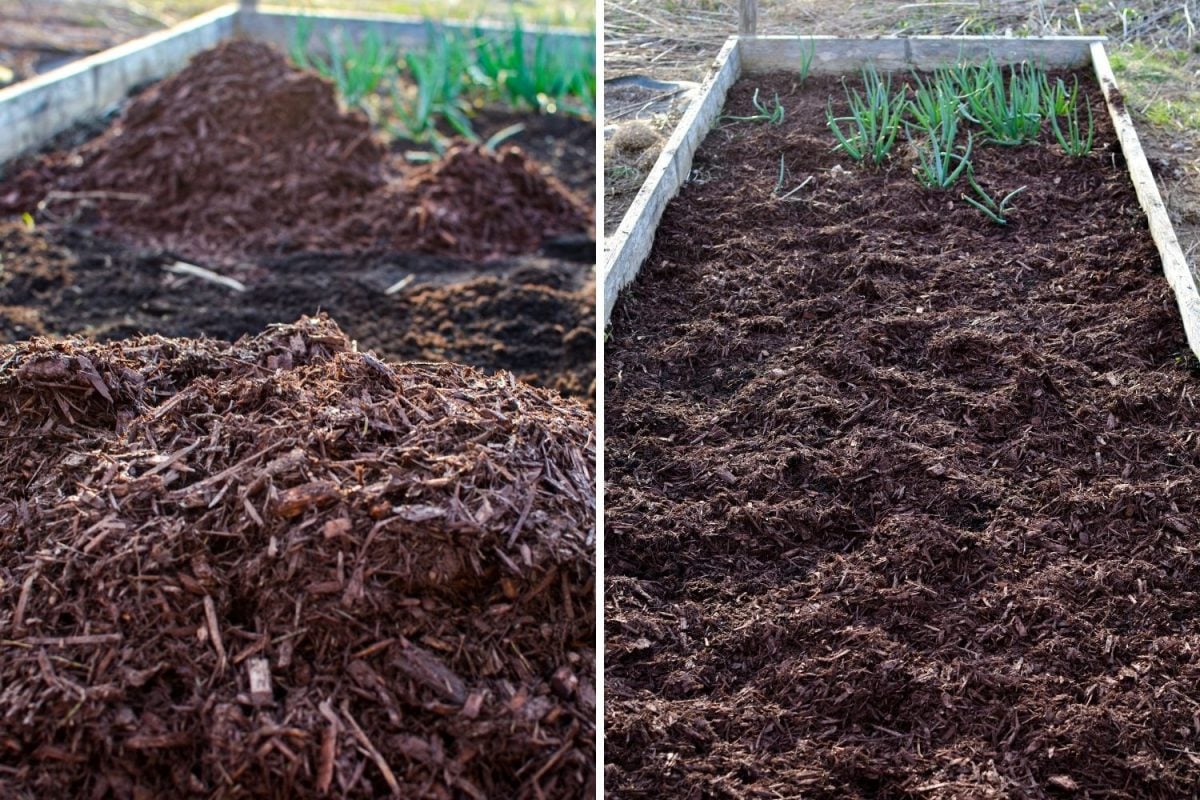
Mulching Your Raised Beds
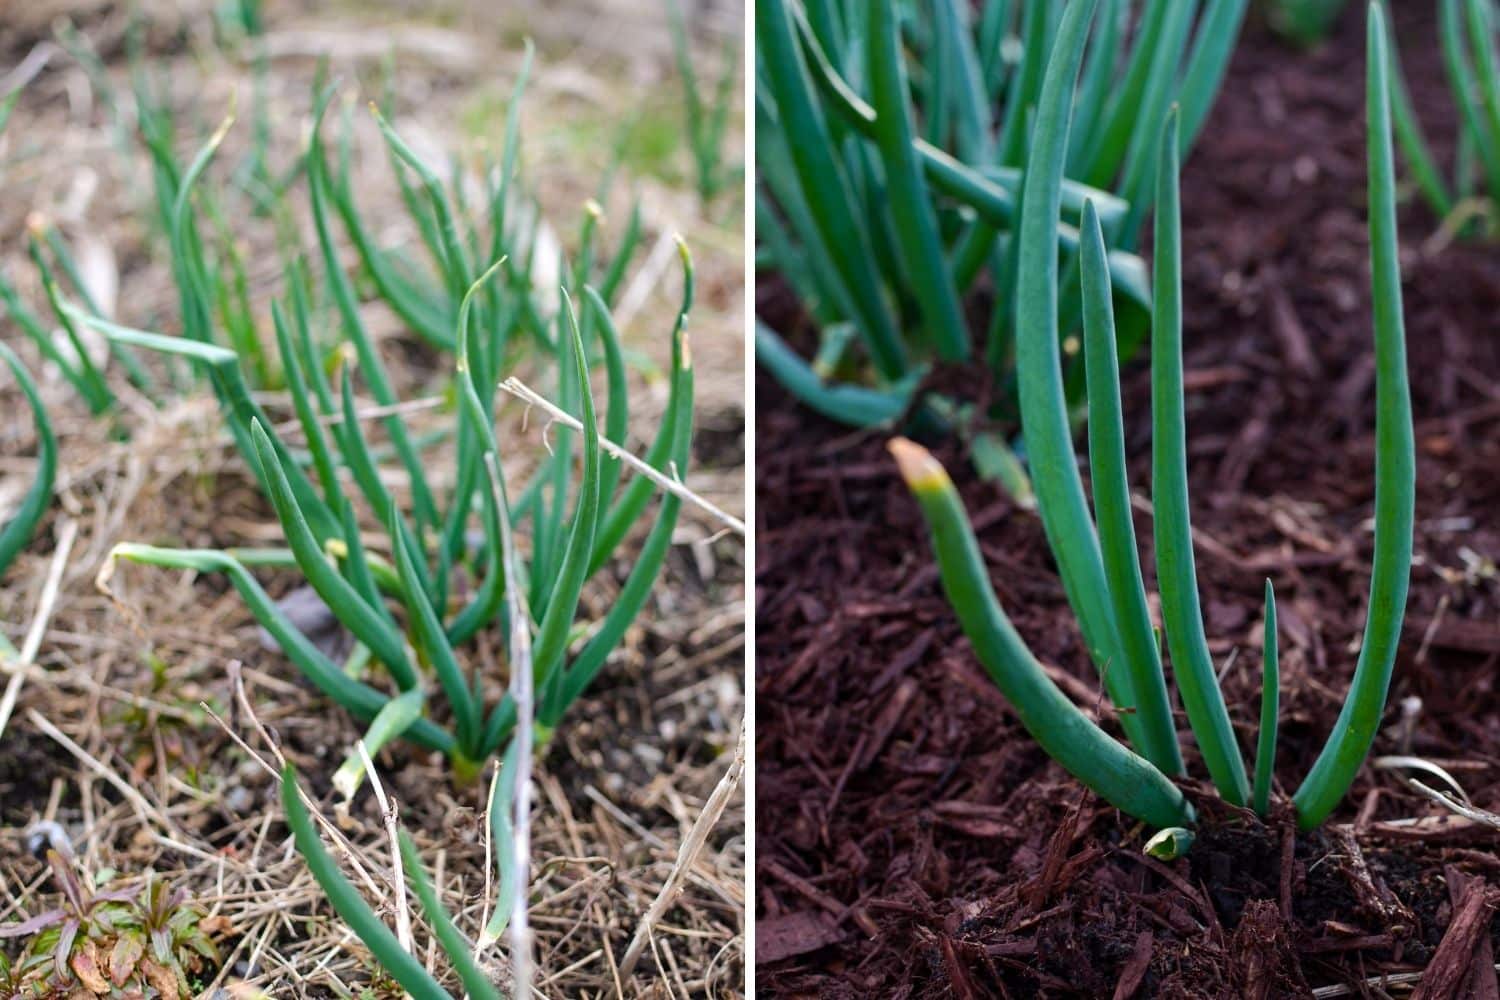
Adding several layers of mulch to your raised beds is a great practice, and can be done even if you plan on planting seedlings in your bed. Mulch will further prevent weed seeds from germinating, and will also help protect the moisture within your beds, meaning you won't have to water as often.
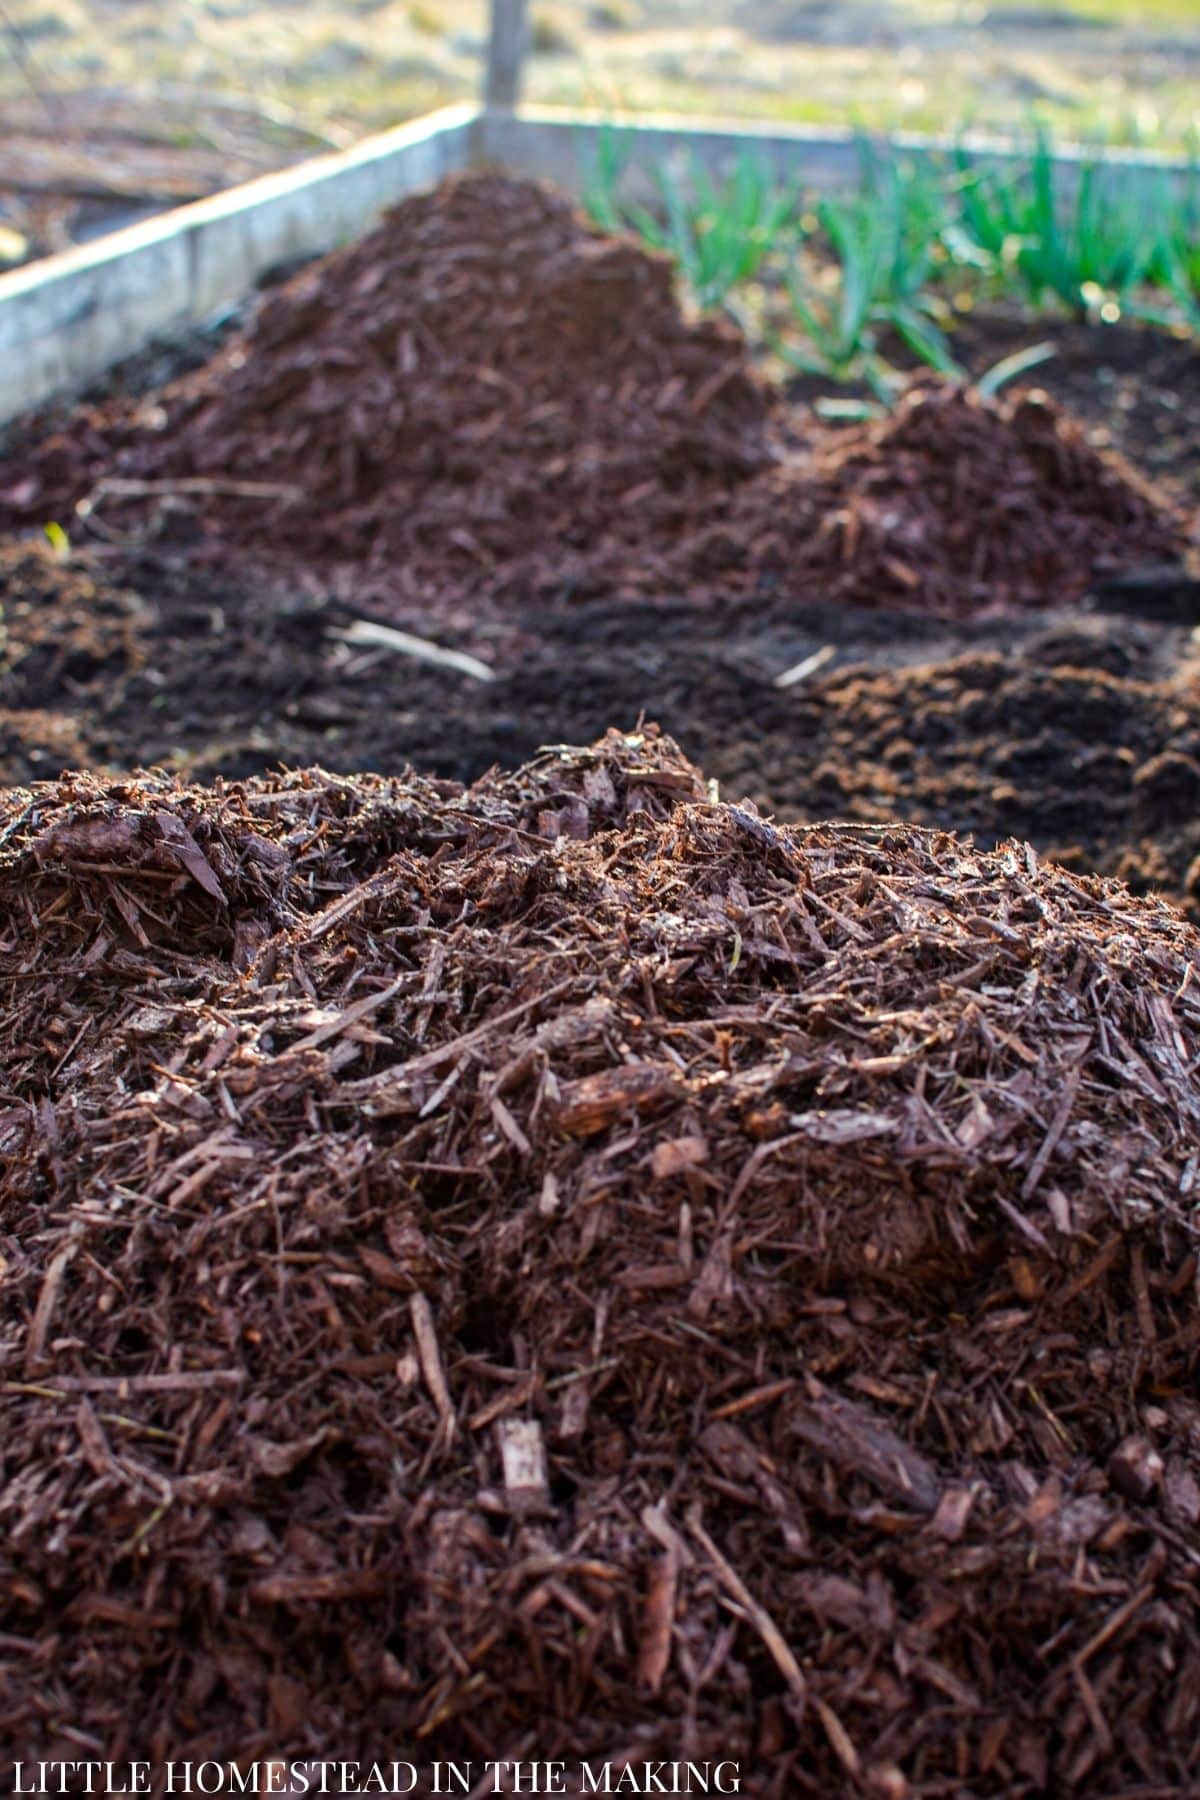
Once your compost has been spread out evenly, add some bark mulch or wood chips. You can use whatever type you like, but a variety that has not been dyed is my preference. I normally prefer cedar mulch, but was not able to find it when I was out grabbing my materials for this project.
I recommend against black mulch, since it can heat up during the hot summer months and has even been known to catch fire! Black mulch can be beneficial if you're in a cool climate and want to get a good yield from heat loving plants like tomatoes and peppers.
When it comes to preparing your raised beds for Spring, I recommend adding 1-2" of mulch at a minimum, but you can certainly add more. 6-8" offers the best possible weed protection, although it can be a bit much if you're planning on sowing seeds directly.
Too Long, Didn't Read (TL/DR)
Above I've offered a more detailed plan of action for preparing raised beds for Spring, but in case you're short on time, here's a break down with the general gist of it, as well as some essential tips and tricks.
The Basics of Preparing Raised Beds for Spring Planting
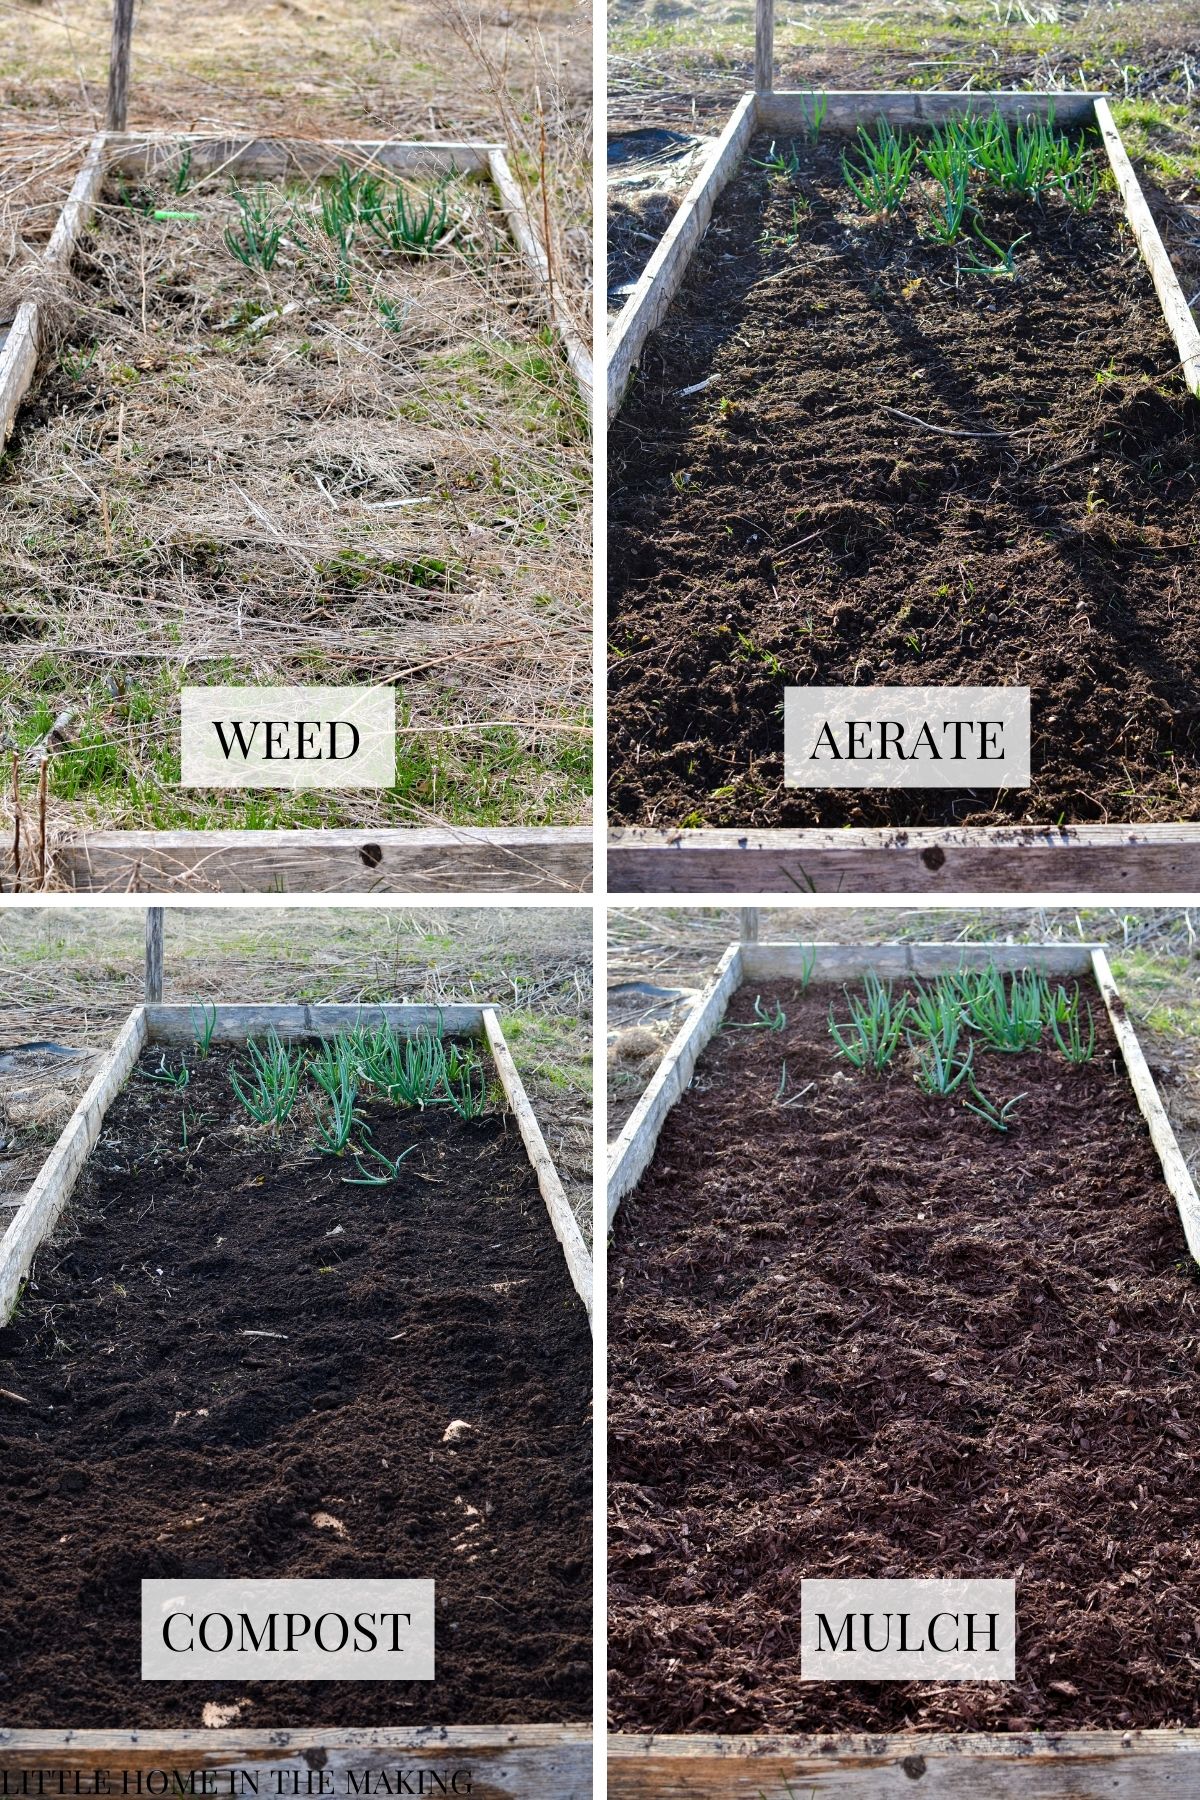
- Weed: Start off by pruning any large weeds back from inside of the raised bed. Also pull any large or invasive weeds around it. Use hoe or your hands to remove the weeds, right down to the roots, pulling out as much as possible. If there is grass growing up, break the clumps up with your hoe and remove it.
- Sheet mulch: If you have lots of persistent weeds or grass, lay down a compostable material. This will block out the light and prevent the weeds from growing up through. Newspaper, brown paper bags, and sheets of compostable paper all can work very well. If you don't need to use your bed for several months, you can opt for a layer of cardboard.
- Aerate: All soil needs a little bit of aeration! Since in raised bed gardening there is no tilling, we rely on worms to do most of the aeration for us. We can help things along by running a broadfork through the soil, or running it over with a tool like the Garden Weasel. This has the added benefit of helping to remove extra weeds.
- Add Compost: Every garden, no matter how rich in organic matter, can benefit from a yearly application of compost. You can use fully composted manure, or a top dressing of finished homemade compost if desired. 1-2" of compost is a good starting place, but you can add more if you feel like your raised beds would benefit from it.
- Mulch: Add a layer of several inches of mulch. This will further prevent weed seeds from germinating, and has the added benefit of helping to retain moisture in the soil below. If you are sowing transplants into your bed, simply push the mulch aside, transplant, and brush the mulch back into place. If you are sowing seeds, brush the mulch away from the rows and push the seeds into the soil. Once the seedlings have germinated and put off their first true leaves, push the mulch back into place.
Frequently Asked Questions
You can start preparing your raised beds at any point that you like. The absolute best time is during the close out of the previous season, but if you didn't think that far ahead, no worries! Just do what you can by weeding, aerating, adding a top dressing of compost, and adding a layer of mulch (if needed). Any amount of preparation is better than none!
The best way to prepare the soil for a raised garden bed is to weed it, ensure that it has not compacted, and apply a top dressing of both compost and mulch. If your soil has compacted over the winter, add elements that will help loosen the soil like vermiculite, perlite, coconut coir, or peat moss, and use a broadfork to help aerate the existing soil.
Yes, and no. Raised beds do warm more quickly than those that are in the ground in the Spring, but they are often the first to frost over in the late Fall and Winter months, and can even be more susceptible to frost in the early Spring. Raised beds also drain more easily, meaning they are ideal in wet climates, but a serious disadvantage in dry climates. So, it really comes down to what your particular gardening goals are, and whether raised beds or in ground beds are better for meeting those goals.
It is not recommended to make raised beds from pallets. Since most pallets have unknown origins and are often chemically treated, its not recommended to use them for vegetable gardening, since their contents could potentially leech into your harvest. If you are using them for flower beds and don't mind the impact on long term soil health, they could certainly work in a pinch, although its probably better to make a new in-ground bed if you are budget conscious.
The best compost for raised beds is really any kind that has been fully composted at a high enough temperature to kill weed seeds. This could include various farm animal or marine manures, kitchen scrap compost, yard waste, or worm castings. It is not recommend to use composted feces from domestic animals like cats or dogs, since they can contain harmful bacteria.
More Helpful Gardening Articles:
- 10 Easy Ways to Prepare for Gardening Season Now
- Rhubarb Companion Plants
- Arugula Companion Plants
- Hot Pepper Companion Plants
- Horseradish Companion Plants
- Companion Plants for Collard Greens
- Bok Choy Companion Plants
Please note that some of my blog posts here at Little Home in the Making may contain affiliate links. If you make a purchase through these links, I will get a small commission at no additional cost to you. See our disclaimer for more information.


Leave a Reply