Want to make sourdough bread, but can't find a friend with a starter? Learn how to make sourdough starter at home with this simple recipe!
With just two simple ingredients and a few basic tools, you can capture wild yeasts and establish a sourdough starter that can be passed down for generations.
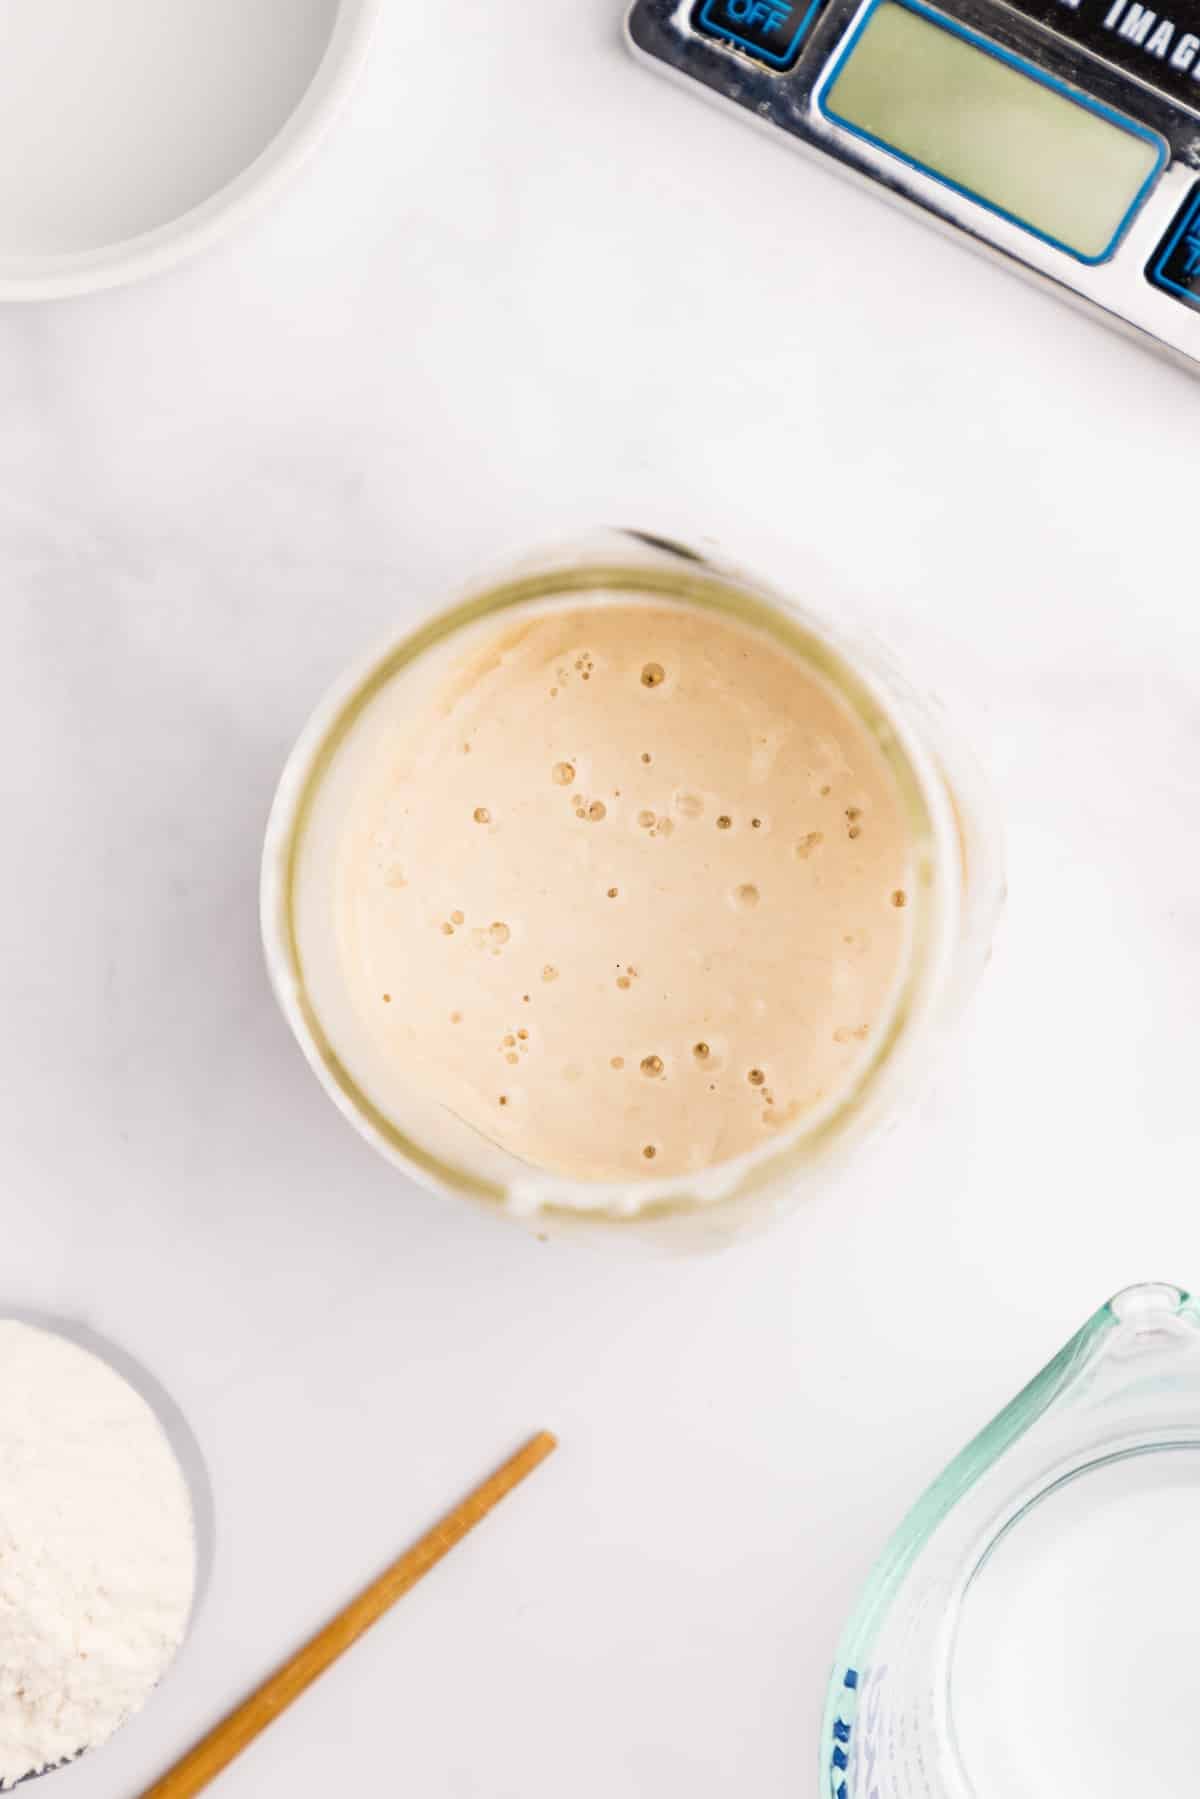
This easy method for making your own sourdough starter (from scratch) is the only one you'll need for getting started in the world of sourdough!
When we moved into our little house in the country I established a new sourdough starter, and it's been going strong ever since. Several years before that I spent time experimenting with whole wheat and rye starters, so I have lots of experience in various types of flours.
This version, which uses all-purpose flour (and a touch of rye - if desired), is the most reliable method and yields a very healthy and active starter. It's also fairly simple to make, and once your starter is mature you'll have a lot more flexibility as far as feedings and discarding goes.
I can promise you one thing - once you get into the world of sourdough, you're never going to want to go back to the store-bought stuff!
Reasons to Make This Sourdough Starter Recipe
- Easy to follow. With step-by-step instructions for each day, plus detailed tips for maintaining your starter on the kitchen counter OR in the fridge, you'll have everything you need to get started.
- Old fashioned natural yeast. Before commercial yeast was available at the grocery store, bakers used a starter to assist in the fermentation process. This traditional method makes for loaves that are not only more delicious, but also more digestible and lower on the glycemic index than store-bought bread.
- Inexpensive. While it's fairly simple to buy dried online, making your own starter is the more budget-friendly option since the only ingredients you'll need are flour and water.
- Versatile. This recipe is a classic 100% hydration starter, meaning it uses equal parts of flour and water. This is the type that is used in nearly every sourdough bread recipe (and most sourdough recipes in general), so you can use this exact starter for the vast majority of baked goodies.
Ingredients
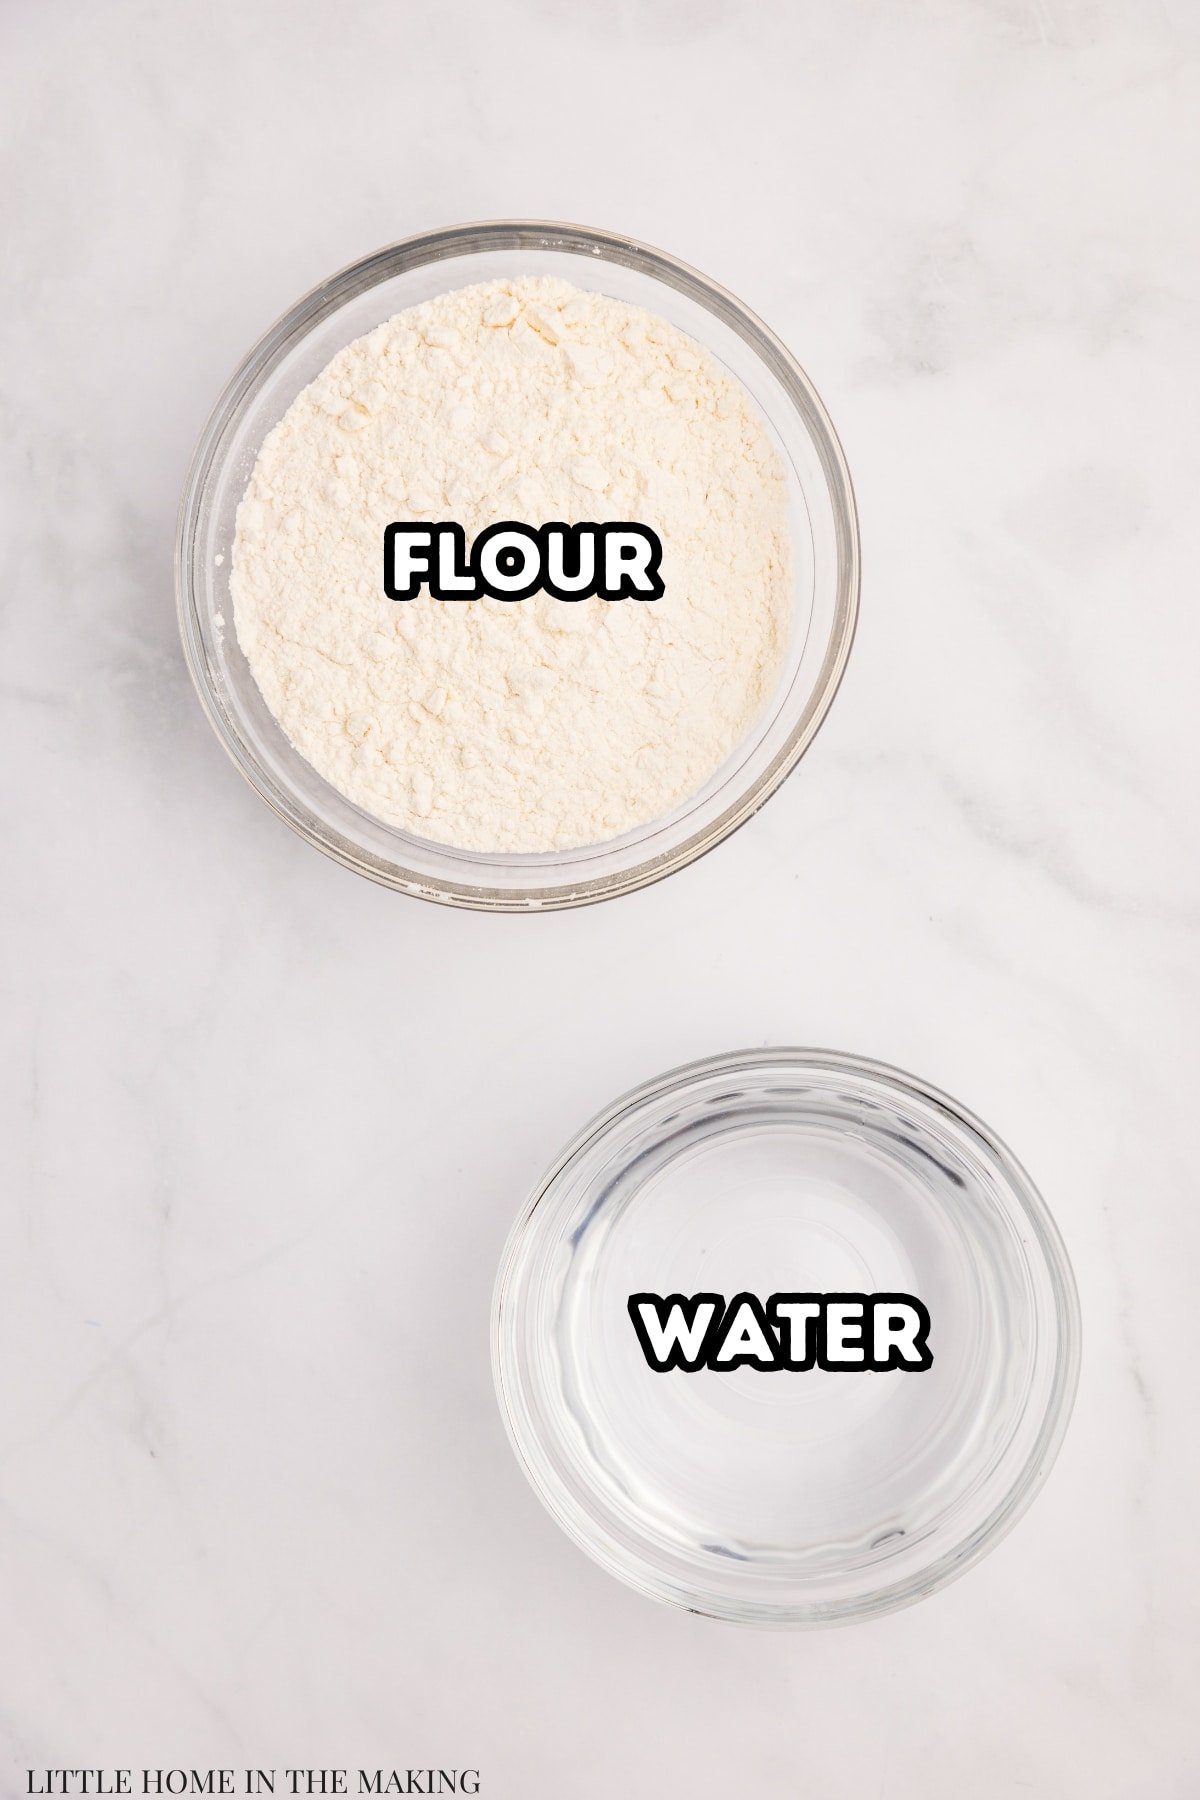
- Flour: There are several options for getting started with homemade sourdough starter. All-purpose is the most common, but bread flour or rye flour can be used (see below).
- Water: You want a drinkable quality water. I use water that's filtered through my Berkey, but non-chlorinated tap water or filtered water is fine. Ideally, your water should be about 80-85ºF (27-29ºC), but room temperature is perfectly fine too.
- (Optional) whole wheat or rye flour: I recommend using a little bit of rye flour (or even whole wheat) to give your new starter a boost of enzymatic activity. Once the starter is mature, you can taper the rye flour and use strictly all-purpose or bread flour.
Equipment
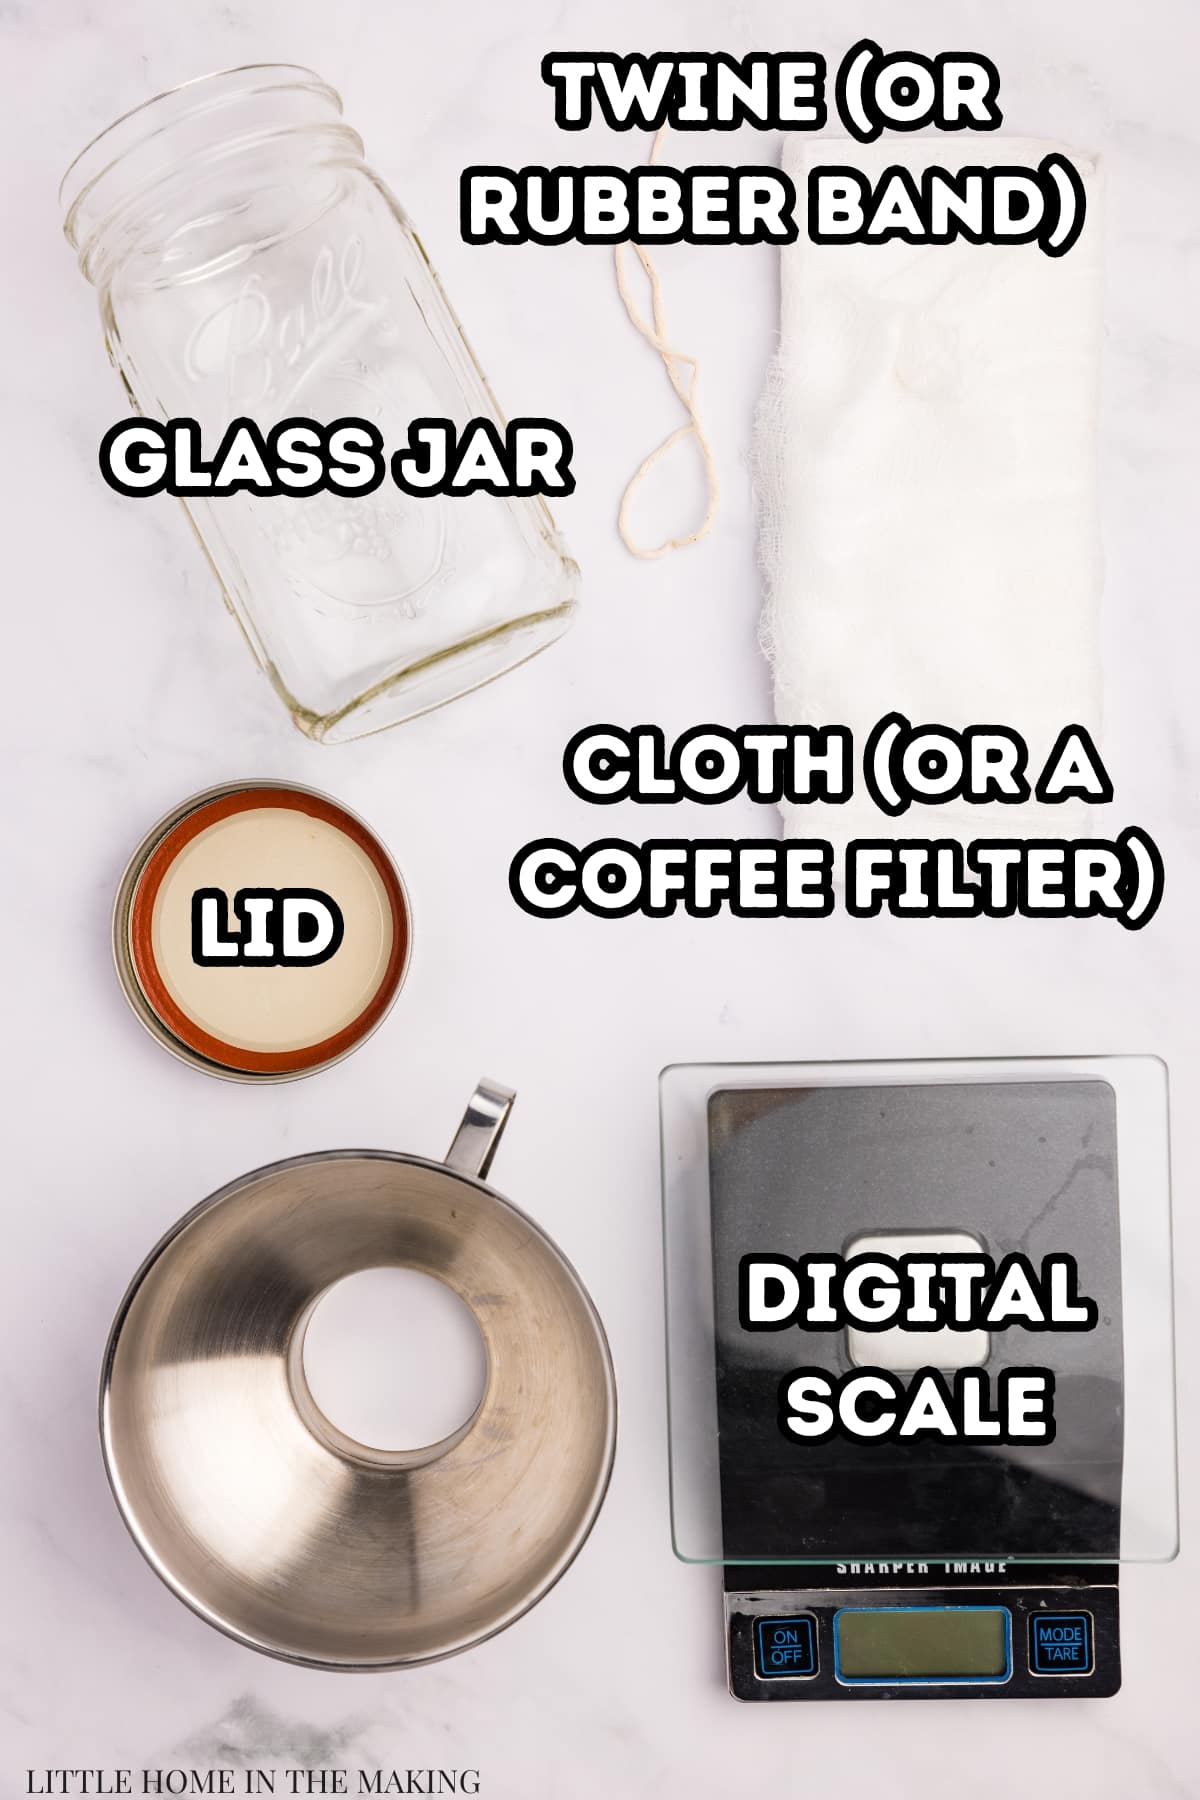
- Glass jar: Any clean glass jar can be used, but I recommend finding one with a wide mouth. My preference is to use Weck jars, but a wide mouth mason jar works perfectly well and many folks have at least one on hand.
- Cloth (or coffee filter): You'll want to have your jar covered loosely to prevent flies, dust, and debris from making their way inside. If using a Weck jar, you can place the glass lid on top (without the gasket or clips). Otherwise, a coffee filter or square of cheesecloth secured with a rubber band works great.
- Rubber band: This works well for both securing the covering of the jar and for marking off the starting line of your sourdough starter. Alternatively, you could mark the side of the jar with a sharpie (clean with soap and water or rubbing alcohol) or dry erase marker.
- Digital scale: If you're serious about sourdough, I highly recommend you pick up a digital food scale. There are lots of affordable options and it will ensure more consistent (and accurate) sourdough baking.
- Lid: Once your starter is mature, covering it with a plastic (or glass) lid is recommended.
- Funnel (optional): If you really don't like getting dried sourdough around the rim of your jar, use a wide mouth funnel (like a canning funnel). Otherwise, this is a nice-to-have rather than a must-have.
How to Make Your Own Sourdough Starter
Before you get started on your first boule of sourdough bread, you need an active starter! If you don't want to purchase one (or have a friend with extra to share), making your own at home is the way to go. You might be surprised by how simple it is!
Getting Started: Days One, Two, and Three
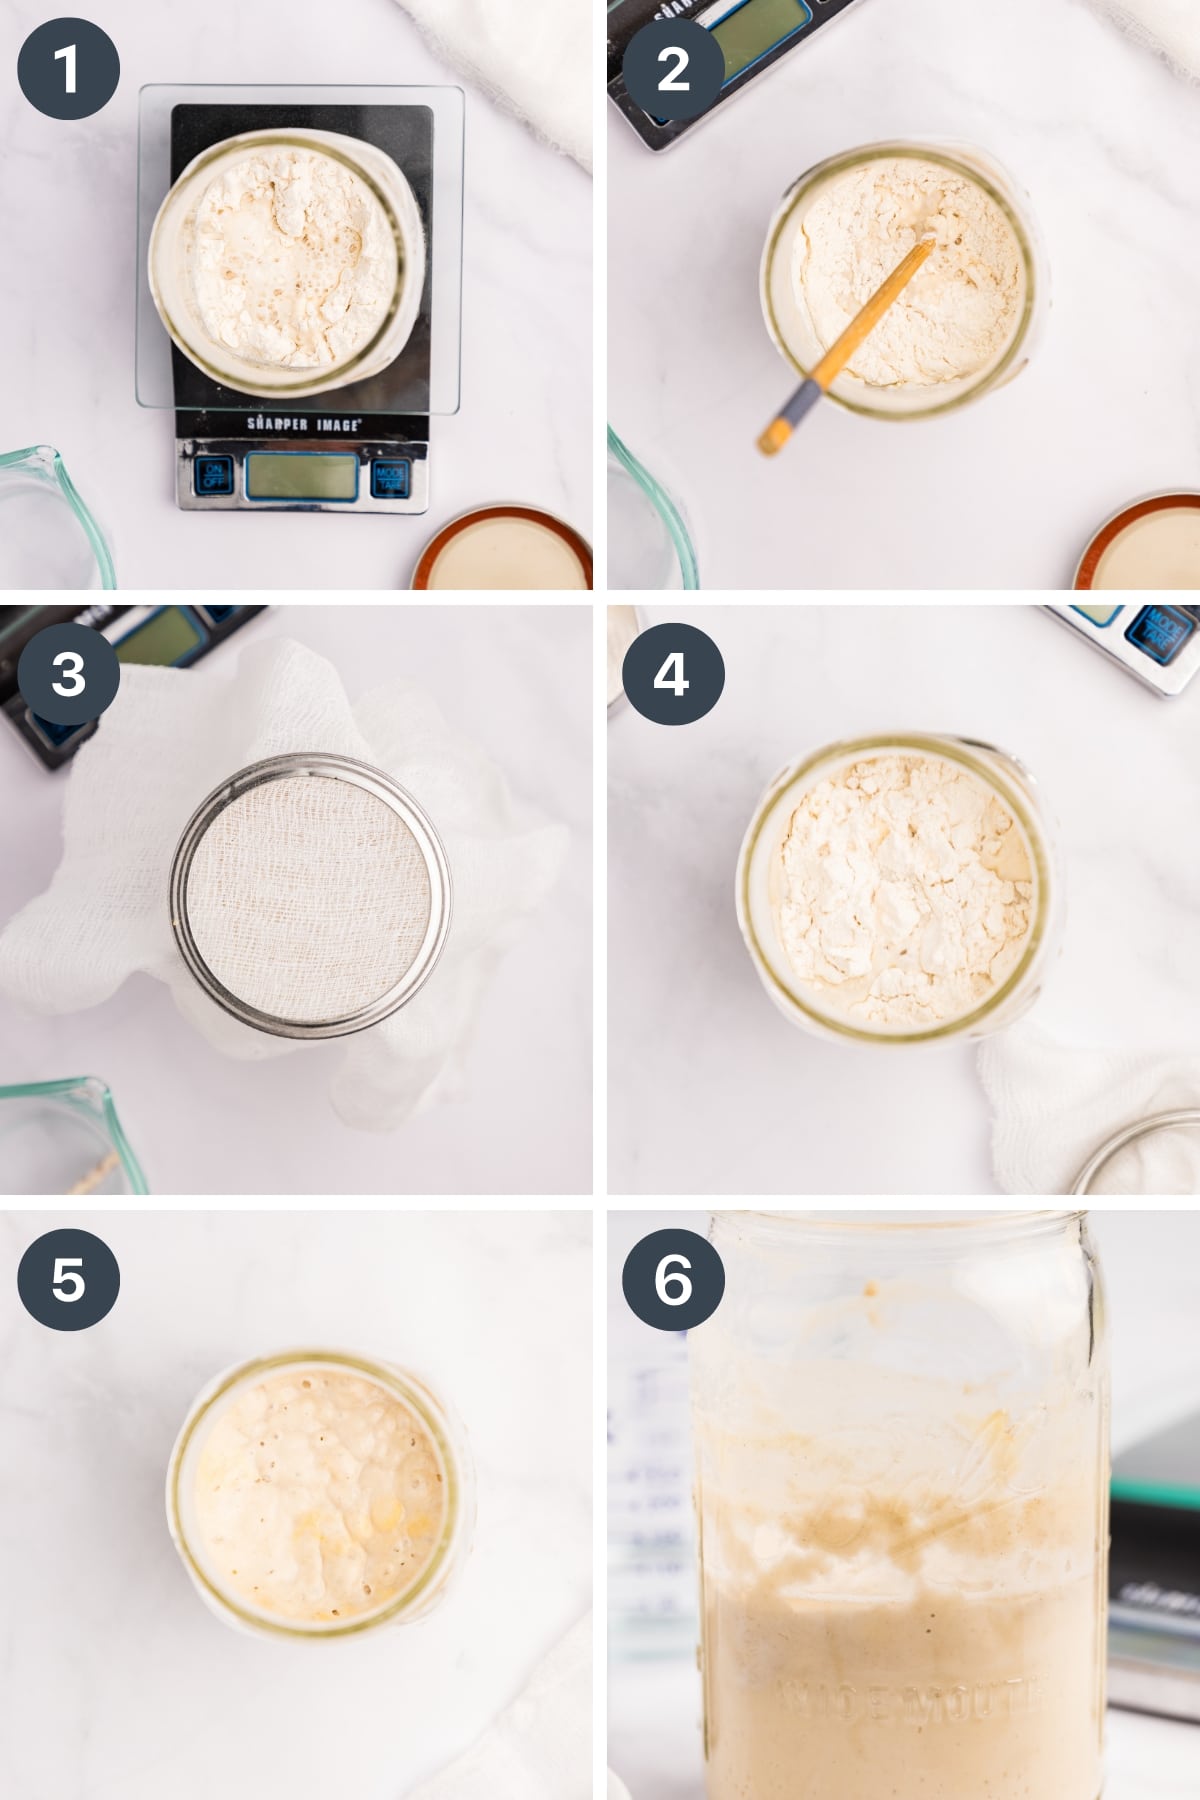
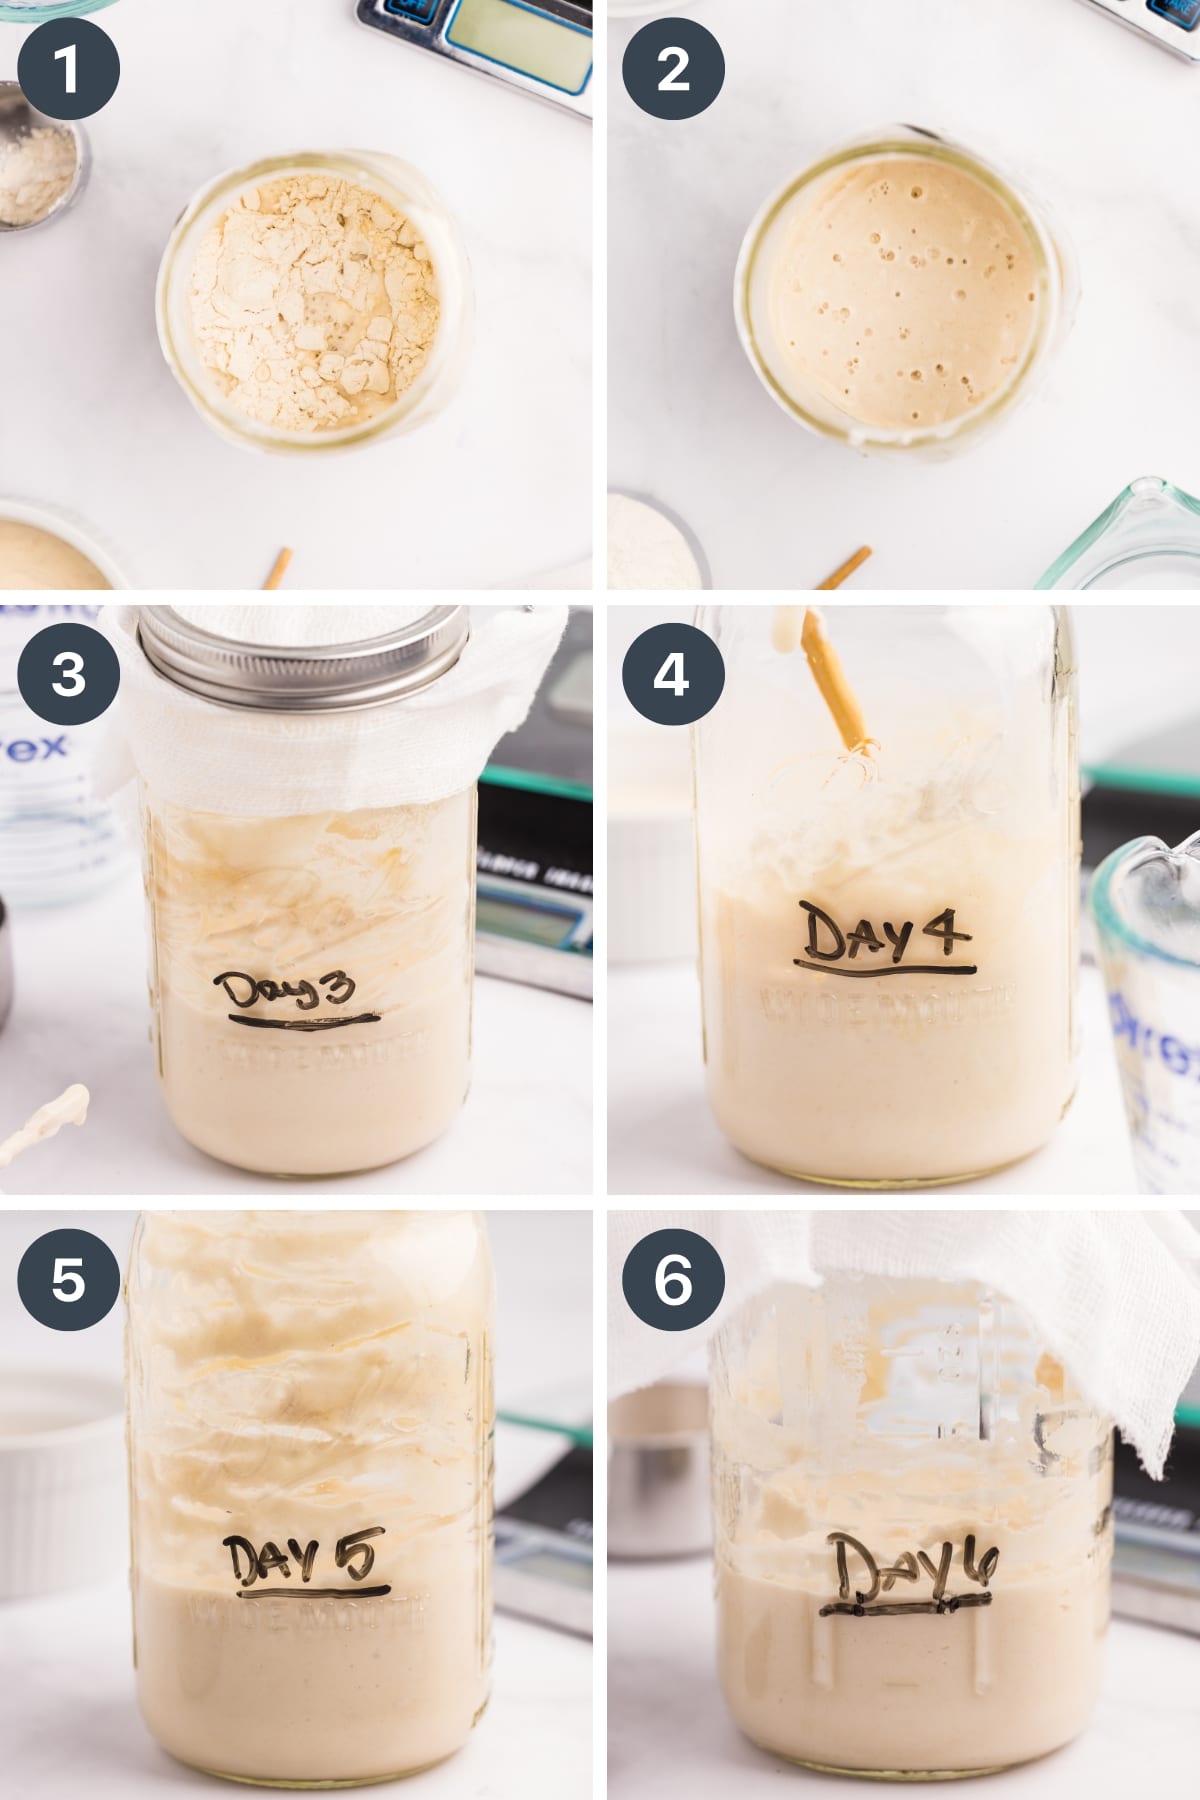
- Add your glass jar to a digital food scale and hit the "tare" button to zero it out. Add in 120 grams each of flour and water (80-85ºF is ideal, room temperature is fine).
- Stir with a chopstick or spoon until well incorporated.
- Cover the jar with cheesecloth, a coffee filter, or a glass lid (if using a Weck jar). Place it in a warm spot in your kitchen and allow to rest for 24 hours.
- After 24 hours, remove about half of the flour and water mixture (this is called "discarding") and feed it an additional 60 grams of flour and 60 grams (60ml) of warm water. Allow to rest for another 24 hours.
- On the third day, I recommend using a new, clean jar. Transfer 60 grams of the starter to a clean jar, then feed it 60 grams of flour and 60 grams (60ml) of warm water. Allow it to rest in a warm place for another 18-24 hours.
- During the third day, it is common to see a boost in activity, especially if you are using a portion of rye flour. If it hasn't - don't worry! Just keep going, and you should eventually see some bubbles. It's also very common to see activity on day 3-4, and then for it to recede until the starter is 1-2 weeks old.
Strengthening Your Starter: Days 4-7+
- From days 4 and onward you will continue the discard and feeding cycle daily, until you start to see your starter reliably double (so more than just once - you'll want to have seen this happen for 2-3 feedings in a row) in less than 24 hours. Once this happens, your starter will be considered mature, and you will move onto a modified feeding schedule (more below regarding ratios and feeding).
- Depending on the wild yeasts you have available in your environment, this process may take just 7 days, or it may take up to 14 days.
- Continue to discard your starter down to 60 grams, then feed it 60 grams each of water and flour daily.
- Once your starter is mature, move onto feeding it on a 1:2:2 ratio (or higher). This means for every 1 part of sourdough starter, feed 2 parts flour and 2 parts water. (Example: 20 grams starter, 40 grams flour, 40 grams water).
The Discard and Feeding Cycle
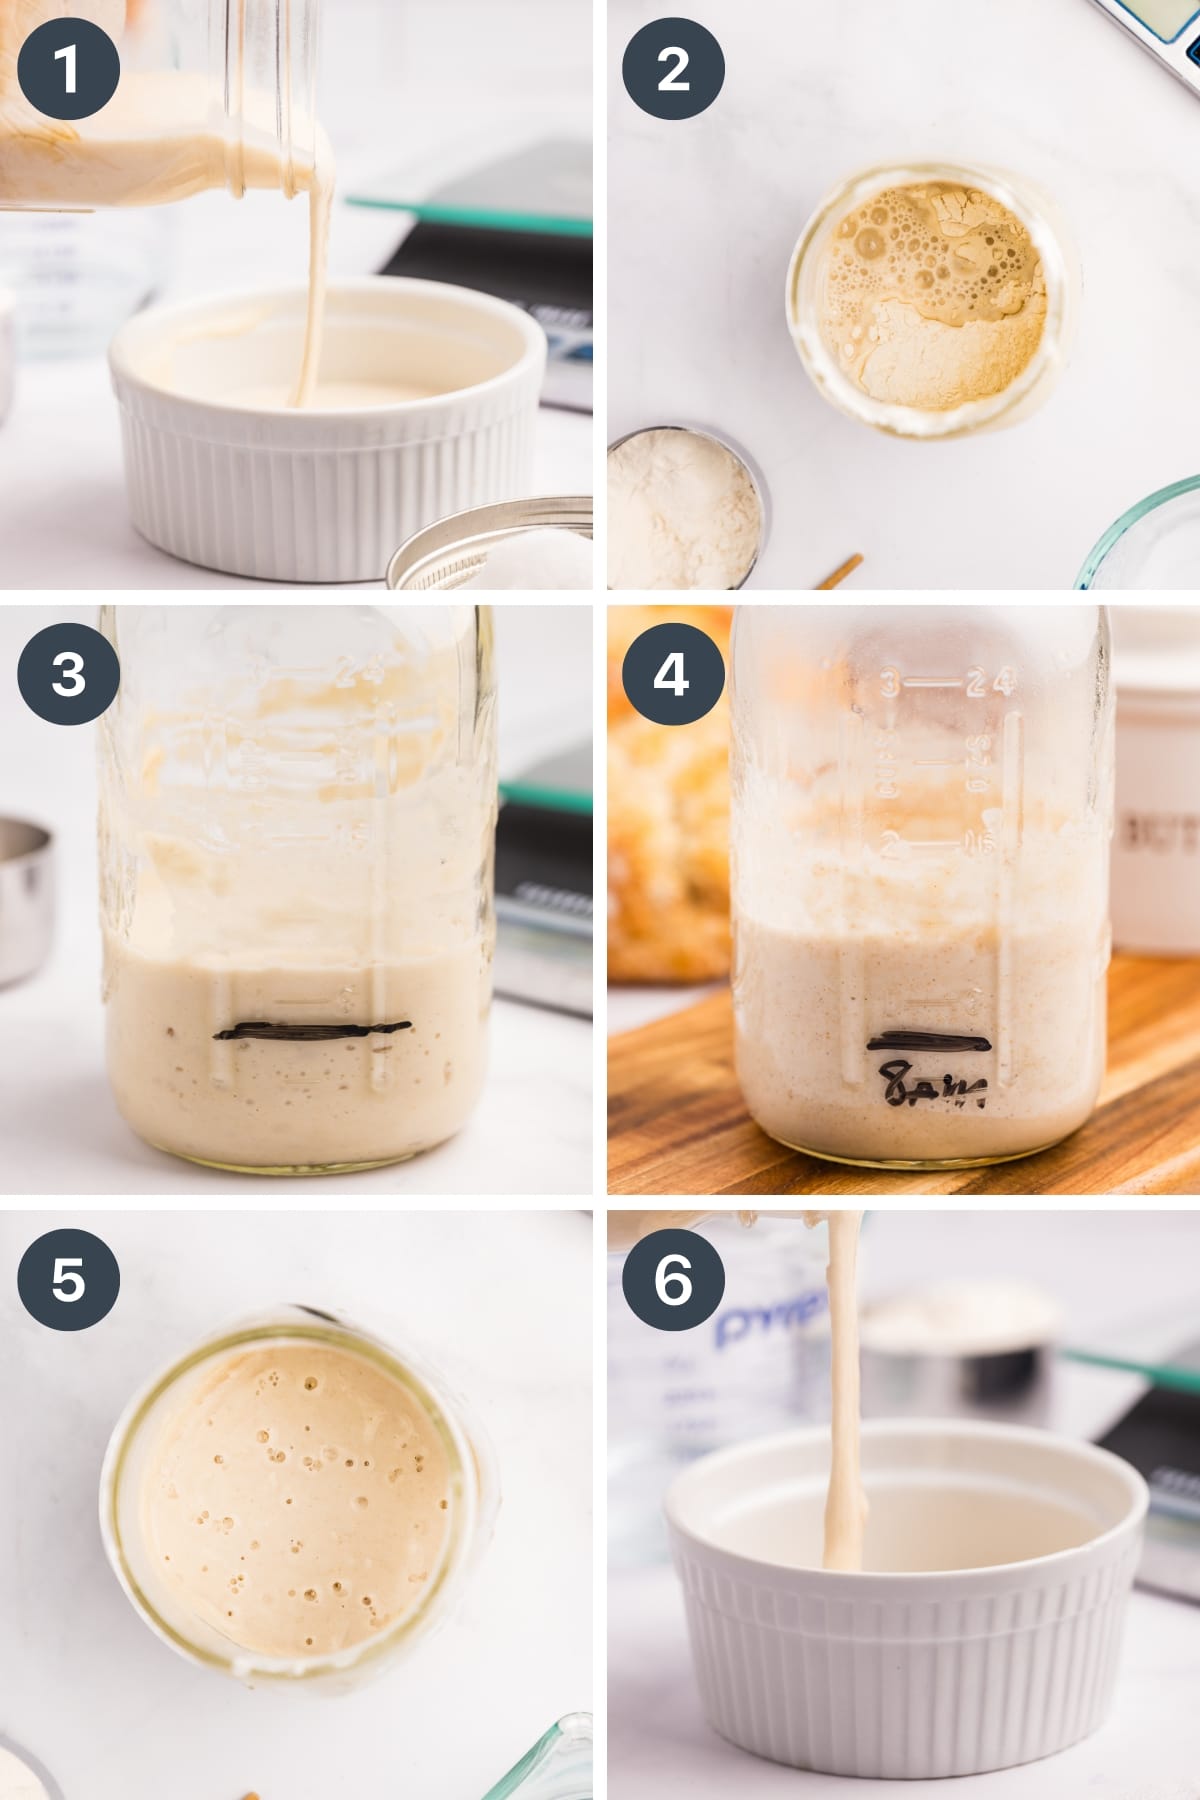
- From day 2 onward, you will start to establish a regular discard and feeding schedule - which you will maintain during the life of your starter!
- After your starter has reached its peak height, you can remove some of it to bake bread (or other sourdough goodies), and discard it down to a small amount (60 grams or less).
- Excess sourdough discard can be stored in a "discard jar" in the refrigerator. Once you have enough you can make simple discard recipes like sourdough crackers or baked pancakes.
- Feed the remaining sourdough starter at a 1:1:1 ratio (during the first 7-14 days) or at a 1:2:2 ratio (or higher) once the starter is mature. This ratio represents 1 part starter, 1 part water, and 1 part flour. (Example: 60 grams starter, 60 grams water, 60 grams flour).
- Discard the starter and feed it again once the starter has doubled (or more). This can be done during the peak, or once it has fallen back. The most important thing is that your starter is fed every 18-24 hours.
- If you find daily feedings difficult to maintain, once your starter is mature you can move it into the refrigerator and feed it every 7-9 days.
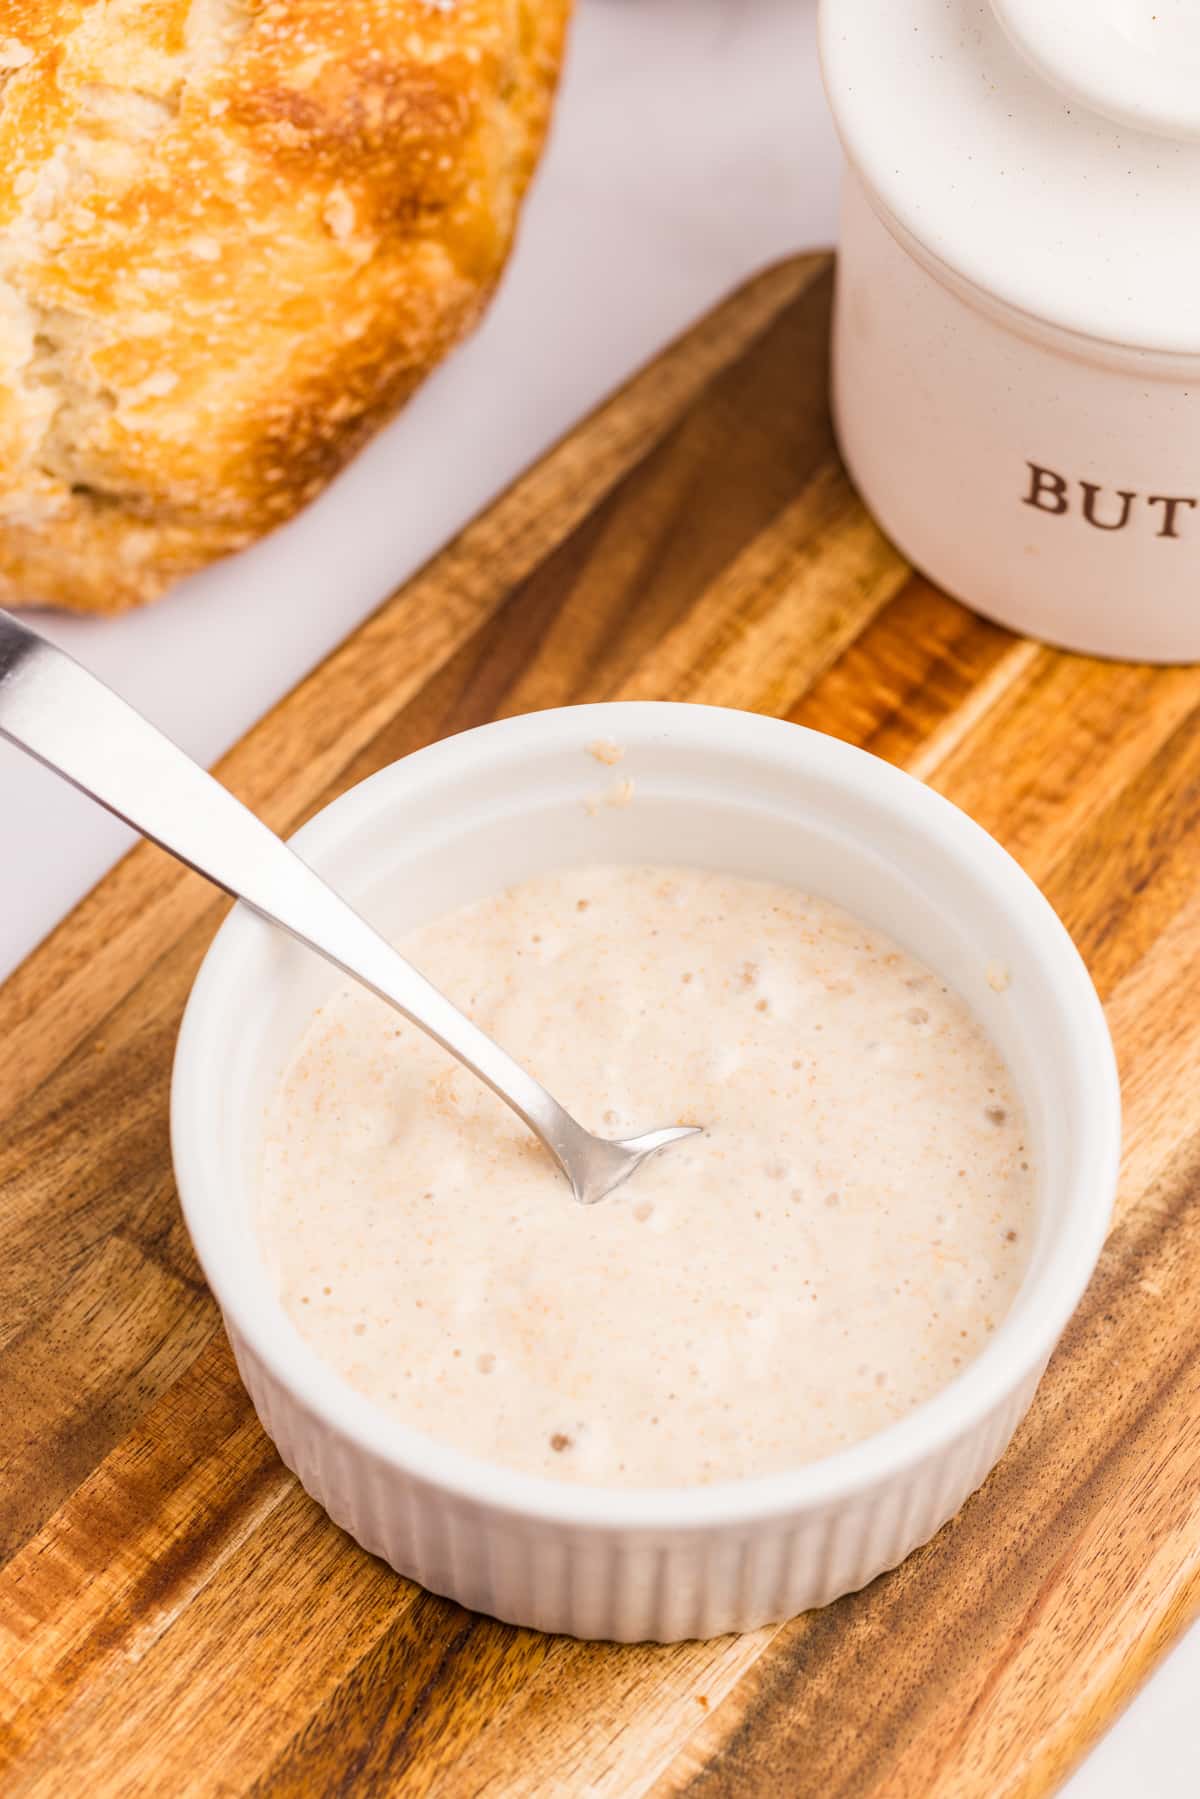
Signs Your Starter is Ready for Baking
- Pleasant smell (slightly yeasty)
- Lots of signs of activity (bubbles and rise)
- Has reliable doubled within 24 hours of feeding for at least 2-3 times in a row
- Passes a float test (see below)
What is a Float Test?
A float test is a way to assess if your starter has enough activity (aka bubbles/gas) to leaven your loaf. It isn't foolproof, but it is a good indicator.
To perform a float test:
- Gently scoop a portion of your recently fed starter and drop it into a glass or bowl of warm water.
- If the starter floats, you should be good to go ahead and use it in your recipe.
- If the starter sinks, you should check again in 30-45 minutes.
- If the starter sinks and it has been 18-24 hours since the last feeding, discard and feed the starter. Try the float test again once the starter has doubled in size.
How to Store and Maintain Your Sourdough Starter
- At room temperature: Feed every 12-24 hours. If your home is warm or you do once per day feedings, consider a higher ratio of flour and water to starter.
- In the refrigerator: Feed, then allow to rest at room temperature for 1-2 hours. Place in the refrigerator until needed. Remove every 7-9 days to repeat the feeding cycle. If using your refrigerated starter to bake bread, do 2-3 room temperature feedings to replenish your starter before baking.
Create a backup starter. I like to keep a jar of discard in the refrigerator for making simple recipes, but it also serves as a backup starter in case anything happens to your main starter.
Just the other day my husband washed my jar, not knowing that it was an active jar and I was about to feed it. Thankfully, I had some discard in the fridge and was able to easily re-establish my 5+ year old starter. I also have some dried starter in my cupboard in case the worse happens, and I suggest you do the same.
Expert Tips
- Wait to make bread. While new sourdough bakers are super eager to make their first boule of delicious sourdough bread, good things come to those who wait! Your starter may be ready as early as 7 days, but I recommend waiting until day 14 to bake your first loaf. In the meantime, you can use it to make sourdough discard recipes or recipes that don't rely on wild yeast for leavening (like pancakes, sourdough biscuits, etc).
- If you make bread and it's flat... don't worry. If you decide to give bread-baking a try and it doesn't exactly work out, know that's completely normal. Rarely does the first loaf turn out, but that doesn't mean it needs to go to waste. Try making sourdough croutons, bread pudding, or breakfast casserole with the cubed bread.
- Sourdough is an art - and it takes time. It may be frustrating at first not being able to predict exactly when your starter will double or when you can make bread, but as you gain experience you will be able to better predict these things based on your particular environment. Rest assured that although there is a learning curve, sourdough baking is not as fussy as it first appears. There is a window of about 3-6 hours where your starter will yield great loaves.
- Water is important. When I first started experimenting with sourdough 12+ years ago, I had some difficulty due to our tap water quality. Chlorinated water is great for keeping bacteria at bay in a municipal water system, but it's not so great for sourdough. Use water that is non-chlorinated for the best results (I had zero problems getting my sourdough re-established once we moved to the country with well water).
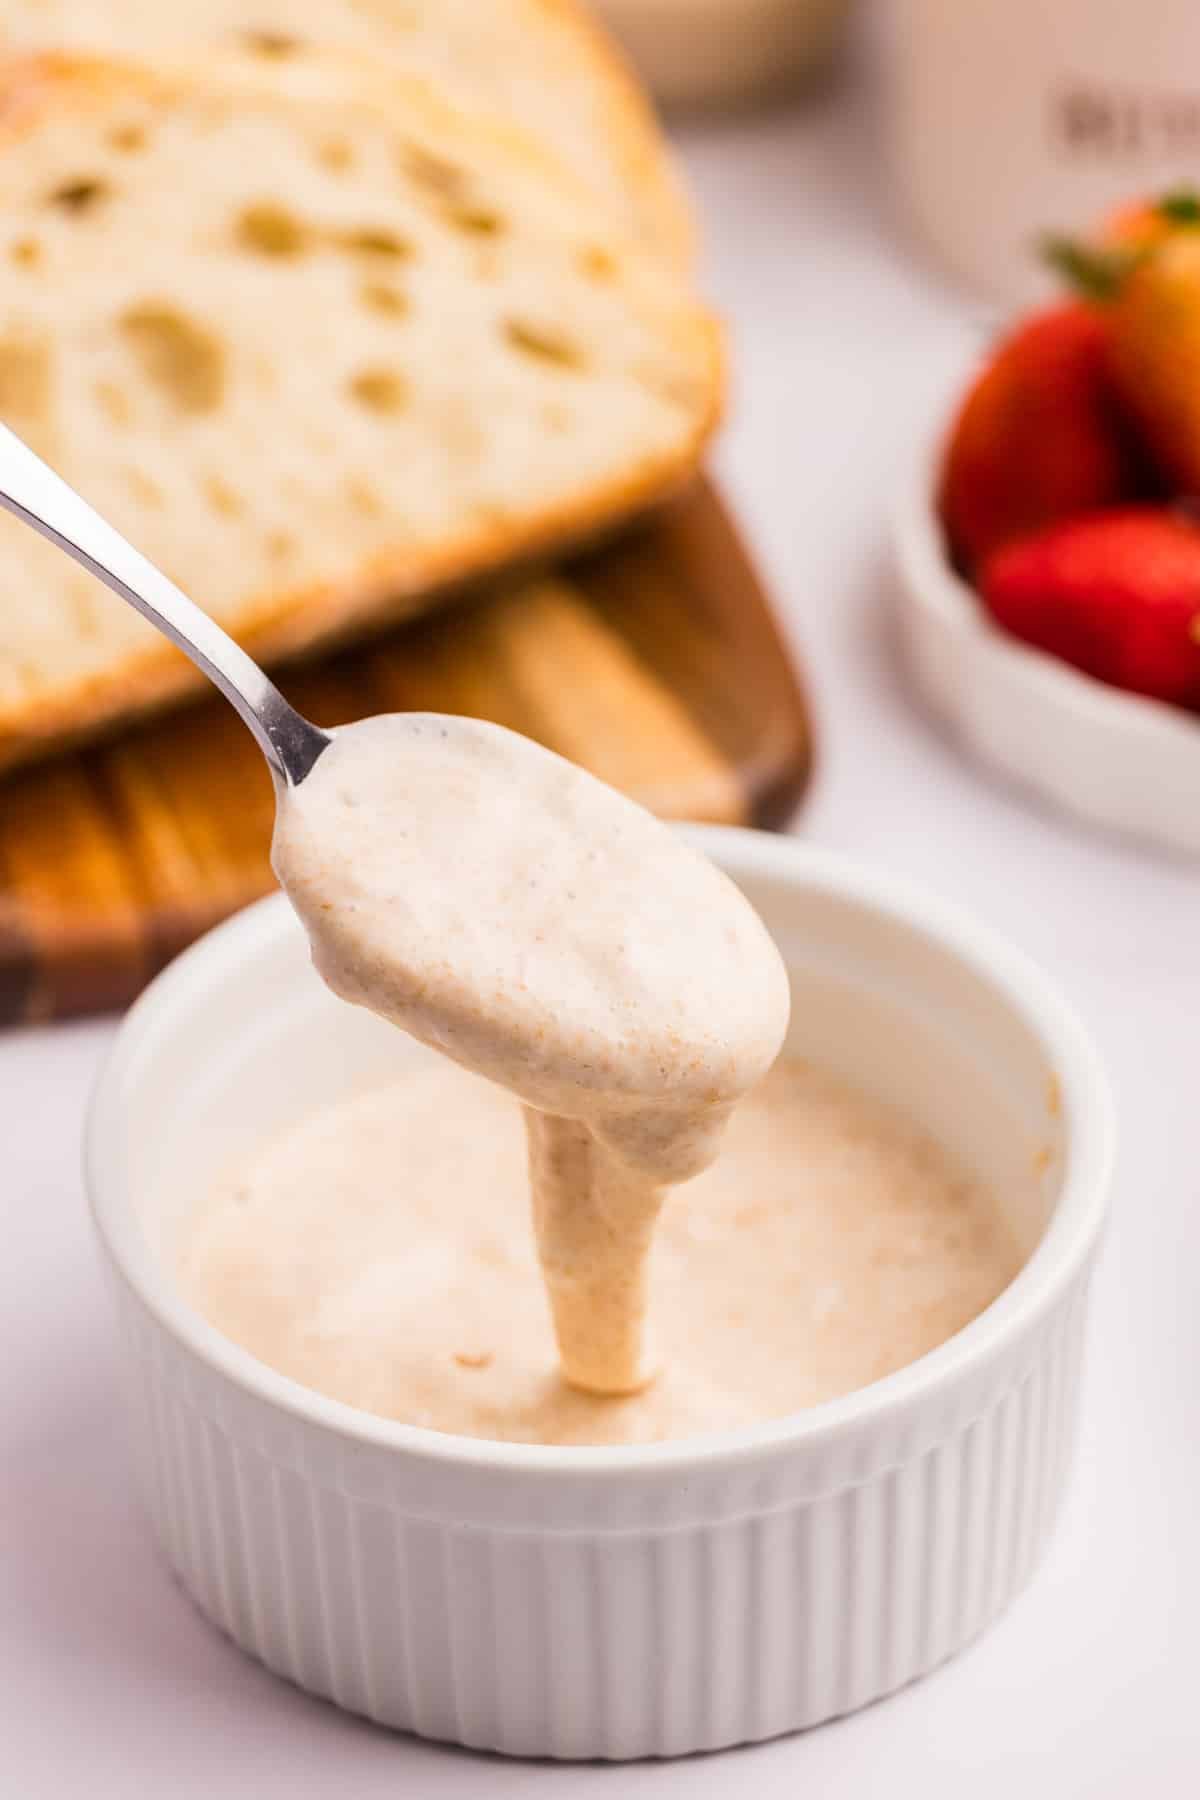
Various Feeding Ratios and Their Benefits
Every sourdough baker has a preferred ratio that they feed their sourdough starter. As you gain experience and experiment in your own kitchen, you'll gain your own preference.
Most beginners start off on a 1:1:1 ratio, which means that you use the same amount of each starter, flour, and water (in grams). This ratio is ideal for beginners because it is simple, but I do recommend that you try other options as you progress. This is also a great ratio for those with cool homes, or for Winter starters.
- 1:2:2 ratio: Feed your sourdough starter twice the amount of flour and water as starter (in grams). For example: 10 grams starter, 20 grams flour, 20 grams water. This ratio (and higher ratios) are ideal for warm kitchens.
- 1:3:3 ratio: Feed your sourdough starter three times the amount of flour and water as starter (in grams). For example: 10 grams starter, 30 grams flour, 30 grams water.
- 1:4:4 ratio: Feed your sourdough starter four times the amount of flour and water as starter (in grams). For example: 10 grams starter, 40 grams flour, 40 grams water.
- 1:5:5 ratio: Many experienced bakers prefer this ratio, as it is supposed to create the most ideal pH, making for a healthy starter. Feed your sourdough starter five times the amount of flour and water as starter (in grams). For example: 10 grams starter, 50 grams flour, 50 grams water.
Recipe FAQs
The best way to build up large amounts when needed for baking is to continue to feed the starter without discarding. Keep in mind that you will need to increase the amounts of flour and water each time to maintain a 1:1:1 ratio. So your feedings should roughly double each time until you have enough starter. Alternatively, you could build a levain using a 1:5:5 ratio, allowing for a longer rising time.
Since your starter will need to be maintained over the long term, the most reliable types of flour to use in a starter include all-purpose (regular or unbleached), bread flour, and small amounts of rye flour. While whole wheat can be added occasionally, starters that use AP or bread flour tend to stay healthier over the long term. You can still use white starters to make whole grain breads without issue.
You can add discard anywhere you don't need the leavening effect of active starter. This includes crackers, pancakes, waffles, cakes, cookies, and more.
If you loved this method for making your own sourdough starter, let me know by leaving a 5-star review in the recipe card or comment below! You can also tag me on Instagram @littlehomeinthemaking.
📖 Recipe

How to Make Sourdough Starter
Equipment
- Glass jar quart-sized
- Rubber band twine, or string
- Wooden spoon or chopstick
- Kitchen scale (recommended)
- Cheesecloth (or kitchen scale)
Ingredients
Day 1
- 120 grams all-purpose flour (about 1 cup)
- 120 grams water room temperature (120ml about ½ cup)
- Optional: Whole wheat or rye flour substituted for some of the all purpose flour
Day 2-7+ (each day)
- 60 grams all-purpose flour about ½ cup
- 60 grams water room temperature (60ml or about ¼ cup)
- Optional: 7 grams whole wheat or rye flour substituted for some of the all purpose flour (about 1 tbsp)
Instructions
Day 1
- Add 120 grams of all-purpose flour (about 1 cup) to a quart-sized glass jar. Pour in 120 grams (120ml or about ½ cup) room temperature water. Stir the mixture using a narrow wooden spoon or chopstick.
- Once the flour and water are well mixed, cover the jar with cheesecloth (or a coffee filter) and secure it with a rubber band or a canning jar ring. This allows your starter to capture wild yeasts in the air while keeping it free from bugs, dust, and debris.
- Place in a slightly warm, dark place and leave undisturbed for about 24 hours.
- Optional: Add 7 grams (about 1 tablespoon) of whole wheat or rye flour to the mixture. Rye flour in particular is known to boost activity in starters, and using a small portion of whole grain flour can help speed things along. Note: Use 7 grams less all purpose flour OR add an extra 7 grams of water to keep your flour and water weight the same.
Day 2
- Remove the lid and covering from the jar. Now you will discard some of the starter, this is done by removing about half of the starter before feeding it again. For an accurate measurement, add a small bowl to a digital scale and tare it. Pour in your starter until the scale reads 120 grams. This can be discarded; use the starter left in the jar to feed with fresh flour and water.
- Add 60 grams of flour (about ½ cup) and 60 grams of water (60ml or about ¼ cup) to the starter, and stir to combine.
- Place the cheesecloth (or coffee filter) back on the jar and secure it with a ring or rubber band. You might start seeing bubbles forming but don’t worry if you don’t. By day 3 you should start to see significant activity.
- Place in a slightly warm, dark place, and allow to rest for about 24 hours.
- Optional: You can use 7 grams of rye or whole wheat flour in place of 7 grams of the all-purpose flour to boost activity.
Day 3
- On the 3rd day, I recommend using a clean jar. This will prevent the risk of contamination.
- Add a clean quart jar to a digital scale and tare the scale. Pour 60 grams of the reserved starter into the new jar, then discard the remaining starter.
- Feed the starter with 60 grams of flour (about ½ cup) and 60 grams of room temperature water (60ml or about ¼ cup). Stir with a spoon or chopstick until fully incorporated.
- Cover the jar with cheesecloth (or a coffee filter) and secure with a canning ring or rubber band. If needed, you can replace the cheesecloth or coffee filter to keep things clean and tidy.
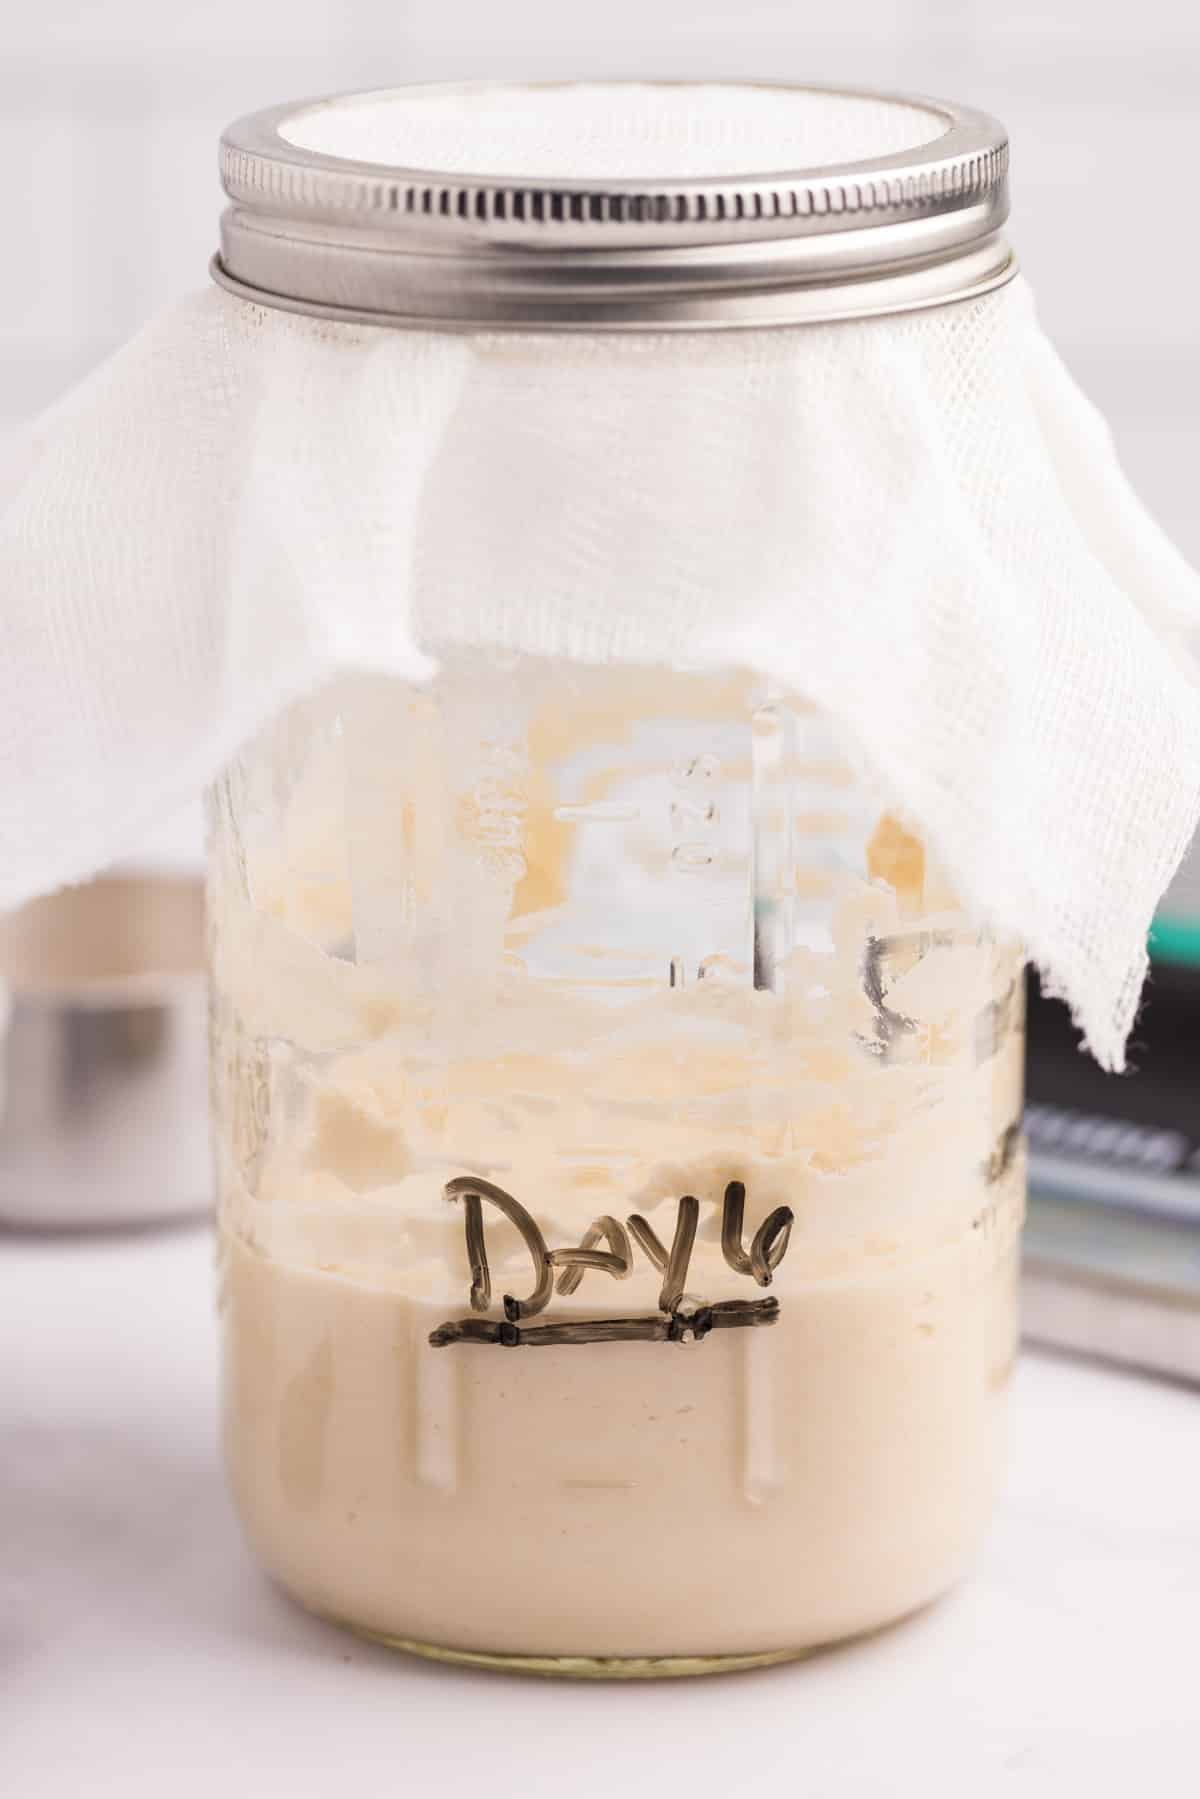
- By day 3 you should begin to see some activity, and it’s a good idea to start tracking the rising and falling of the starter. This can be done by marking on the side of the jar with a dry erase marker OR using a rubber band as a guide. The goal is to have the starter double (or more) by the end of 1-2 weeks. At that point, you will know your starter is mature and ready to make bread. You can also mark the day (ex. “Day 3”) on the jar with the dry erase marker - this can be helpful to keep you on track.
- Place in a slightly warm, dark place and allow to rest for 18-24 hours.
- Optional: You can use 7 grams of rye or whole wheat flour in place of 7 grams of the all purpose flour to boost activity.
Day 4
- By day 4, you should continue to see bubbles and growth. It’s normal to have lots of activity on day 3, and then see a decline in activity until days 7-9, so don’t worry if it slows down again. As long as you see some bubbles and there are no signs of spoilage (mold, orange spots or streaks, etc), you’re heading in the right direction.
- Discard the starter down to 60 grams before proceeding with the daily feeding.
- Add 60 grams of flour (about ½ cup) and 60 grams of water (60ml or about ¼ cup) to the jar and stir until well combined.
- Place the cheesecloth (or coffee filter) back on the jar and secure it with a rubber band or jar ring. Mark the starting line with a dry erase marker or rubber band.
- Place in a slightly warm, dark place to rest and rise for 18-24 hours.
- Optional: You can use 7 grams of rye or whole wheat flour in place of 7 grams of the all purpose flour to boost activity.
Day 5
- Discard the starter down to 60 grams before proceeding with the daily feeding.
- Add 60 grams of flour (about ½ cup) and 60 grams of water (60ml or about ¼ cup) to the jar and stir until well combined.
- Place the cheesecloth (or coffee filter) back on the jar and secure it with a rubber band or jar ring. Mark the starting line with a dry erase marker or rubber band.
- Place in a slightly warm, dark place to rest and rise for 18-24 hours.
- Optional: You can use 7 grams of rye or whole wheat flour in place of 7 grams of the all purpose flour to boost activity.
Day 6
- On day 6, I recommend switching to a clean jar again like you did on day 3 (see above).
- Add a clean quart jar to a digital scale and tare the scale. Pour 60 grams of the reserved starter into the new jar, then discard the remaining starter.
- Feed the starter with 60 grams of flour (about ½ cup) and 60 grams of room temperature water (60ml or about ¼ cup). Stir with a spoon or chopstick until fully incorporated.
- Place the cheesecloth (or coffee filter) back on the jar and secure it with a rubber band or jar ring. Mark the starting line with a dry erase marker or rubber band.
- Place in a slightly warm, dark place to rest and rise for 18-24 hours. Your starter may start doubling on this day, but if it doesn’t - don’t worry. As long as there are no signs of contamination you can keep discarding and feeding until your starter is active.
- Optional: You can use 7 grams of rye or whole wheat flour in place of 7 grams of the all purpose flour to boost activity.
Days 7-14
- Keep up with the daily discarding and feeding schedule as established in days 3-6. Discard down to 60 grams of starter, then feed with 60 grams each of flour and water.
- Your starter is ready when it reliably doubles (or more) within 24 hours, and falls back down to the starting line (a little above or a little below is fine). Many people will find this happens around day 7, but you may need to go longer. I recommend waiting until your starter is about 2 weeks (14 days) old before using it to make classic sourdough bread (without yeast). A mature starter will perform better than a young starter, but if you want to try bread on day 7 or 8 go ahead! If it doesn’t turn out, you can cube the bread and use it to make croutons or bread pudding.
- Feed your established starter daily, or twice daily (discarding each time) if your home is very warm. It can be fed weekly if kept in the fridge, and your starter will keep indefinitely as long as you feed it regularly and switch out to a clean jar every few weeks.
Feeding and Maintaining Your Starter
- Continue to discard and feed your sourdough starter daily (or twice daily if using a 1:1:1 ratio) . I recommend using a 1:2:2 ratio (or higher) depending on the time of year and your preferences. This will mean for every 1 part starter, add 2 parts flour, and 2 parts water. For example, 30 grams starter + 60 grams flour + 60 grams water. I like to use a 1:1:1 or 1:2:2 ratio during the Winter months, since our home is cool and the starter takes longer to work through each feeding. In the Summer months, a 1:5:5 ratio works best in my opinion.
- If you don’t plan on baking several times a week, you may find that you prefer storing your starter in the refrigerator. After discarding and feeding, cover the jar and place in the refrigerator. For the best results, remove the starter weekly. Discard down to 30-60 grams, feed, and allow to rise at room temperature until doubled (or tripled). Then, discard, feed again, and place back in the refrigerator until needed. When you’re ready to bake, remove it from the fridge 1-2 days in advance and feed it at least 2 times before baking, although 3-4 is ideal. You can feed twice daily as long as the volume is doubling.
- Switch to a clean jar every 2-4 weeks for the best results and to reduce the risk of contamination. Once the starter is established, I like to use a weck jar and glass lid without the rubber gasket. You could also use a glass jar with a plastic lid; once the wild yeasts are caught a loose lid is perfectly fine to use in place of the cheesecloth (or coffee filter).
Notes
Signs of Spoilage
If you’re using clean equipment and a clean jar, you shouldn’t expect to have problems with your starter. That being said, it isn’t completely uncommon, especially if you go long stretches without feeding your starter. Here are some signs your starter isn’t doing well:- Seeing pink or orange streaks (this happens when left at room temperature unfed)
- Seeing mold on top of your starter, or around the jar
- You see no activity several hours after feeding it
- The smell is off or it smells foul
- Being stored at high heat (above 120ºF)
Recipe FAQs
My starter has black liquid on top - is it okay to use? This black-ish liquid is referred to as “hooch” and appears when you have gone too long in between feedings (and/or you’ve been storing it for a long time in the refrigerator). This can be poured off, then you can feed and maintain your starter as usual. As long as it’s not accompanied by mold, a foul smell, or off colors - it’s totally normal. Do you have to discard the starter every time you feed it? No. However, the starter grows and it may be difficult to use it up or keep healthy. Further, if you have a large volume of starter it takes a lot more flour and water to maintain it. It is best to discard it before each feeding. If you want to reduce waste, collect the discard in a jar in the fridge until you have enough to make your favorite sourdough discard recipes (like sourdough crackers). Can sourdough starter replace yeast? You can adapt almost any recipe calling for yeast to use sourdough instead. The general rule is about 100 grams of starter will replace one packet (2 ¼ teaspoons of yeast), but it will require a proofing time of 8+ hours, and may require cold proofing (depending on the original recipe). For the best results, find a specific “sourdough” recipe for what you want to bake. I post lots of sourdough recipes on www.littlehomeinthemaking.com and share new ones every month. How do I increase my starter? If you’re making a recipe that calls for a lot of starter, continue to feed it without discarding until you have the amount needed. Just be sure to maintain your regular feeding ratio (1:2:2 - 1:5:5).Nutrition
Please note that some of my blog posts here at Little Home in the Making may contain affiliate links. If you make a purchase through these links, I will get a small commission at no additional cost to you. See our disclaimer for more information.













Renee
I feed sourdough the amount called for in the recipe I'll be using so then when it's ready to use > measure it out and then what starter is remaining is at the level I began with before I prepared my recipe. Then I dontvhave to have lots of discard to deal with. This works well for me. I enjoy your website. Good job feeding your family well. 😊
Dolly | Little Home in the Making
Hi Renee, Thank you for your kind words! Your method is great for those who want to avoid waste! It's very similar to the Levain method, only you don't keep a separate small starter. Great tip for those who want to avoid having extra discard.