How to Make Sourdough Starter
Want to make sourdough bread, but need a starter? Learn how to make sourdough starter at home with this simple recipe!
Print
Pin
Equipment
- Glass jar quart-sized
- Rubber band twine, or string
- Wooden spoon or chopstick
- Kitchen scale (recommended)
- Cheesecloth (or kitchen scale)
Ingredients
Day 1
- 120 grams all-purpose flour (about 1 cup)
- 120 grams water room temperature (120ml about ½ cup)
- Optional: Whole wheat or rye flour substituted for some of the all purpose flour
Day 2-7+ (each day)
- 60 grams all-purpose flour about ½ cup
- 60 grams water room temperature (60ml or about ¼ cup)
- Optional: 7 grams whole wheat or rye flour substituted for some of the all purpose flour (about 1 tbsp)
Instructions
Cook ModeDay 1
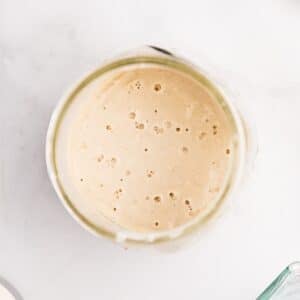
- Add 120 grams of all-purpose flour (about 1 cup) to a quart-sized glass jar. Pour in 120 grams (120ml or about ½ cup) room temperature water. Stir the mixture using a narrow wooden spoon or chopstick.
- Once the flour and water are well mixed, cover the jar with cheesecloth (or a coffee filter) and secure it with a rubber band or a canning jar ring. This allows your starter to capture wild yeasts in the air while keeping it free from bugs, dust, and debris.
- Place in a slightly warm, dark place and leave undisturbed for about 24 hours.
- Optional: Add 7 grams (about 1 tablespoon) of whole wheat or rye flour to the mixture. Rye flour in particular is known to boost activity in starters, and using a small portion of whole grain flour can help speed things along. Note: Use 7 grams less all purpose flour OR add an extra 7 grams of water to keep your flour and water weight the same.
Day 2
- Remove the lid and covering from the jar. Now you will discard some of the starter, this is done by removing about half of the starter before feeding it again. For an accurate measurement, add a small bowl to a digital scale and tare it. Pour in your starter until the scale reads 120 grams. This can be discarded; use the starter left in the jar to feed with fresh flour and water.
- Add 60 grams of flour (about ½ cup) and 60 grams of water (60ml or about ¼ cup) to the starter, and stir to combine.
- Place the cheesecloth (or coffee filter) back on the jar and secure it with a ring or rubber band. You might start seeing bubbles forming but don’t worry if you don’t. By day 3 you should start to see significant activity.
- Place in a slightly warm, dark place, and allow to rest for about 24 hours.
- Optional: You can use 7 grams of rye or whole wheat flour in place of 7 grams of the all-purpose flour to boost activity.
Day 3
- On the 3rd day, I recommend using a clean jar. This will prevent the risk of contamination.
- Add a clean quart jar to a digital scale and tare the scale. Pour 60 grams of the reserved starter into the new jar, then discard the remaining starter.
- Feed the starter with 60 grams of flour (about ½ cup) and 60 grams of room temperature water (60ml or about ¼ cup). Stir with a spoon or chopstick until fully incorporated.
- Cover the jar with cheesecloth (or a coffee filter) and secure with a canning ring or rubber band. If needed, you can replace the cheesecloth or coffee filter to keep things clean and tidy.
- By day 3 you should begin to see some activity, and it’s a good idea to start tracking the rising and falling of the starter. This can be done by marking on the side of the jar with a dry erase marker OR using a rubber band as a guide. The goal is to have the starter double (or more) by the end of 1-2 weeks. At that point, you will know your starter is mature and ready to make bread. You can also mark the day (ex. “Day 3”) on the jar with the dry erase marker - this can be helpful to keep you on track.
- Place in a slightly warm, dark place and allow to rest for 18-24 hours.
- Optional: You can use 7 grams of rye or whole wheat flour in place of 7 grams of the all purpose flour to boost activity.
Day 4
- By day 4, you should continue to see bubbles and growth. It’s normal to have lots of activity on day 3, and then see a decline in activity until days 7-9, so don’t worry if it slows down again. As long as you see some bubbles and there are no signs of spoilage (mold, orange spots or streaks, etc), you’re heading in the right direction.
- Discard the starter down to 60 grams before proceeding with the daily feeding.
- Add 60 grams of flour (about ½ cup) and 60 grams of water (60ml or about ¼ cup) to the jar and stir until well combined.
- Place the cheesecloth (or coffee filter) back on the jar and secure it with a rubber band or jar ring. Mark the starting line with a dry erase marker or rubber band.
- Place in a slightly warm, dark place to rest and rise for 18-24 hours.
- Optional: You can use 7 grams of rye or whole wheat flour in place of 7 grams of the all purpose flour to boost activity.
Day 5
- Discard the starter down to 60 grams before proceeding with the daily feeding.
- Add 60 grams of flour (about ½ cup) and 60 grams of water (60ml or about ¼ cup) to the jar and stir until well combined.
- Place the cheesecloth (or coffee filter) back on the jar and secure it with a rubber band or jar ring. Mark the starting line with a dry erase marker or rubber band.
- Place in a slightly warm, dark place to rest and rise for 18-24 hours.
- Optional: You can use 7 grams of rye or whole wheat flour in place of 7 grams of the all purpose flour to boost activity.
Day 6
- On day 6, I recommend switching to a clean jar again like you did on day 3 (see above).
- Add a clean quart jar to a digital scale and tare the scale. Pour 60 grams of the reserved starter into the new jar, then discard the remaining starter.
- Feed the starter with 60 grams of flour (about ½ cup) and 60 grams of room temperature water (60ml or about ¼ cup). Stir with a spoon or chopstick until fully incorporated.
- Place the cheesecloth (or coffee filter) back on the jar and secure it with a rubber band or jar ring. Mark the starting line with a dry erase marker or rubber band.
- Place in a slightly warm, dark place to rest and rise for 18-24 hours. Your starter may start doubling on this day, but if it doesn’t - don’t worry. As long as there are no signs of contamination you can keep discarding and feeding until your starter is active.
- Optional: You can use 7 grams of rye or whole wheat flour in place of 7 grams of the all purpose flour to boost activity.
Days 7-14
- Keep up with the daily discarding and feeding schedule as established in days 3-6. Discard down to 60 grams of starter, then feed with 60 grams each of flour and water.
- Your starter is ready when it reliably doubles (or more) within 24 hours, and falls back down to the starting line (a little above or a little below is fine). Many people will find this happens around day 7, but you may need to go longer. I recommend waiting until your starter is about 2 weeks (14 days) old before using it to make classic sourdough bread (without yeast). A mature starter will perform better than a young starter, but if you want to try bread on day 7 or 8 go ahead! If it doesn’t turn out, you can cube the bread and use it to make croutons or bread pudding.
- Feed your established starter daily, or twice daily (discarding each time) if your home is very warm. It can be fed weekly if kept in the fridge, and your starter will keep indefinitely as long as you feed it regularly and switch out to a clean jar every few weeks.
Feeding and Maintaining Your Starter
- Continue to discard and feed your sourdough starter daily (or twice daily if using a 1:1:1 ratio) . I recommend using a 1:2:2 ratio (or higher) depending on the time of year and your preferences. This will mean for every 1 part starter, add 2 parts flour, and 2 parts water. For example, 30 grams starter + 60 grams flour + 60 grams water. I like to use a 1:1:1 or 1:2:2 ratio during the Winter months, since our home is cool and the starter takes longer to work through each feeding. In the Summer months, a 1:5:5 ratio works best in my opinion.
- If you don’t plan on baking several times a week, you may find that you prefer storing your starter in the refrigerator. After discarding and feeding, cover the jar and place in the refrigerator. For the best results, remove the starter weekly. Discard down to 30-60 grams, feed, and allow to rise at room temperature until doubled (or tripled). Then, discard, feed again, and place back in the refrigerator until needed. When you’re ready to bake, remove it from the fridge 1-2 days in advance and feed it at least 2 times before baking, although 3-4 is ideal. You can feed twice daily as long as the volume is doubling.
- Switch to a clean jar every 2-4 weeks for the best results and to reduce the risk of contamination. Once the starter is established, I like to use a weck jar and glass lid without the rubber gasket. You could also use a glass jar with a plastic lid; once the wild yeasts are caught a loose lid is perfectly fine to use in place of the cheesecloth (or coffee filter).
Notes
Using rye or whole wheat: If using the optional 7 grams of whole wheat or rye flour, reduce the all-purpose to 53 grams; maintain the water at 60 grams (60ml).
Feeding schedule: If storing at room temperature, feed your starter daily at a 1:2:2 ratio. If you have a very warm house, you may need to feed twice daily (or use a 1:5:5 ratio). If storing in the refrigerator, feed once per week for the best results. Discard and refresh your refrigerated starter with 2-3 feedings before baking.
Signs of Spoilage
If you’re using clean equipment and a clean jar, you shouldn’t expect to have problems with your starter. That being said, it isn’t completely uncommon, especially if you go long stretches without feeding your starter. Here are some signs your starter isn’t doing well:- Seeing pink or orange streaks (this happens when left at room temperature unfed)
- Seeing mold on top of your starter, or around the jar
- You see no activity several hours after feeding it
- The smell is off or it smells foul
- Being stored at high heat (above 120ºF)
Recipe FAQs
My starter has black liquid on top - is it okay to use? This black-ish liquid is referred to as “hooch” and appears when you have gone too long in between feedings (and/or you’ve been storing it for a long time in the refrigerator). This can be poured off, then you can feed and maintain your starter as usual. As long as it’s not accompanied by mold, a foul smell, or off colors - it’s totally normal. Do you have to discard the starter every time you feed it? No. However, the starter grows and it may be difficult to use it up or keep healthy. Further, if you have a large volume of starter it takes a lot more flour and water to maintain it. It is best to discard it before each feeding. If you want to reduce waste, collect the discard in a jar in the fridge until you have enough to make your favorite sourdough discard recipes (like sourdough crackers). Can sourdough starter replace yeast? You can adapt almost any recipe calling for yeast to use sourdough instead. The general rule is about 100 grams of starter will replace one packet (2 ¼ teaspoons of yeast), but it will require a proofing time of 8+ hours, and may require cold proofing (depending on the original recipe). For the best results, find a specific “sourdough” recipe for what you want to bake. I post lots of sourdough recipes on www.littlehomeinthemaking.com and share new ones every month. How do I increase my starter? If you’re making a recipe that calls for a lot of starter, continue to feed it without discarding until you have the amount needed. Just be sure to maintain your regular feeding ratio (1:2:2 - 1:5:5).Nutrition
Sodium: 9mg | Calcium: 5mg
