


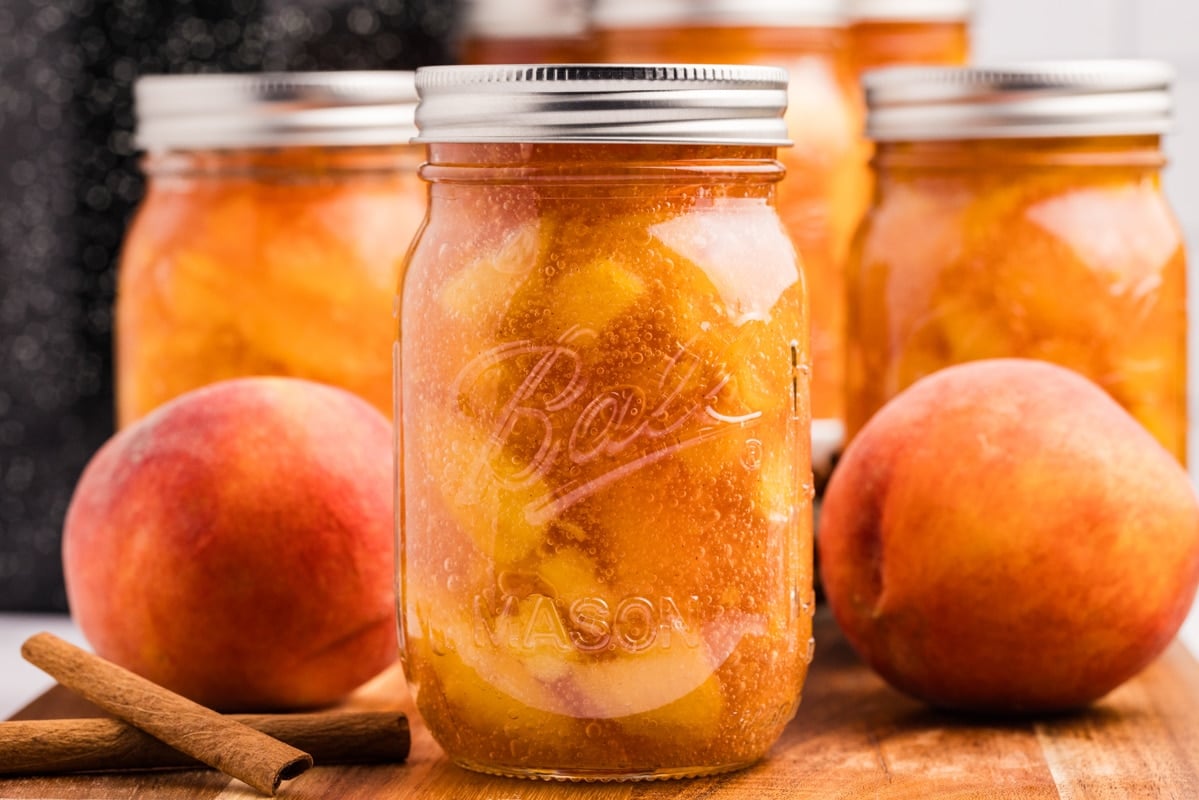
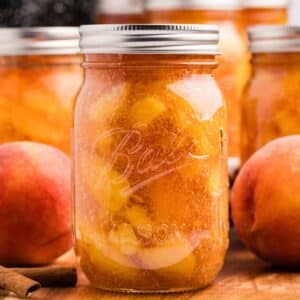
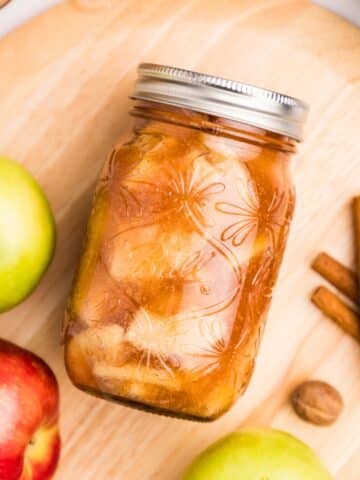
Whether you have a load of fresh peaches from the farmer's market, grocery store, or your very own peach tree - you need to try canning peach pie filling!
This easy water bath canning recipe is made with simple ingredients, and features a beginner-friendly canning method, so you can be enjoying fresh peach desserts all year long.

With peach season in full swing, I couldn't think of a better time to share this recipe and guide to canning peach pie filling!
Why You'll Love It:
- This recipe is super simple, focusing on the fantastic flavor of peaches, and features just a few ingredients (no added apples or raisins in this one thanks!).
- While canning peaches in syrup can be a bit of a time consuming (and sticky) process, making pie filling is one of my favorite ways to preserve the season's bounty.
- Once the peaches are peeled and blanched, the rest goes pretty quickly. Even if it's your first time, you should find this homemade peach pie filling easy to prepare.
- Enjoy homemade peach pie (or a yummy peach cobbler) on the coldest days of Winter, knowing that your hard work in the Summer made it possible. What's not to love about that?
And while you have your canning supplies out, check out my recipes for canning apple pie filling and raspberry pie filling too!
Ingredients
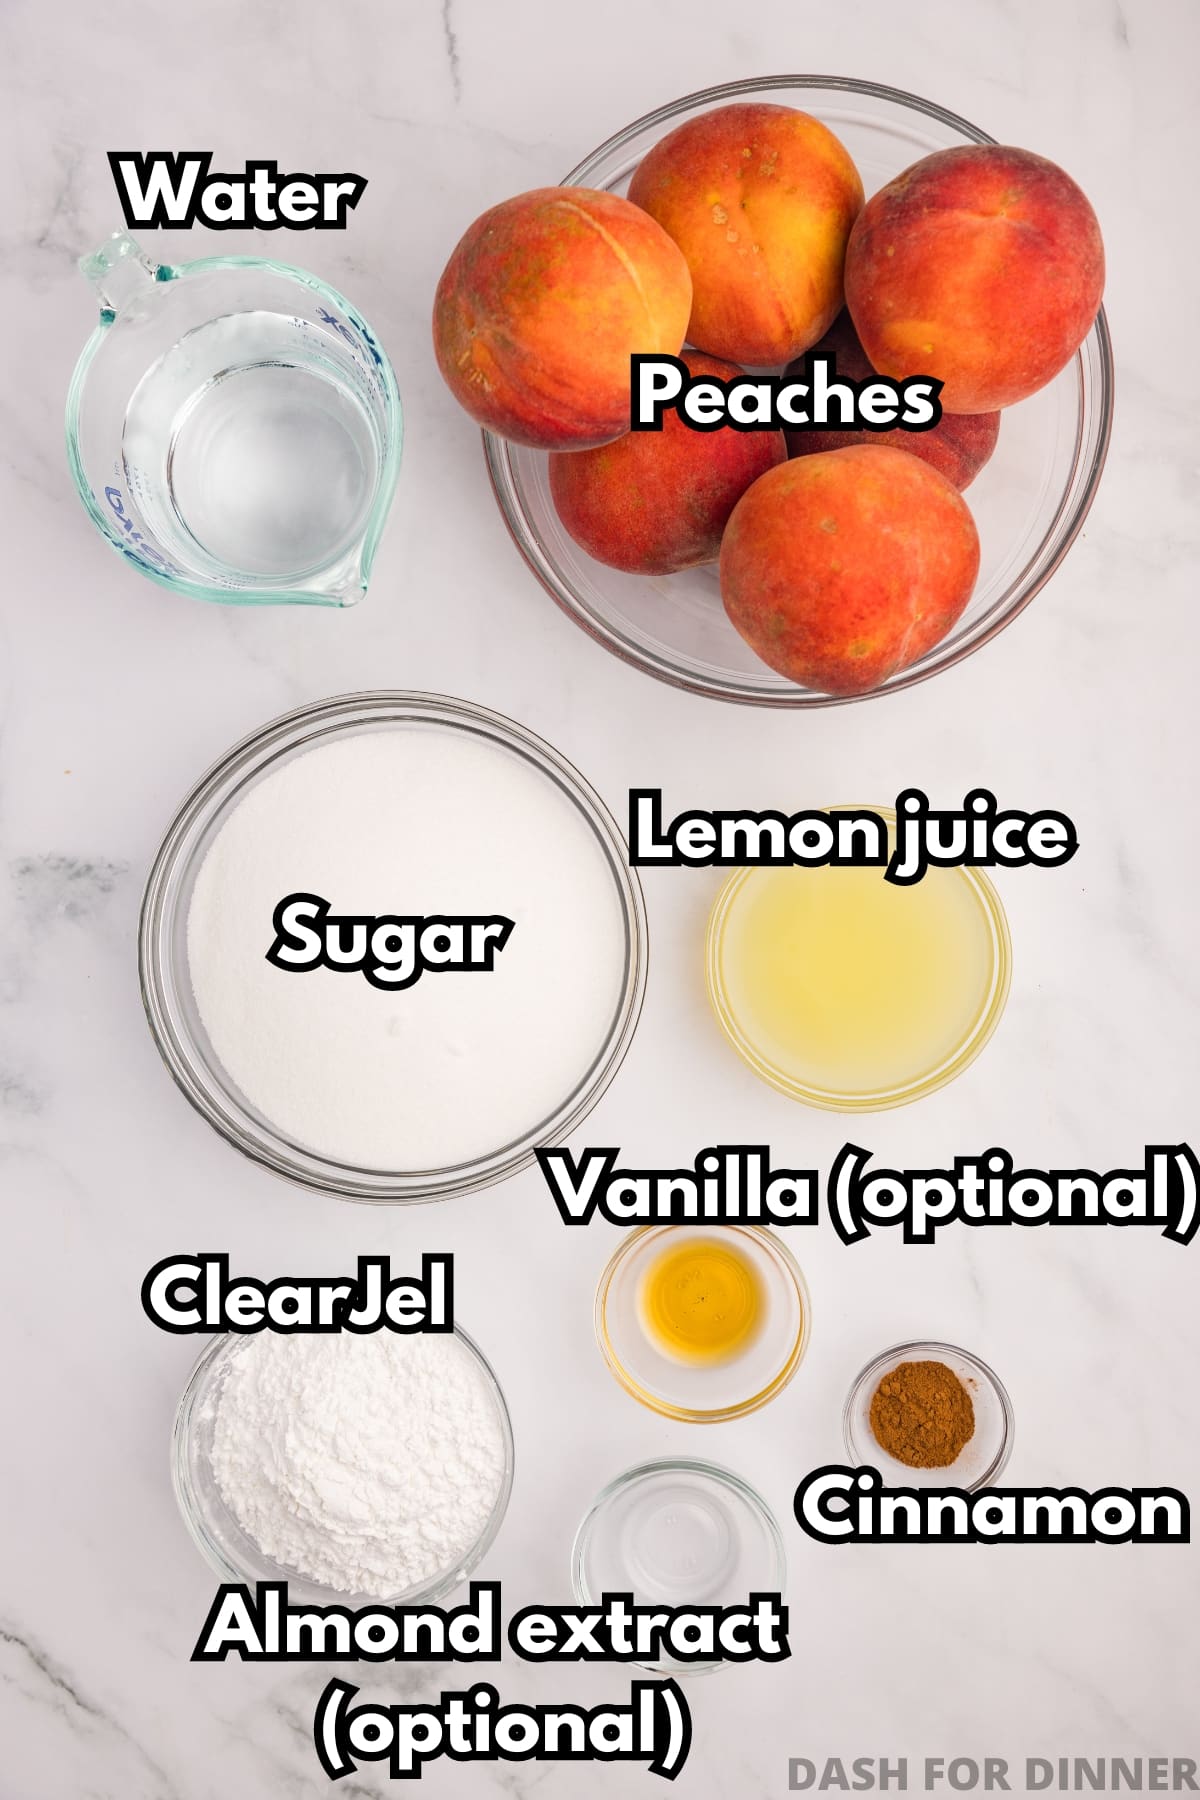
- Peaches: For a canner load of 6 pints you will need about 10 ½ cups of prepared peaches, or about 6 quarts of fresh whole peaches.
- Sugar: Use either regular white granulated sugar or organic. Since this is a recipe for canning, you cannot make substitutions (like maple syrup or honey) without affecting safety (as recipes are tested and approved with sugar).
- ClearJel (cook type): This is a type of modified food starch that is tested and safe for canning recipes. It helps to thicken foods, while still making them penetrable by heat. Do not substitute this for corn starch or flour - these ingredients are not safe for canning. You can reduce the amount of Clear jel by about 1-2 tablespoons if you prefer a looser set pie filling.
- Lemon juice: Be sure to use bottled lemon juice (not fresh). Bottled lemon juice has to meet certain criteria for acidity, while freshly squeezed juice varies in acidity. Acidity is an important component of safe canning.
- Cinnamon: This adds a nice touch of warm flavor. If desired, you can increase the cinnamon, add a pinch or two of nutmeg, or add your favorite warm spices.
- Extracts (optional): Although optional, a little bit of vanilla and/or almond extract adds more flavor to the finished pie filling.
- Water: You will need some cold water; this helps to activate the ClearJel, which thickens the pie filling.
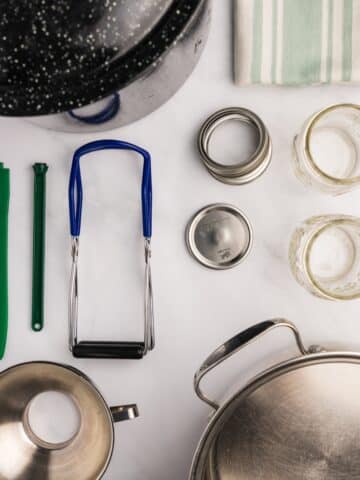
Tools & Equipment
The following tools are what I recommend for canning your own pie fillings. Some may be optional, or there may be alternative options. If you want more information on the specific tools, check out my post on essential water bath canning supplies.
- Water bath canner (also known as boiling water canner)
- Canning jars, lids, and rings (pint-sized jars - 500ml)
- Magnetic lid lifter (optional)
- Headspace checker (optional - can use a clean ruler)
- A debubbling tool (a clean butterknife or chopstick works well)
- Stock pot (or Dutch oven)
- Wide-mouth funnel (optional)
- Ladle and whisk
- Thick kitchen towel
Before You Get Started: Canning Prep
- Wash all the jars, lids, rings, and canning equipment with hot, soapy water. Rinse well.
- Fill the water bath canner with water and bring to a boil.
- Add the canning jars to the boiling water and sterilize for at least 5 minutes.
- Turn the heat to low and allow the jars to rest in the hot water until you're ready to use them.
- Sterilize the rings (optional) in boiling water for 5. Then lower the heat and allow to rest in hot water until needed.
- Warm the canning lids in hot water (not boiling) until needed. I recommend adding them to the pot you used to sterilize the rings, only after the boiling time is up.
Water Bath Canning Peach Pie Filling
Preparing the Peaches
This is the method I recommend for peeling, pitting, and slicing peaches. If you have one that works better for you, feel free to use that instead!

- Bring a large pot of water to a boil and score and "x" in the bottom of each of the peaches. Working in batches of 4-6 peaches, drop them into the water and allow to boil for 60-90 seconds, or until the skins start to slip back.
- Remove the boiled peaches and immediately transfer them to an ice water bath to cool.
- Slip the skins off with your fingers, then slice the peaches in half, remove the pit, and slice into ¼" slices.
Preventing the Peaches From Browning
As you peel and slice the peaches, add them to a bowl of cold water with ¼ cup of fresh lemon juice added in. This will help prevent oxidation while you prepare the remaining peaches and pie filling base.
Blanching
Since peaches hold a lot of air, it's recommended to blanch the fruit before preparing the pie filling. This prevents siphoning and helps to ensure consistency between the processed jars.
- Fill a large pot with hot water and bring to a boil over high heat.
- Working in batches of 5-6 cups, submerge the sliced peaches and allow to cook for 1 minute.
- Remove the peaches with a slotted spoon (or drain them in a colander).
- Add them to a large bowl to keep warm until the pie filling base is ready.
- Repeat until all fruit is blanched.
Preparing the Filling
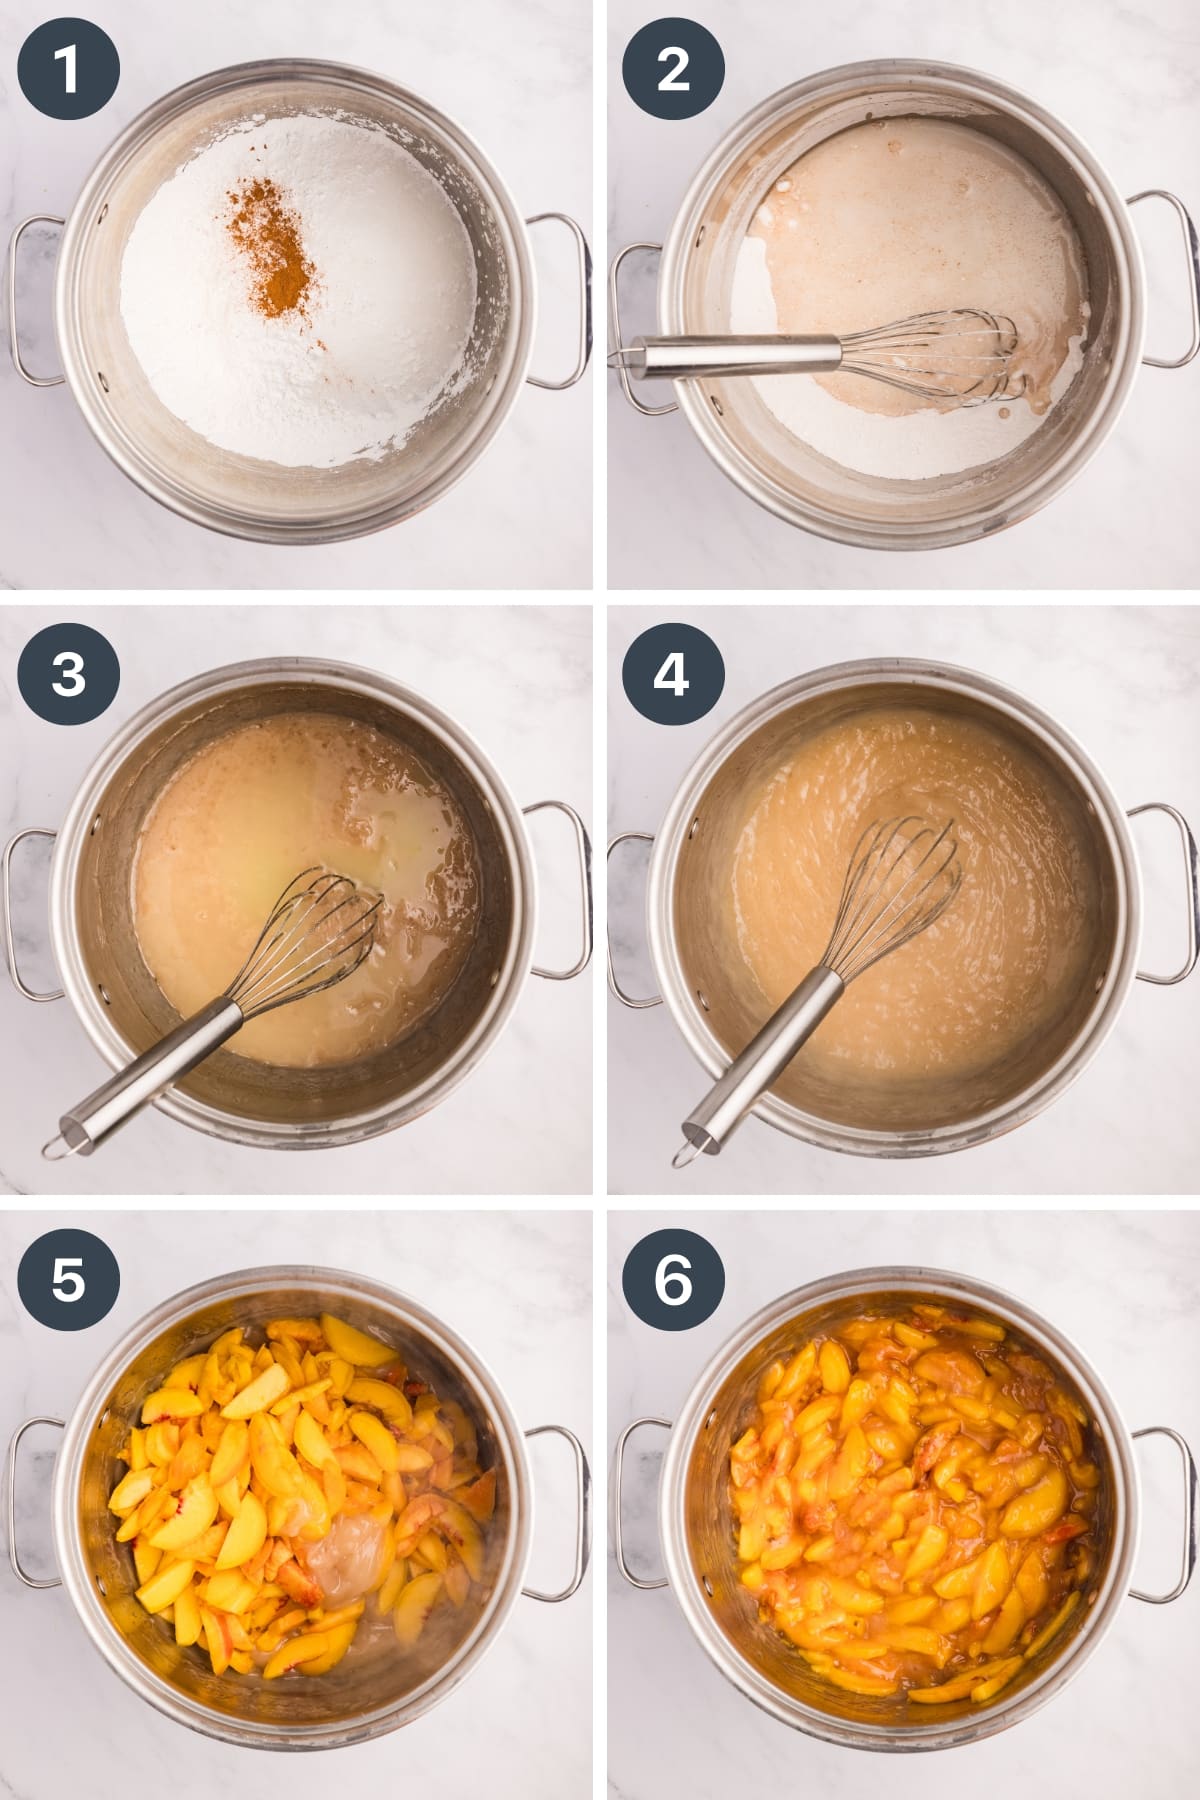
- Add the sugar, ClearJel, and cinnamon to a large pot (or Dutch oven) and whisk well to combine.
- Pour in 2 ¼ cups of cold water and whisk until it is well incorporated.
- Bring the mixture to a low boil over medium heat (or up to medium high heat), whisking constantly to prevent clumping or scorching. Be careful - the mixture will thicken very quickly!
- Once the sugar and ClearJel mixture is thickened and bubbling, add the lemon juice and whisk to combine. Boil for 1 minute, stirring often.
- Remove from the heat and add the blanched peach slices. Fold them in gently until well coated.
- Return to the heat and cook for 3 minutes, or until heated through. Finally, stir in the vanilla extract and and almond extract (if using).
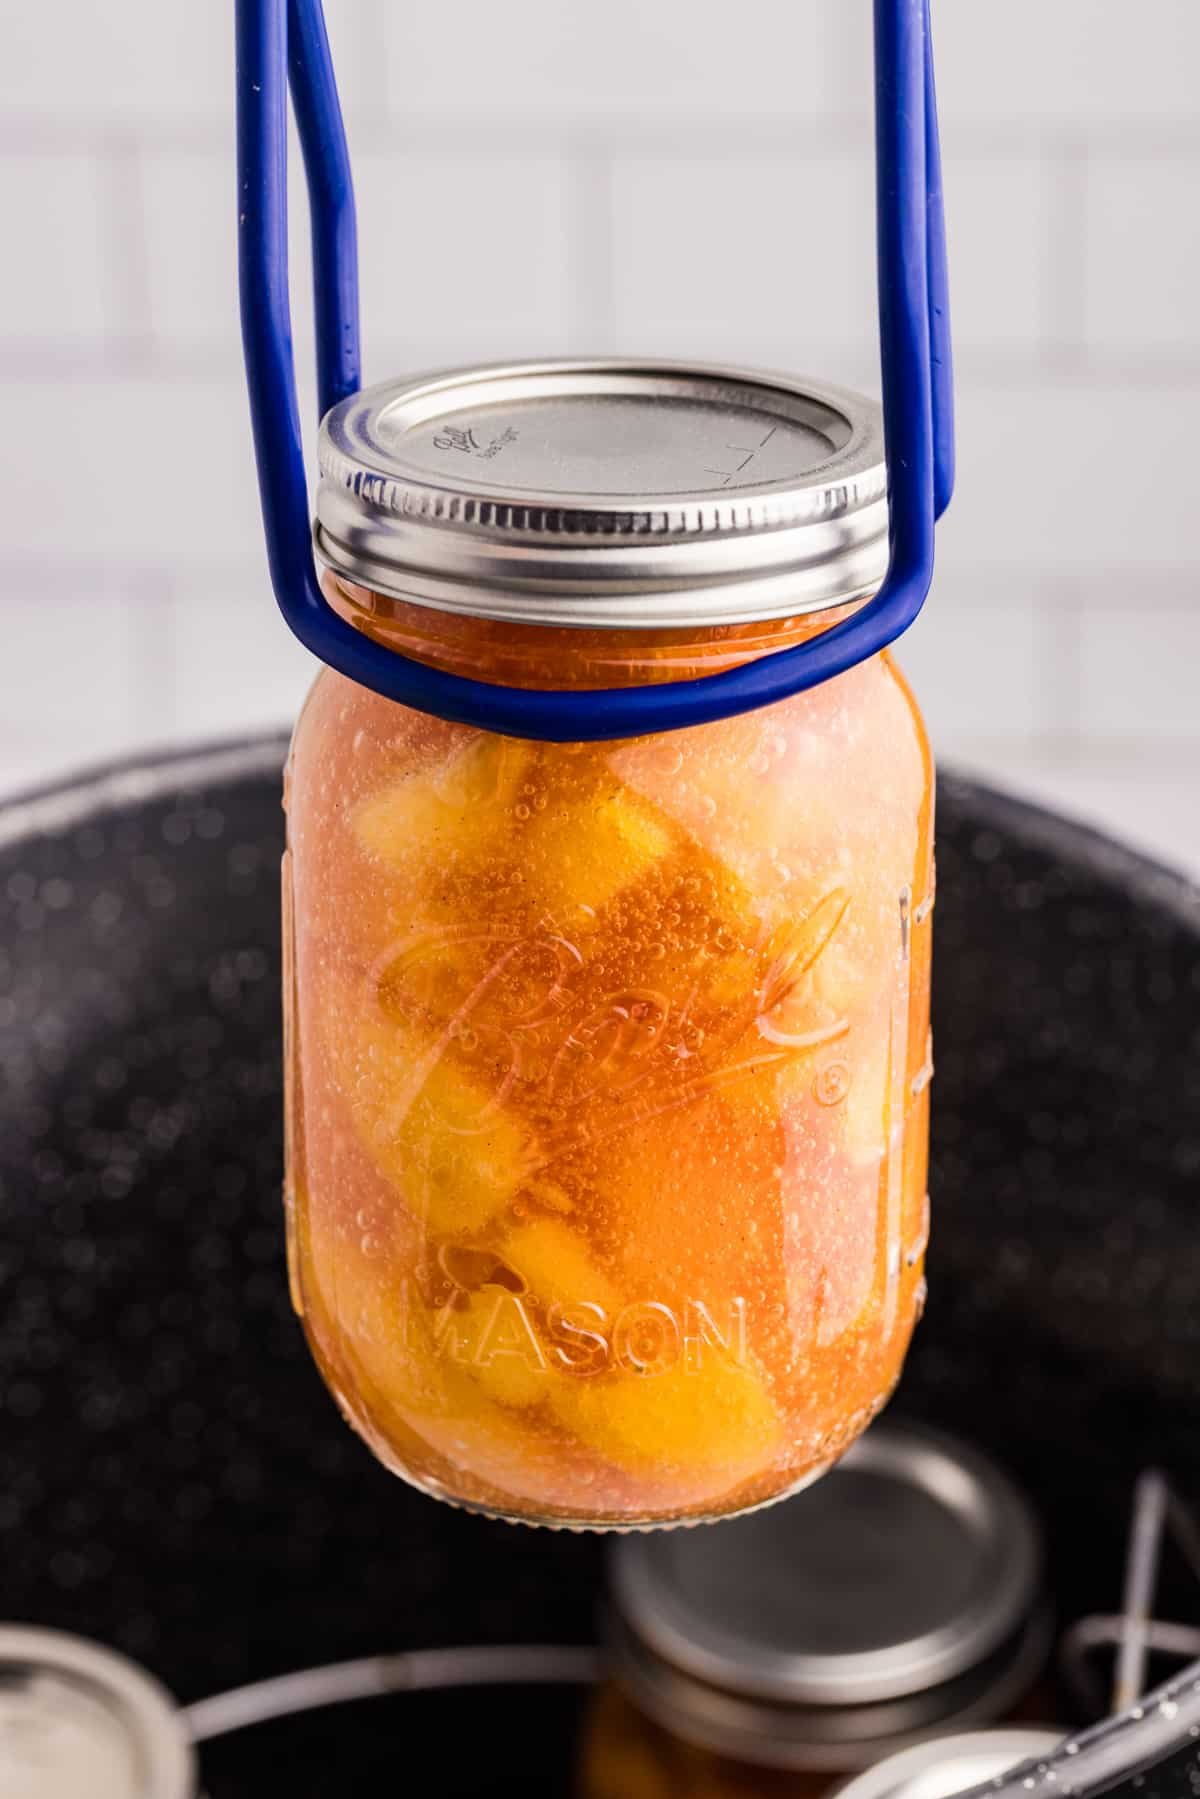
Processing the Jars
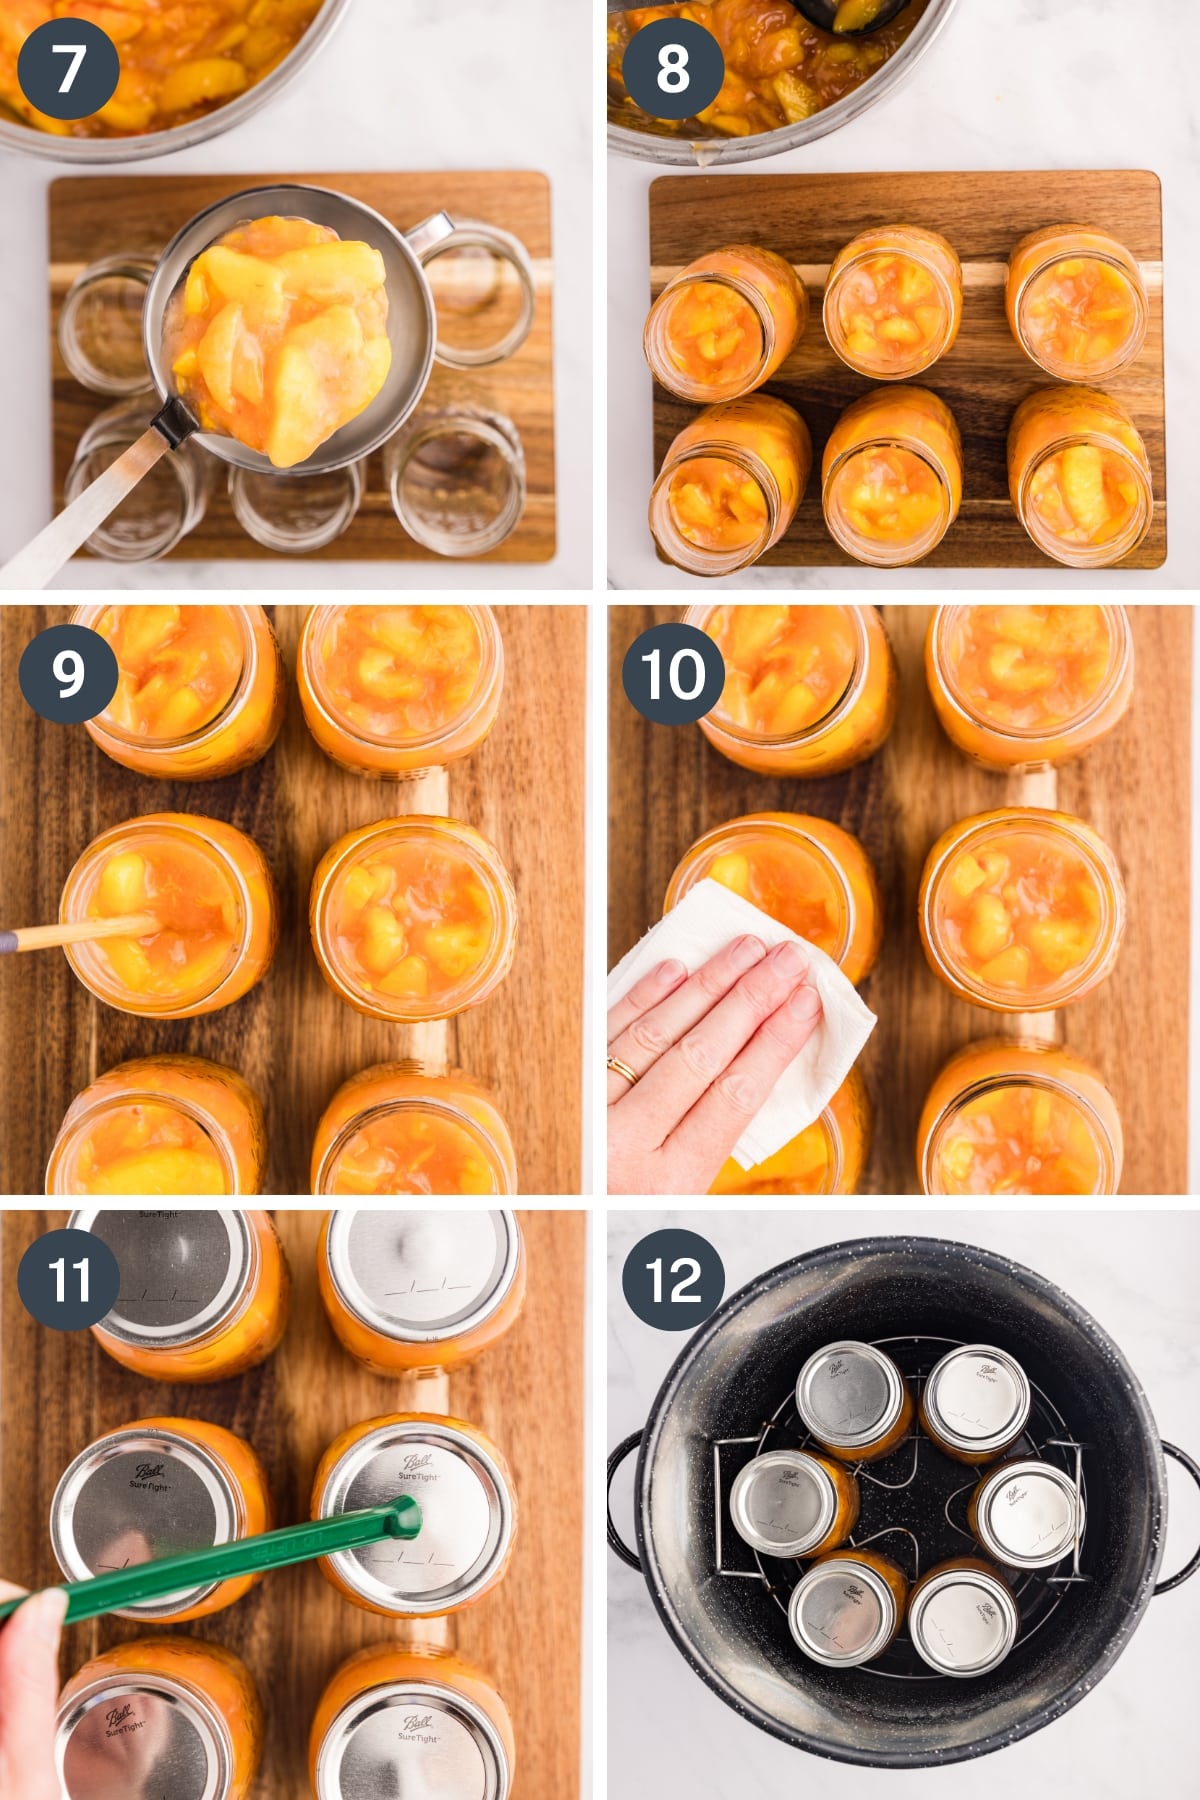
- Fit the hot jars with a wide-mouth canning funnel (optional) and ladle in the pie filling, leaving a generous 1-inch headspace (for wide-mouth jars, or up to 1 ½ inches for regular-mouth jars).
- Repeat until all of the jars are filled, or until all of the pie filling is used up - whichever happens first.
- Remove any air bubbles in the jars using a debubbling tool, clean chopstick, or butter knife. Adjust the headspace as needed (by adding more pie filling if necessary).
- Wipe the rims of the jars with a damp paper towel (or clean kitchen towel).
- Place a warm lid on each of the jars, then secure the lid with a canning ring just until fingertip tight.
- Position the filled jars in the boiling water canner, ensuring they are covered by at least 1-2 inches of water (add boiling water from a kettle if needed). Return to a rapid boil over high heat with the lid in place. Once a boil is reached, process the jars for 30 minutes.
Once the processing time is up:
- Turn off the heat.
- Remove the canner from the heat source, and leave the lid on.
- Allow the canner to rest (with the jars inside) for 5 minutes.
- Remove the lid, then carefully remove the jars using a jar lifter.
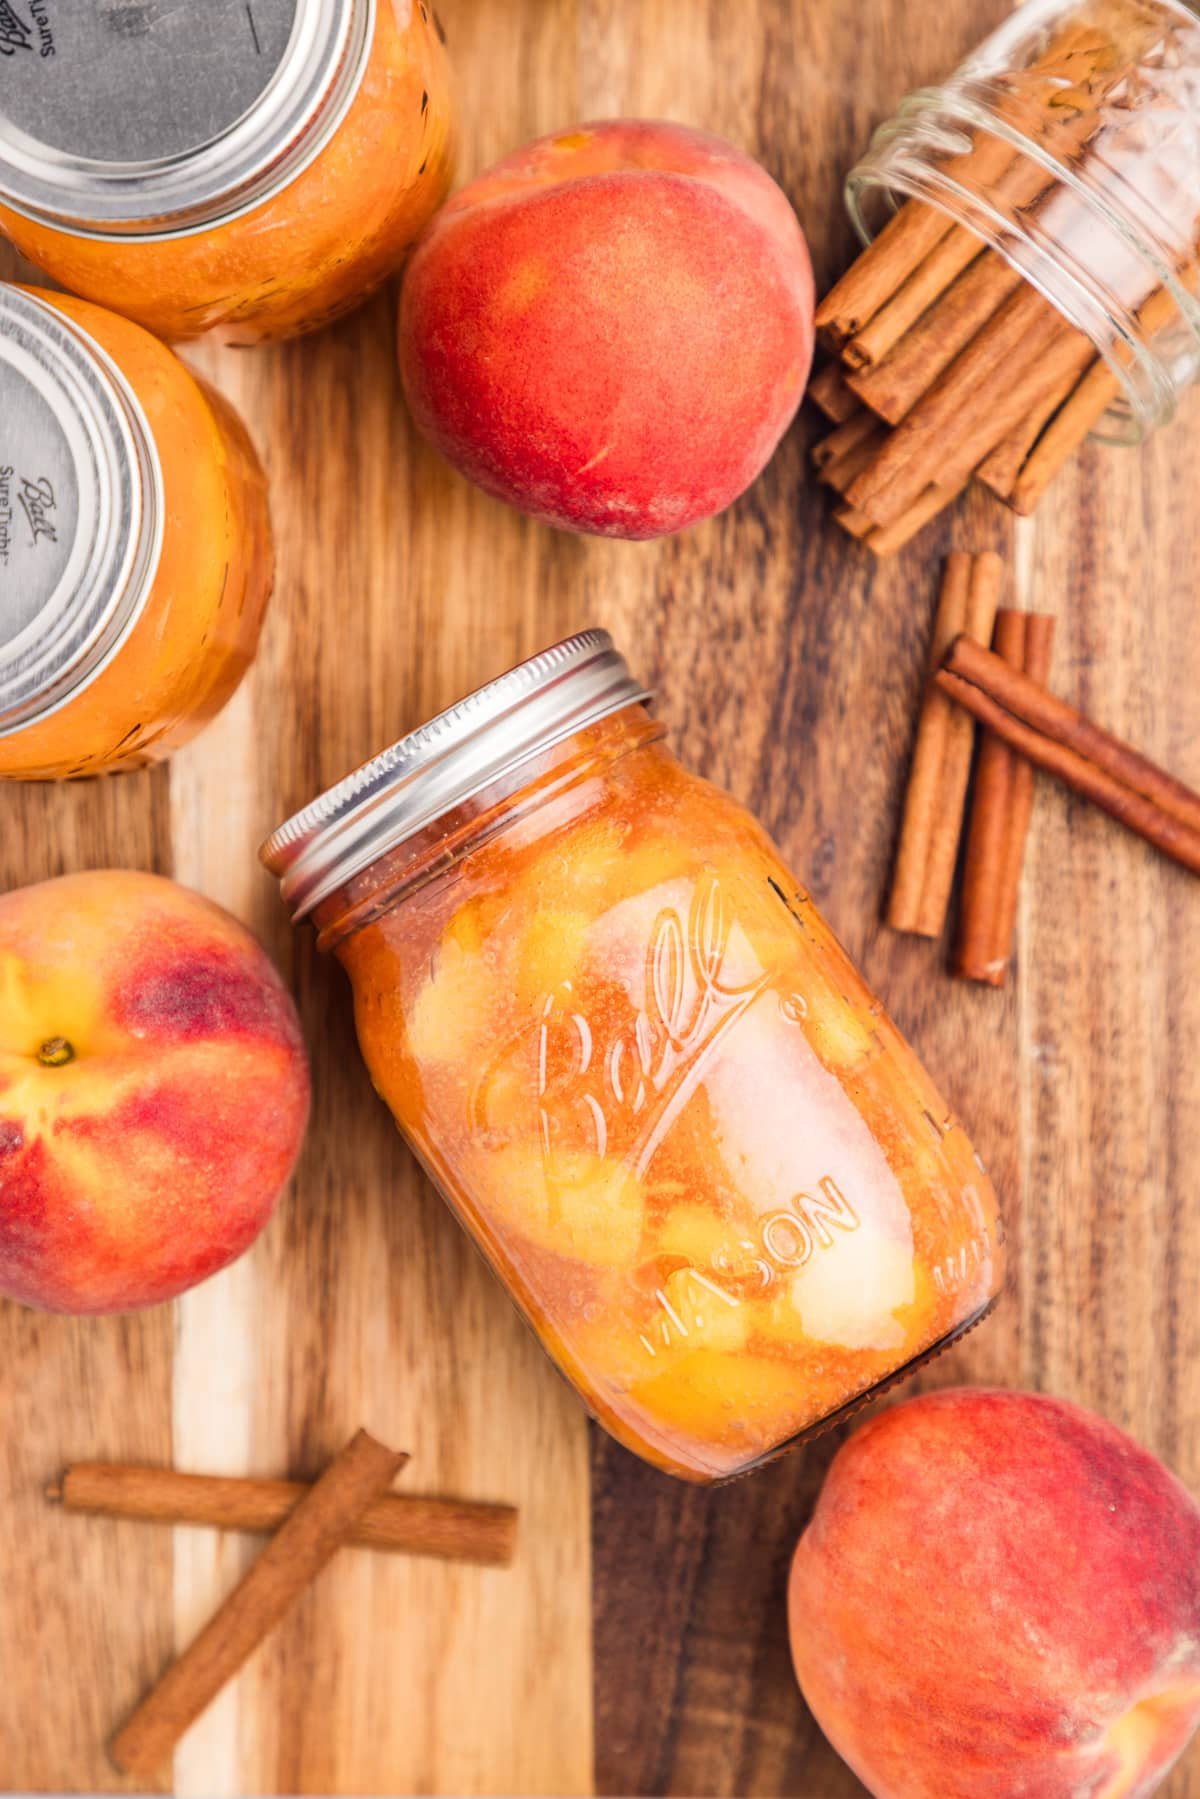
- Place the jars on a thick kitchen towel (or a wire rack). Leave them in a place where they can go undisturbed for 24 hours.
- Check the seals. As the jars seal you will hear a loud POP and the center will indent slightly. Most of the jars will seal in the first 1-2 hours, but some may take longer.
- Tip: a good way to check for a proper seal is to remove the canning ring and lift the jar up by the metal lid.
What if the Jars don't seal?
- If any of your jars fail to seal, it may be for a variety of reasons (inadequate headspace, imperfections around the rim of the glass jar, imperfections in the lid seal, etc).
- It's very common to have a failed seal occasionally, so as long as the vast majority of your jars sealed you can be fairly sure you did everything correctly.
- Jars that did not seal do not need to go to waste. Transfer them to the fridge, where they can be stored for up to a week.
Storing Canned Food
- The USDA states that home-canned food (with a true seal) is good for at least 1 year, while most jar manufacturers say the seal is good for at least 18 months.
- Many experienced canners maintain that canned foods are good for many years, but the quality will begin to degrade after 1 year.
- Keep in a cool, dark place (like a basement) for the best results.
- Never store your home-canned goods with the outer ring in place, and discard if the seal is compromised or there is any off smell or growth in the jar.
- ALWAYS inspect your canned foods for signs of spoilage and for a secure seal before consuming. Lift the jar up by the lid; if the lid falls off - discard immediately as the seal has been compromised.
Expert Tips
- Blanching the peaches is essential. Fruits like peaches and apricots hold a lot of air, and if they are packed raw in a canning jar they can cause the jar to siphon or have inconsistent liquid levels. For this reason it is recommended to heat and blanch peaches before canning - this also helps to prevent browning.
- Follow the recipe. When it comes to canning recipes, it's important to stick to the given instructions and quantities. Adding extra ingredients, changing quantities, etc. can compromise the safety of the finished product. You can adjust the amount of spices to your taste (within reason), and reduce the sugar slightly if you prefer.
- ClearJel is a must. Don't substitute this for cornstarch or flour - Clear Jel is the only thickener approved for canning.
Using Other Fruits
If you want to try other fruits in place of the peaches in this pie filling recipe, there are several that are approved and tested via the Washington State Extension. Be sure to use the same quantities (prepared) and blanch the fruit as directed in the recipe.
- Apricots
- Nectarines
- Plums
- Pears
- Rhubarb
Source: Let's Preserve Fruit Pie Fillings - Washington State Extension
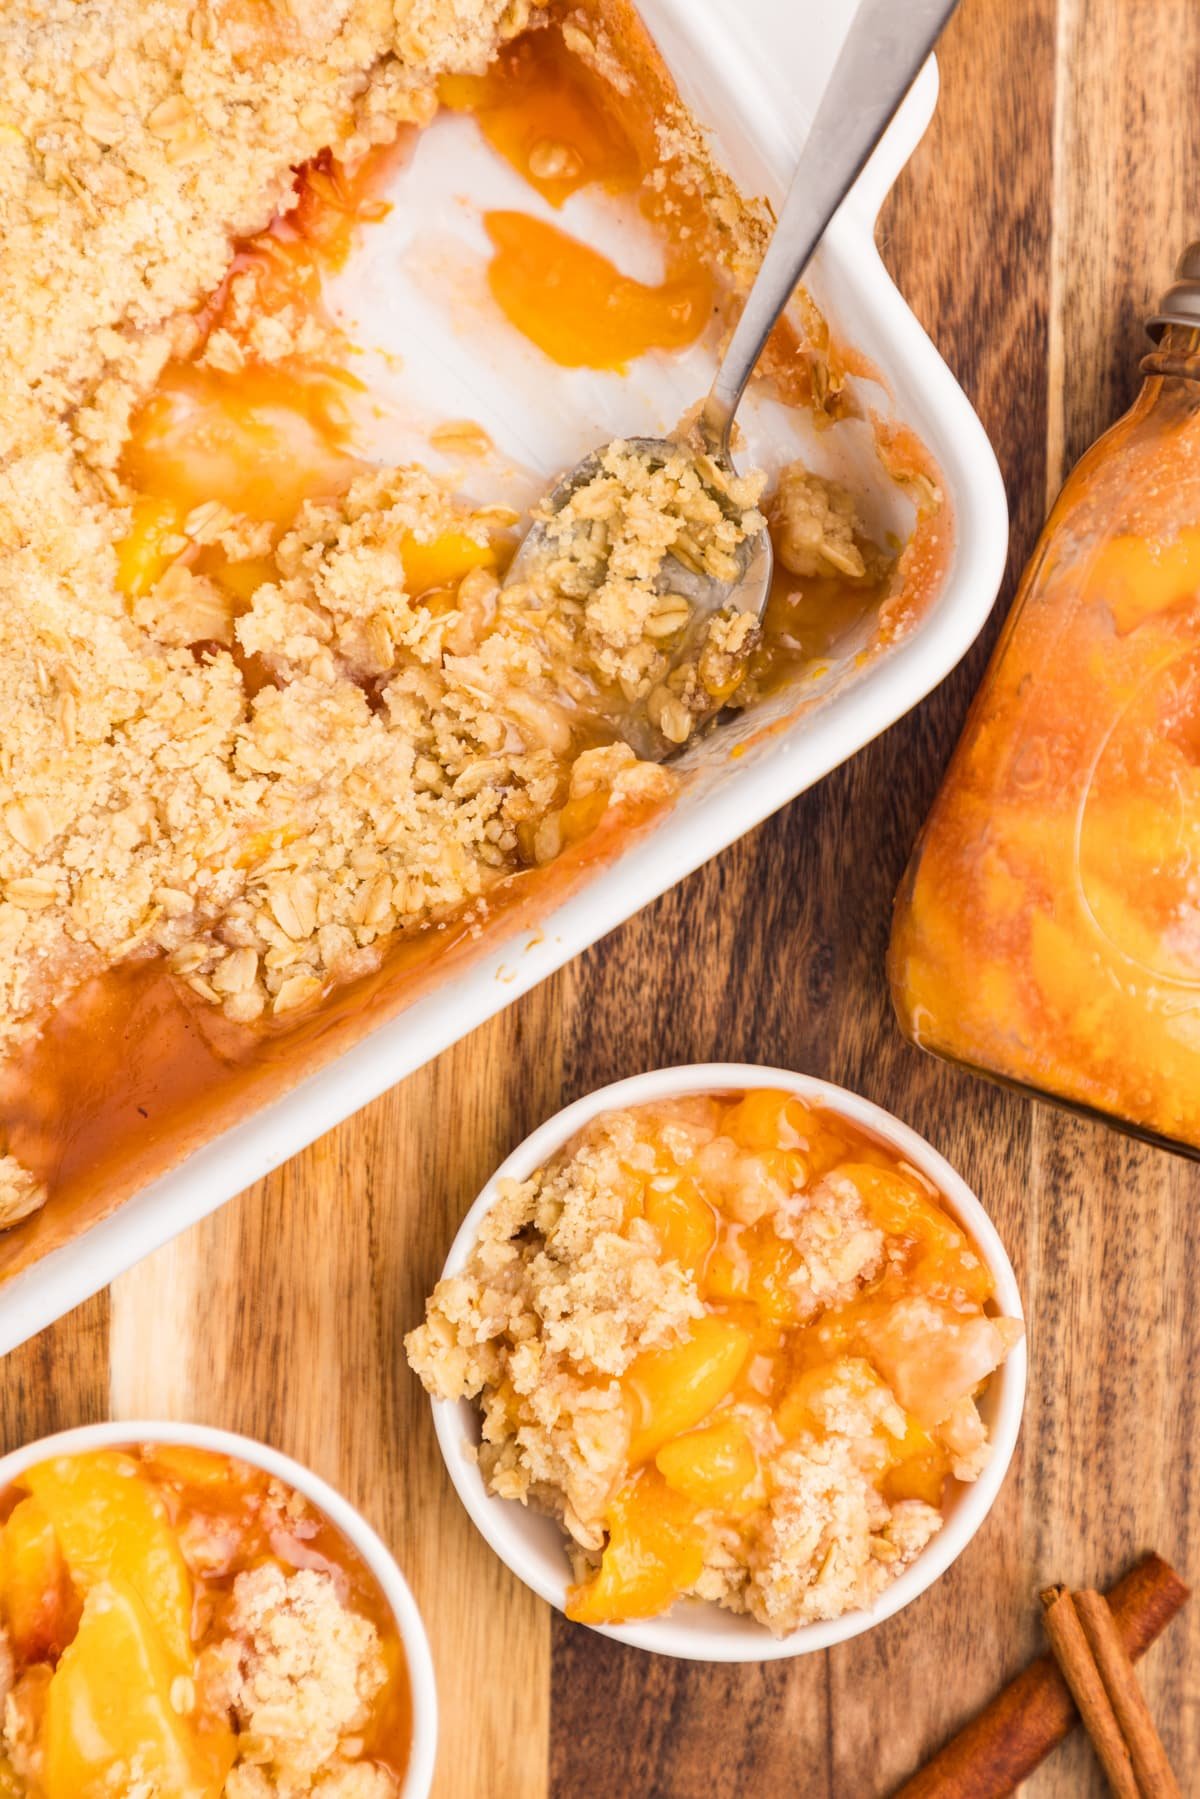
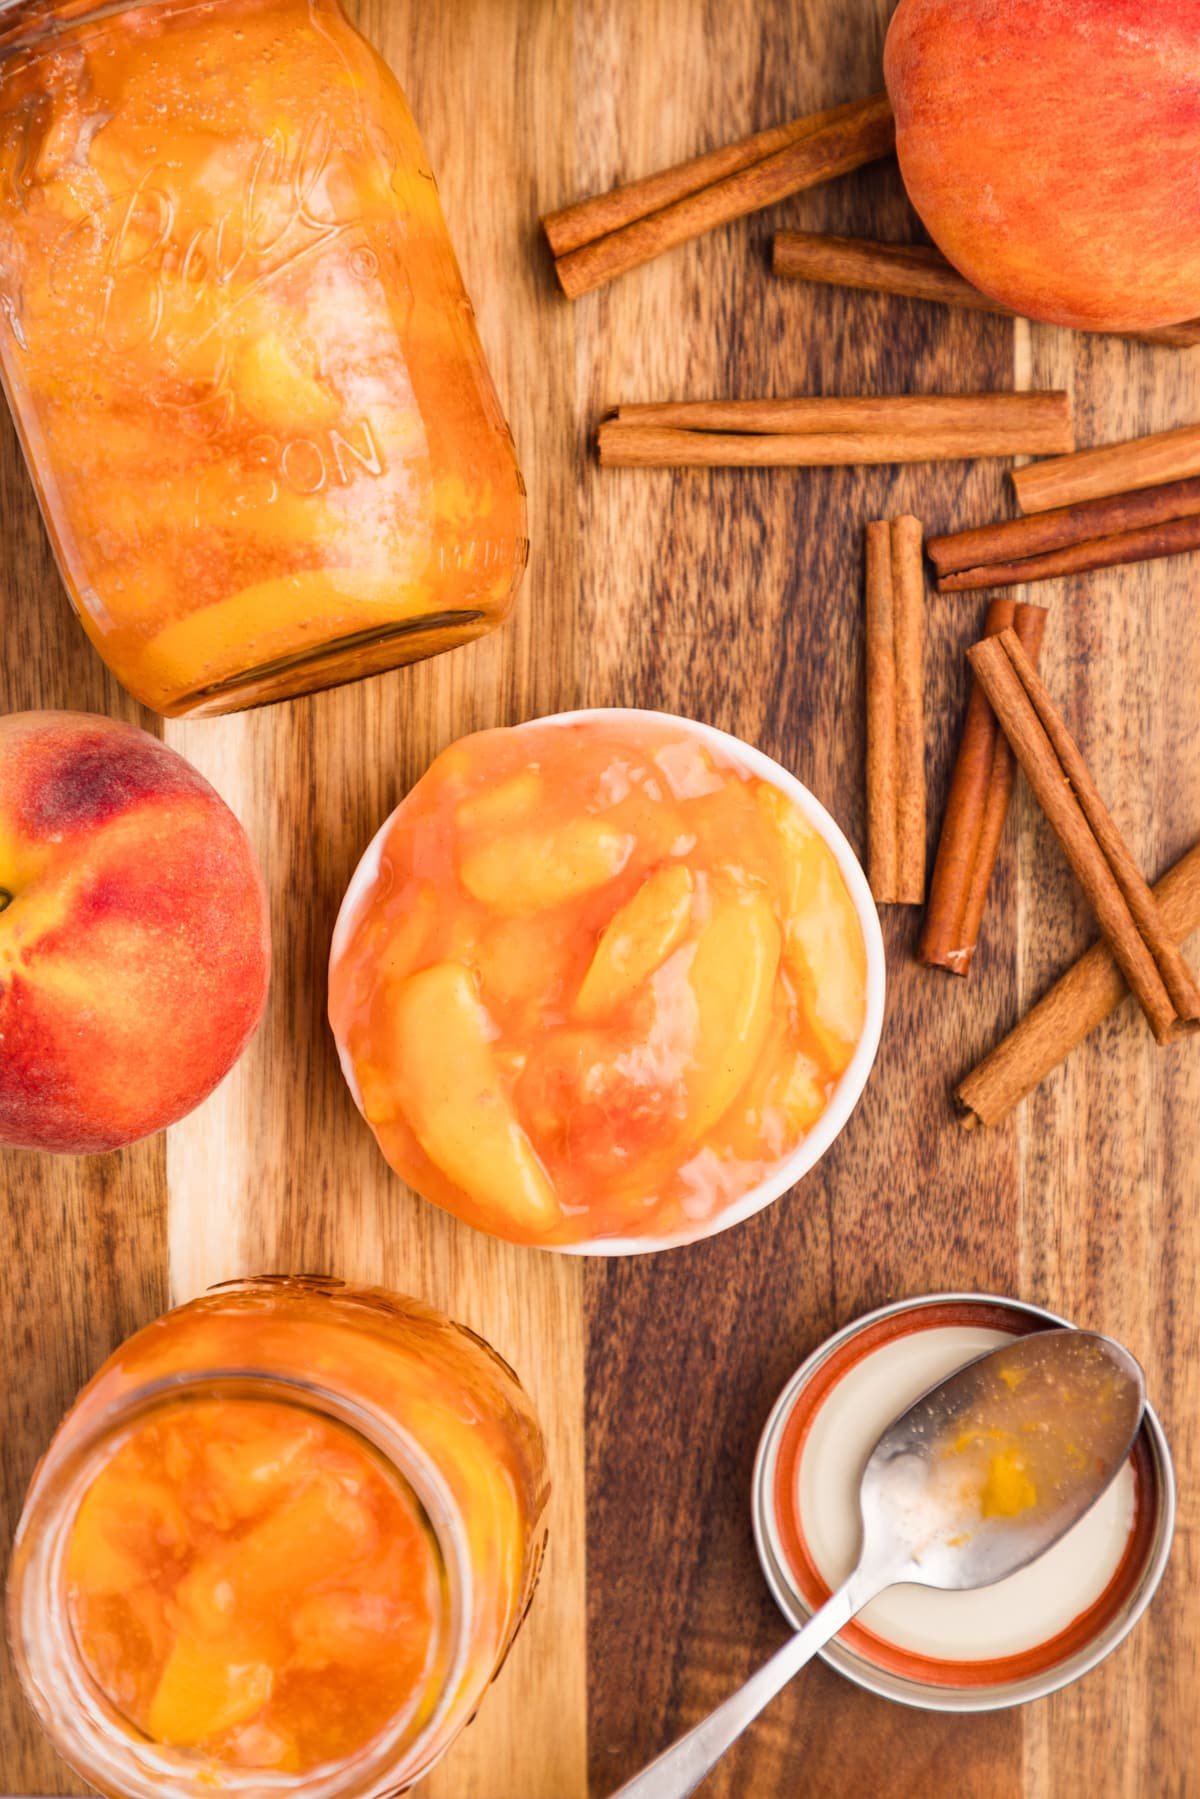
Ways to Use Peach Pie Filling
- Homemade peach pie (I have recipes for classic pie crust, Amish pie crust, AND sourdough pie crust)
- Peach crisp
- Peach cobbler (try my sourdough peach cobbler)
- As a cheesecake topping
- With ice cream
- Filling for hand pies
- Crepe filling (along with maple whipped cream)
- As a pancake topping
- On top of homemade yogurt
Recipes FAQs
Yes, you can use frozen peaches. Be sure to select unsweetened fruit, and thaw it completely before measuring. Drain and reserve the juice that collects during thawing and use it in place of some of the water called for in the pie filling recipe - this helps to improve flavor.
This recipe can be used with either pints or quarts, and which one you use will be a matter of preference. I like to use pints as that seems to be the perfect amount for a smaller family, while quarts are great for full size pies, crisps, and cobblers. Both pints are quarts are processed for 30 minutes.
No. ClearJel is the only approved thickener for canning recipes, and cannot be substituted with alternatives like cornstarch or flour. Density is an important factor in safe canning, and other thickeners create an ultra dense product, which cannot be adequately heated (and thus processed safely).
It's important to use bottled lemon juice rather than freshly squeezed lemon juice. Bottled lemon juice needs to meet certain standards for acidity, while freshly squeezed juice varies in acidity. A high acidity is an important element of safe canning recipes.
You may reduce the amount of sugar if desired, but fruits that are preserved with higher amounts of sugar tend to maintain their texture, flavor, and color better than those canned with less sugar. Keep in mind that the sugar will be spread out over 6 pints (or 3 quarts), and then over multiple servings.
High Altitude Adjustments
If you live in a high elevation area, you will need to make adjustments to your processing times when water bath canning. This includes pie filling recipes like this one.
Processing times for high elevations:
- >1,000 feet: 30 minutes
- 1,000-3,000 feet: 35 minutes
- 3,001-6,000 feet: 40 minutes
- 6,001 + feet: 45 minutes
If you loved this recipe for Canning Peach Pie Filling, let me know by leaving a 5-star review in the recipe card or comment below! You can also tag me on Instagram @littlehomeinthemaking.
📖 Recipe
Canning Peach Pie Filling
Ingredients
- 10 ½ cups sliced fresh peaches* about 6 quarts
- 3 cups granulated sugar
- ¾ cup + 3 tbsp. ClearJel cook-type
- ½ teaspoon ground cinnamon
- 2 ¼ cups cold water
- ¾ cup bottled lemon juice**
- ¼ teaspoon almond extract optional
- ¼ teaspoon vanilla extract optional
Instructions
Cook Mode- Prepare equipment. Wash all canning supplies, jars, lids, and rings in hot soapy water. Sterilize if needed.
- Prepare the Jars and Lids. Fill the canner about ⅔ of the way with water and bring to a boil. Add 7-8 pint jars (or 4 quart jars) filled with hot water and bring to a boil, holding the boil for at least 5 minutes. Turn off the heat and leave in the canner until needed. Add the jar lids to a pot of gently simmering water and keep warm over low heat during the canning process.
- *Prepare the peaches. To easily peel and slice peaches, I recommend scoring an “X” at the bottom of each one. Then bring a large pot of water to a boil, and (working in batches) place 4-5 peaches into the water. Allow to boil for 30-60 seconds, or until the skins start to peel. Immediately remove from the boiling water using a slotted spoon and submerge them in an ice water bath. After the peaches have chilled, you should be able to easily slip off their skins. Then slice them in half, remove the pit, and cut into ½” thick slices. Place the sliced peaches in a large bowl of cold water with ¼ cup of lemon juice added.
- Blanch the peaches. Fill a large pot with hot water and bring to a boil over high heat. Working in batches of 5-6 cups, submerge the sliced peaches and allow to cook for 1 minute. Then remove the peaches with a slotted spoon (or drain them in a colander). Add the peaches to a large bowl to keep warm until the pie filling base is ready. Repeat with the remaining peaches.
- Once the jars have been sterilized, add the sugar, ClearJel, and cinnamon to a very large stainless steel saucepan. Whisk well, then pour in the cold water. Whisk to combine.
- Bring to a low boil over medium heat, whisking constantly to prevent clumping.
- Once the mixture has thickened and begins to bubble, add the lemon juice. Whisk to combine.
- Boil the pie filling mixture for 1 full minute.
- Add in the drained peaches and stir them in gently to combine. Heat for 3 minutes, stirring often.
- Once the peaches are heated through, stir in the vanilla and almonds extracts (if using). Remove from the heat.
- Fit the jar with a canning funnel, and ladle the peach pie filling into the jar, leaving a generous 1” headspace (up to 1 ½ inches if using a regular mouth jar***). Remove any air bubbles with a clean butter knife or debubbler tool. Adjust headspace if necessary.
- Wipe the rim of the jar with a clean, damp kitchen towel (or paper towels). Using a magnetic lid lifter, center a warm lid on the jar, then secure a canning ring until it is fingertip tight.
- Place the filled jar in the canner, then repeat with the remaining jars until all of the jars are filled (or the peach filling has been used up). You should get 5-6 pints (or 2-3 quarts). Feel free to scale the recipe up or down according to how many peaches you would like to preserve.
- Place the lid on the canner and bring it back up to a rolling boil over high heat.
- Once a boil has been reached, process for 30 minutes.
- When the 30 minutes are up, turn off the heat and remove the canner from the element. Remove the lid, and wait 5 minutes.
- After the 5 minutes are up, remove the jars with a jar lifter and place them on a thick kitchen towel. Leave them completely undisturbed for 24 hours.
- After 24 hours, check the seals and remove the canning rings. Wipe down the jars and label them. Any jars that have not been sealed should be moved to the fridge to be eaten right away.
Notes
- Nectarines
- Pears
- Rhubarb
- Apricots
- Plums
- 1,001-3,000 feet: 35 minutes
- 3,001-6,000 feet: 40 minutes
- 6,001 feet+: 45 minutes
Nutrition
Please note that some of my blog posts here at Little Home in the Making may contain affiliate links. If you make a purchase through these links, I will get a small commission at no additional cost to you. See our disclaimer for more information.
The majority of the canning recipes here at Little Home in the Making are adapted from tested recipes from the USDA, National Center for Home Food Preservation (NCHFP), and other trusted sources. Check the recipe card for listed sources and relevant links.

Dolly | Little Home in the Making says
We love this recipe in our home and it's perfect for using in pies, crisps, cobblers, or even to top cheesecakes. I hope you enjoy it as much as we have.
Terri says
I have picky eaters and they love this peach filling! Thank you
Cindy colson says
I am new to canning but the instructions in this post were very well explained and I would love be to try this I do have a question do I need to get a pressure cooker or will a big pot do the same also where do I find a jar lifter
Dorothy from Folk Kitchen says
Hi Cindy! So glad you found the instructions helpful! If you are doing water bath canning recipes you can use a large pot, just make sure you have something to elevate the jars off of the bottom of the pot. You can purchase canning racks separately for around $10, but I find them in the thrift store all the time! Sometimes you can even find water bath canning pots there. Jar lifters can be purchased on Amazon, hardware stores, etc. I've never seen one at a thrift store, but you might have some luck checking marketplace.
Tracie says
10 1/2 cups sliced peaches, about.6 quarts. How can this be? Isn't 6 quarts is 24 cups?
Dolly | Little Home in the Making says
I meant quarts purchased whole! About 6 quarts of whole peaches will be about 10 1/2 cups once peeled, pitted, and sliced. I'll see if I can re-word that.
Zena says
Can I keep the sliced peaches in the water and lemon juice overnight? I have 2 young kids and sometimes canning doesn't happen all in one day lol
Dolly | Little Home in the Making says
I totally understand about canning be difficult with kids! I'm not sure about keeping the peaches overnight. The fruit might soften and make it mushy for the actual canning process.
Krystall Parker says
ur better off to make the filing and let it all set over night that way rather than just the fruit. this is how im doing it. I've did quite a few things this way. good luck
Sweet Sue says
I live in the Caribbean and we do t have peaches but we DO have lots of mangoes. I substitute them into many peach recipes. Can the substitute here?
Dolly | Little Home in the Making says
Unfortunately with most canning recipes you can't make swaps, but if you check out canning jar manufacturers or authorities like Ball, Kerr, or NCHFP you should be able to find recipes for canning mangoes.
Clarrisa says
Mine didn't get thick at all and I am using certainly for jams and jellies. Is this the right kind of liquid pectin? Why doesn't it thicken? I followed the instructions but it never really got thick.
Dolly | Little Home in the Making says
Hi Clarrisa, the recipe uses Clear Jel, not pectin. Unfortunately there are no safe substitutes for clear jel, and it thickens much more than pectin does. Pectin is used just for jam and jelly, not pie filling.
Cheryl says
I made this recipe yesterday. It is wonderful. I made a double batch in pints jars for a variety of uses. I think I could eat the jar with a spoon! The recipe is so simple. I plan other than the obvious to use in my ninja slushie and ninja creami machines. We make most everything we eat at home. With cooking at home desserts sometimes get missed. So I added this recipe to fix that issue. lol
Dorothy Bigelow says
So glad you enjoyed the recipe! I really need to try it in the Ninja Creami now!