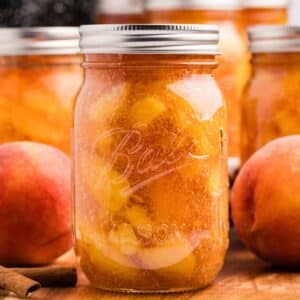
Canning Peach Pie Filling
This easy recipe for Canning Peach Pie Filling is a simple way to preserve peaches all year round!
Print
Pin
Servings: 6 pints
Calories: 647kcal
Ingredients
- 10 ½ cups sliced fresh peaches* about 6 quarts
- 3 cups granulated sugar
- ¾ cup + 3 tbsp. ClearJel cook-type
- ½ teaspoon ground cinnamon
- 2 ¼ cups cold water
- ¾ cup bottled lemon juice**
- ¼ teaspoon almond extract optional
- ¼ teaspoon vanilla extract optional
Instructions
Cook Mode- Prepare equipment. Wash all canning supplies, jars, lids, and rings in hot soapy water. Sterilize if needed.
- Prepare the Jars and Lids. Fill the canner about ⅔ of the way with water and bring to a boil. Add 7-8 pint jars (or 4 quart jars) filled with hot water and bring to a boil, holding the boil for at least 5 minutes. Turn off the heat and leave in the canner until needed. Add the jar lids to a pot of gently simmering water and keep warm over low heat during the canning process.
- *Prepare the peaches. To easily peel and slice peaches, I recommend scoring an “X” at the bottom of each one. Then bring a large pot of water to a boil, and (working in batches) place 4-5 peaches into the water. Allow to boil for 30-60 seconds, or until the skins start to peel. Immediately remove from the boiling water using a slotted spoon and submerge them in an ice water bath. After the peaches have chilled, you should be able to easily slip off their skins. Then slice them in half, remove the pit, and cut into ½” thick slices. Place the sliced peaches in a large bowl of cold water with ¼ cup of lemon juice added.
- Blanch the peaches. Fill a large pot with hot water and bring to a boil over high heat. Working in batches of 5-6 cups, submerge the sliced peaches and allow to cook for 1 minute. Then remove the peaches with a slotted spoon (or drain them in a colander). Add the peaches to a large bowl to keep warm until the pie filling base is ready. Repeat with the remaining peaches.
- Once the jars have been sterilized, add the sugar, ClearJel, and cinnamon to a very large stainless steel saucepan. Whisk well, then pour in the cold water. Whisk to combine.
- Bring to a low boil over medium heat, whisking constantly to prevent clumping.
- Once the mixture has thickened and begins to bubble, add the lemon juice. Whisk to combine.
- Boil the pie filling mixture for 1 full minute.
- Add in the drained peaches and stir them in gently to combine. Heat for 3 minutes, stirring often.
- Once the peaches are heated through, stir in the vanilla and almonds extracts (if using). Remove from the heat.
- Fit the jar with a canning funnel, and ladle the peach pie filling into the jar, leaving a generous 1” headspace (up to 1 ½ inches if using a regular mouth jar***). Remove any air bubbles with a clean butter knife or debubbler tool. Adjust headspace if necessary.
- Wipe the rim of the jar with a clean, damp kitchen towel (or paper towels). Using a magnetic lid lifter, center a warm lid on the jar, then secure a canning ring until it is fingertip tight.
- Place the filled jar in the canner, then repeat with the remaining jars until all of the jars are filled (or the peach filling has been used up). You should get 5-6 pints (or 2-3 quarts). Feel free to scale the recipe up or down according to how many peaches you would like to preserve.
- Place the lid on the canner and bring it back up to a rolling boil over high heat.
- Once a boil has been reached, process for 30 minutes.
- When the 30 minutes are up, turn off the heat and remove the canner from the element. Remove the lid, and wait 5 minutes.
- After the 5 minutes are up, remove the jars with a jar lifter and place them on a thick kitchen towel. Leave them completely undisturbed for 24 hours.
- After 24 hours, check the seals and remove the canning rings. Wipe down the jars and label them. Any jars that have not been sealed should be moved to the fridge to be eaten right away.
Notes
Yield: 5-6 pints (500ml) or 2-3 quarts (1L). Feel free to double the recipe if using quarts to produce a full canner load.
Note: Do not replace ClearJel with cornstarch or flour. ClearJel is the only thickener approved for safe canning.
Adapted from Complete Guide to Home Canning - United States Department of Agriculture
Other fruits that can be used (prepared, measured, and blanched):
- Nectarines
- Pears
- Rhubarb
- Apricots
- Plums
- 1,001-3,000 feet: 35 minutes
- 3,001-6,000 feet: 40 minutes
- 6,001 feet+: 45 minutes
Nutrition
Calories: 647kcal | Carbohydrates: 163g | Protein: 3g | Fat: 1g | Saturated Fat: 0.1g | Polyunsaturated Fat: 0.2g | Monounsaturated Fat: 0.2g | Sodium: 44mg | Potassium: 365mg | Fiber: 5g | Sugar: 123g | Vitamin A: 881IU | Vitamin C: 23mg | Calcium: 19mg | Iron: 1mg
