This straight-forward recipe for canning beets is perfect for food storage and uses just 2 simple ingredients - beets and water. You'll learn everything you need to know about canning beets safely in a pressure canner, or you can check out my pickled beets recipe if you want to try water bath canning instead!
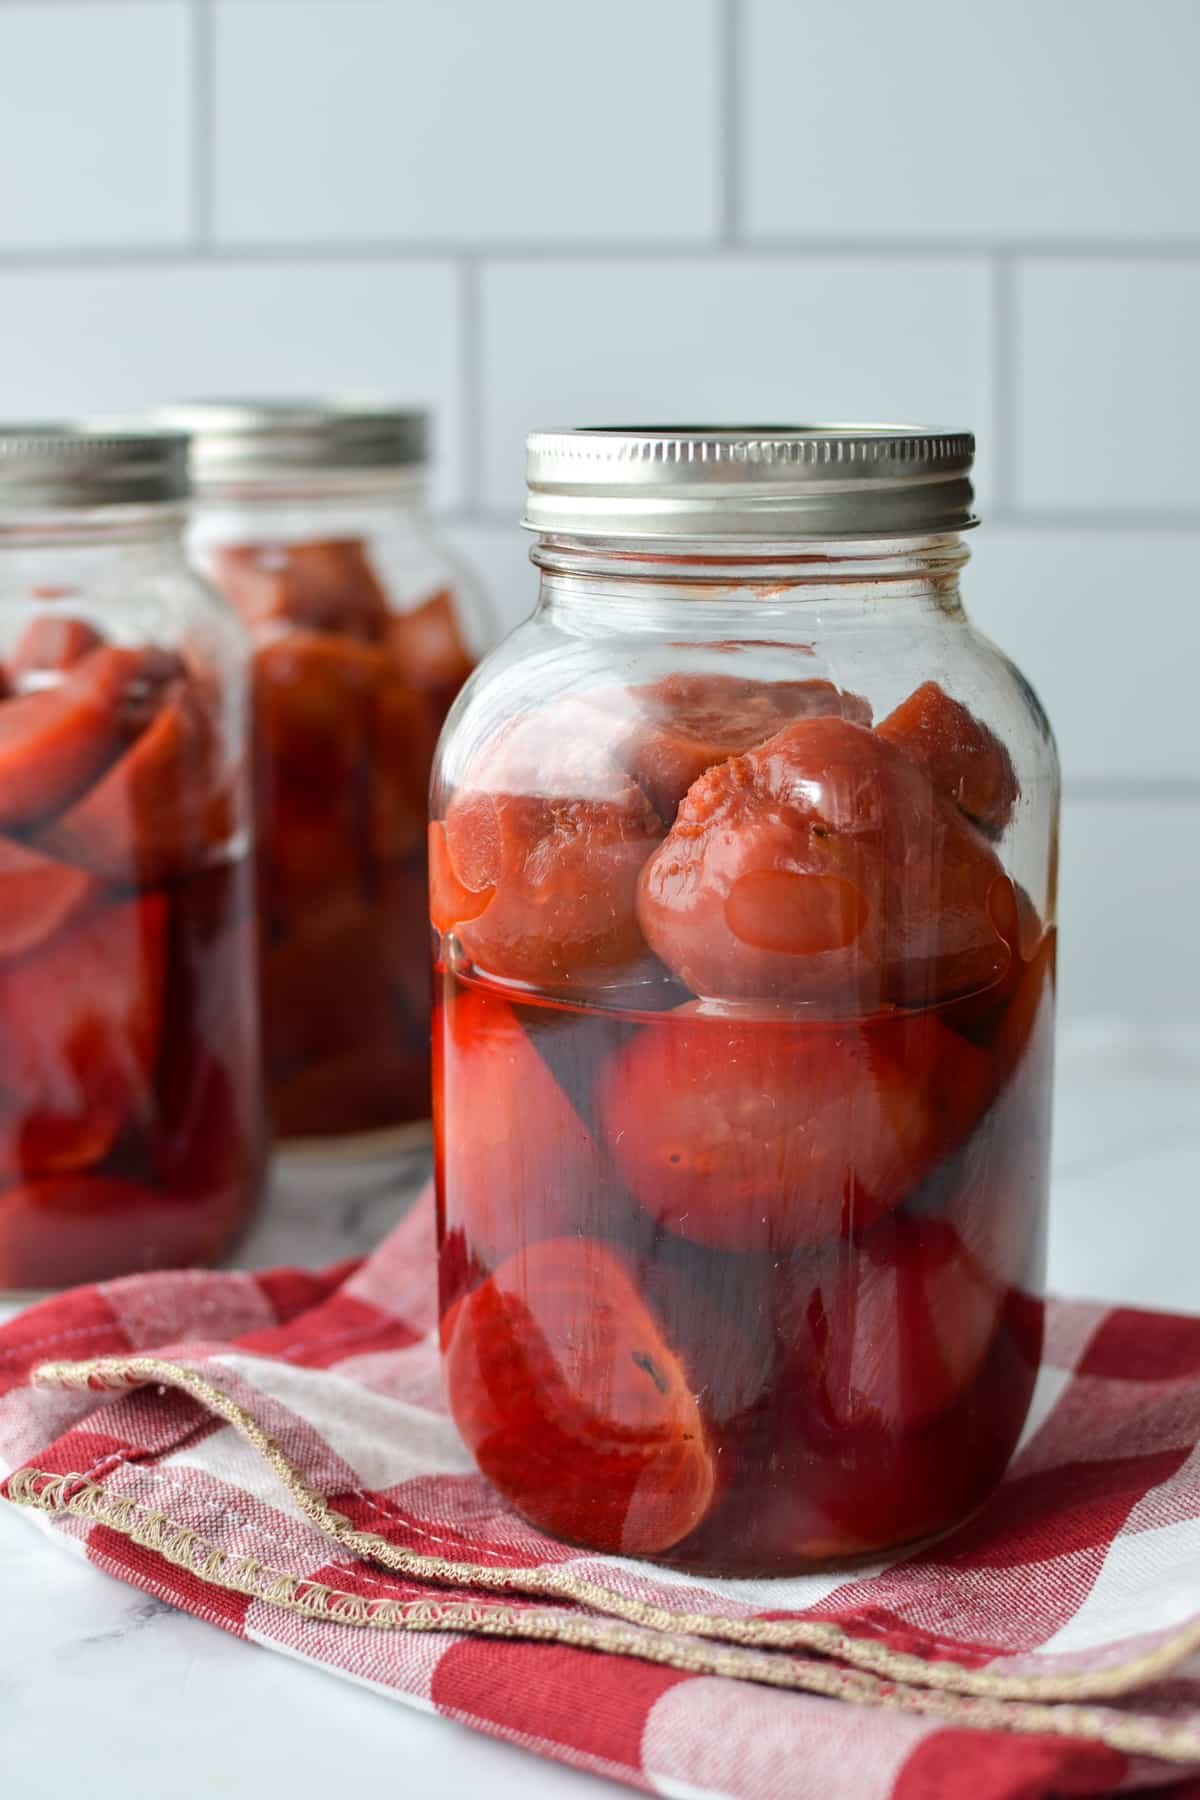
If you're like me and you've been simultaneously faced with too much food, AND a strong conviction against wasting said food, you've probably already been enticed by the idea of canning.
While you may have canned a batch or two of strawberry jam, or even some bread and butter pickles, have you ventured into the realm of pressure canning yet? Pressure canning allows you to preserve food that you couldn't otherwise do with your typical water bath canning methods.
I've been canning for more than a decade now, and I've been pressure canning for about 5 years, and it's been a great benefit to my food storage plan as well as a great way to ensure nothing goes to waste. This method for canning beets in the pressure canner is straight-forward, beginner-friendly, and very detailed. I hope it wins you over to pressure canning and all of the wonderful possibilities it offers.
Benefits of Canning Beets:
- Great for food storage! While I love some pickled beets for adding to my meals, sometimes I want something simple that I can easily add to my favorite dishes or roast in the oven. These plain beets are perfect for that.
- If you grew a ton of beets (or picked up a huge amount at the Farmer's Market), this is a great way to preserve a bumper crop.
- While pickled beets contain sugar to balance the acidity, these pressure canned beets are completely sugar free and require just 2 ingredients.
- These plain canned beets can be added to your favorite meals easily throughout the year. Think of soups, stews, roasting, Harvard beets, etc.
Ingredients
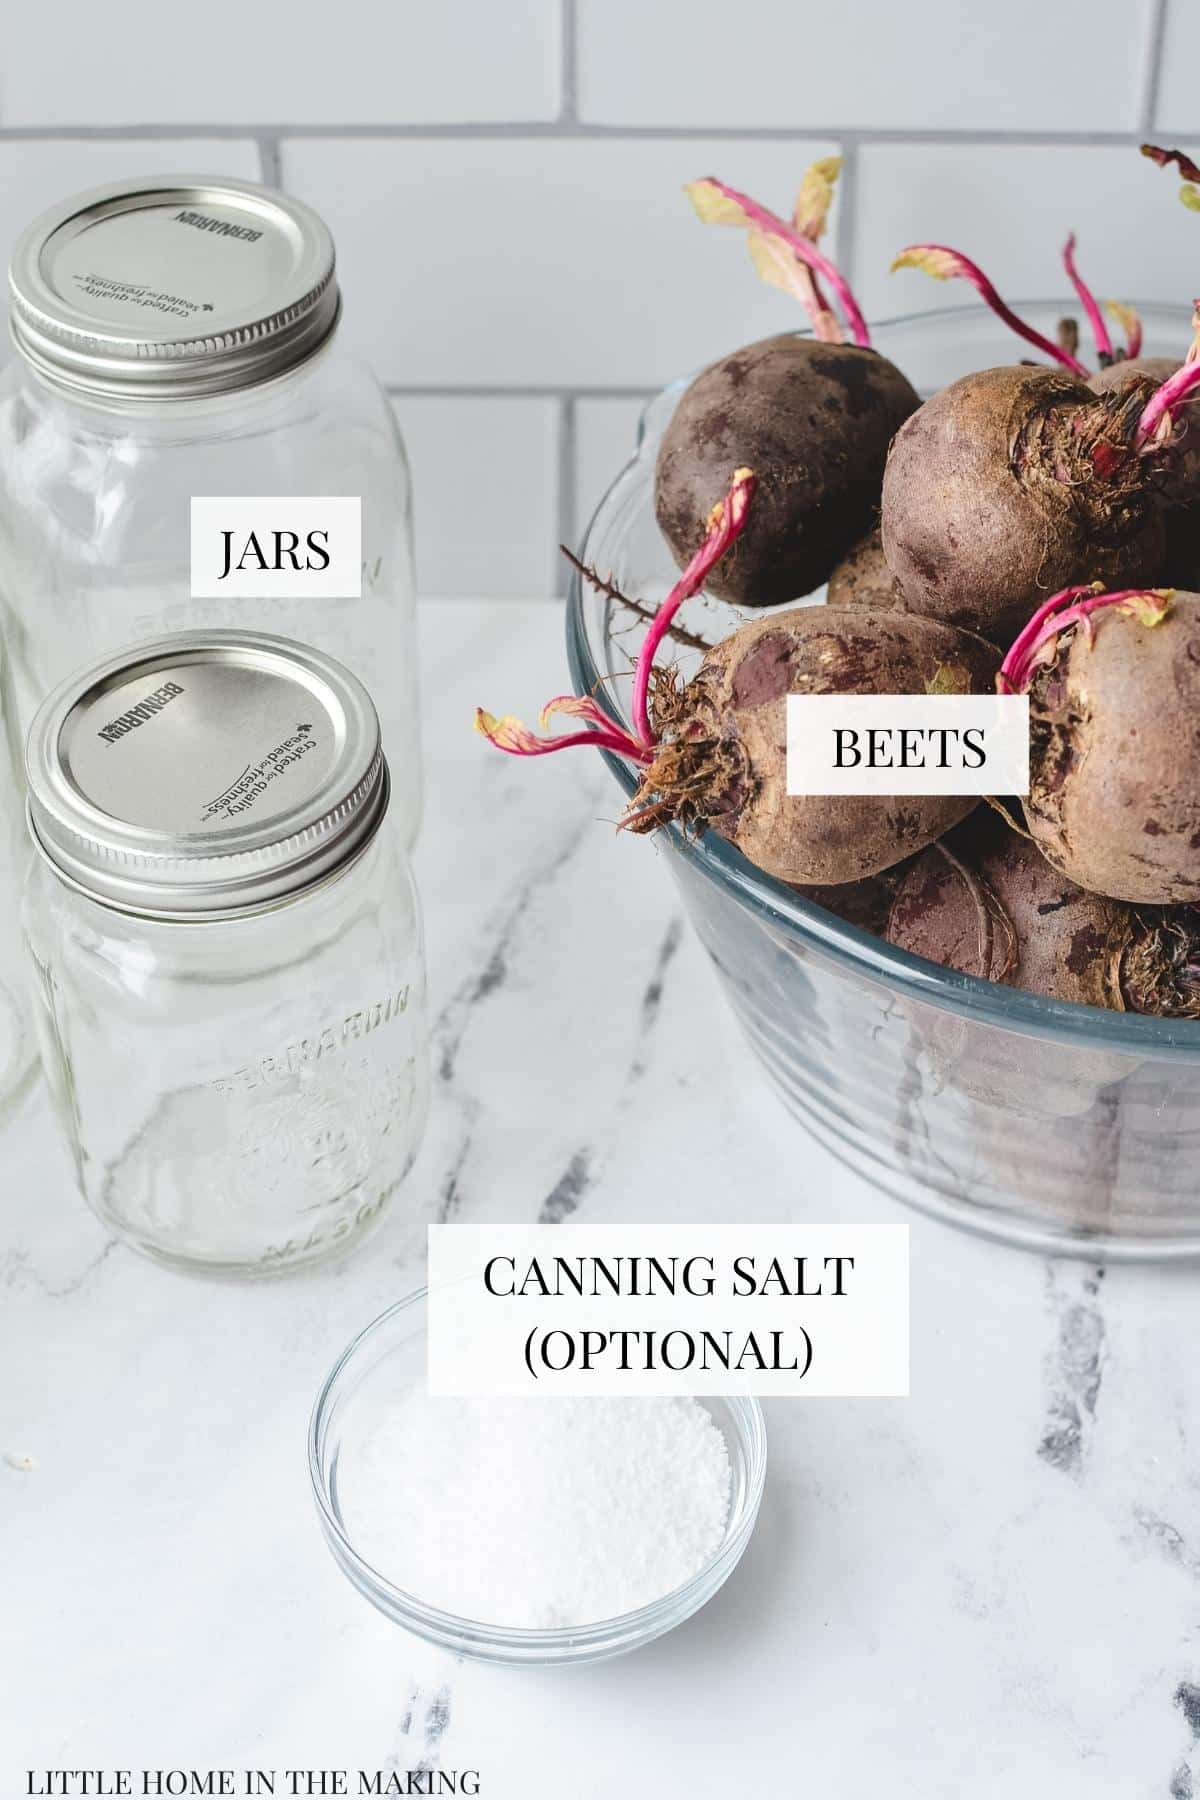
- Beets: Seek out fresh, good quality beets. It's okay if they have some bruising, as that can be cut away, but they should be free from mold or obvious disease. You’ll need anywhere from 2-3 ½ pounds of beets per quart sized jar (or 1-1 ¾ pounds for a pint jar). Use the lower range if you’re keeping your beets in larger pieces (whole or halved) and the higher range if you’re cubing them.
- Water: You'll need enough water to first cook the beets, and then additional fresh boiling water for adding to the hot jars.
- Canning salt (optional): To preserve color and add flavor, use 1 teaspoon of canning salt in each quart jar. This is an optional ingredient, but highly recommended. Canning salt is preferred since it does not cloud the liquid and dissolves easily.
Equipment and Tools:
- Pressure canner: I have the 23-quart Presto model and I use it for both pressure canning and water bath canning. It's been a pleasure to use in my kitchen, and I find the manual easy to navigate. This is a dial gauge pressure canner. The much coveted All American Canner is a weighted gauge model, and is very popular with homesteaders.
- Canning jars and lids: This recipe uses quart jars, but you pint jars can be used if you prefer. Make sure your jars are in good shape, with no nicks around the lip of the jar. Seek out new canning lids each time you can, but rings can easily be reused.
- Wide mouth funnel: This makes adding larger chunks of beets to a canning jar simple. I have a stainless one that I love because it is easy to sterilize.
- Canning tools: like a jar lifter, magnetic lid lifter, and headspace checker.These are optional, but make the canning process so much easier.
Preparing the Beets
Before you start canning beets, they need to be partially cooked, peeled, and prepared for pressure canning. I have a tutorial for preparing beets for canning, which has step-by-step photos and instructions. In this post, I'll give you the steps needed to prepare your fresh beets.
Preparing Beets for Pressure Canning
- Weigh or portion out how many beets you will need for your canning recipe. For canning plain beets, you will need about 2-3 ½ pounds per quart jar.
- Scrub the beets gently under running water, setting them aside.
- Leave the taproot (long thin piece) intact, and trim the stem to 2” if needed.
- Sort the beets by size, placing the largest ones on the bottom of a large stockpot.
- Keep adding the beets by size, from largest to smallest. This ensures the larger beets have the most direct heat. Thereby allowing them to cook through at a similar rate to the smaller beets at the top of the pot.
- Once all of the beets are added, add enough water to the stockpot to cover the beets by ½”.
- Place the lid on the stockpot, and set the element to high heat. Bring to a boil.
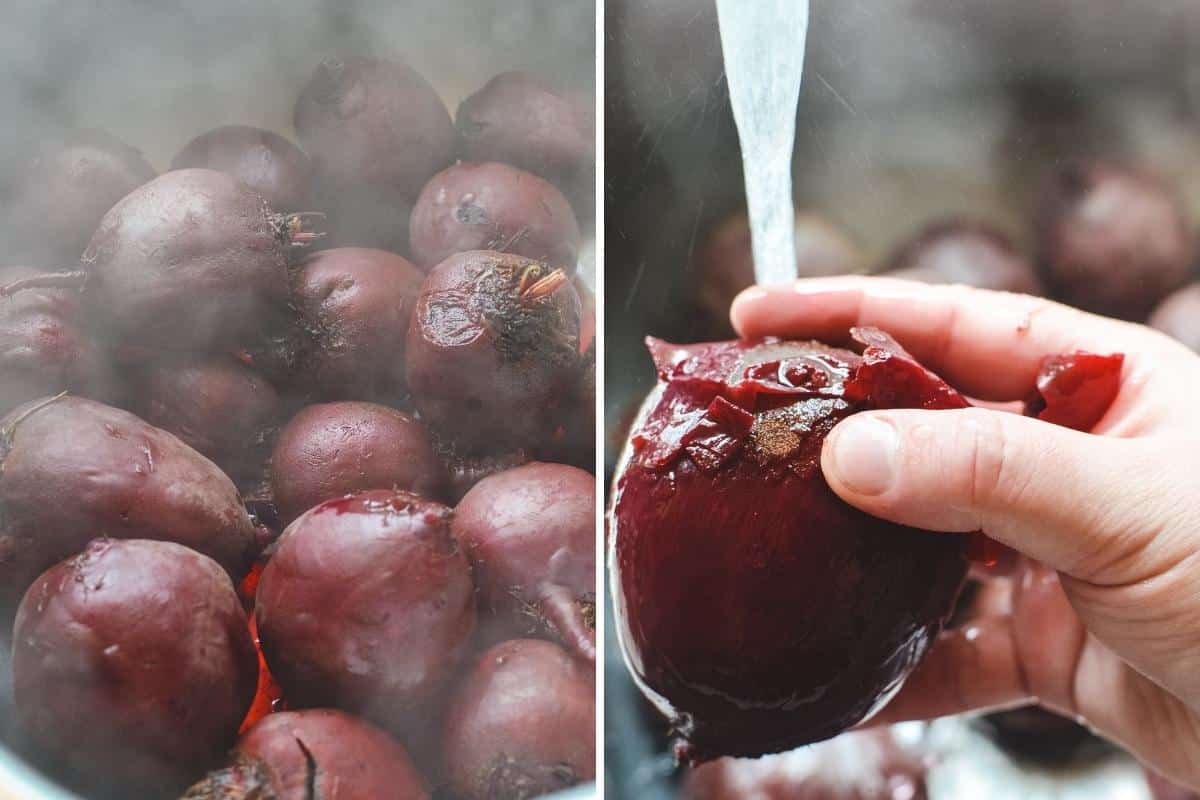
- Cook the beets for 15-30 minutes, or until the skins slip off very easily when run under cold water. Test a few of the larger beets before draining the whole pot. Sometimes the batch will need a longer boil to get the skins loose.
- Once the test beets are easy to peel, drain or remove the beets from the water.
- Run each beet under cold running water, using your fingers to slip the skins off the beets. Rub any stubborn spots with the back of your thumb.
- Repeat until all of the beets are peeled. Remove the taproot.
- Leave your beets whole, OR cut them according to your preference for canning. Whole, halved, quartered, and sliced are all popular options for pressure canning. You will get the most color retention from leaving them whole. But you will be able to fit the most food per jar if your slice or chop your beets.
Before You Start Canning
While your beets are cooking, set up and prepare all of your equipment and tools for canning. Here is a list of preparations to make before you start canning:
- Thoroughly wash your jars, canning rings, and equipment in hot soapy water. Make sure to rinse well.
- Fill your pressure canner with enough water to sterilize/warm the jars.
- Add some water to the bottom of each jar (enough to weigh them down) and place them in the canner.
- Place the lid on the canner and bring to a boil.
- Boil the jars for 5, then turn off the heat. Allow the jars to rest in the hot water until ready to use.
- Bring a small saucepan of water to a simmer. Add the canning lids and reduce the heat to low. Keep them warm until they are ready to be used.
- If needed, sterilize your headspace tool, magnetic lid lifter, and canning funnel.
- Place a thick kitchen towel or wire rack next to your canning space. You will also need paper towel (or a clean cloth), and a jar lifter.
How to Pressure Can Beets
To get started, heat a kettle or a large pot of boiling water on the stove. Once the water comes to a boil, set it aside. Pack your prepared beets into pint or quart jars, leaving a generous ½" headspace (the space between the top of the food and the jar).
Pour some boiling water into the jar, leaving ½" of headspace at the top of the jar. Use a debubbling tool or a clean knife to remove any large air bubbles that have formed in the jar. This is done by sliding it down the sides of the jar.
Remove the funnel to check for ½" headspace and adjust with additional water if needed.
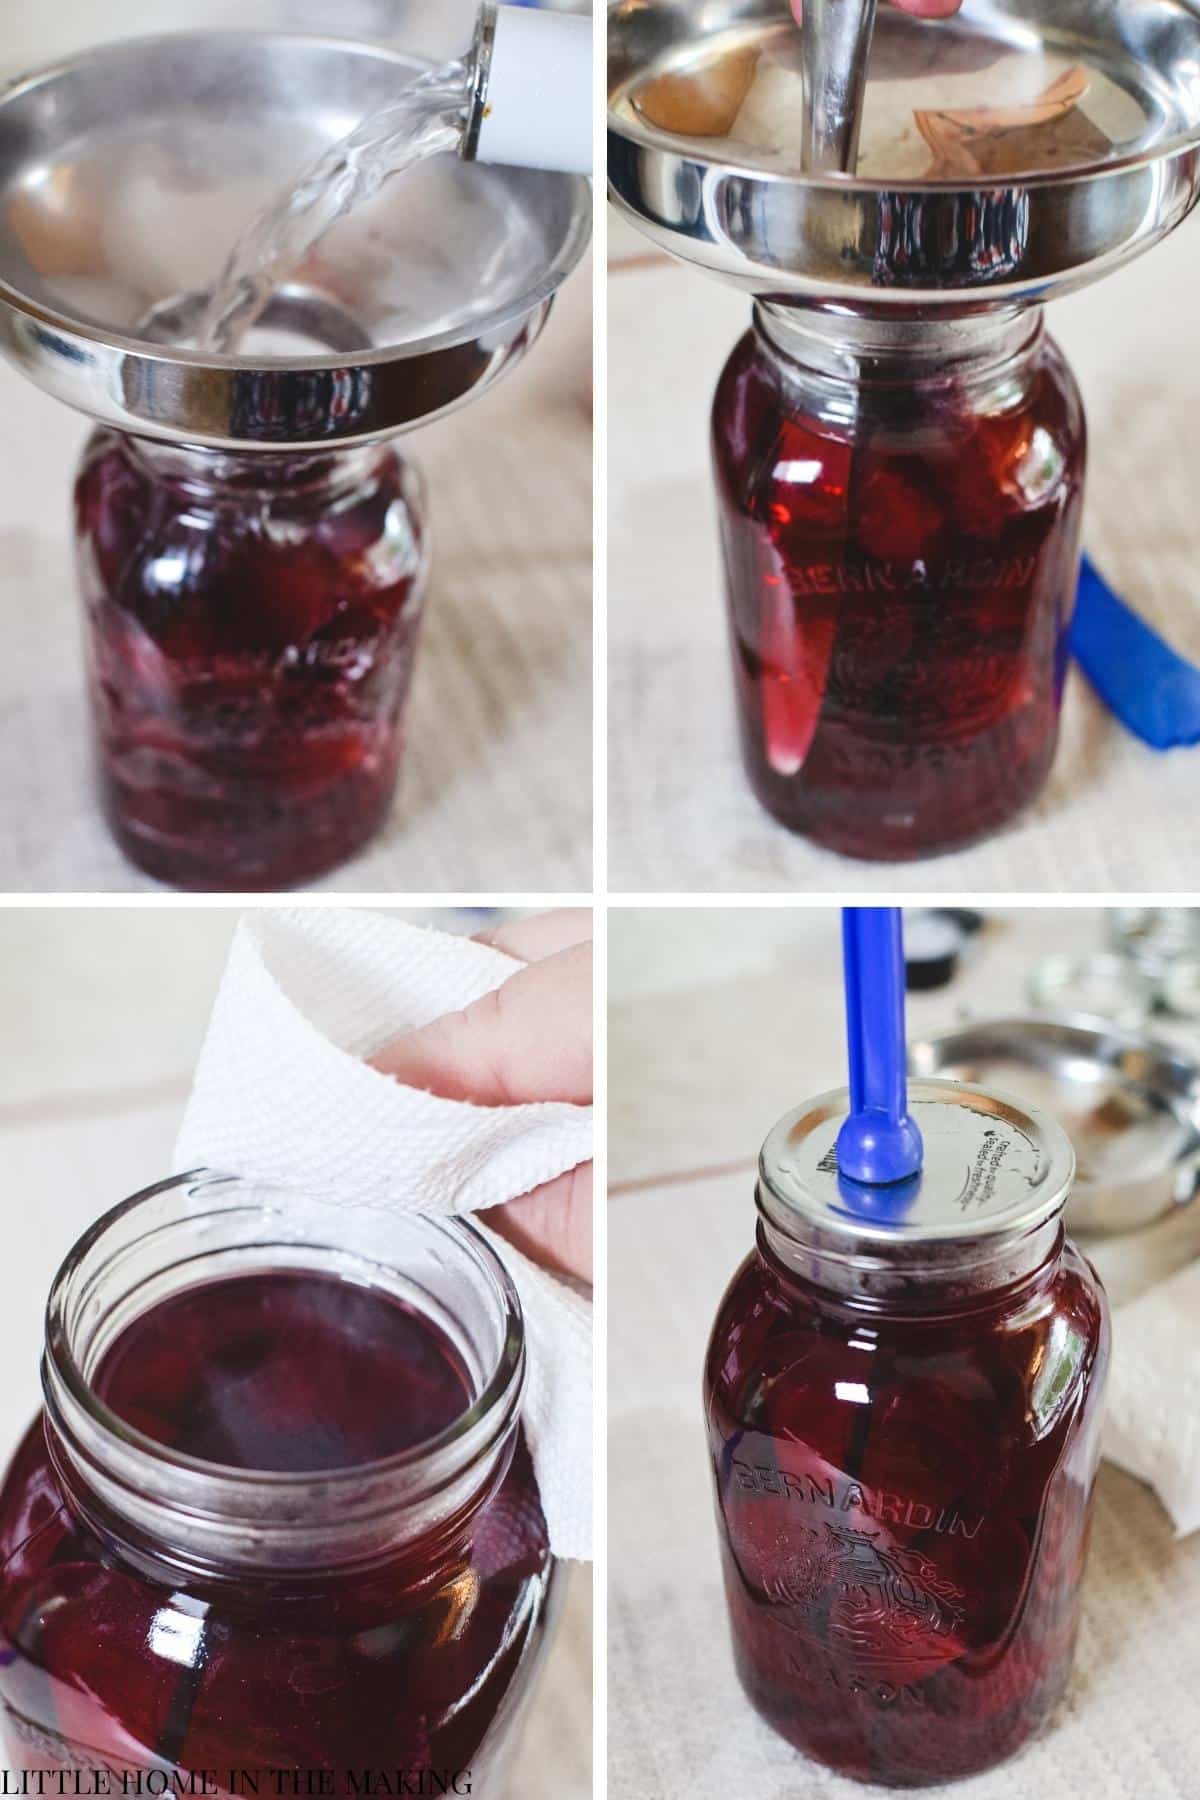
Wipe the rim of the jar clean with a damp paper towel (or very clean kitchen towel). If desired, you can wipe them with white vinegar instead.
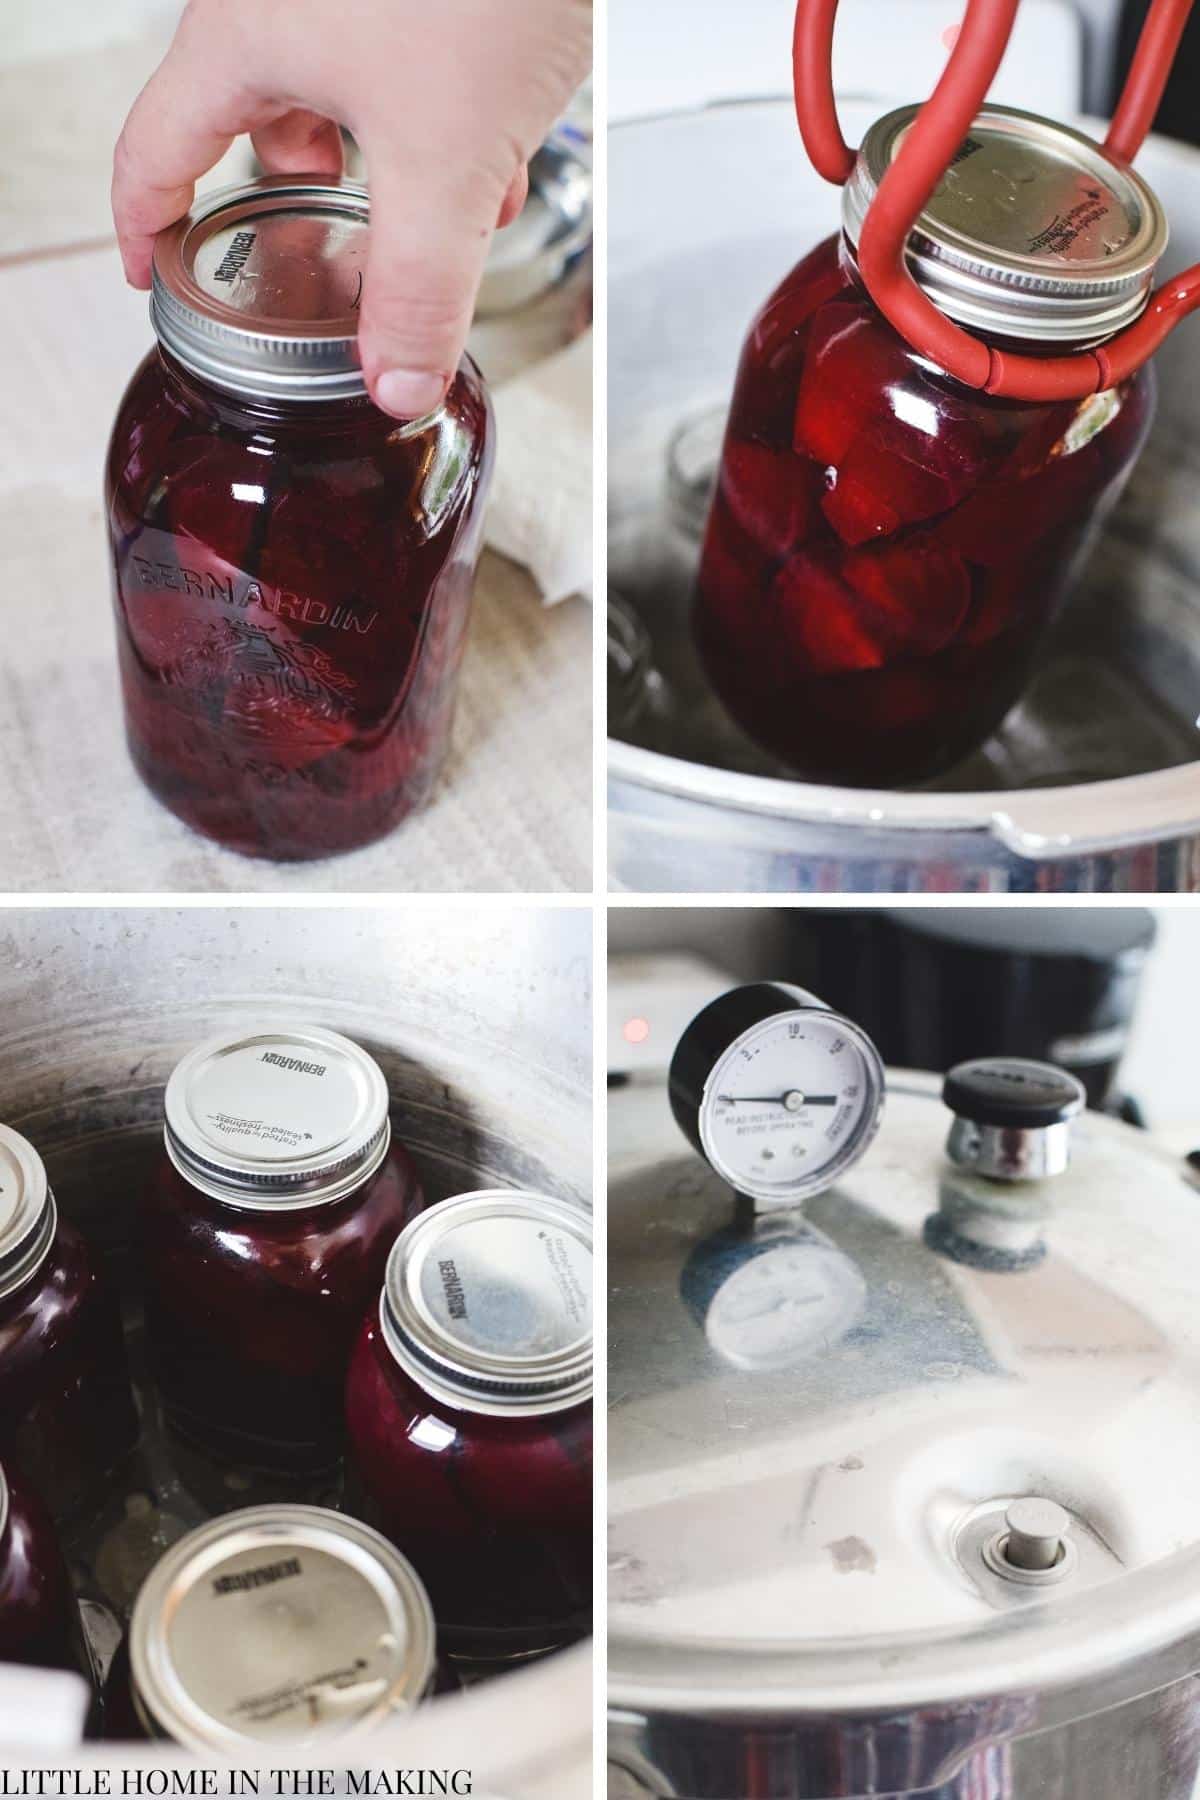
Place a warm canning lid on the jar using a lid lifter. Then secure the canning lid to fingertip tight (use just enough pressure that you don't need to use the muscles in your hands - just your fingers).
Repeat with all remaining jars until all of your jars are filled. If you have any leftover beets you could add them to your upcoming meals, or make a batch of refrigerator pickled beets.
Adjusting the Water Level in your Pressure Canner
Every model of pressure canner has a different requirement for the water level needed to safely pressure can food. Some models go by inches of water (typically 2-3 inches), and others go by cups or quarts. My pressure canner (a 23 Quart Presto model) requires 3 quarts of water. This water can be preheated to 140-180ºF, which will help prevent siphoning and jar shock.
Add the amount of water as dictated by the manual for your particular model. Then add the jars to the pressure canner, making sure the rack is in place to keep the jars off the bottom of the canner.
Pressure Canning Plain Beets
- Place the jars inside of the pressure canner, giving them adequate space. The jars should not be touching, and ideally have about 1" of space between each jar.
- Once the canner has been loaded, check your pressure canning lid to make sure everything is in working order (your manual will instruct you on how to do this). Generally that means checking the seal, that the gauge is secure, and that the vent pipe is clear from debris.
- Secure the lid and heat over medium-high heat until the vent pipe releases a steady stream of steam. Continue to vent this steam for a total of 10 minutes. Then place the weight on top of the vent pipe.
- Keep the heat on medium-high as you watch the pressure rise in the canner (looking at the dial indicator). While each model may have a different pressure requirement for canning, the base amount for dial gauge pressure canners is 11lbs of pressure. The base amount for weighted gauge canners is 10lbs. This can also change greatly based on altitude, so check below for high altitude guidelines.
- Once the dial is getting close to reaching the desired pressure (11lbs for most dial gauge canners), begin to turn down the heat slightly to slow down the rise in pressure. You will need to maintain a steady pressure once the amount is reached, so reducing it now gently will help you maintain a steady pressure.
- As soon as a pressure of 11lbs is reached, start your processing time. If the pressure dips below that at any time, you’ll need to start your time over again. You can decrease the pressure by turning the element down (just a little bit at a time) or increase pressure by turning the element up.
- Process pint jars for 30 minutes and quart jars for 35 minutes (or longer, if you live at a high altitude***).
Removing the Jars
- Once the processing time is up, turn off the heat and allow the canner to cool completely - do not remove the weight from the vent. You will see that the pressure naturally releases to zero over the period of several hours.
- Once the canner has returned to zero pressure and then cooled for a full 5 minutes, remove the weight from the vent pipe, unlock the lid, and open it away from your face.
- Allow the jars to cool in the canner for an additional 10 minutes, then remove them using a jar lifter.
- Set the hot jars on a wire rack or on thick kitchen towels.
- Allow the jars to rest undisturbed for 24 hours. After about 6 hours, check the jars for seals.
- Transfer anything that did not seal to the refrigerator and consume within 1-2 weeks.
Checking the Seals
- To test the seals, check the center of the lid - it should be flat or slightly pulled down. Press in the center - if there was a “pop” or it moved, the jar was not sealed.
- After 24 hours, remove the canning ring and test the jar seal by lifting it by the edges with your fingertips.
- Wipe down the jars, label, and transfer to storage.
Adjusting for High Altitudes
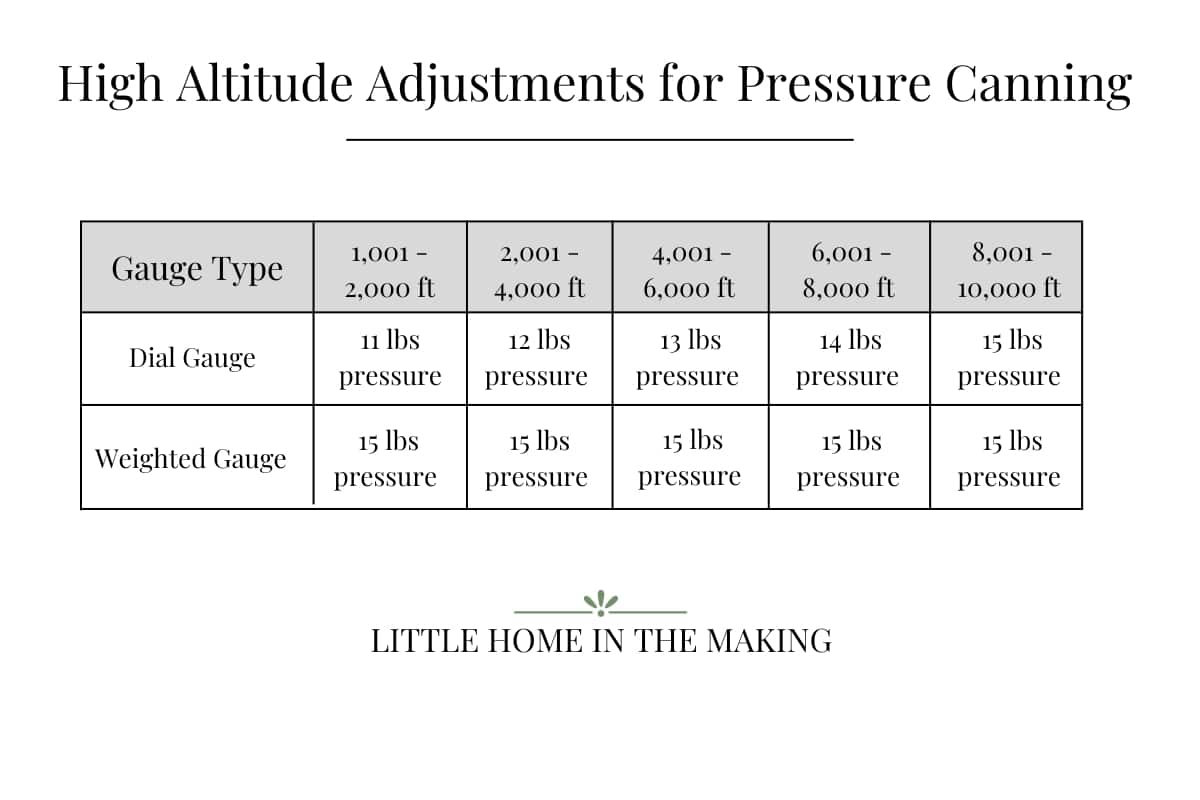
If you live at a high altitude (greater than 1,000 feet (304.8 meters) above sea level, you may need to make some adjustments in order to pressure can safely. When making altitude adjustments for pressure canning you'll notice that there is often no change in the processing time (as is the case with canning beets), but rather that the required pressure changes.
See the chart below (or the notes in the recipe card) to determine if you need to make any changes to your processing pressure.
Loss of Liquid in Jars - Is it Normal? Is it Safe?
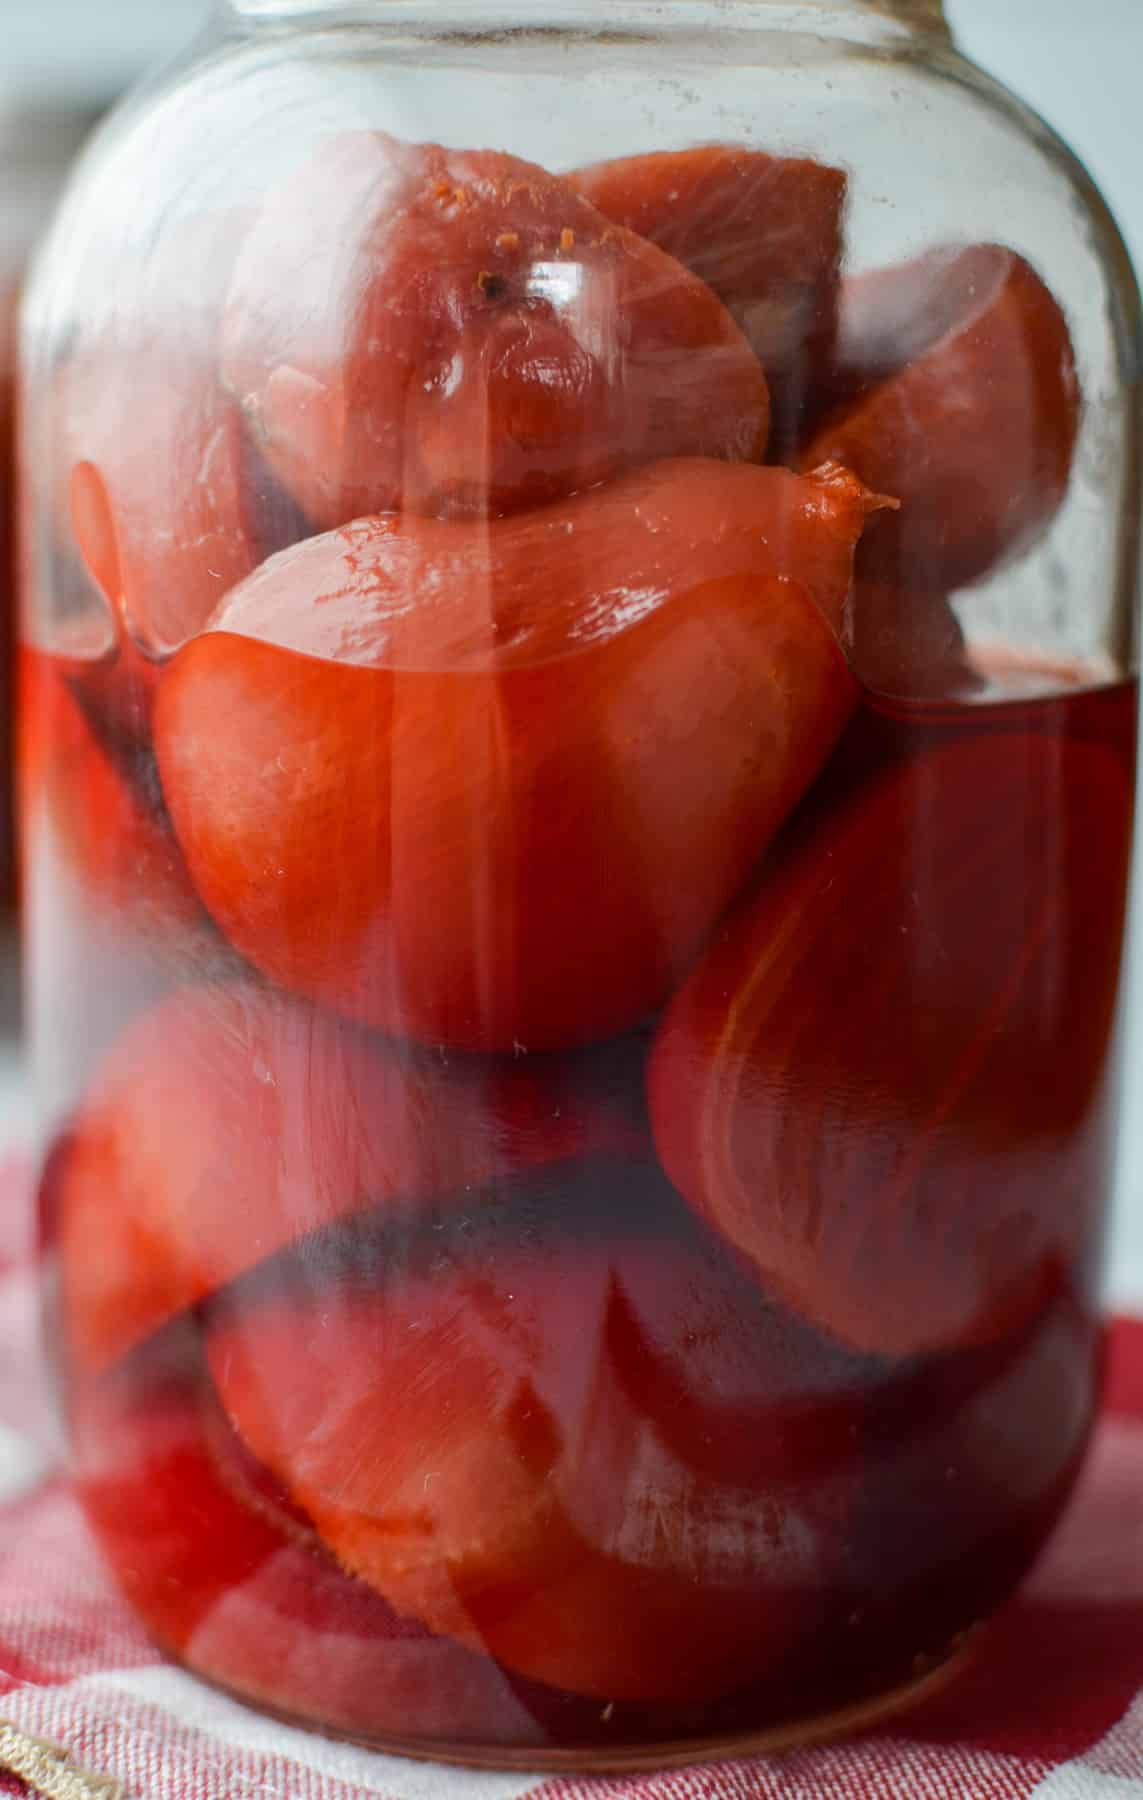
Sometimes when you are pressure canning foods, you can see a significant loss of liquid loss in the jars. Sometimes it isn't that noticeable, and then other times, it can go below the line of the food (as was the case for this batch).
Liquid loss happens for a variety of reasons, but most of the time it is completely safe. The one caveat is that a significant loss of liquid does shorten the storage and shelf life of the particular food. So be particularly vigilant to use your jars with a low amount of liquid first, and try to use it within that first year. Also, as with all home canned foods, check that the seals are intact and that there are no signs of spoilage.
Reasons for Siphoning/Liquid Loss:
- Oxygen in the food, causing it to expand and push liquid out of the jar,
- Rings that were sealed more than fingertip tight.
- Jar shock - Using cold water in the canner and placing hot jars inside.
- Taking too long to come to pressure, coming to pressure too quickly, or the pressure fluctuating during the processing time.
- Incorrect headspace (not leaving enough room - adhere to the recipe and always measure it).
- Air bubbles remaining in the food before processing.
- Removing the jars from the canner too quickly after processing.
- Raw packed food - this makes siphoning more common.
When does liquid loss become concerning?
If your loss of liquid during pressure canning is significant, I would recommend that you transfer those jars to the fridge and use immediately.
Any jars that have lost more than half of their liquid would qualify for this, and of course any jars that did not seal during the first 6 or so hours after processing.
Preserving Color in Canned Beets
Beets have a vibrant red color, and they add a splash of rich color to every dish they are included in. If you've ever cooked beets, you also know they can bleed pretty badly! If you've ever roasted a variety of vegetables, I'm sure you've seen the liquid from the beets stain your butternut squash slightly pink. How rude!
When it comes to canning, you may experience some of that color loss as well. After the beets are chopped into halves, slices, or chunks, they will start losing some color. The smaller you chop the beet, the more surface area is exposed and the more likely you are to get color loss. This should not affect the taste of your beets, and they can be used just the same as more vibrant jars would be.
Varieties and Color
The biggest factor when it comes to color retention is the variety of beets. If you're also a gardener, you probably know there is a great selection of cultivars when it comes to this favorite root vegetable. Some claim to be excellent for canning, and others boast the best color retention. Those genetics come in to play when it comes to canning. Your loss of color probably has more to do with the type of beet used than anything you may have done during the canning process.
All that being said, I did test a few color retention tips with some mixed results. None were absolutely astounding, but they did improve the color retention slightly.
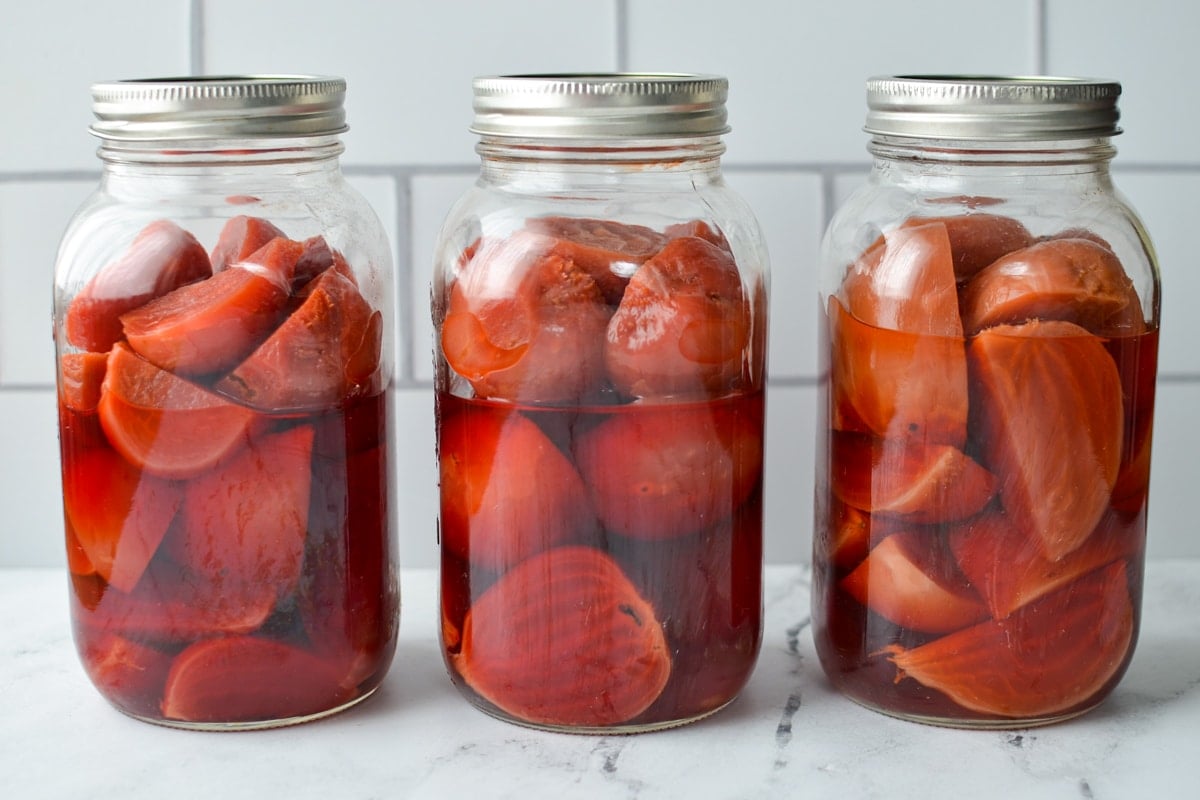
Ways to improve color retention:
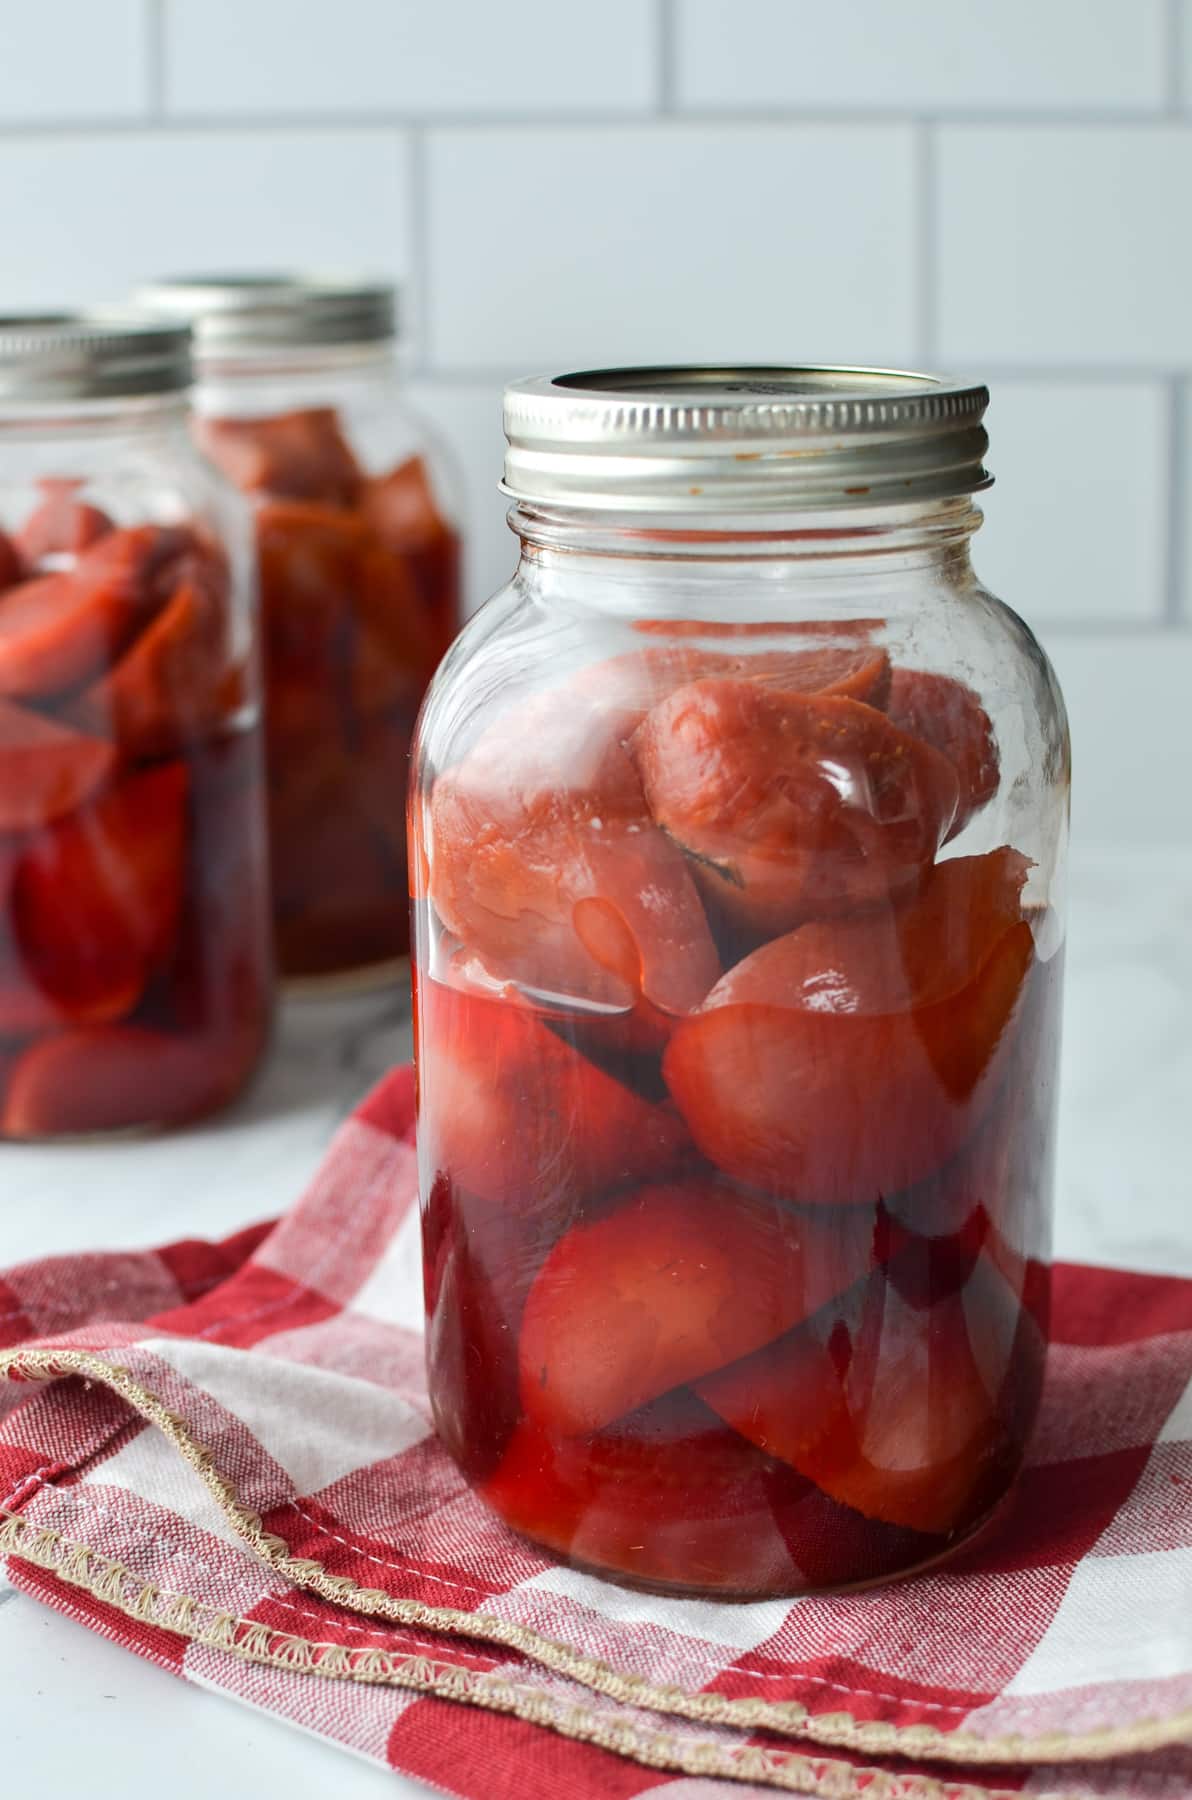
Salt - Adding approximately 1 teaspoon of canning salt to each quart jar of plain beets (or ½ teaspoon per pint) will improve flavor, and does show a marked improvement in color. In fact, in tests it performed better than vinegar did (which is well reputed as a way to preserve color). The jar with salt added is the one on the far left in the image above.
Vinegar - This is used to make pickled beets, which very easily keep their color and become even darker and richer during the pickling process. Some older, more experienced canners recommend adding 1 tablespoon of vinegar to each quart jar of beets (or 1 ½ teaspoons to pint jars). This was used for the jar on the far right. I did see some improvement, but not as much as using canning salt.
Salt & Vinegar - I also did a test jar (in the middle) that combined both salt and vinegar, and saw a nice improvement in color. It is only slightly better than the jar with salt alone, but it is noticeable if you look closely.
After testing these three options, I think using 1 teaspoon of canning salt per quart jar is the best bet. The inclusion of vinegar shows only marginal improvement. Although the small amount shouldn't affect the taste of the beets, I would prefer to use as few ingredients as possible just for the sake of ease.
Frequently Asked Questions
Yes, it is recommended by USDA guidelines to boil and partially cook beets before canning. This not only helps you peel the tough peels, but it also ensures the beets do not absorb and push out too much liquid during the canning process, leaving you with a dry and unsafe jar. For pressure canning, you need to boil just long enough to slip the skins off, and for water bath canning until they are easily pierced with a knife.
If you want to can beets plain - that is with water - you will need to pressure can them. If you want to water bath can beets, try making pickled beets. Since pickled beets include vinegar there is enough acidity present to safely can and preserve beets this way.
It is not recommended to raw pack beets for canning. Beets must be peeled, and their peels slip off more easily if they have been cooked for at least 15-20 minutes. Further, raw beets will contain too much oxygen, which will expand in the jar and cause significant siphoning. For that reason, it's important to adhere to a tested recipe and cook your beets according to the instructions provided.
Home canned beets, when processed and sealed using either a pressure canner or a water bath canner (for pickled beets) can last for at least 1 year, but often last for many years longer than that. If your seal is intact and there are no signs of spoilage, your food is safe to consume for several years after processing. The best quality preservation will be in those first 1-2 years.
More Canning Recipes
- Canning Pickled Beets
- Canning Strawberries
- Low Sugar Strawberry Jam
- Old Fashioned Strawberry Jam
- Canning Bread and Butter Pickles
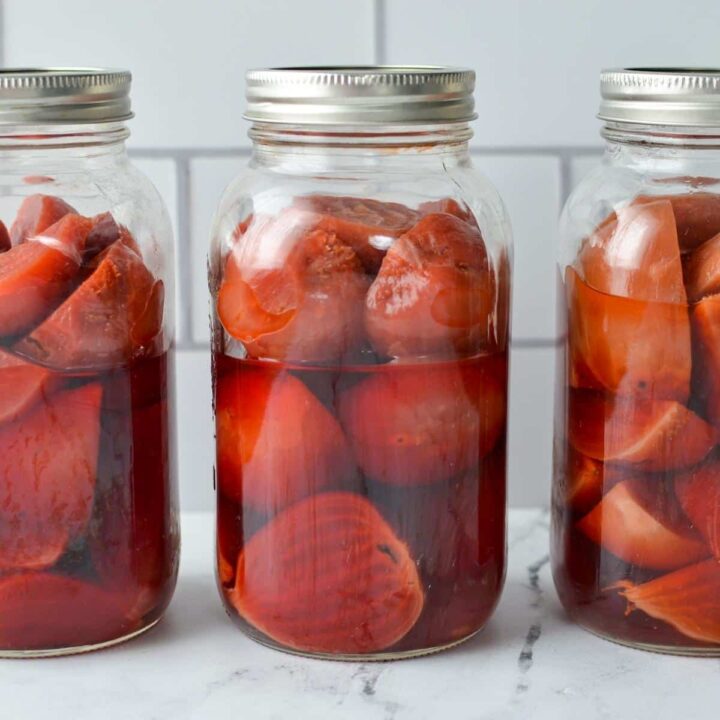
Canning Beets
This detailed recipe for canning beets is perfect for food storage and uses just 2 simple ingredients - beets and water.
Ingredients
- Beets*
- Water
- Canning salt (optional)
Instructions
- Scrub the beets gently under running water, setting them aside.
- Leave the taproot (long thin piece) intact, and trim the stem to 2” if needed.
- Place your scrubbed beets in a large stockpot or saucepan and add enough water to cover them by ½”.
- Put the lid on the pot and bring to a boil over high heat.
- Meanwhile, prepare all of your canning equipment and jars. (See notes**)
- Cook the beets for 15-30 minutes, or until the skins slip off very easily when run under cold water. Test a few of the larger beets before draining the whole pot, as sometimes the batch will need a longer boil to get the skins loose.
- Once the test beets are easy to peel, drain or remove the beets from the water.
- Run each beet under cold running water, using your fingers to slip the skins off the beets, rubbing any stubborn spots with the back of your thumb.
- Repeat until all of the beets are peeled. Remove the taproot.
- Leave your beets whole, OR cut them according to your preference for canning. Whole, halved, quartered, and sliced are all popular options for pressure canning. You will get the most color retention from leaving them whole, and will be able to fit the most food per jar of your slice or chop your beets.
- Prepare a pot or kettle of fresh water and bring to a boil. This will cover your beets once they have been packed into the jars.
- Pack the prepared beets into the jars (quart or pint), leaving a generous 1” headspace. If using, add 1 teaspoon of salt to ever quart jar (or ½ teaspoon for pints).
- Pour boiling water over the beets, leaving a 1” headspace. Use a butter knife or debubbling tool to remove any air bubbles, and then adjust the headspace as needed.
- Wipe the rim of the jar with a clean towel and place a warm lid on the jar. Then secure a canning ring until it is fingertip tight. Use a jar lifter to add the packed jars to the canner, ensuring they don’t touch each other.
- Adjust the water level as directed in your pressure canner manual (different manufacturers have various guidelines) and secure the lid by locking it.
- Heat over medium-high heat until the vent pipe releases a steady stream of steam.
- Continue to vent steam for 10 minutes, and then place the weight on top of the vent pipe.
- Keep the heat on medium-high and watch the dial rise, indicating the pressure inside of the canner. Check your manual to determine what pressure is required for your particular model. The base amount for dial gauge canners is 11lbs of pressure, while the base amount for weighted gauge canners is 10lbs. This will also vary based on your altitude, so check the notes*** for more information.
- Once the dial is getting close to reaching the desired pressure (11lbs for most dial gauge canners), begin to turn down the heat slightly to slow down the rise in pressure. You will need to maintain a steady pressure once the amount is reached, so reducing it now gently will help you maintain a steady pressure.
- As soon as a pressure of 11lbs is reached, start your processing time. If the pressure dips below that at any time, you’ll need to start your time over again. You can decrease the pressure by turning the element down (just a little bit at a time) or increase pressure by turning the element up.
- Process pint jars for 30 minutes and quart jars for 35 minutes (or longer, if you live at a high altitude***).
- Once the processing time is up, turn off the heat and allow the canner to cool completely - do not remove the weight from the vent. You will see that the pressure naturally releases to zero over the period of several hours.
- Once the canner has returned to zero pressure, allow the canner to cool for 5 minutes. Then remove the weight from the vent, unlock the lid, and open it away from your face.
- Allow the jars to cool in the canner for an additional 10 minutes, then remove them using a jar lifter. Set them on a wire rack or on thick kitchen towels.
- Allow the jars to rest undisturbed for 24 hours.
- After about 6 hours, check the jars for seals. Transfer anything that did not seal to the refrigerator and consume within 1-2 weeks.
- To test the seals, check the center of the lid - it should be flat or slightly pulled down. Press in the center - if there was a “pop” or it moved, the jar was not sealed.
- After 24 hours, remove the canning ring and test the jar seal by lifting it by the edges with your fingertips. Wipe down the jars, label, and transfer to storage.
Notes
*How many Beets?: How amount of beets you prepare for canning depends on how many jars you would like to process. You’ll need anywhere from 2-3 ½ pounds of beets per quart sized jar (or 1-1 ¾ lb for a pint jar). Use the lower range if you’re keeping your beets in larger pieces (whole or halved) and the higher range if you’re cubing them.
**Preparing canner, jars and lids: To prepare for canning, wash all of your equipment and rinse thoroughly. Check your pressure canner to ensure all of the pieces are in place (compare with the manual). Place the jars in the canner with several inches of water and bring to a boil. Boil for 5-10 minutes, then turn off the heat and keep warm while you cook the beets. Place the canning lids in a small saucepan of simmering water, and keep warm as you go through the canning process.
***Altitude:
If you live in an altitude exceeding 1000ft, you’ll need to adjust the pressure required to successfully can your beets. You’ll notice that there is no time difference (as is typical with water bath canning), but instead a difference in pressure.
1,001 - 2,000 ft: 11lbs dial gauge, or 15lbs weighted gauge.
2,001 - 4,000 ft: 12lbs dial gauge, or 15lbs weighted gauge.
4,001 - 6,000 ft: 13lbs dial gauge, or 15lbs weighted gauge.
6,001 - 8,000 ft: 14lbs dial gauge, or 15lbs weighted gauge.
8,001 - 10,000 ft: 15lbs dial gauge, or 15 lbs weighted gauge.
Color retention: Beets naturally lose their color during cooking and canning, and this can depend greatly on the variety used during canning. Some cultivars retain their color very well, while others do not. I tested adding salt, as well as adding 1 tablespoon of vinegar to each jar to see if that helped with color. Both salt (1 teaspoon of canning salt per quart) and vinegar (1 tablespoon per quart) showed a slightly better color retention than just water. You could add either (or both) if desired.
Please note that some of my blog posts here at Little Home in the Making may contain affiliate links. If you make a purchase through these links, I will get a small commission at no additional cost to you. Please see my Disclaimer for more information.






Leave a Reply