


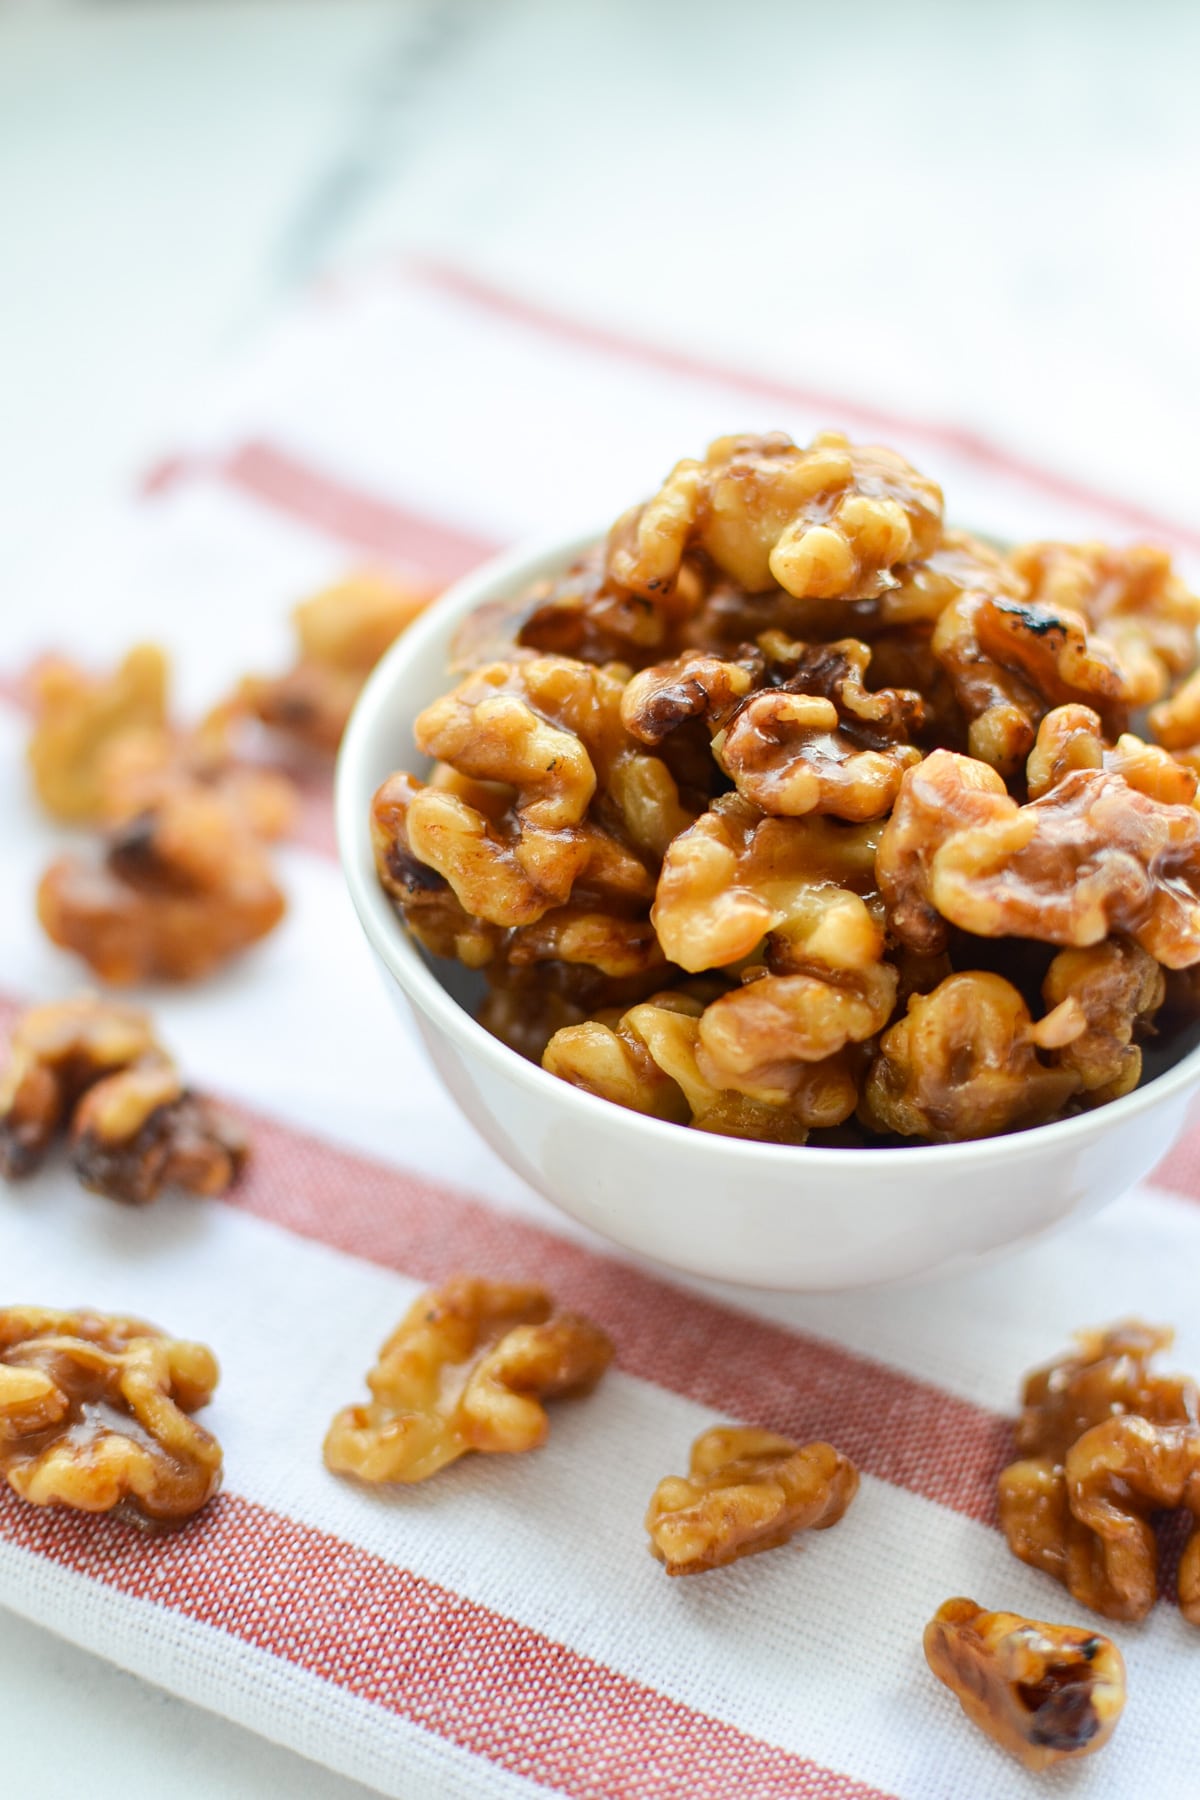
These naturally sweetened candied walnuts with maple syrup are the ultimate sweet and salty snack! Perfect for a DIY food gift, or for tossing into your favorite salads and snack mixes. These candied walnuts require just 3 ingredients and take less than 10 minutes to make!
Published December 15 2020 | Updated May 7th 2022
Maybe it's because I'm Canadian, but maple syrup is truly just one of the best foods out there! Not only is it easily available (for me, at least) but it also makes a simple and delicious natural sweetener for all kinds of foods.
As I'm changing my diet and including more whole, nourishing foods, I like to use maple syrup in place of granulated sugar and other sweeteners. As a bonus, it tastes absolutely amazing and leaves its signature flavor behind wherever it goes. Whether it's a bowl of peanut butter cookie oatmeal, or a savory batch of healthy sloppy joes, it's safe to say maple syrup does a fantastic job of sweetening our favorite foods.
And what a better way to use this yummy natural sweetener than in a batch of candied walnuts with maple syrup? Sweet, slightly salty, and totally delicious, this easy recipe is ready in less than 10 minutes and takes just 3 ingredients to make! It's also the perfect DIY food gift, and a delicious addition to charcuterie boards.
But it doesn't have to stop there! I love topping a nice, hot bowl of butternut squash soup with a few, or adding it to a delicious salad. Candied walnuts are also an extra special treat when folded into some muffin batter (like my sourdough apple walnut muffins) or tossed into a batch of granola. They truly are SO versatile.
Let's get started and I'll show you how to make them!
Ingredients
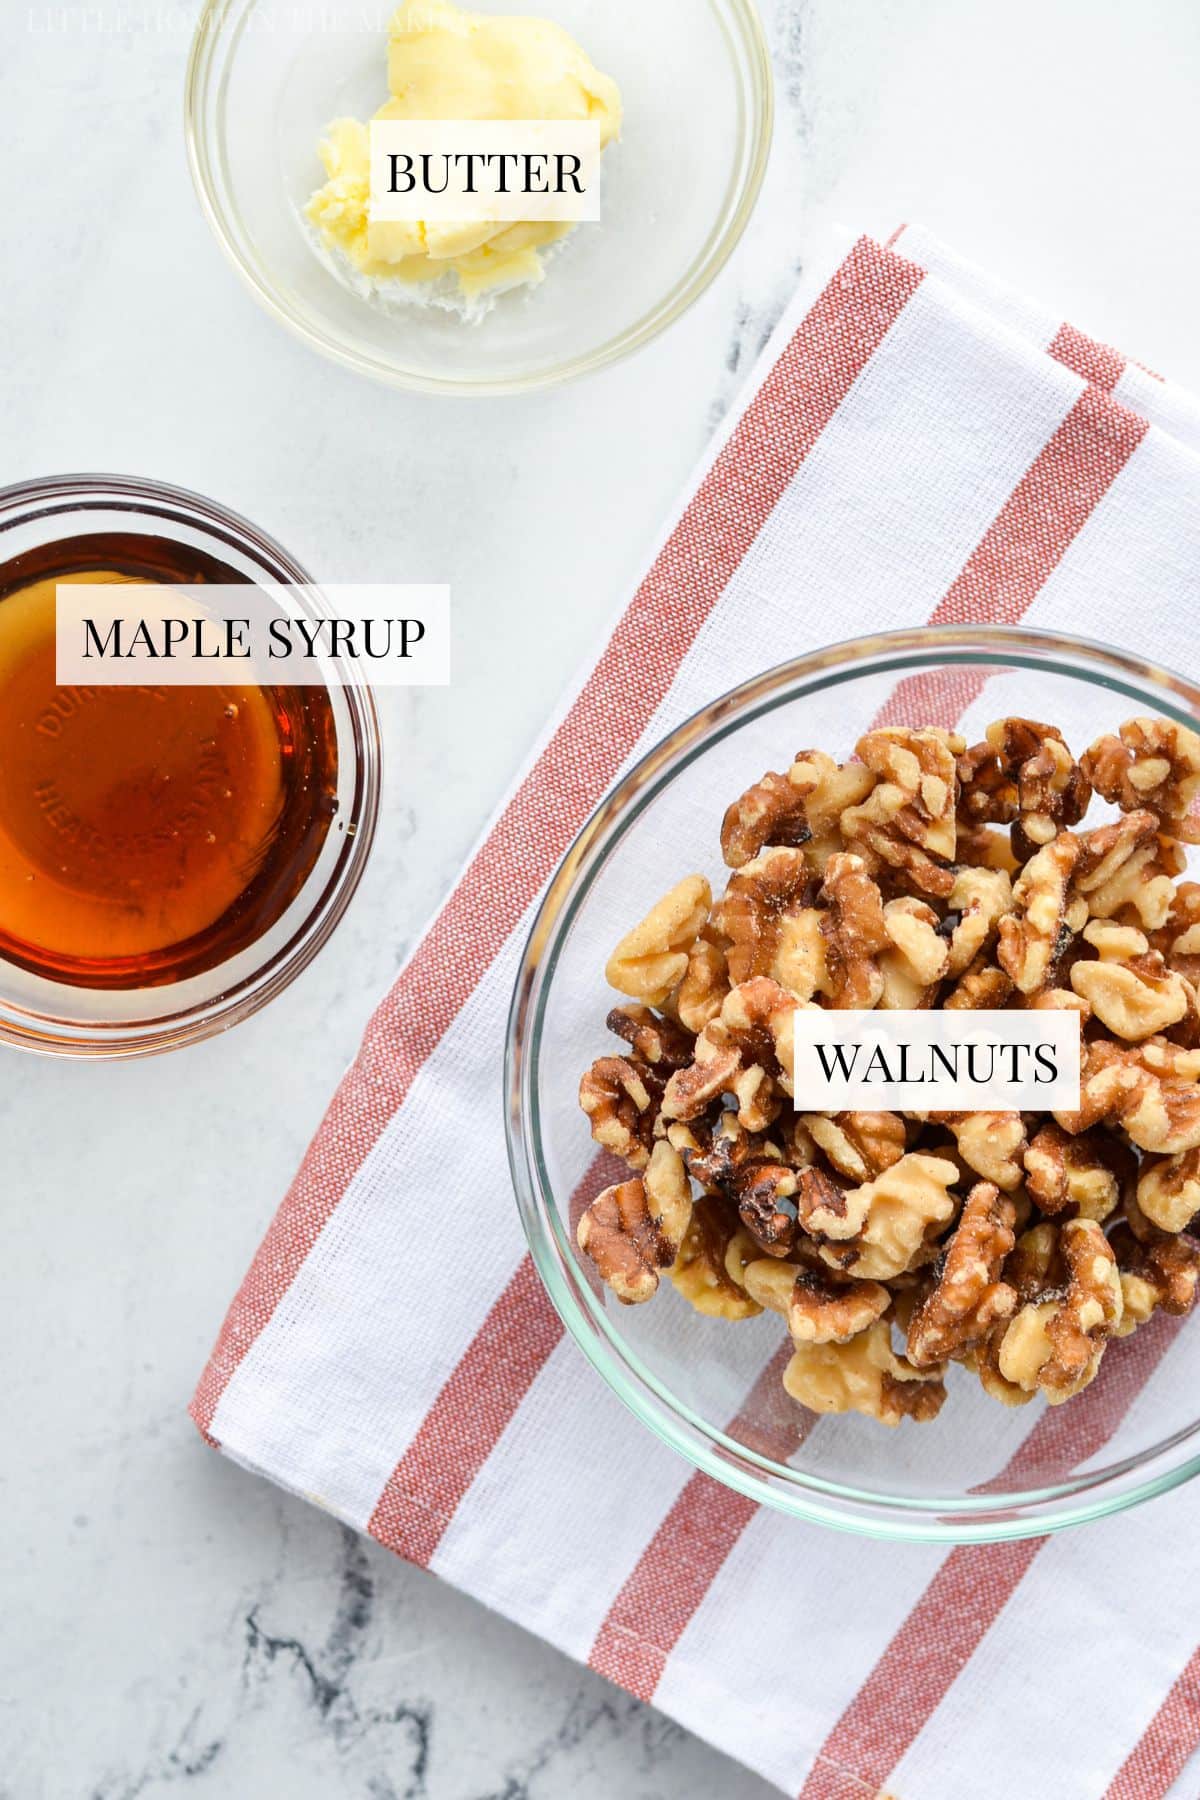
- Walnuts: You can use any size of walnut here, but I prefer walnut halves. These larger pieces are less prone to burning and are easier to work with. If you want smaller pieces after, you can chop the candied walnuts.
- Maple syrup: You'll want to use pure maple syrup. Either A or B grade maple syrup works here.
- Butter: Salted butter is recommended, since it adds the perfect saltiness to this easy recipe. If you don't have salted butter, you can use unsalted + a pinch of salt.
Equipment Needed:
- Parchment paper: The key to easy clean up during baking is parchment paper! I spent many years leaving this essential tool off of my grocery list, but now it's an absolute must in my kitchen!
- Heavy bottomed skillet: This will prevent the syrup and the nuts from burning too quickly. Inexpensive, thin pans get too hot and burn the sugars very quickly.
- Silicone spatula: Since this involves some very sticky ingredients, it's important to use a heat proof silicone spatula. I like this one and use it daily in my kitchen.
How to Make Candied Walnuts with Maple Syrup
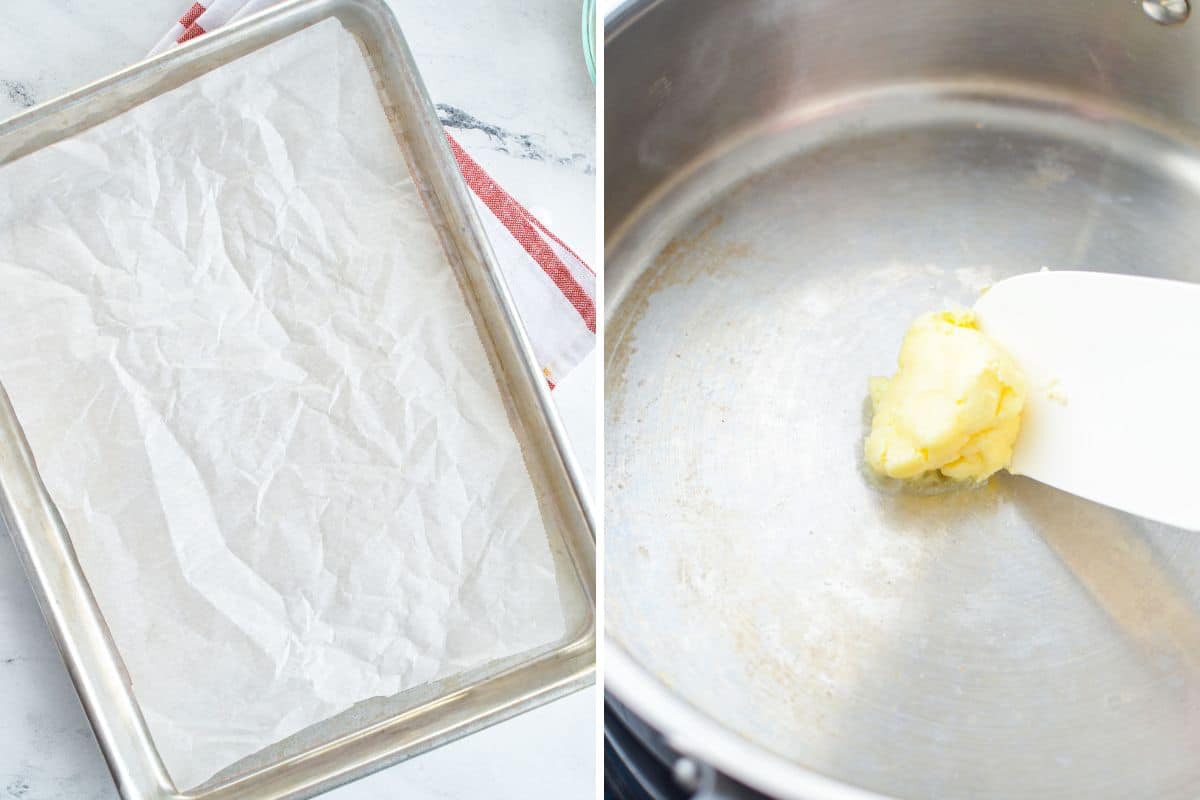
Start off by lining a baking sheet or cookie sheet with parchment paper. If you're getting close to the end of your roll and it's very curly, scrunch the paper and it will stay together perfectly!
Heat a heavy bottomed skillet over medium heat. Once the skillet is hot, add the butter and swirl it around until melted.
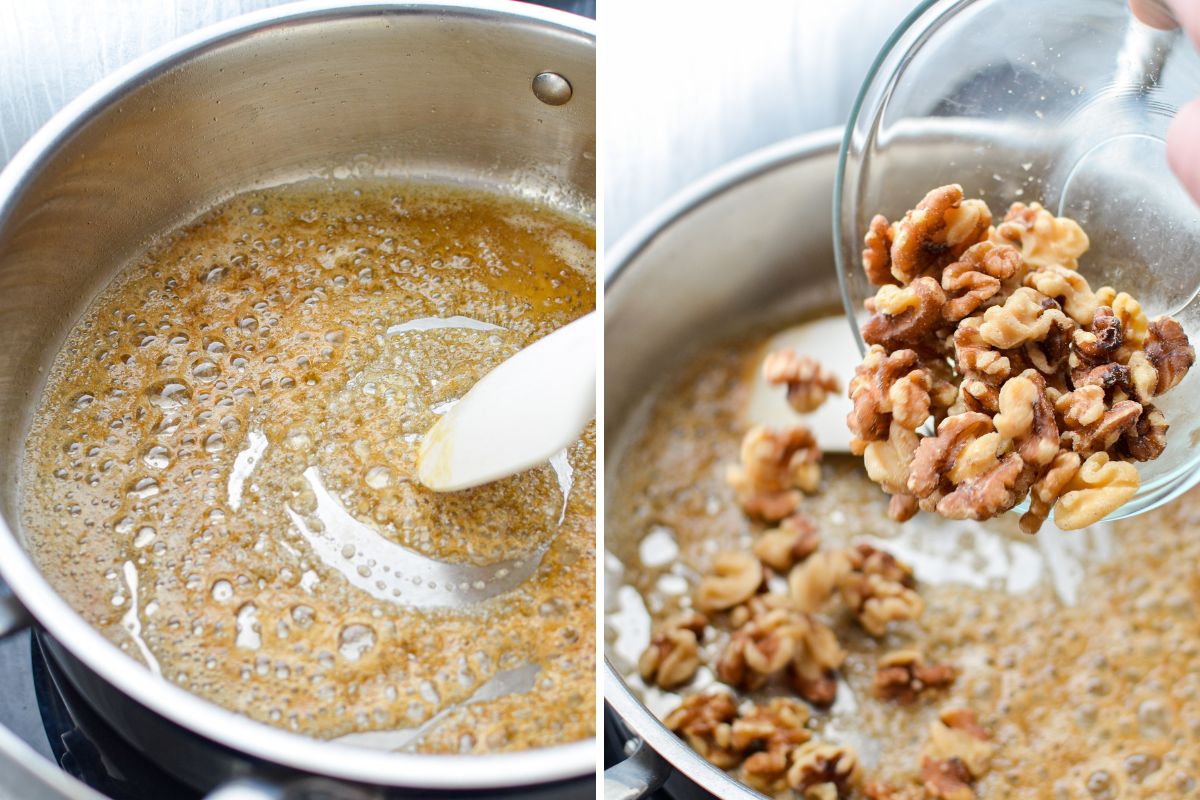
Add the maple syrup and stir well until its fully combined with the butter.
Add in the walnuts, and toss to coat them with the maple syrup and butter mixture.
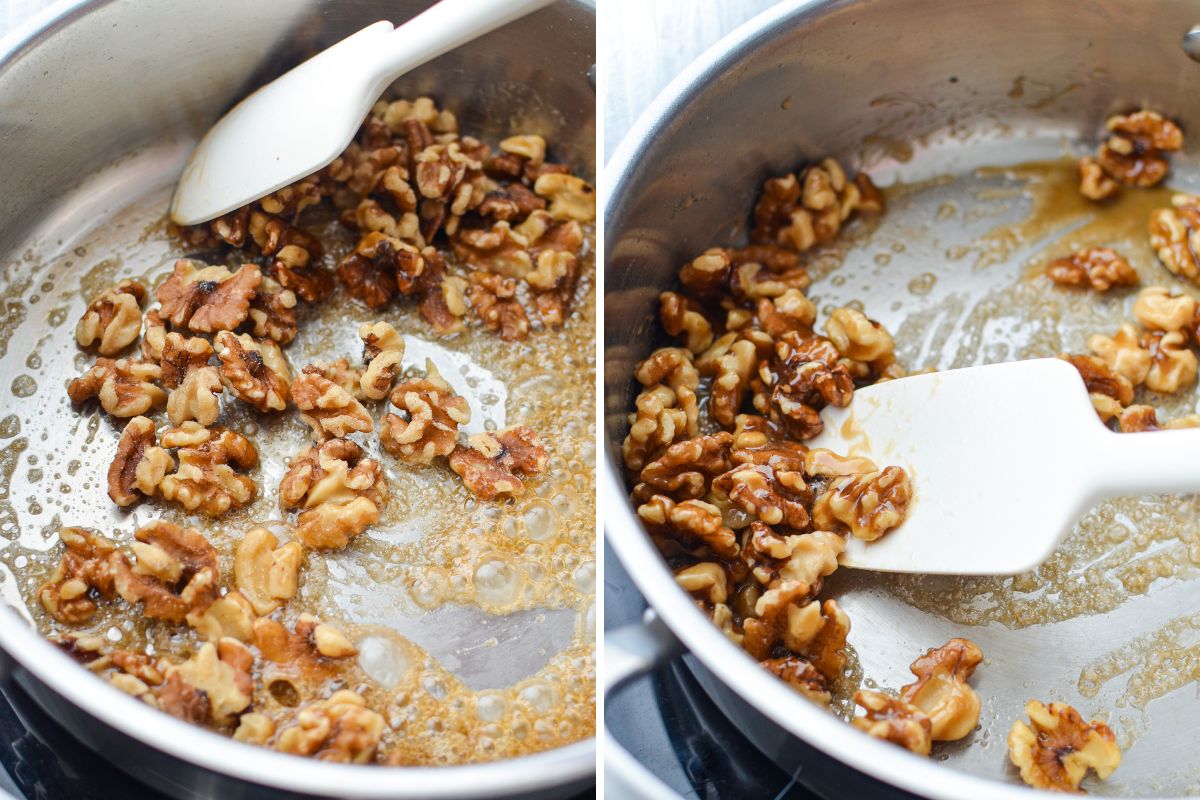
Stir constantly, to prevent burning and to fully coat the walnuts in the maple and butter mixture.
Cook for a total of 3-5 minutes, or until the nuts are fully coated and toasty, but not burned. This mixture can burn quickly, so it's important to watch it carefully and remove from the heat as soon as the nuts are finished.
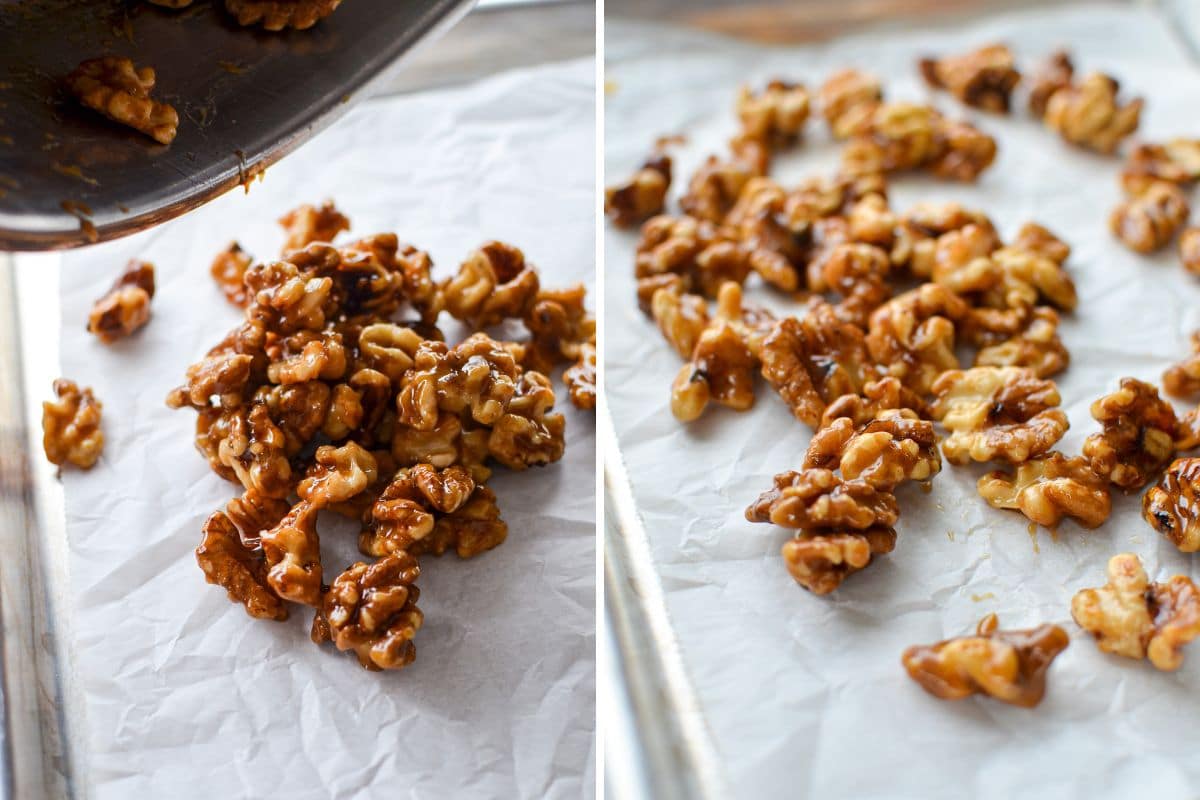
Pour the nuts out onto the prepared lined baking sheet, using a silicone spatula to get everything out of the skillet.
Spread the nuts out onto the baking sheet while still warm, trying to avoid any clumps and breaking up the nuts as much as possible.
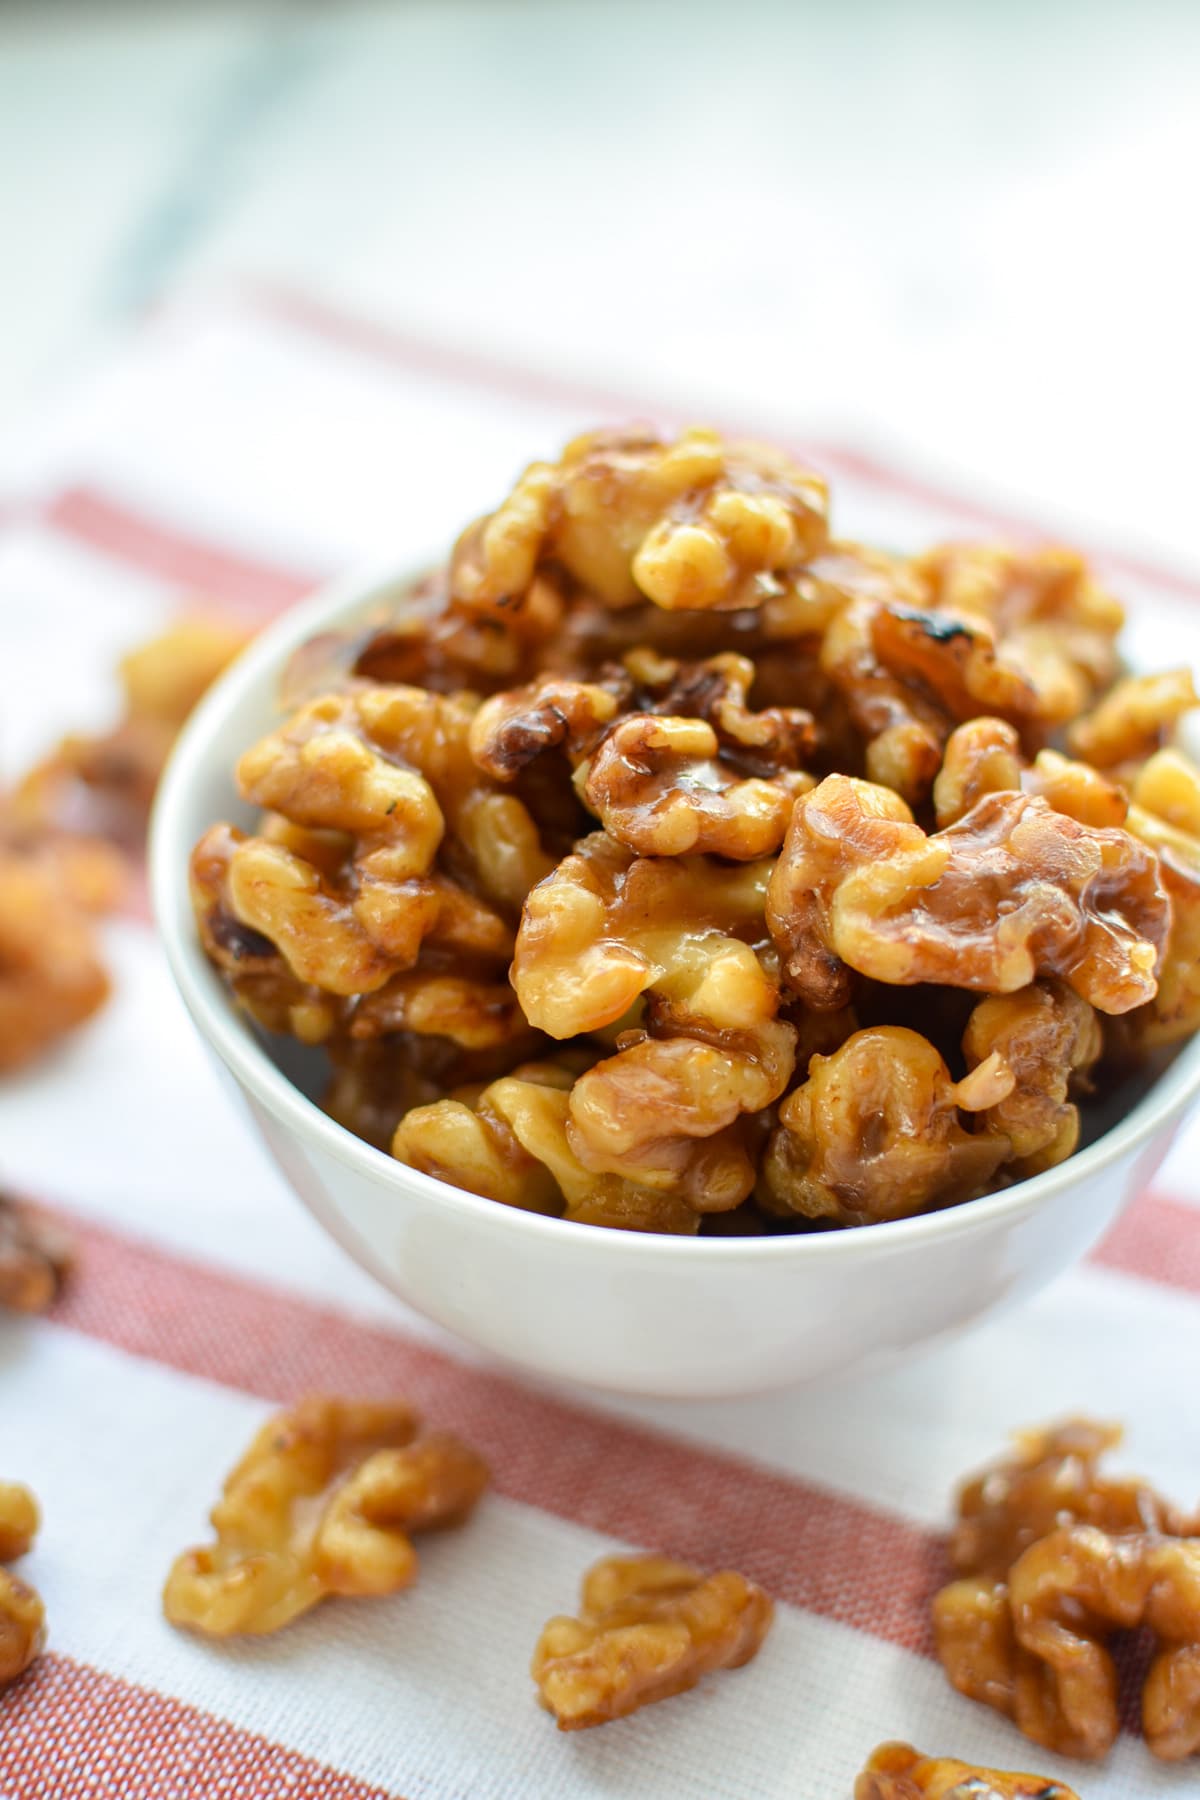
Allow your maple candied nuts to cool completely to room temperature before serving or storing.
Storage
If you're wondering how you can store candied walnuts, it's actually quite simple! To get started, allow your candied nuts to cool completely. Storing warm nuts will create condensation and result in early spoilage. Once the nuts are cooled, add them to an airtight container or storage bag and seal tightly.
Store at room temperature for up to 1 week, or in the fridge for up to 3 weeks. For longer storage, add your nuts to the freezer and store them for up to 3 months.
Variations and Substitutions
With honey: It's easy to make these naturally sweetened candied walnuts with honey. Just substitute the maple syrup in a 1:1 ratio and you're good to go. Honey does burn more quickly than maple syrup, so be sure to watch the skillet closely.
With brown sugar: You can substitute brown sugar for the maple syrup, just increase the amount to 4 tablespoons (in place of 3 tablespoons of maple syrup) and follow the directions in the recipe.
Dairy free: To make these candied walnuts dairy free (and vegan), simply substitute the butter for coconut oil or butter flavored coconut oil.
Other nuts: Make these candied nuts with maple syrup and your nut of choice. Some nuts work better than others, and my recommendations are limited to walnuts, pecans, or almonds.
Expert Tips
- In order to prevent sticking and to make for an easy clean up, parchment paper is used to scoop the candied nuts onto. The nuts will cool on the parchment, and can easily be removed from it once they are ready for storage. Don't use waxed paper or plastic wrap in its place.
- The key to making any sort of "candied" food is to use a heavy bottomed skillet. Inexpensive, thin skillets heat too quickly and too unevenly, causing the sugar to burn much more quickly.
- A good quality silicone spatula is essential for this recipe. You'll need one that is heatproof, and doesn't stick. This makes transferring and stirring the nuts easy, as well as the clean up after since very little is left behind in the skillet to clean.
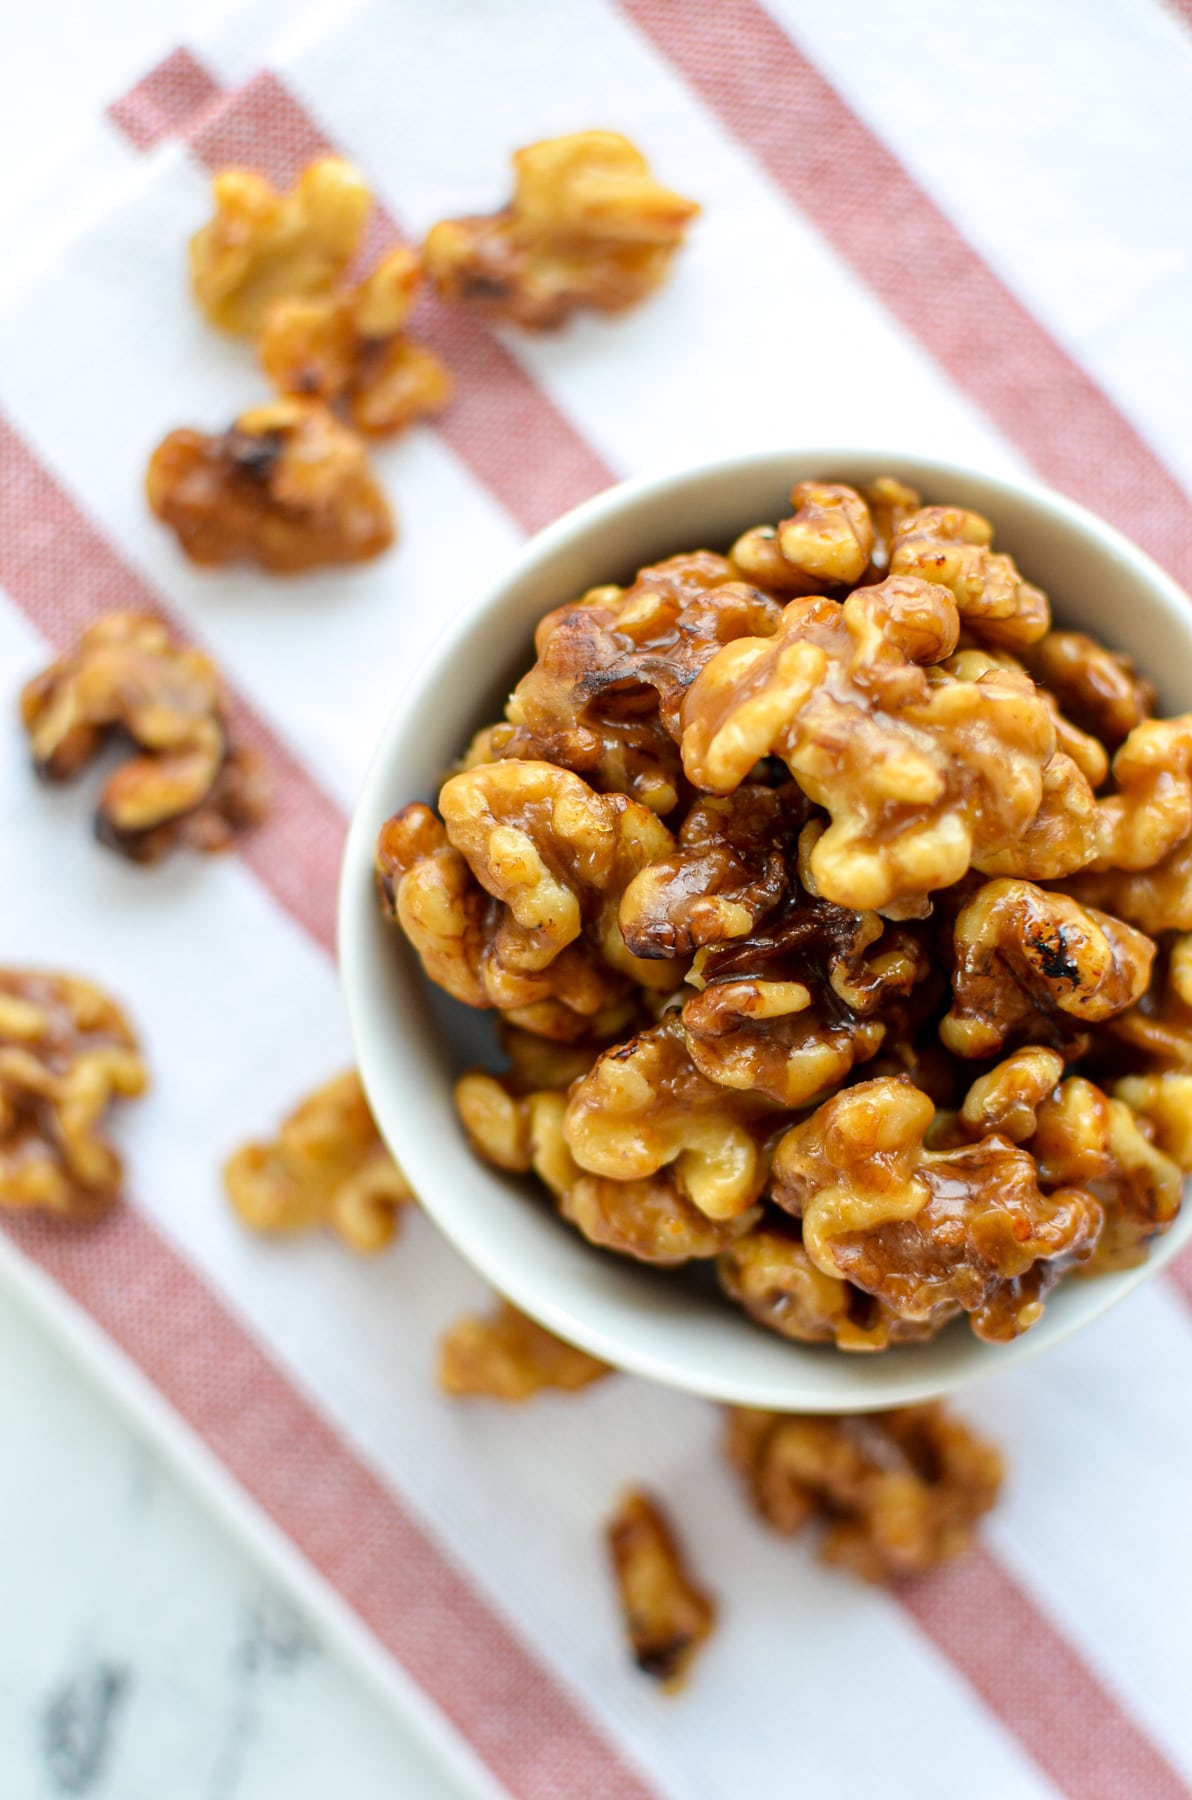
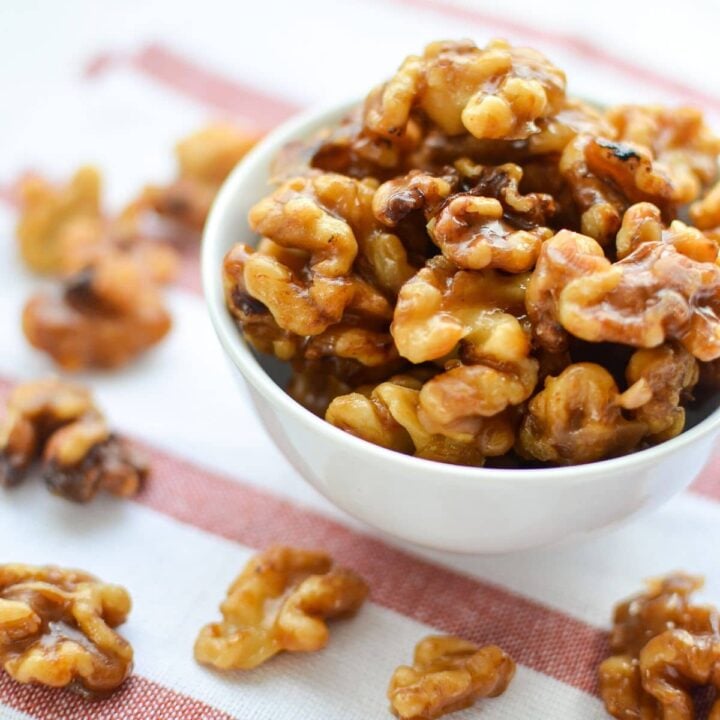
Ways to Serve Candied Walnuts
- To garnish salads
- On top of soups (like butternut squash or pumpkin soup)
- As a sweet and salty snack
- Featured on a charcuterie board
- Sprinkled on top of roasted vegetables
- In muffins
- Added to granola
Frequently Asked Questions
Yes, maple syrup is completely gluten free! Since it is only made from one ingredient (the concentrated sap of maple trees), the possibility of cross contamination or additives is pretty low. Maple syrup is also generally produced in its own facility or on farm, so even trace amounts of wheat should be virtually none.
If you don't have maple syrup on hand, you can use honey, brown sugar, agave, brown rice syrup, or corn syrup depending on the particular recipe you're using. If the recipe relies on the maple syrup as a liquid, opt for a liquid substitute instead of a granular substitute like brown sugar.
Since all nuts have a high fat content, and fat spoils more quickly than carbohydrate based foods, nuts (including walnuts) do go bad. To prolong their storage life, store them in an airtight container in either the fridge or the freezer. Nuts that are frozen are kept fresh for a very long time, and don't require thawing as many other frozen foods do. They can be used directly from the freezer.
Candied Walnuts with Maple Syrup
These maple candied walnuts are need just 3 ingredients and take less than 10 minutes to make!
Ingredients
- 1 cup walnut halves
- 1 tablespoon salted butter
- 3 tablespoons pure maple syrup
Instructions
- Preheat a skillet over medium heat, and gather your ingredients to ensure they are ready when needed. Line a baking sheet with parchment paper and make sure it is ready and next to your work space.
- Once the skillet is hot, add the butter and stir with a heatproof silicone spatula until melted.
- Add the maple syrup, and stir quickly to combine with the melted butter.
- Add the walnuts, and toss well in the butter and maple syrup.
- Keep stirring often, to prevent burning and to evenly coat the walnuts with the maple and butter mixture.
- Cook for 3-5 minutes, tossing frequently. Keep a close eye, since it can burn easily.
- Once the nuts are toasted and coated, immediately scrape them out of the skillet and onto the prepared parchment paper. Use your silicone spatula to break up the nut pieces so they are not all clustered together.
- Let the nuts cool to room temperature before serving.
- Once the nuts are completely cooled, transfer to an airtight container or freezer bag.
Notes
Storage: When stored in an airtight container, these nuts will last for up to 1 week at room temperature, 3 weeks in the fridge, and 3 months in the freezer. To make sure your nuts store well, ensure they are completely cooled before transferring to their storage container. The warm nuts can cause condensation, and the presence of moisture will spoil them very quickly!
With honey: It's easy to make these naturally sweetened candied walnuts with honey. Just substitute the maple syrup in a 1:1 ratio and you're good to go. Honey does burn more quickly than maple syrup, so be sure to watch the skillet closely.
With brown sugar: You can substitute brown sugar for the maple syrup, just increase the amount to 4 tablespoons (in place of 3 tablespoons of maple syrup) and follow the directions in the recipe.
Nutrition Information:
Yield: 6 Serving Size: ⅙ of RecipeAmount Per Serving: Calories: 157Total Fat: 13gSaturated Fat: 2gTrans Fat: 0gUnsaturated Fat: 10gCholesterol: 5mgSodium: 17mgCarbohydrates: 9gFiber: 1gSugar: 7gProtein: 3g
Nutrition information is an estimate only.
This post contains affiliate links, which means that if you click a link and make a purchase, we receive a commission at no additional cost to you. See our disclaimer for more information. Any nutritional information is for entertainment and informational purposes only, and is not intended as medical advice. Always seek the advice of your health provider.
Margie says
These are so delicious and easy to make. I much prefer them to using granulated sugar instead of maple syrup.