


This method for Instant Pot Yogurt is the easiest way to make creamy yogurt - at home! Includes directions for all types of milk, and you can even strain some to make your own Greek Yogurt.
You're never going to want to buy yogurt from the store again!

One of the best things to start making at home instead of buying is yogurt. Store-bought can be pricey, especially if you like special types like Greek or Skyr for their higher protein content.
Homemade, in contrast, will cost you just a gallon (or half gallon) of milk - plus a few tablespoons of yogurt to get you going (and you probably have some on hand).
I've been making my own yogurt at home for well over 10 years, and I used a slow cooker for many of those years. As soon as the Instant Pot came on the scene, all of that changed!
Homemade Instant Pot yogurt is the easiest method I've tried and it sets up every.single.time. In fact, in my 5 years of making it - I've never had a batch fail! I can't say the same about other methods I've used.
But the best part? You'll be saving money AND using quality ingredients to make a yummy breakfast and snack option for your family. What's not to love about that?
What You'll Need:

- Milk: Use whatever type of milk you have on hand (as long as it isn't ultra-pasteurized milk). Whole milk makes for the thickest yogurt, but lower fat milk will work just fine.
- Yogurt: You will need a few tablespoons of store bought yogurt to act as your culture. Use plain, unsweetened yogurt with active or live cultures listed on the label.
Equipment
- Instant Pot: If you're going to make a lot of yogurt (or bone broths), I recommend upgrading to an 8 quart Instant Pot.
- Digital thermometer: When it comes to yogurt making, it's really important to check the temperature of the milk. I use an inexpensive digital thermometer for this task and it works great!
- Strainer (optional): If you want thick Greek-style yogurt, you can strain it after culturing. I use a special yogurt strainer, but an inexpensive option is a colander lined with cheesecloth or a flour sack towel.
Choosing a Yogurt for Starter
While specific yogurt starter cultures can be purchased, the most accessible option for most people is to use store-bought yogurt as a starter.
- Use plain yogurt. Since this contains no added sugar, flavor, or color, it's the best choice for making homemade yogurt.
- Active cultures. Check the label to ensure the yogurt contains active cultures (I haven't personally seen one without active cultures, but it's good to check just in case).
- Fresh is best. Don't use a starter culture that is very near to expiry. Instead, go with a good quality yogurt that is fresh.
- What type of yogurt do you like best? Different types of yogurt use different types of cultures (for example: Balkan), and some may be more mild or more tart than others. Use one that you like the flavor of, and your yogurt is more likely to have those same qualities.
Optional Prep: Cleaning the Instant Pot
This isn't a necessary step, but if you make a lot of bone broth, soups, or chili in your Instant Pot, sterilizing it can prevent the yogurt from taking on the flavor of previous foods. For the best results, remove and clean the seal too.
- Method one: Add boiling water to the pot and place lid on. Allow to rest for 5-10 minutes. Then release the pressure, pour the water out, and wipe the pot with a clean kitchen towel.
- Method two: Place 2 cups of water in the Instant Pot, plus 1 tablespoon of white vinegar. Cook on high pressure for 5 minutes. Do a quick release, then pour the water out and dry the pot with a clean kitchen towel.
- Method three: If you only use your IP for yogurt, you can get away with a really good soap and water cleaning. But the sterilization methods are great for multi-purpose use pots.
Instructions
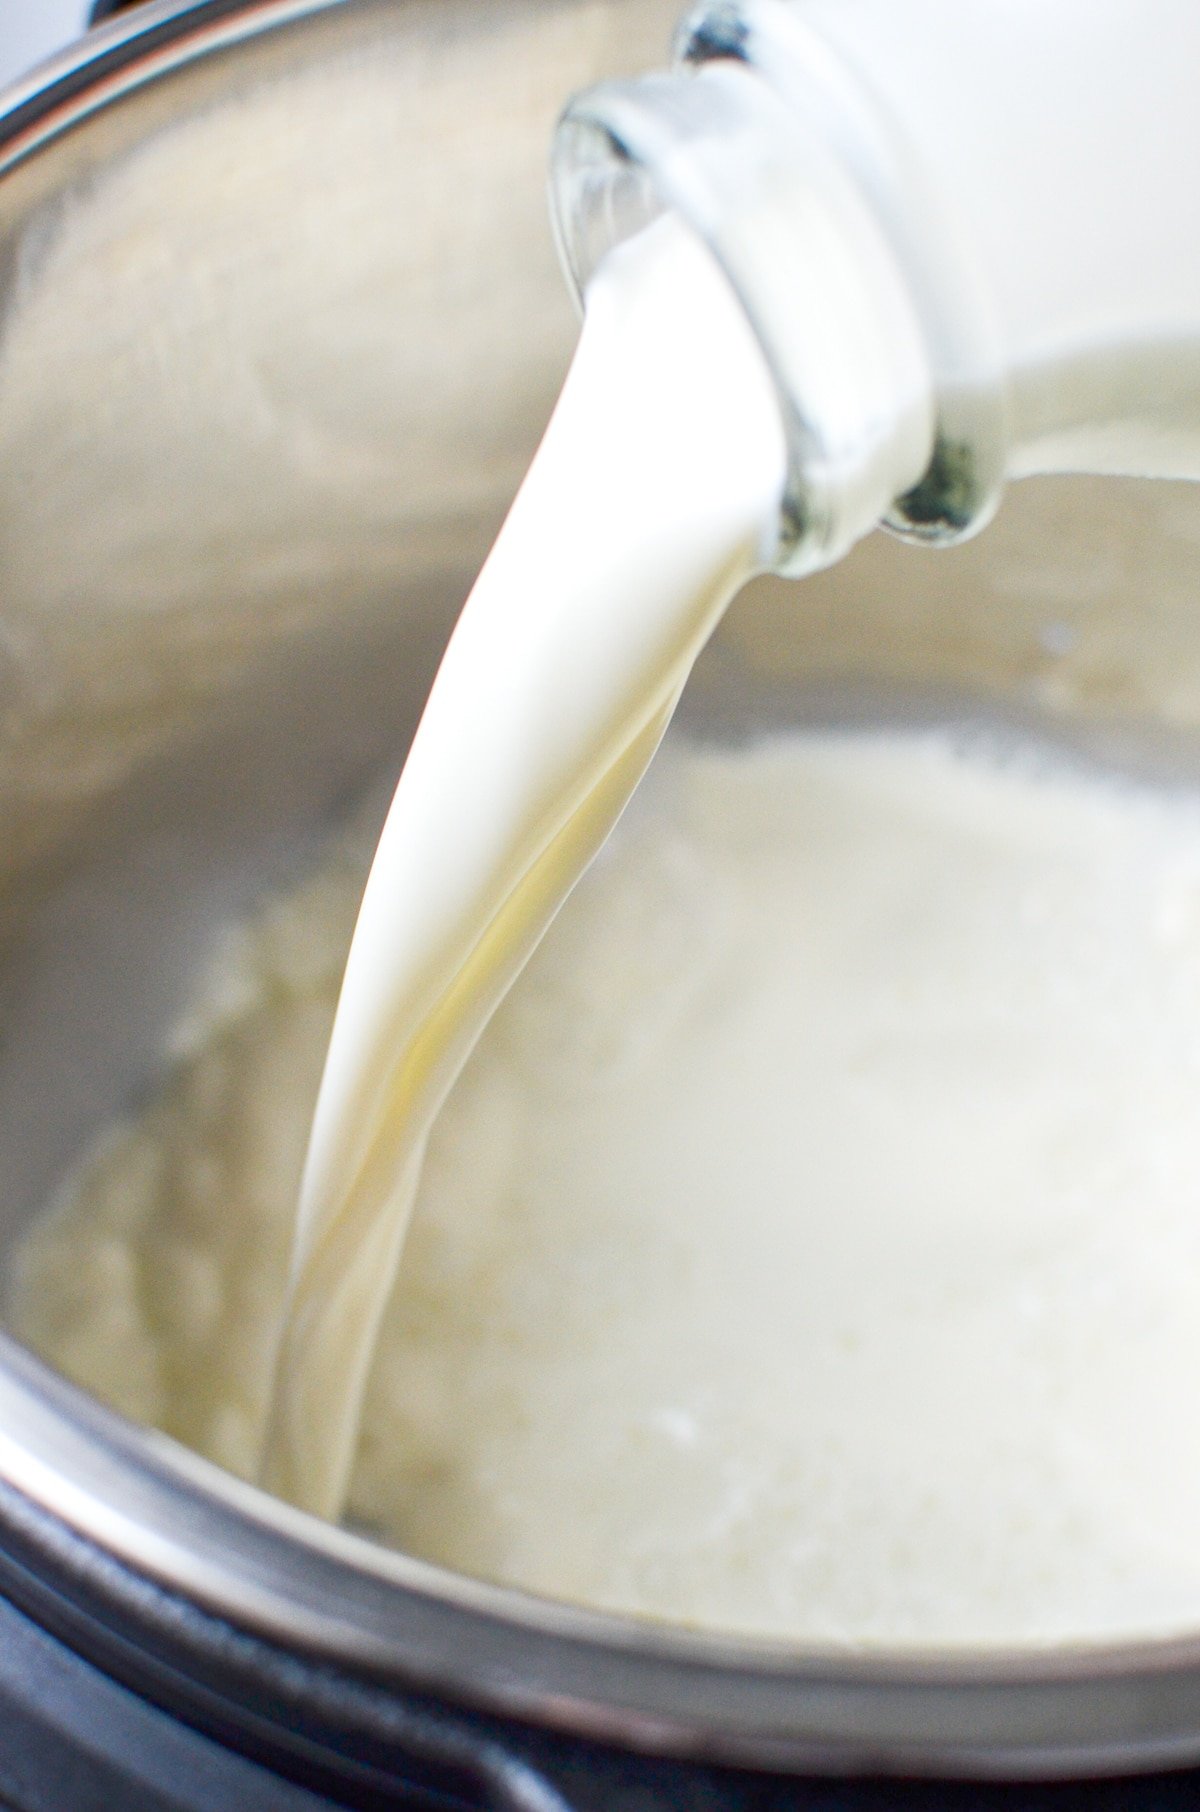
- Add the milk to the inner pot of the Instant Pot. Then secure the lid and select the yogurt setting; keep pressing the yogurt button until "boil" is displayed.

- Once the boil setting is complete (this will take about an hour) the pot will beep.
- Open the lid and verify (with a digital thermometer) that the milk has reached 180-185ºF (82-85ºC).
Note: If the milk has not reached the desired temperature, you can briefly heat it using the "saute" function of the Instant Pot. It shouldn't take more than a few minutes.
Cooling the Milk
- Cool the milk to 105-110ºF (40-43ºC); this can be done by removing the inner pot and placing it in an ice bath in the sink, or placing it on the counter.
- If using an ice bath (or cold water bath) it should take about 15 minutes, or an hour if you leave it at room temperature.
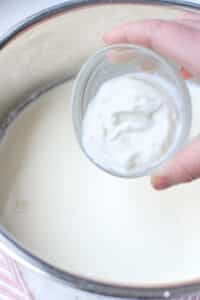
Adding the Starter
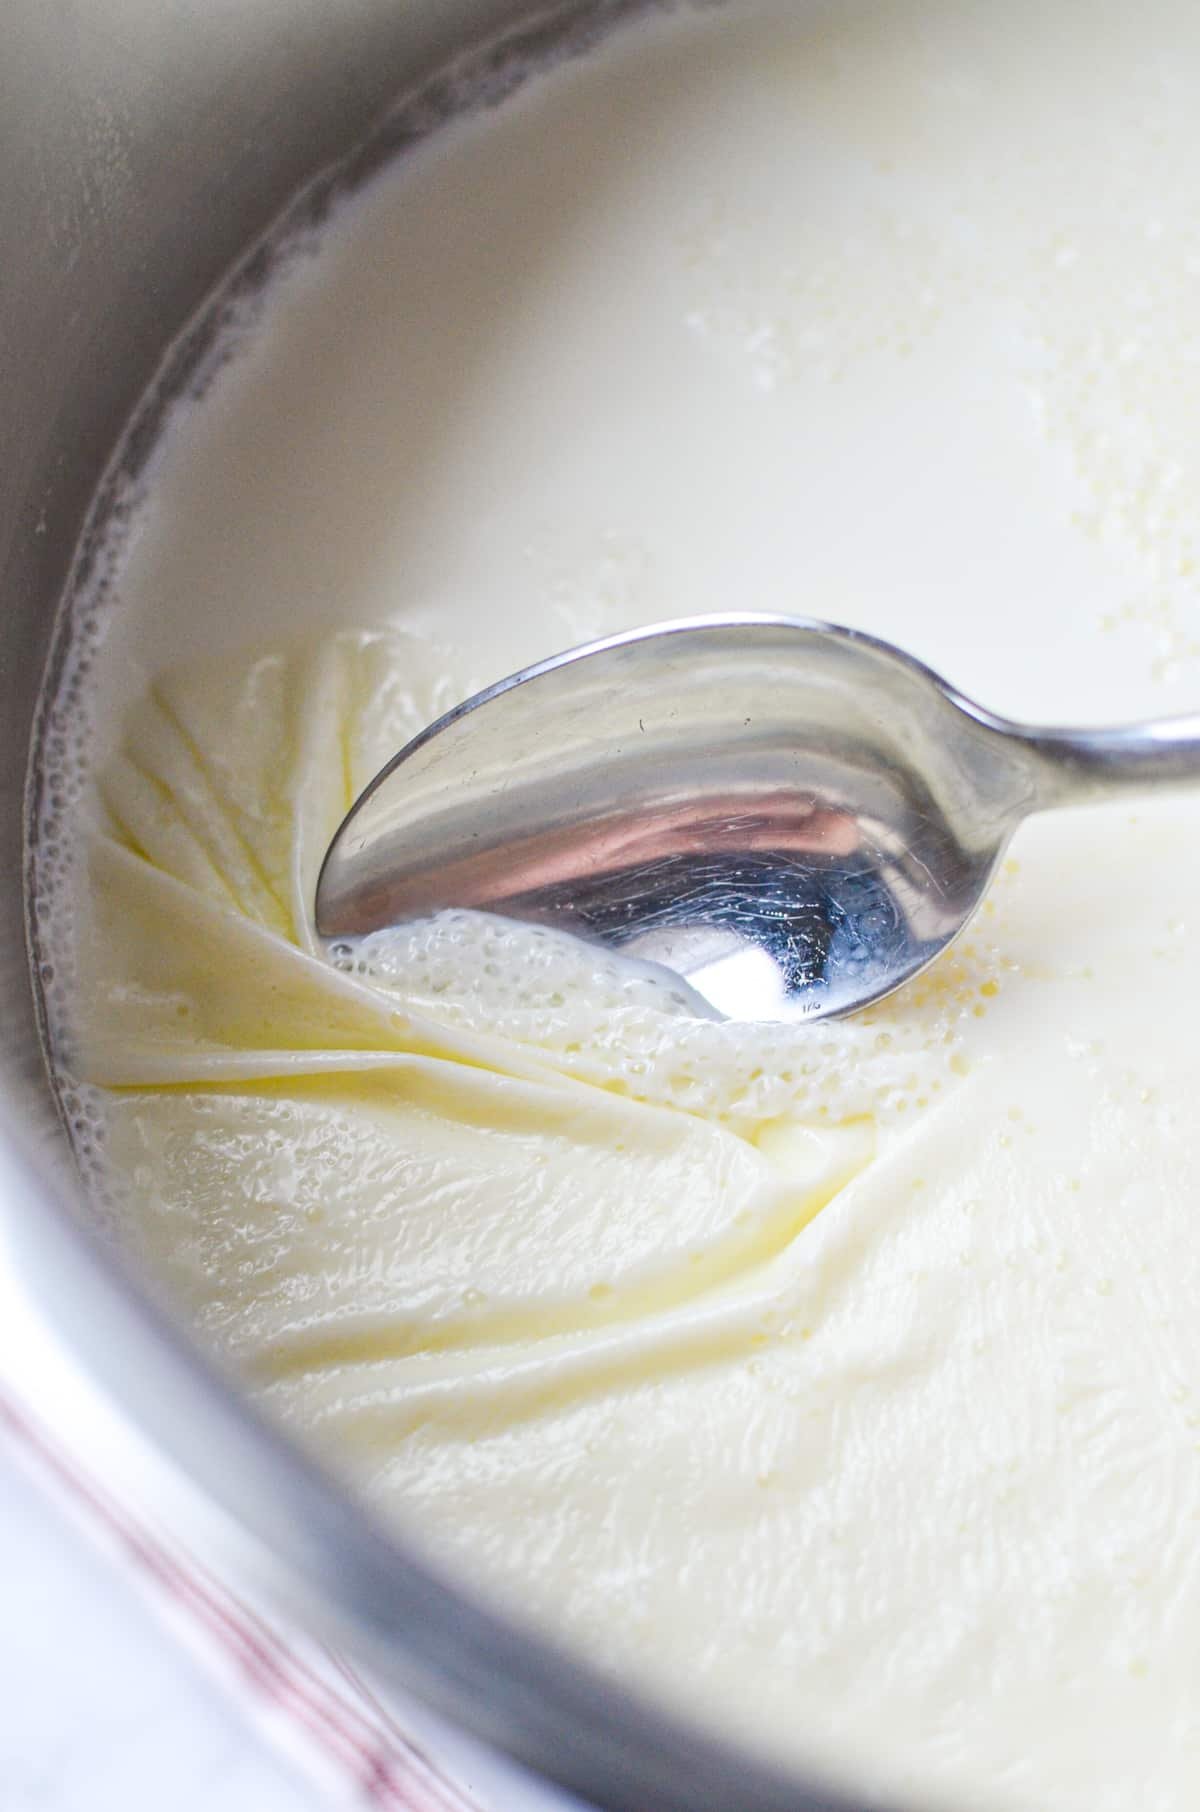
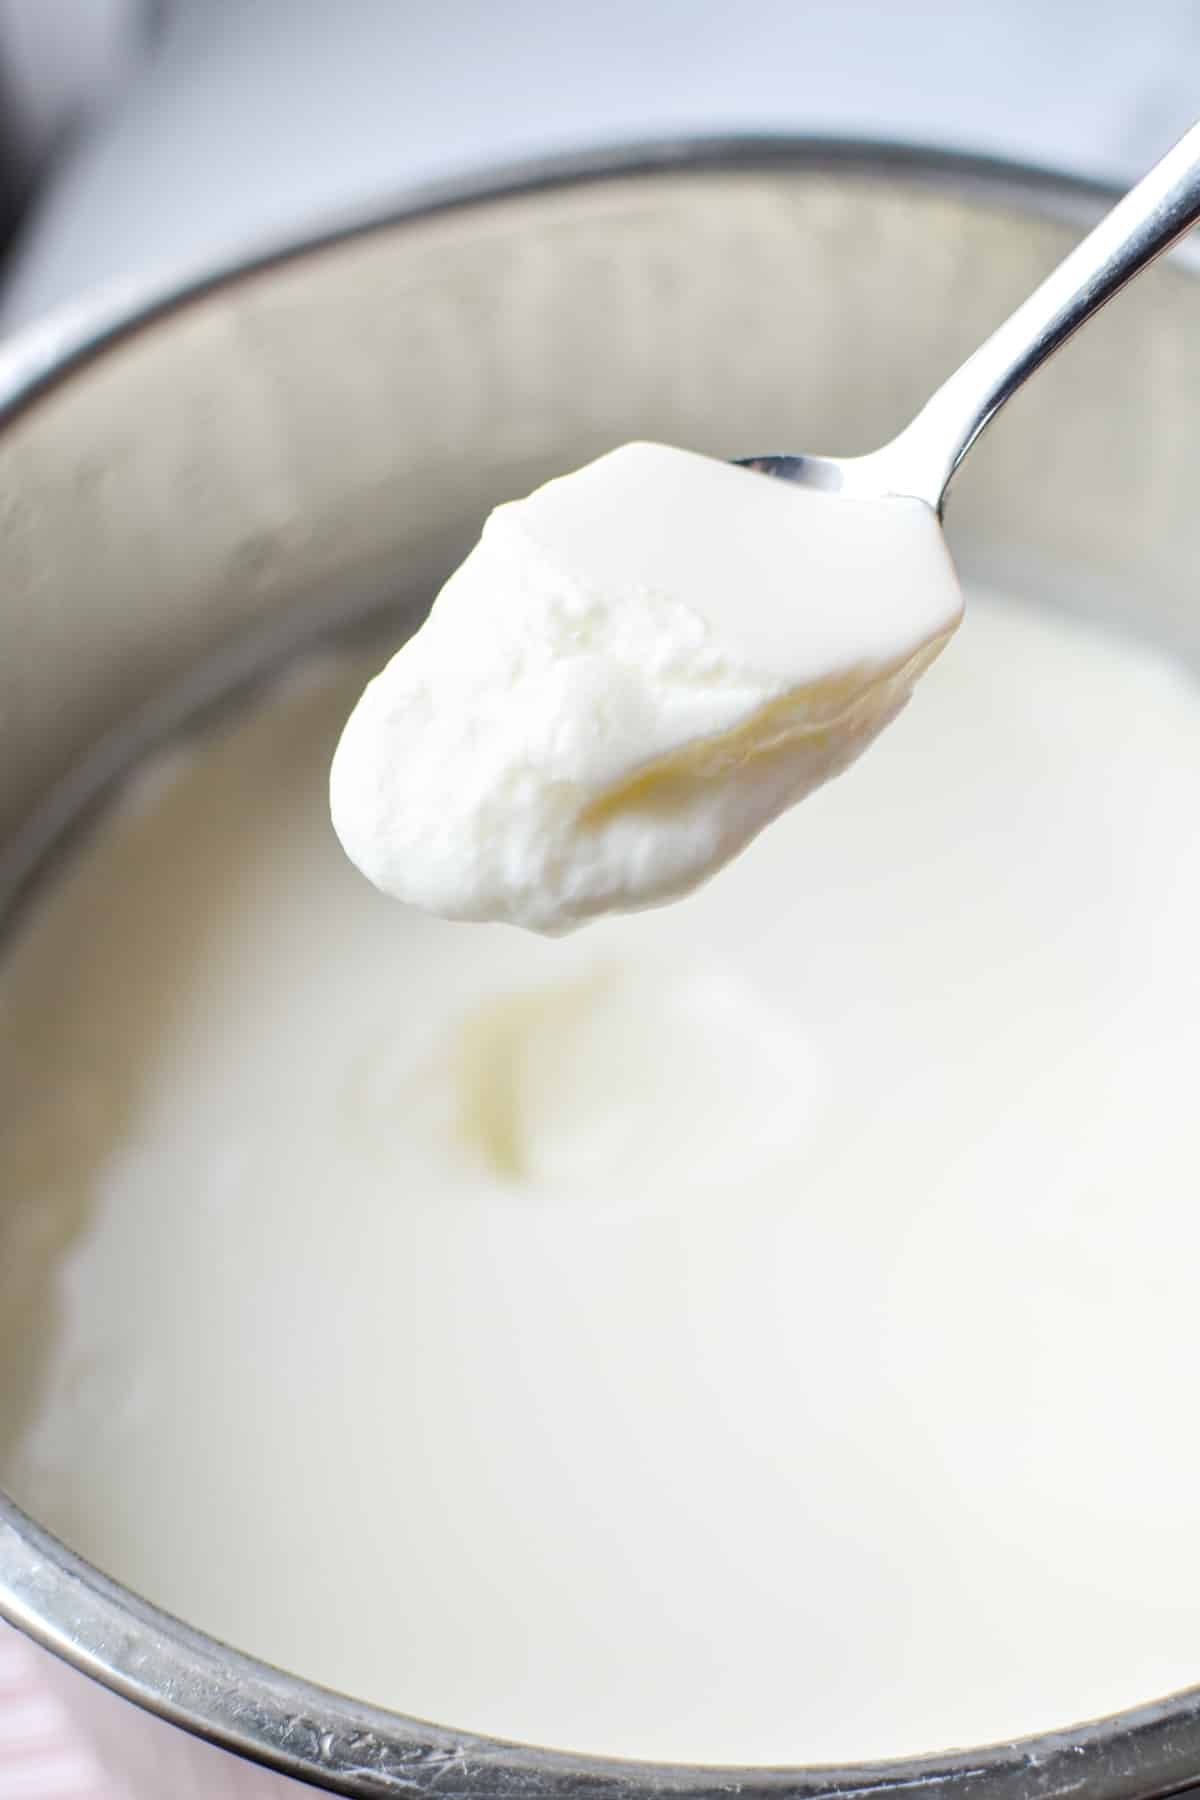
- Once the yogurt has cooled, skim off the surface "skin" that forms.
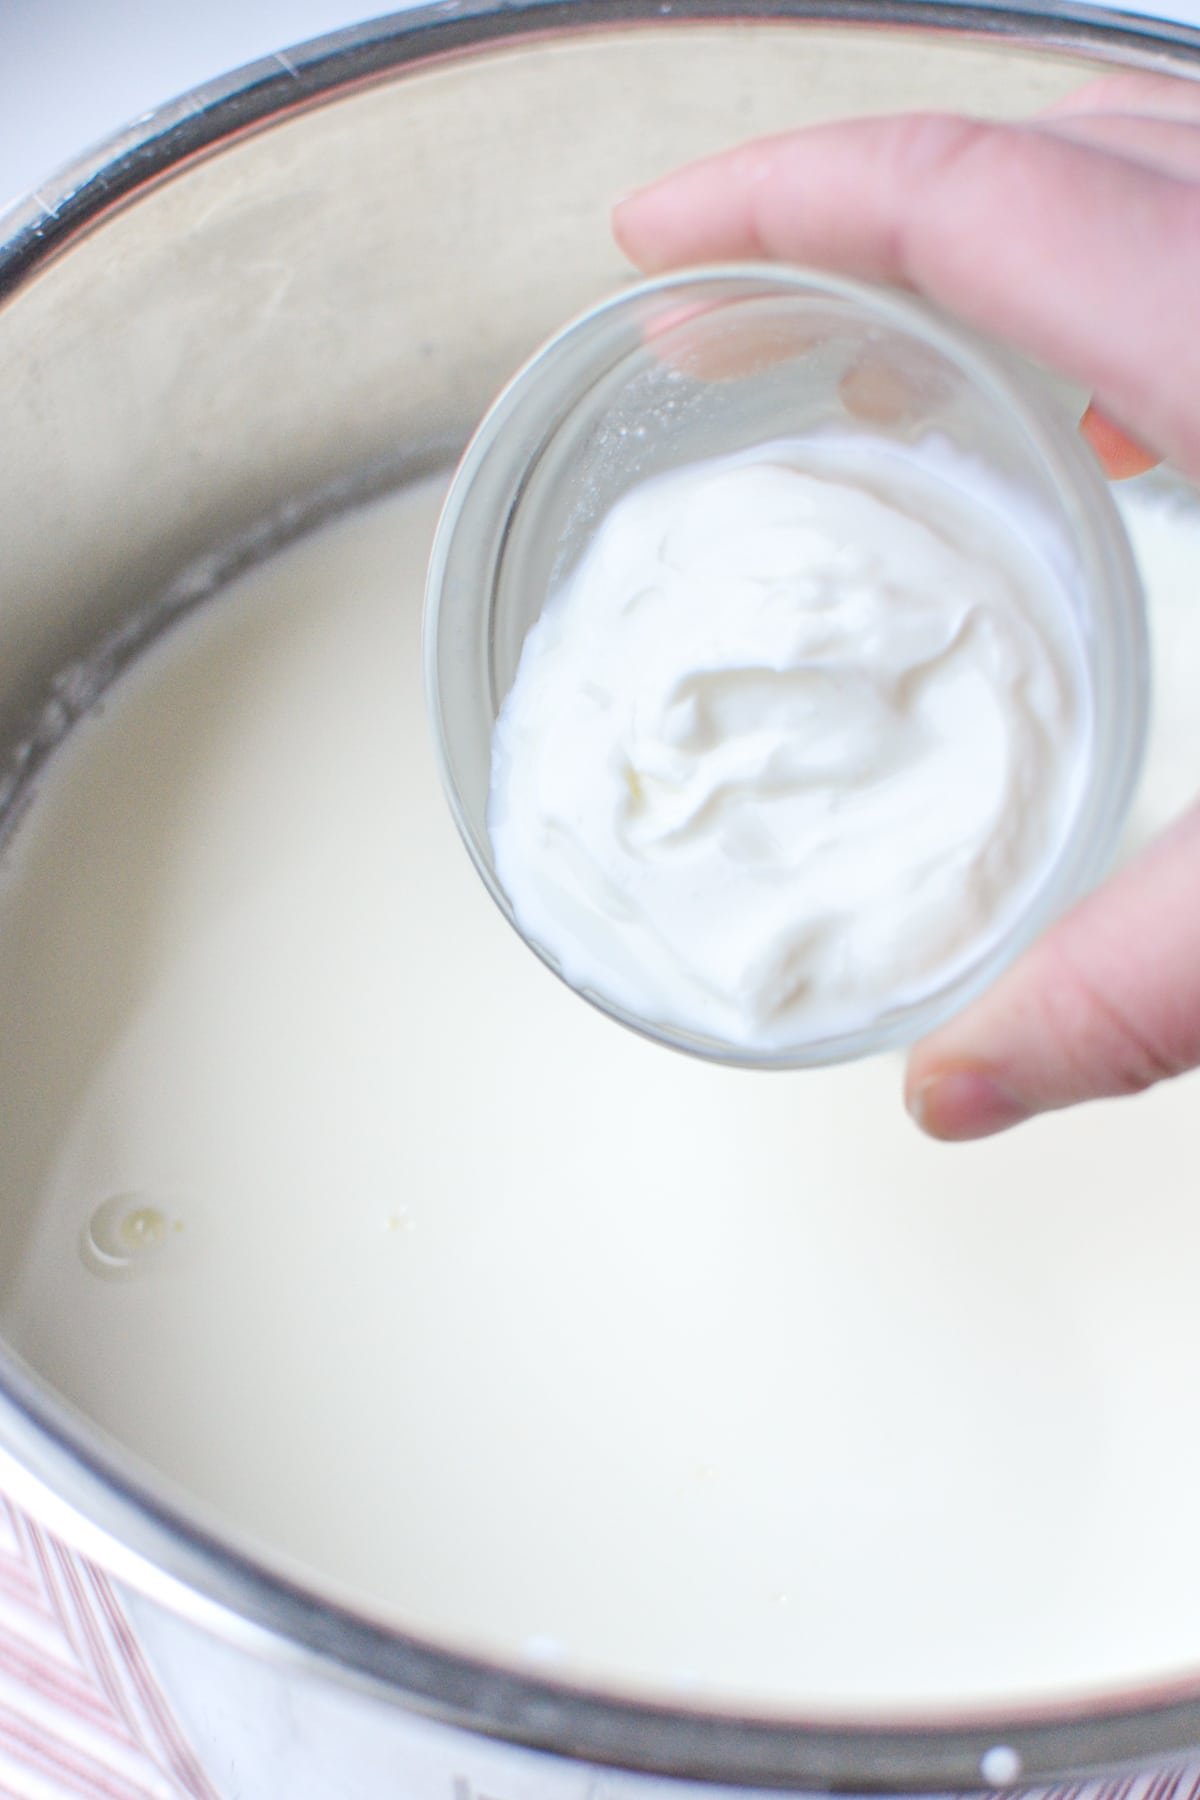
- Add 2 tablespoons of yogurt to the warm milk.
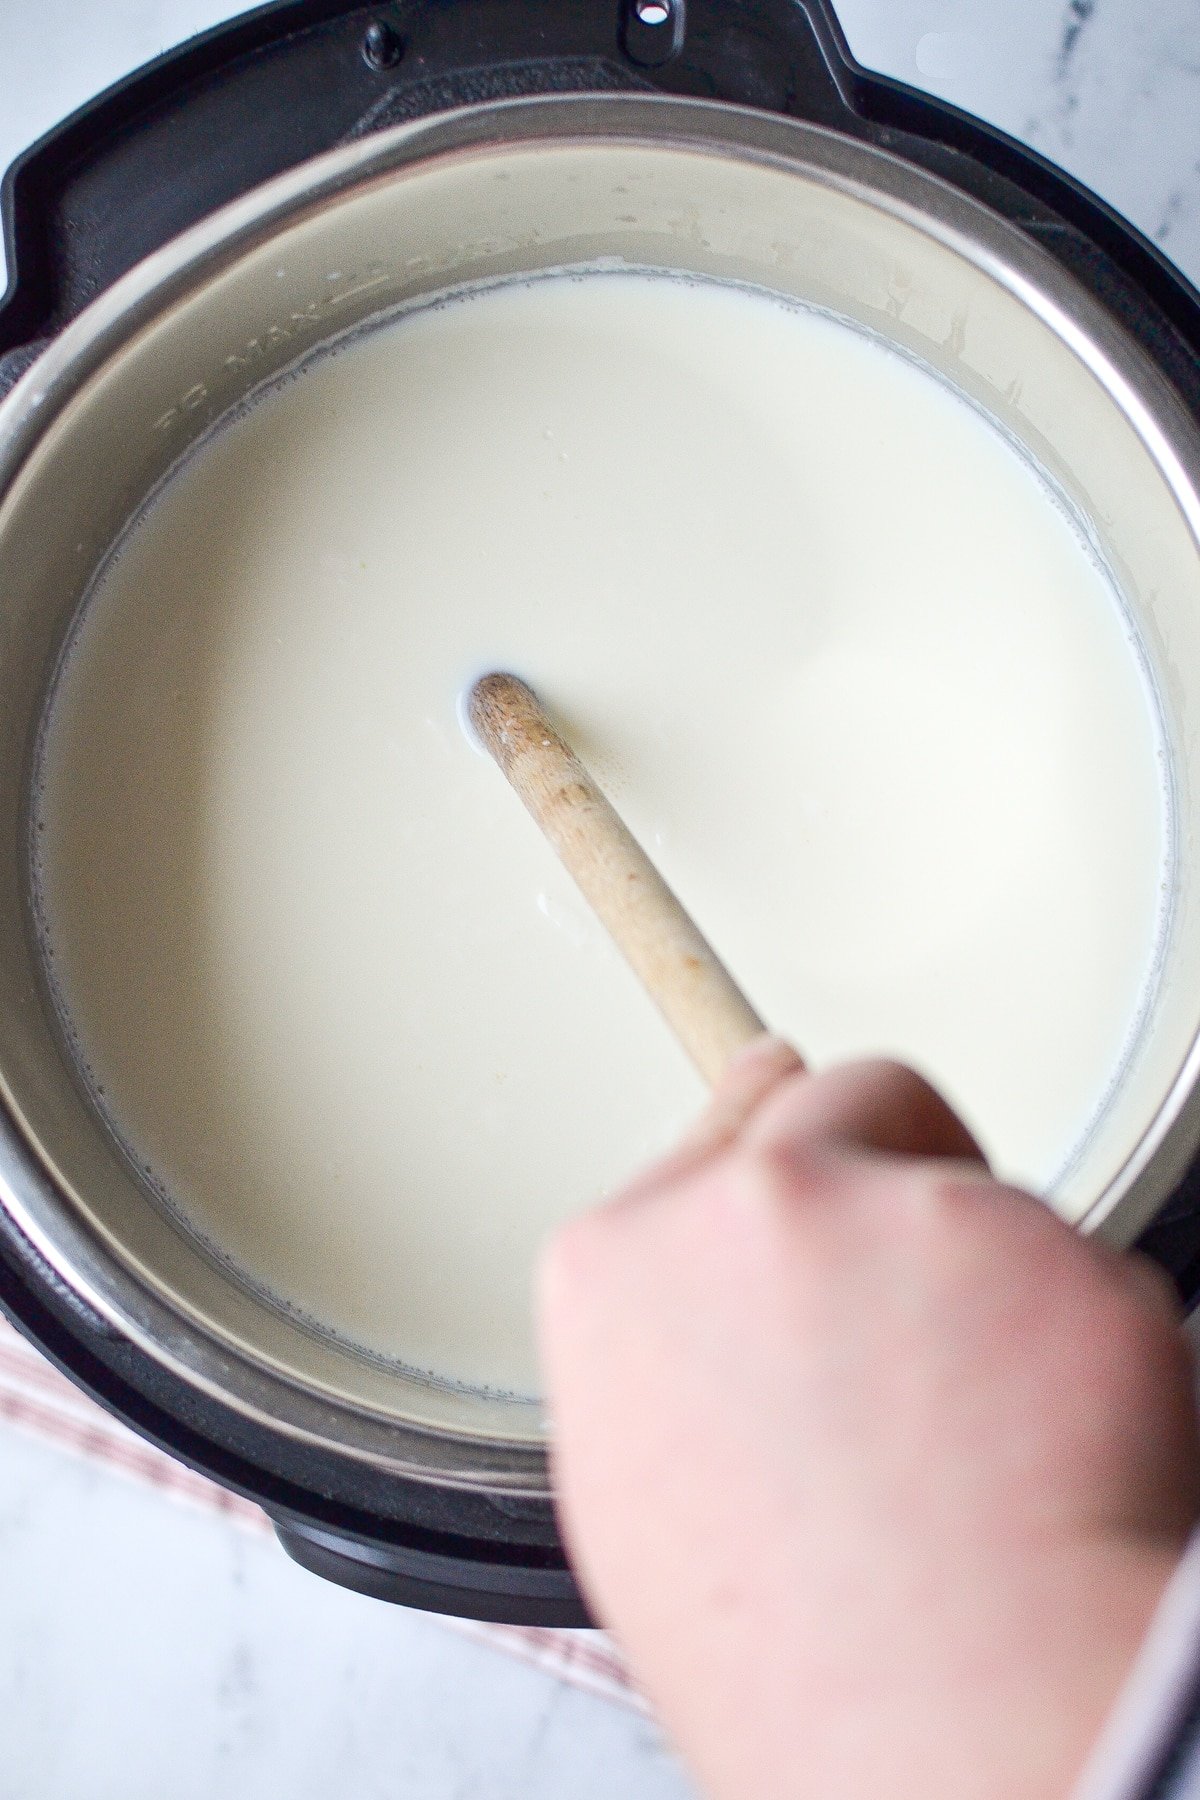
- Stir the yogurt into the milk using a wooden spoon.
- Place the lid on the Instant Pot and press the yogurt button until you see three different time options - 8, 12, or 24 hours. Select your desired culturing time, then allow the pot to do the work!
How Long Should I Culture my Instant Pot Yogurt?
The yogurt button offers 3 options for time, which one should you choose?
- 8 hours. This is the minimum amount of time it takes to make yogurt, and it's a great way to finish your yogurt in one day (start in the morning, done by dinnertime).
- 12 hours. You'll get a few extra probiotic benefits from the longer culturing time, and it's a great way to prepare your yogurt overnight (start it after dinner, and it's ready by the morning).
- 24 hours. This is my preferred culturing time for yogurt. It offers the most in terms of probiotic benefits, and I find it is more mild in flavor. It's also lower in carbohydrates since the fermentation process consumes sugar.
Tip: If you're making a large amount of yogurt in a smaller pot (like a 6 quart), selecting a longer culturing time can help your yogurt set up better.
Cold Start Method
If you want to make Instant Pot yogurt without bringing it to a boil first, and then cooling to 105-110ºF, there is a cold start option.
- In order to make cold start yogurt you will need to use milk that has been ultra-filtered (like Fairlife milk).
- This type of milk has already been pasteurized at a high heat and cooled down, eliminating the need for the first two steps.
Note: This absolutely will not work with regular milk. Follow the original instructions and your yogurt should turn out great!
The Final Product
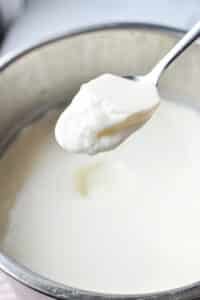
- Once the culturing time is through, the electric pressure cooker will beep, indicating it is done. Carefully open the lid, and check your yogurt to ensure it has set up.
How will I know if it worked?
I've never had a batch of yogurt fail in the Instant Pot (but I have in the slow cooker, so I know what it looks like). Here's how to know you've had a successful batch:
- Thick consistency (chilling will thicken it further)
- Easily scooped with a spoon
- Small pockets of yellowish whey forming around the edges
- Very jiggly
- Pleasant, yet tangy scent
Chilling and Storing Homemade Yogurt
- Your homemade yogurt should be good for about 2 weeks in the refrigerator, depending on how fresh your milk is.
- Transfer the yogurt to glass jars or storage containers and cover tightly with a lid.
- Store in the refrigerator for up to 2 weeks, or in the freezer for 2-3 months.
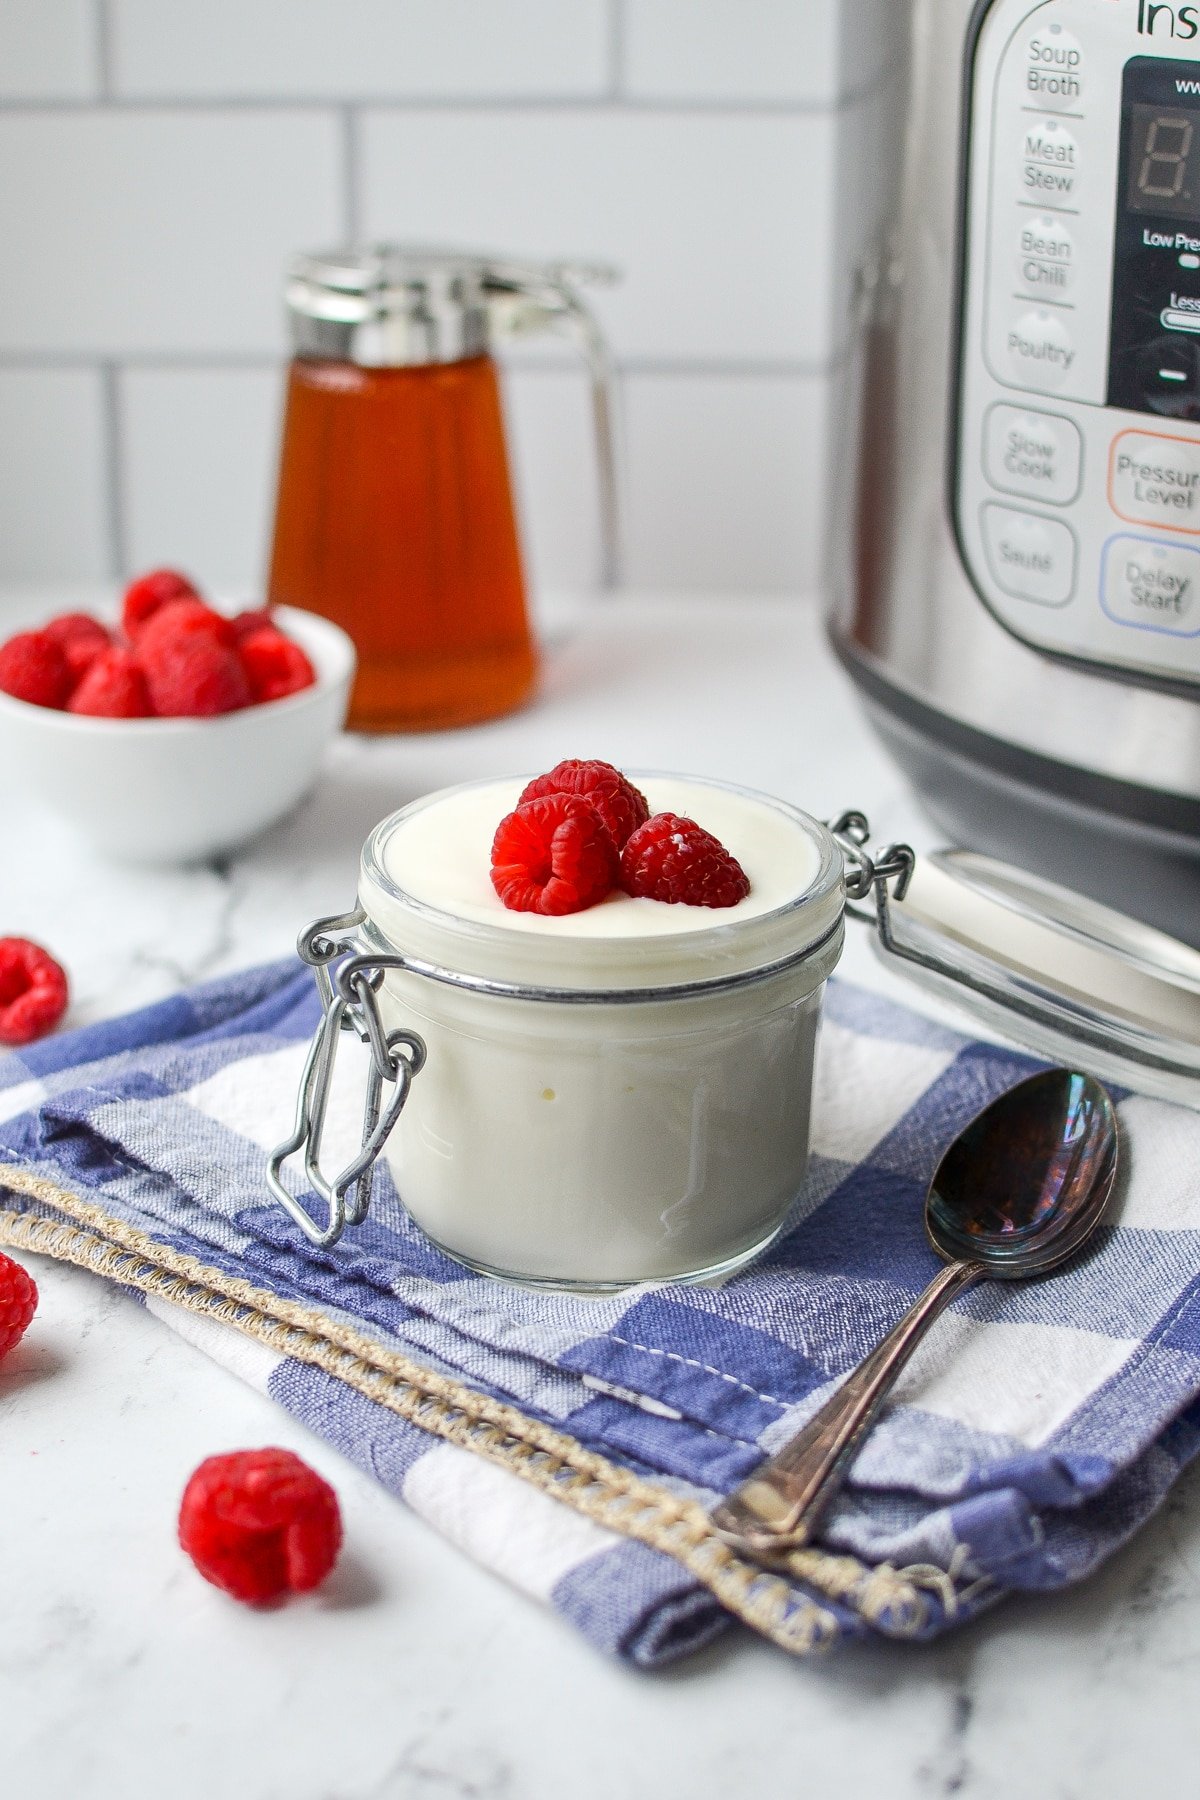
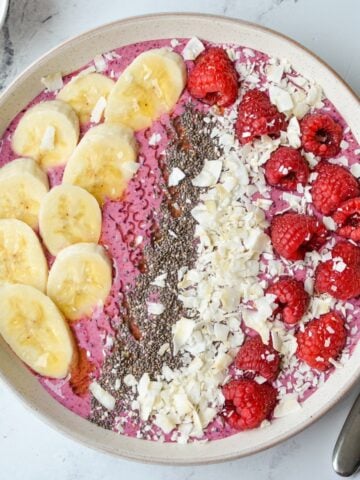
Flavor and Sweeten Your Yogurt - Naturally!

- Honey
- Maple syrup
- Vanilla extract (or vanilla bean paste)
- Low sugar jam
- Chia seed jam
- Flavored syrups
- Stewed fruit
- Fresh fruit (berries, grapes, etc.)
Recipe FAQs
Since the yogurt setting is not done under pressure there is no need to seal the pot. There is also no negative impact if you switch the valve to sealing, so it's not something to worry about.
If you are making a larger batch in a smaller pot, sometimes you may have some difficulty getting the milk to reach temperature. This can easily be solved by switching the Instant Pot to "saute", which will turn on the element. This should warm up the milk - but watch carefully! It should only take a few minutes to heat the milk adequately.
Yes, it does contain active cultures (AKA probiotics). Instant Pot yogurt is not made under high heat or pressure, instead it maintains a steady temperature over a period of time. This is the same method used by yogurt makers, dehydrators, etc, which preserve (and promote) probiotics through the culturing process.
Yes! Homemade yogurt is made with milk and just a few tablespoons of store-bought yogurt, meaning you can get probiotic-rich yogurt for the same cost as milk. When it comes to homemade food, yogurt has one of the best returns on investment.
How to Make Instant Pot Greek Yogurt
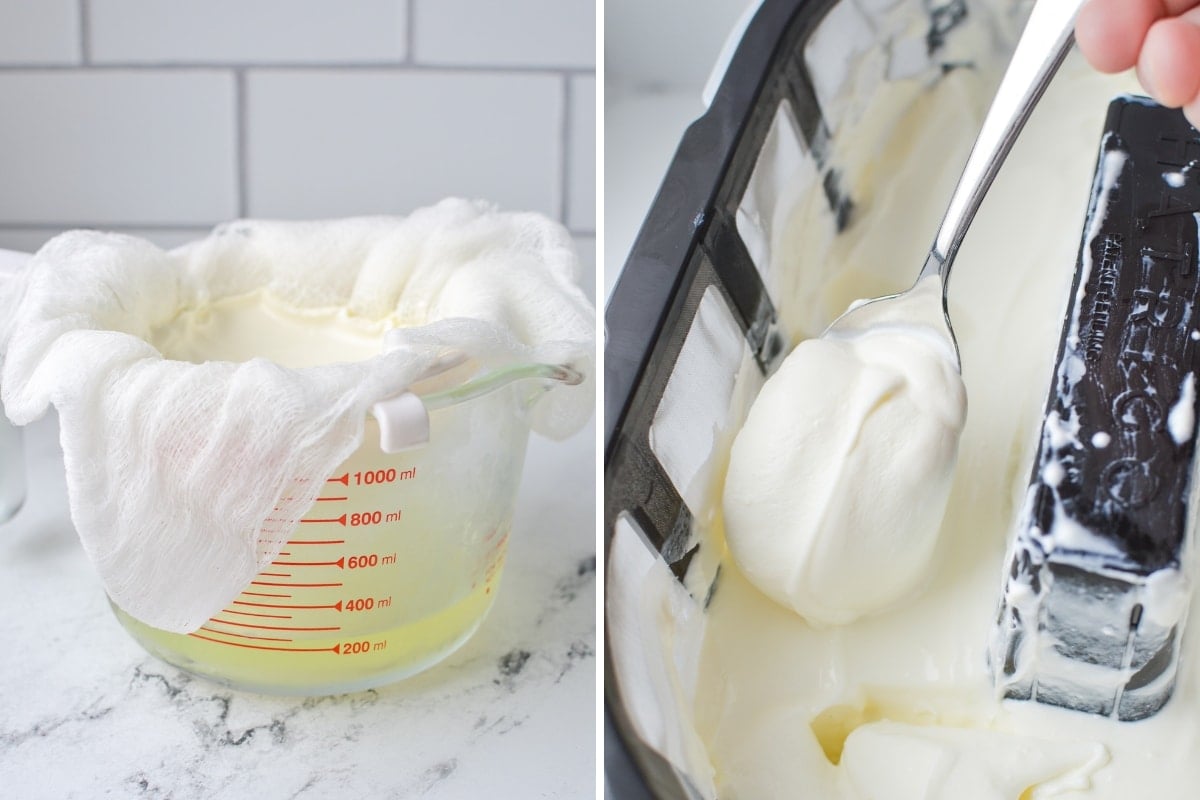
A Greek-style yogurt can be made at home by straining the yogurt to remove some of the liquid whey. Here are 3 ways to do just that:
- Cheesecloth + sieve: Line a mesh sieve or colander with a double or triple layer of cheesecloth (OR a clean flour sack towel) and place it over a large bowl. Transfer the yogurt (in batches, if necessary) to the lined strainer and place in the refrigerator while it drains.
- Yogurt strainer: Transfer the yogurt directly to the strainer, or line the strainer with a clean flour sack towel (or cheesecloth) for the perfect consistency (this is my preferred method).
- Nut milk bag: Line a colander with a nut milk bag and set it over a large bowl. Transfer the yogurt into the bag and allow to strain.
You will know the yogurt is strained well enough when it is thick, and there is a greenish-yellowish liquid collecting in the container (or bowl) below.
Top Tip: The longer you strain your yogurt, the thicker it will become. You can even make a yogurt cheese (similar to cream cheese) if you strain for 18-24 hours.

If you loved this Instant Pot Yogurt recipe, let me know by leaving a 5-star review in the recipe card or comment below! You can also tag me on Instagram @littlehomeinthemaking.
📖 Recipe

Instant Pot Yogurt
Equipment
- Instant Pot 6-quart or 8-quart
- Yogurt strainer (optional - for Greek yogurt)
Ingredients
- 8 cups milk
- 2 tablespoons plain yogurt with active cultures
Instructions
- Prep (optional). Pour boiling water into the Instant Pot and place the lid on. Allow to rest for 5 minutes, then release any pressure before removing the lid. This will help to remove residual flavor or smell that remains in the Instant Pot.
- Pour the milk into the Instant Pot and secure the lid.

- Heat the milk. Select the “yogurt” button and toggle through the options until the display reads “boil”.
- Allow the Instant Pot to complete the cycle, which normally takes about 1 hour. You should hear a beep, indicating the cycle is complete. When this happens, remove the lid and check with a digital thermometer that the milk has reached 180-185ºF (82-85ºC)*.

- Cool the milk. Remove the Instant Pot insert from the electric portion, and allow it to cool down until it reaches 110ºF (43ºC) (a range of 5ºF in either direction is fine). This takes about an hour at room temperature, OR 10-15 minutes in a sink filled halfway with ice water.
- Use a spoon to skim off any skin that has formed on the milk.
- Add cultures. Add 2 tablespoons of plain yogurt (containing live cultures) and stir it into the milk gently with a wooden spoon.
- Place the insert back into the Instant Pot unit and secure the lid.
- Ferment. Select the “yogurt” button and toggle to the timer options (8, 12, or 24 hours). For a thicker, tangier yogurt select the 24-hour option. Select the 8 or 12-hour option for a mild flavor or quick results.
- Check the finished yogurt. Once the culturing time is up the Instant Pot will beep. You can then remove the lid and check your yogurt. The consistency should be thick, spoonable, and with some whey collecting at the edges of the pot.
- Refrigerate. Transfer the cultured yogurt to an airtight container and refrigerate until chilled and thick (or, if desired, strain for Greek yogurt).
- To make Greek yogurt: strain the yogurt in a cheesecloth-lined colander set over a bowl, or a yogurt strainer for several hours (I do this in the refrigerator). The yellow liquid that collects at the bottom is whey and can be repurposed. The strained yogurt can be used like regular Greek yogurt.
- Sweeten individual servings of your yogurt with honey, maple syrup, stewed fruit, or low-sugar jam after chilling.


Notes
- Storage: Transfer your yogurt to storage containers or mason jars and store them in the refrigerator for up to 2 weeks. For longer storage, transfer to freezer-safe containers and freeze for up to 3 months. Thaw before using.
- Yogurt starter: You can use 2 tablespoons of any plain store-bought yogurt (or homemade) that contains active cultures. Once you have established a yogurt culture, you can use a few tablespoons of your homemade yogurt to culture the next batch. Some people have success with continuing on, and some find their culture weakens over time.
- Type of milk: You can use almost any type of milk, but I personally recommend using whole milk for the best results and thickest consistency. Ultra Pasteurized milk is not recommended.
- Sweetening homemade yogurt: Allow the yogurt to chill and set up before sweetening. Then use honey, maple syrup, chia seed jam, stewed fruit, or low-sugar jam to add sweetness and flavor. You could also make a simple syrup with sugar or honey and add a little bit of vanilla bean paste.
- Gallon-sized batch: Double the amount of milk and yogurt culture used, but maintain the same process and culturing time. If using a full gallon of milk you will need to use an 8 quart Instant Pot. I have used a 6 quart Instant Pot, but left the milk just below the maximum line, which wasn’t quite 1 gallon ( around 3 ½ quarts).
- Milk isn’t coming up to temperature? If you’re using a large amount of milk in a smaller pot (like a 6 quart), I’ve experienced some issues with getting the milk to reach 180ºF (82ºC). This is easily solved by setting the Instant Pot to “saute” which turns on the element, and heats the milk. This takes just a few minutes, so be sure to monitor closely and remove the pot as soon as the temperature is reached.
- How to Strain Yogurt: I have a post that goes into detail on the yogurt straining process if you want step-by-step instructions. Otherwise, line a strainer with a double layer of cheesecloth OR a clean flour sack towel and strain until thickened. The yellowish-greenish liquid that collects below is known as whey and can be used to culture fruits and vegetables, beverages (like fermented lemonade), used to make bread, or given to livestock.
Nutrition
Please note that some of my blog posts here at Little Home in the Making may contain affiliate links. If you make a purchase through these links, I will get a small commission at no additional cost to you. See our disclaimer for more information.


Vicki Cunneen
Your recipe is spot-on! I have been making Greek yogurt with a gal of skim milk and fermenting for 24 hrs in an IP. It has been perfect! I was recently corrected on social media that I shouldn’t ferment for 24 hrs but for 8 to 12 hours. I decided to try it yesterday and the results were disappointing. After staining, I got only a quart of yogurt. I would normally get 1.5 quarts after straining. I will be going back to the 24 hr fermentation. Btw, once you start making yogurt, instead of using yogurt as a starter, save some of your whey. It works just as well! You can even freeze the whey in an ice cube tray and just drop 2, 3 or 4 cubes into your boiled, then cooled milk.
Dolly | Little Home in the Making
Hi Vicki! So glad you're loving the 24 hour fermentation! It's my favorite method too. I am loving this tip about the whey being used as starter. I really need to try this!!!
Anamaria Micu
I have some raw milk that went a little sour. Is it ok to use this?
Dolly | Little Home in the Making
Hmmm, I would not, personally. Some people use soured raw milk to make clabber cheese. You might want to look into something like that!
Piera
I used to make yogurt all the time when my kids were young. I stopped making it for many years, I don’t know why. You motivated me to try again, now with the instant pot. Made it once and strained it. Came out great. I’m making a new batch tonight. Thank you for your clear directions!
Dolly | Little Home in the Making
So glad I could help Piera! Happy yogurt-making!