













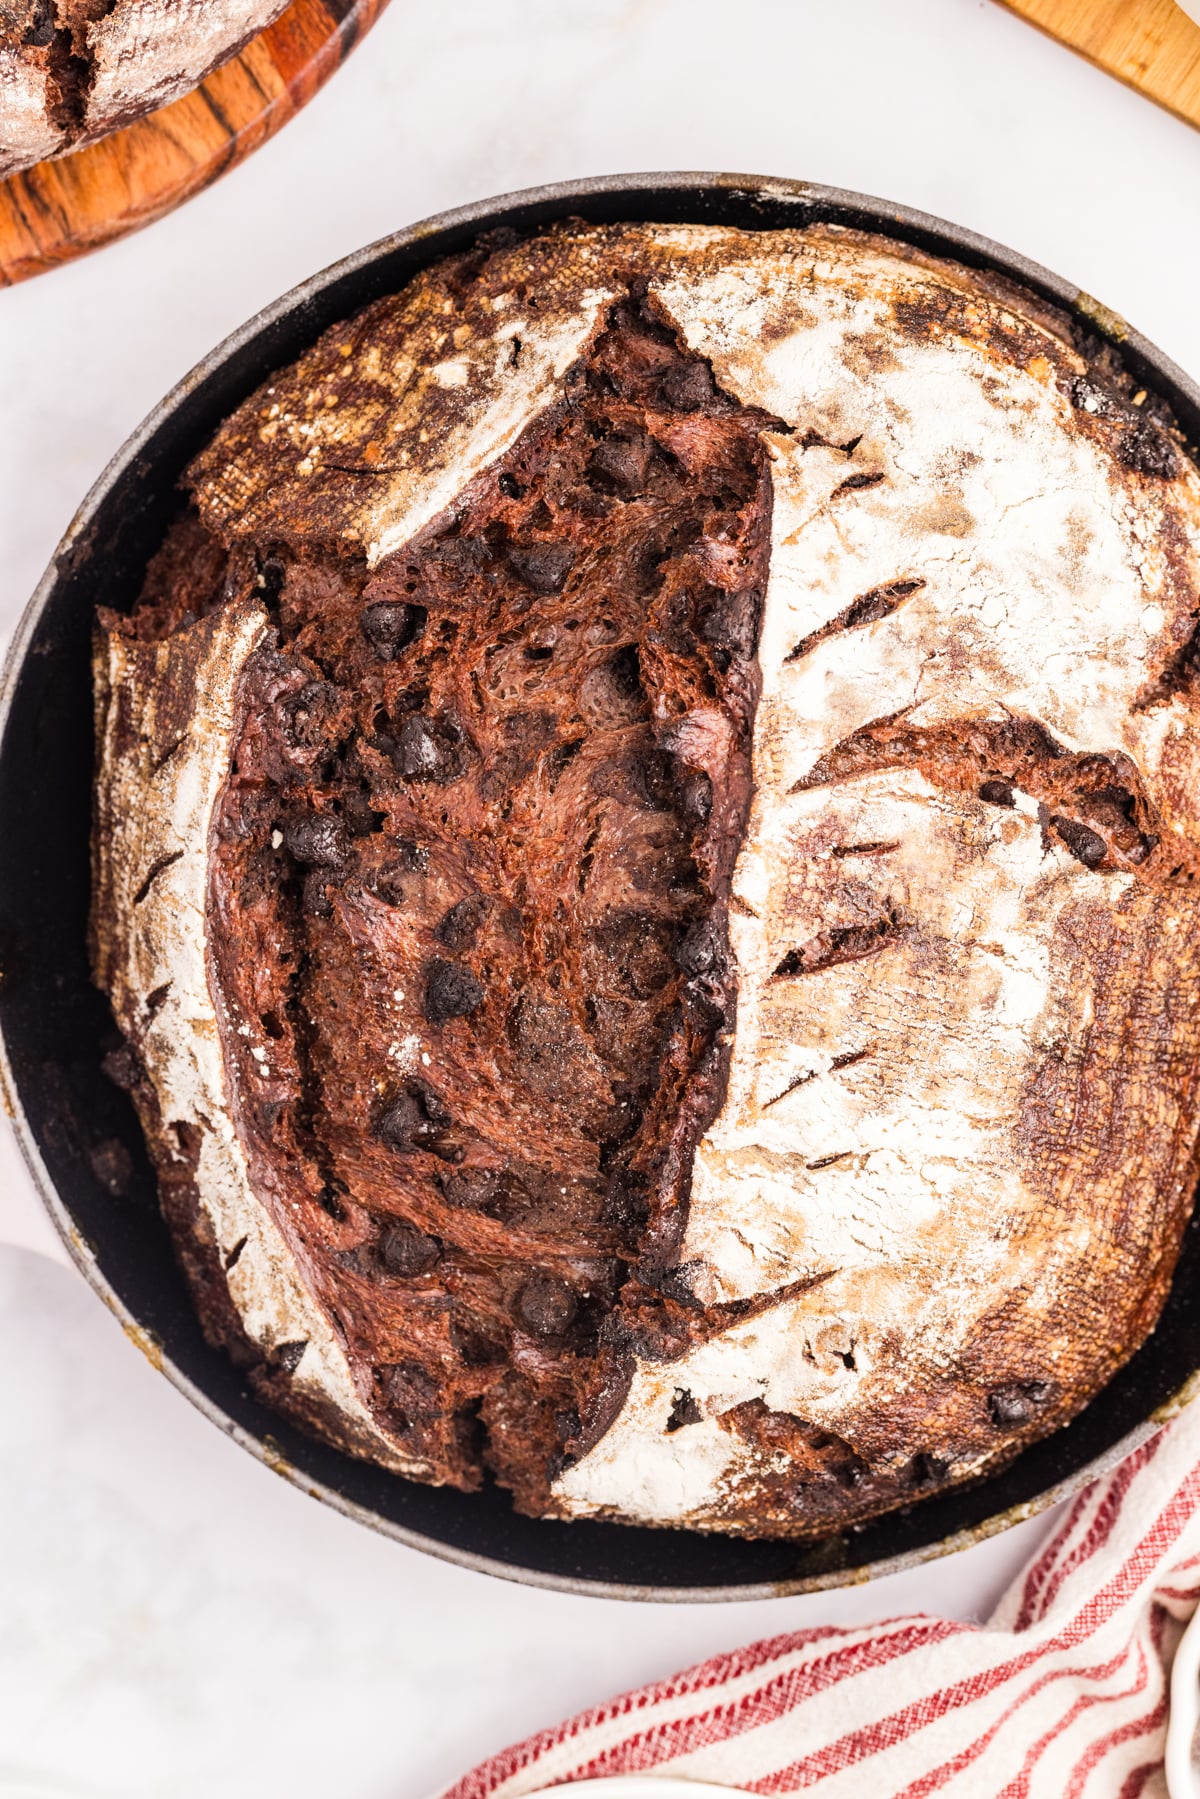
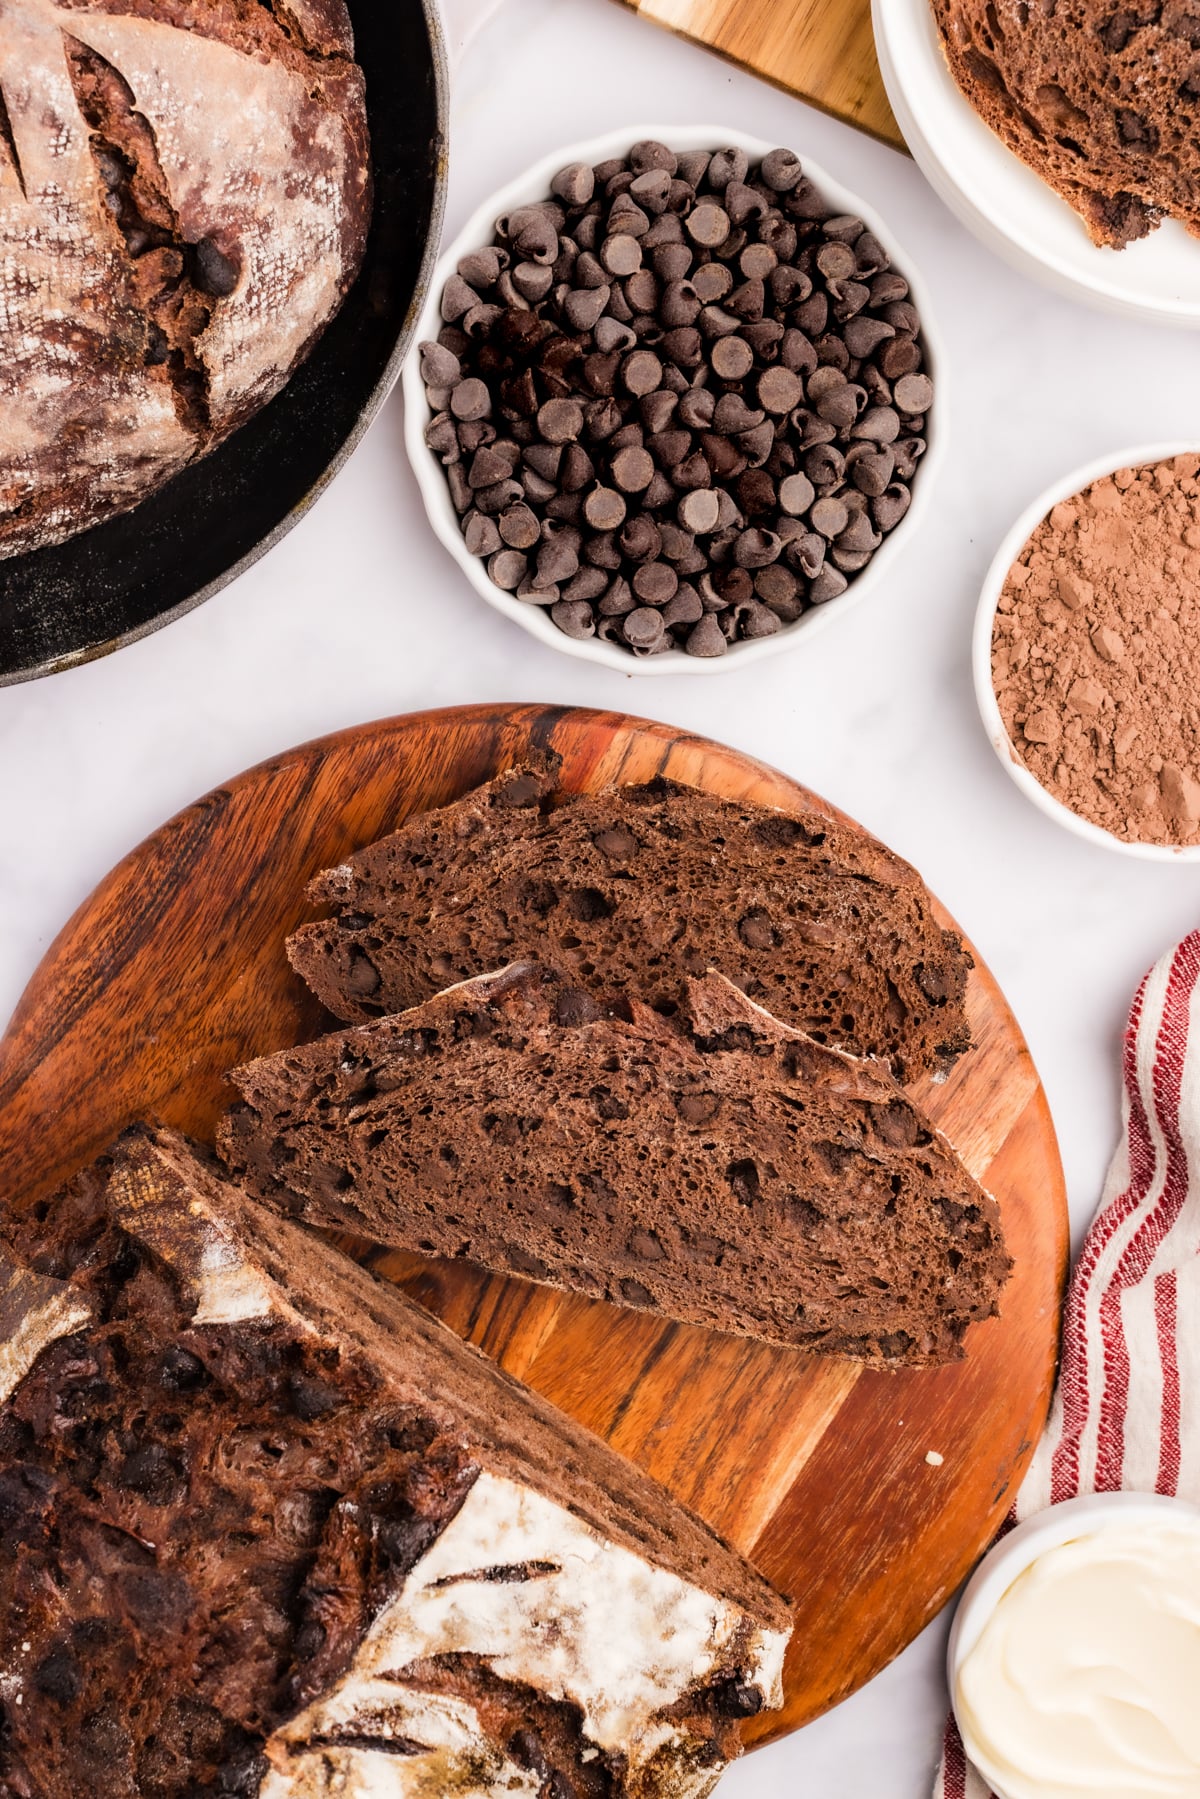
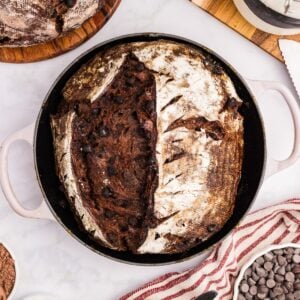
This Double Chocolate Sourdough Bread is made with simple ingredients and packed with rich chocolate flavor.
The recipe includes a variation for Chocolate Espresso Bread and a detailed baker's schedule.
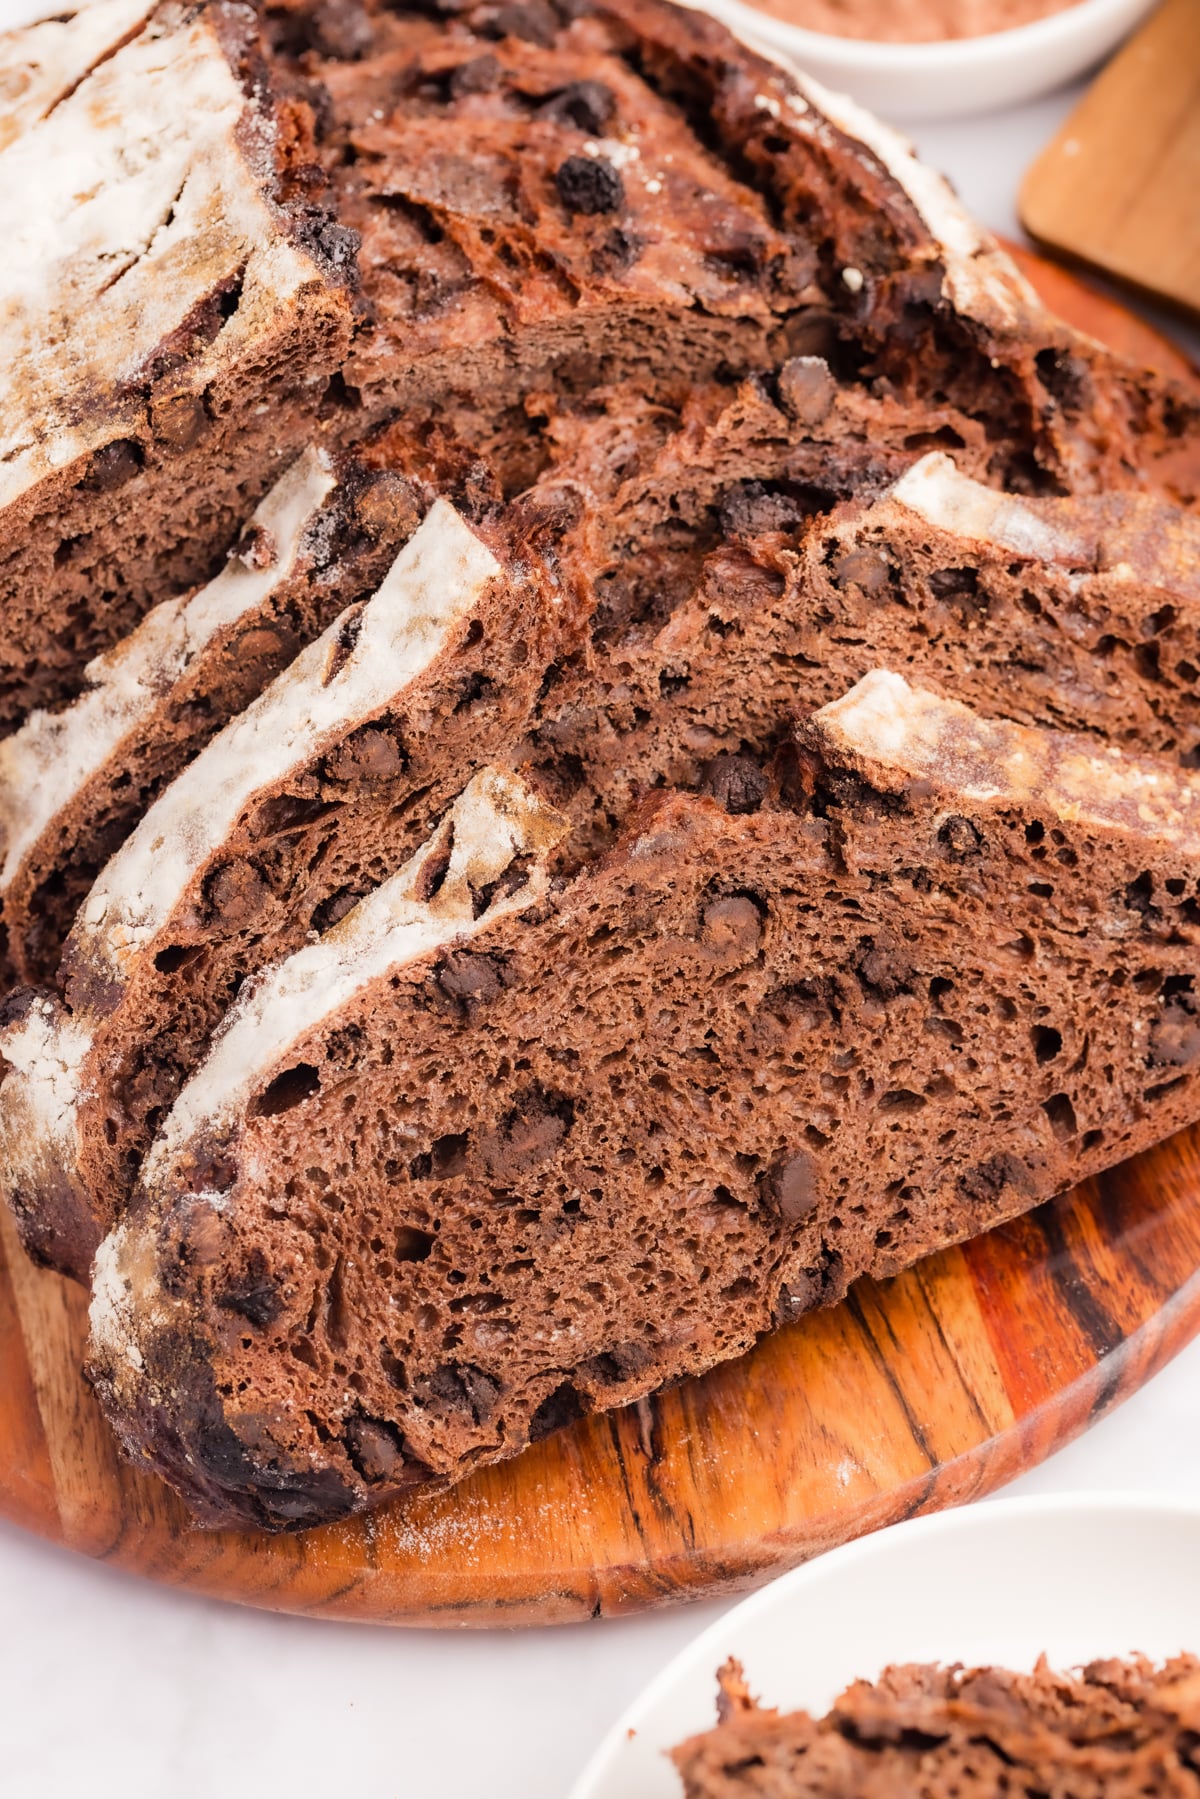
Just when you thought sourdough bread couldn't get any better, we went and made this double chocolate sourdough bread. Truly, it's the best way to enjoy the deep deliciousness of chocolate and the distinct flavor of sourdough bread in a single recipe.
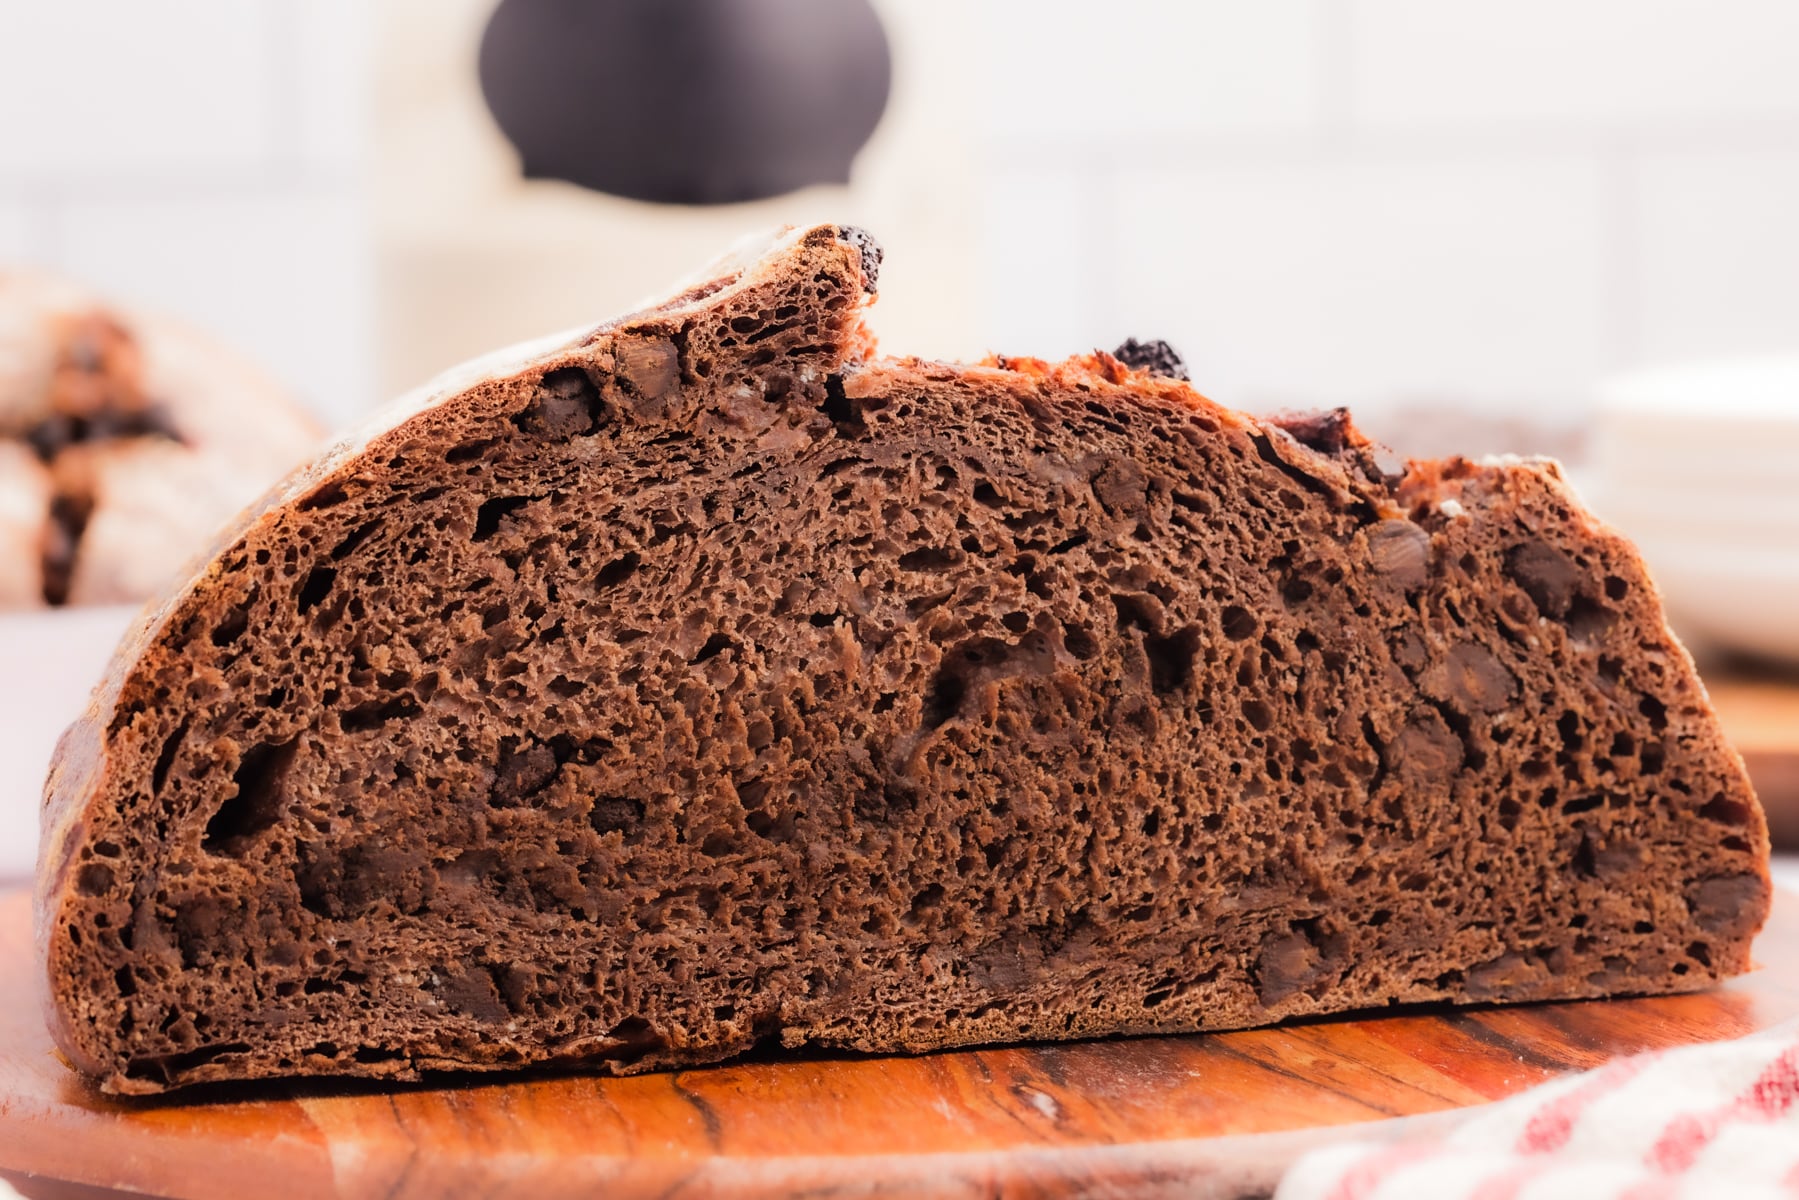
Featuring a soft chocolate crumb and chocolate chips throughout, this chocolate sourdough bread recipe is sure to be on repeat in your kitchen (it is in mine!). The fermentation process is simple, with detailed instructions that guide you step by step from autolyse to finished loaf. All you need is some active bubbly starter, a few simple ingredients, and a bit of time.
Who needs chocolate cake when you can have a slice of this indulgent bread instead?
Why You'll Love It:
- Everyone loves it. All kids from 3 to 33 (and beyond) love this delicious bread. Eat it as is or toast it and slather it with butter – it's SO good!
- Sweet, but not too sweet. This double chocolate sourdough bread is not a quick bread or overly sweet. It has the perfect (small) amount of sugar needed to balance the flavors.
- Bakers' schedule included. If you like detailed instructions (or it's your first time), you'll love the baker's schedule. You can prep the bread dough on day 1 and bake the next day – all with guided timelines.
Ingredients
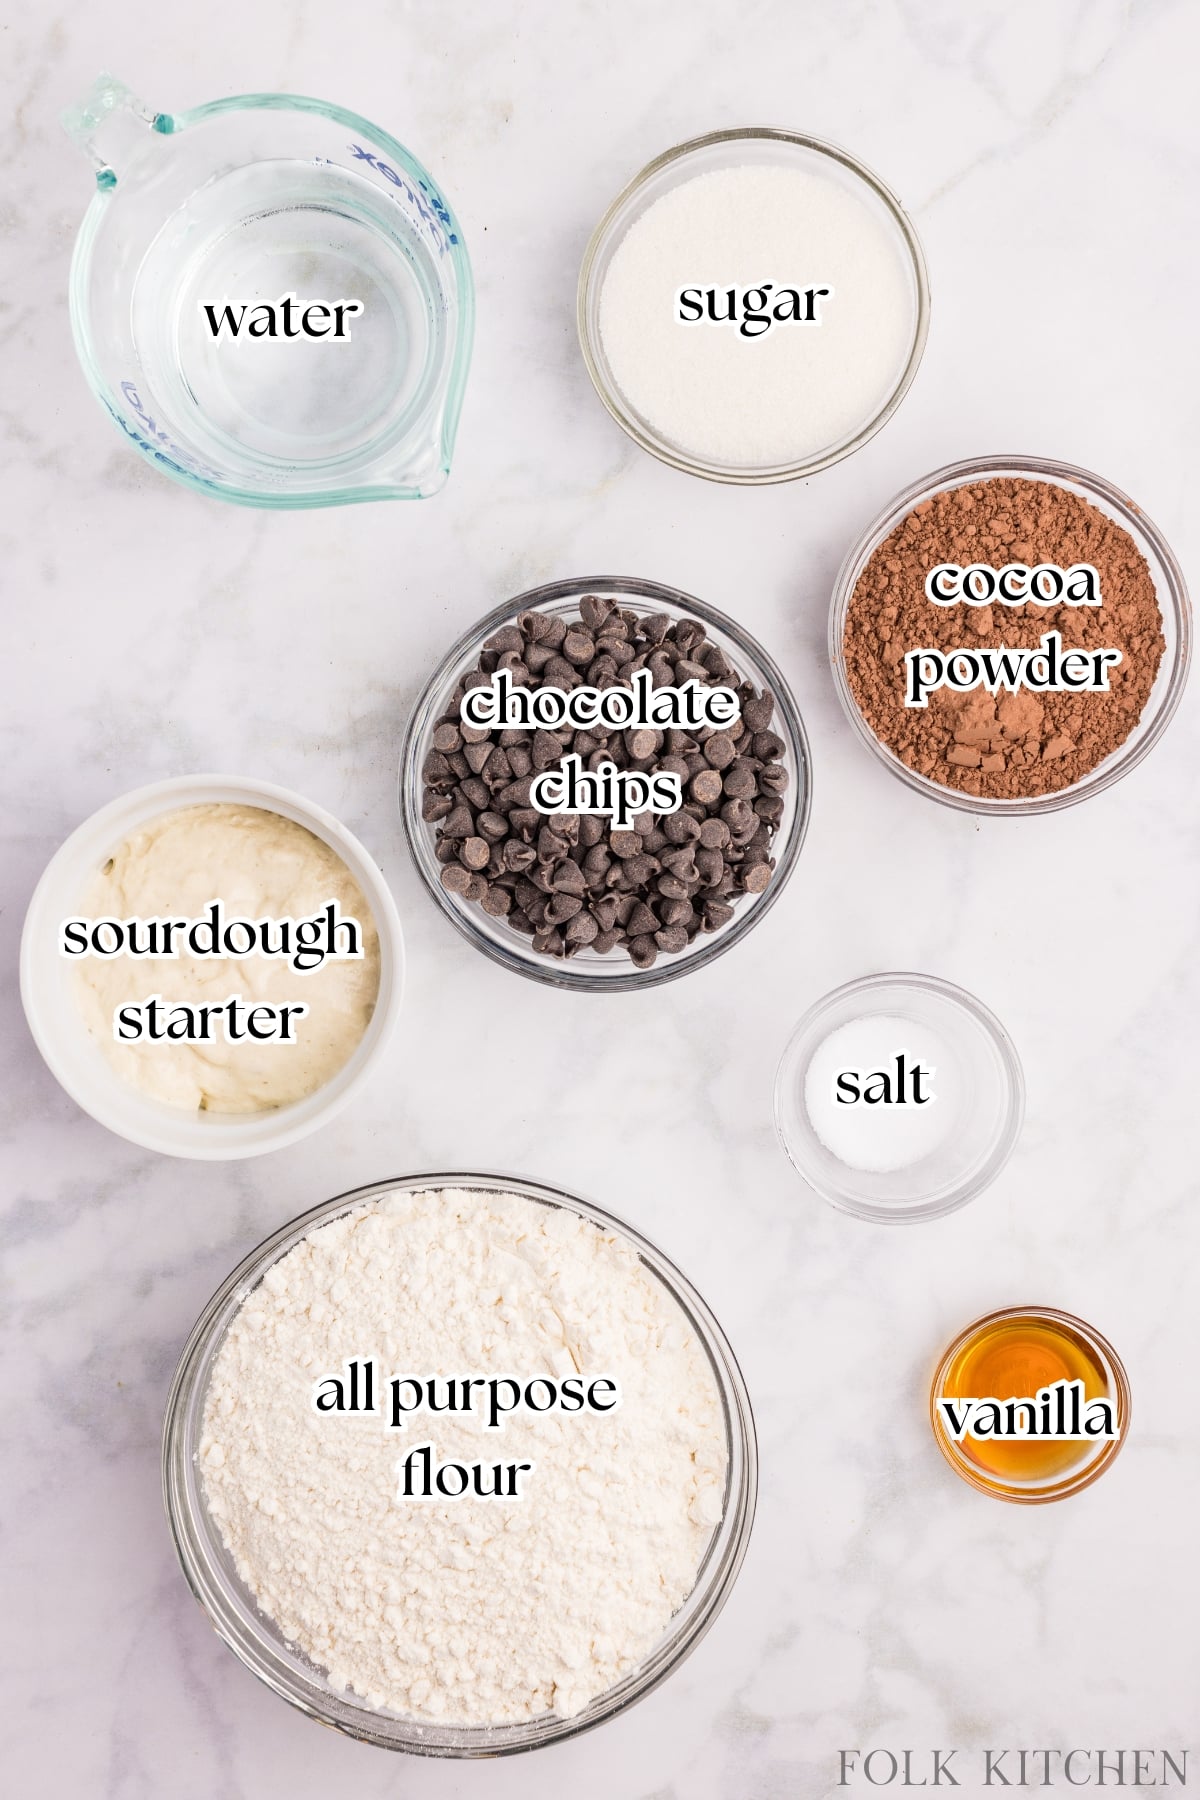
- Flour: All-purpose flour can be used for this recipe. It's widely available, affordable, and works great for most sourdough loaves! If you don't have your own sourdough starter, check out my guide on how to make sourdough starter.
- Sourdough starter: Use a mature, active sourdough starter that has been fed in the past 24 hours and is at (or near) its peak.
- Cocoa powder: This adds a delicious chocolate flavor to the dough itself, making for a double chocolate effect that kids (and adults) can't get enough of!
- Chocolate chips: We recommend using semi-sweet chocolate chips or chocolate chunks for the best results, but you can use milk chocolate chips or a chopped chocolate bar if you prefer!
You will also need:
- Granulated sugar (a small amount is needed to balance the bitterness of cocoa)
- Vanilla extract
- Salt
Recommended Equipment:
- Dutch oven (or bread baking cloche)
- Large bowl
- Banneton basket
- Parchment paper (or silicone bread sling)
How to Make Chocolate Sourdough Bread
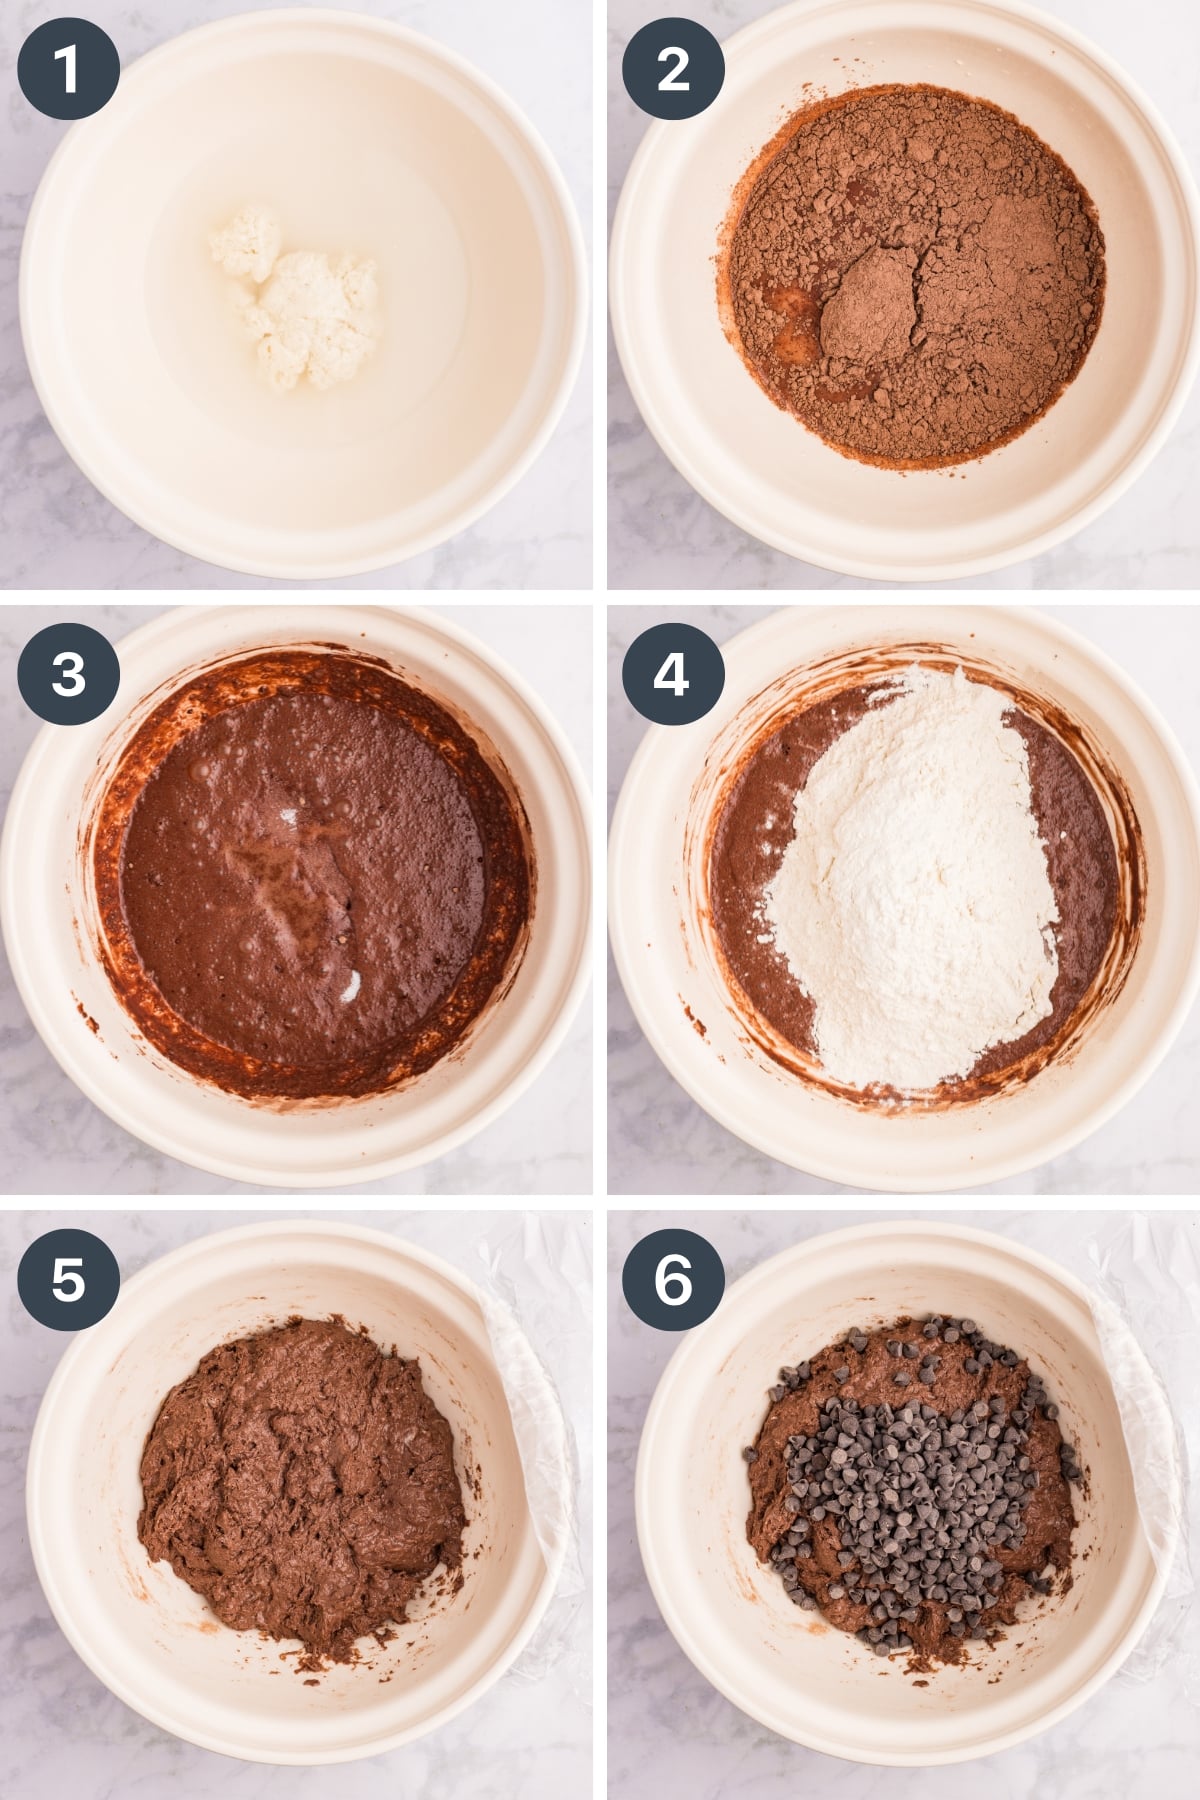
- Whisk together 350 grams of water and 100 grams of sourdough starter.
- Stir in granulated sugar and cocoa powder.
- Whisk until smooth.
- Add 450 grams of all-purpose flour, and use a silicone spatula or dough whisk to begin incorporating it into the wet ingredients.
- Continue until no dry bits of flour remain. Cover with plastic wrap and allow to rest for 1 hour (also known as an autolyse).
- After the dough has rested for 1 hour, add the chocolate chips.
Stretch and Folds with Inclusions
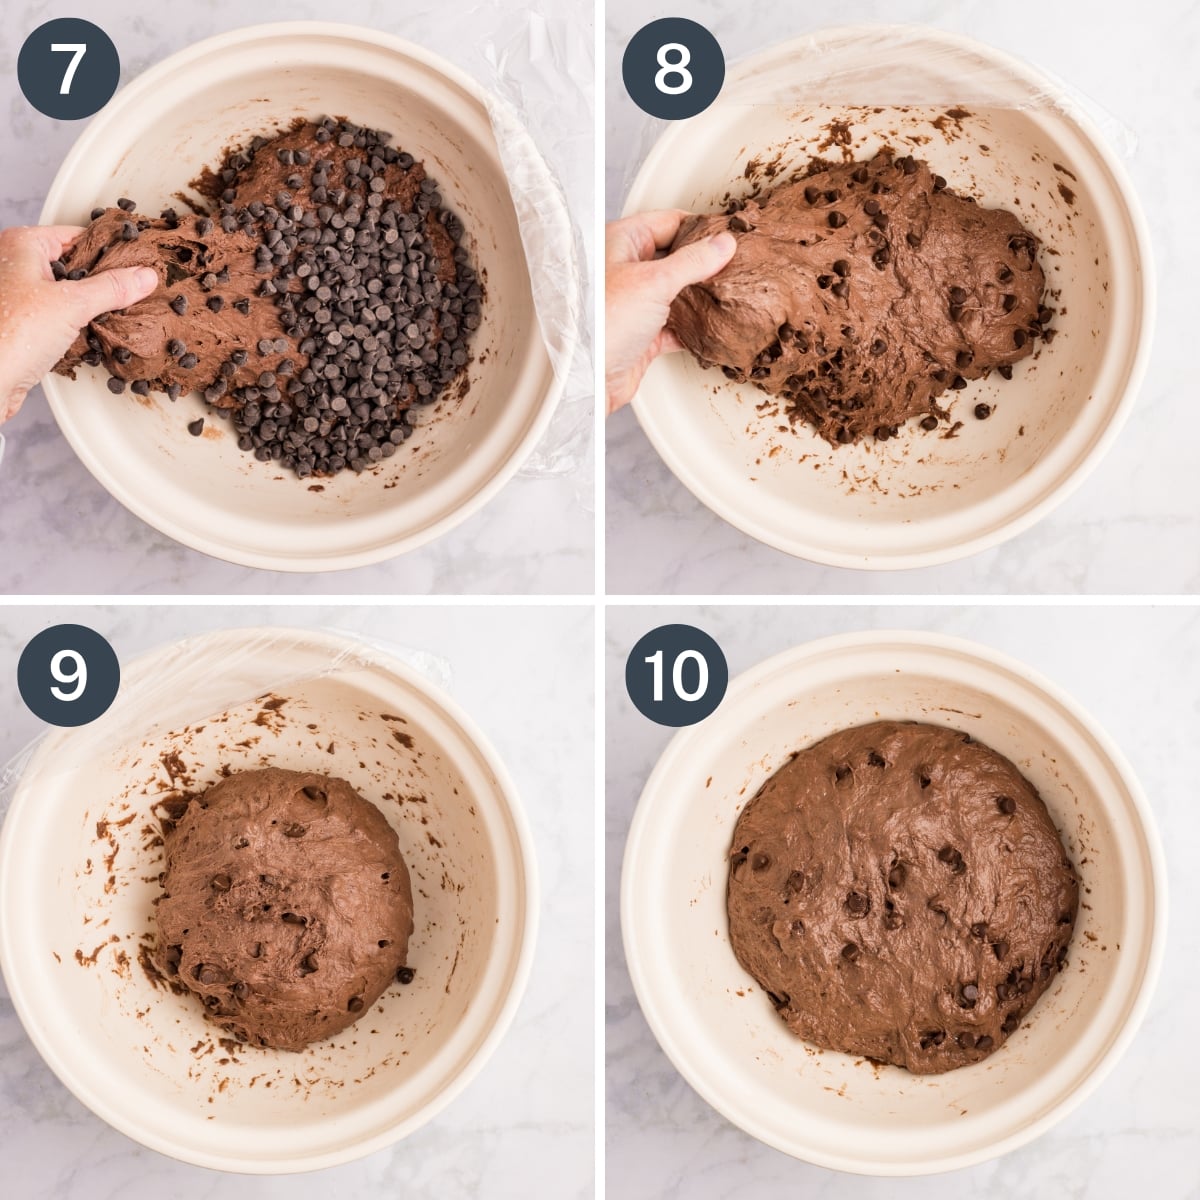
- Using dampened hands, perform one set of stretch-and-folds (see the image further down in the post if you need a visual). After a series of stretch-and-folds is completed, cover the bowl and rest for 30 minutes.
Tip: Some people find it helpful to imagine the stretch-and-folds as a quarter turn: lift one side, rotate ¼ of the way around the bowl, and perform another set. I prefer the clock method, but you can use whatever works best for you. - Repeat another round of stretch-and-folds followed by a 30-minute rest.
- Continue repeating sets of stretch-and-folds followed by a 30-minute dough rest until 4-5 sets have been performed.
- After the final fold, cover the bowl and let the dough rise in a warm spot for 6-8 hours, or until nearly doubled in size with a domed appearance.
Shaping and Baking the Loaf
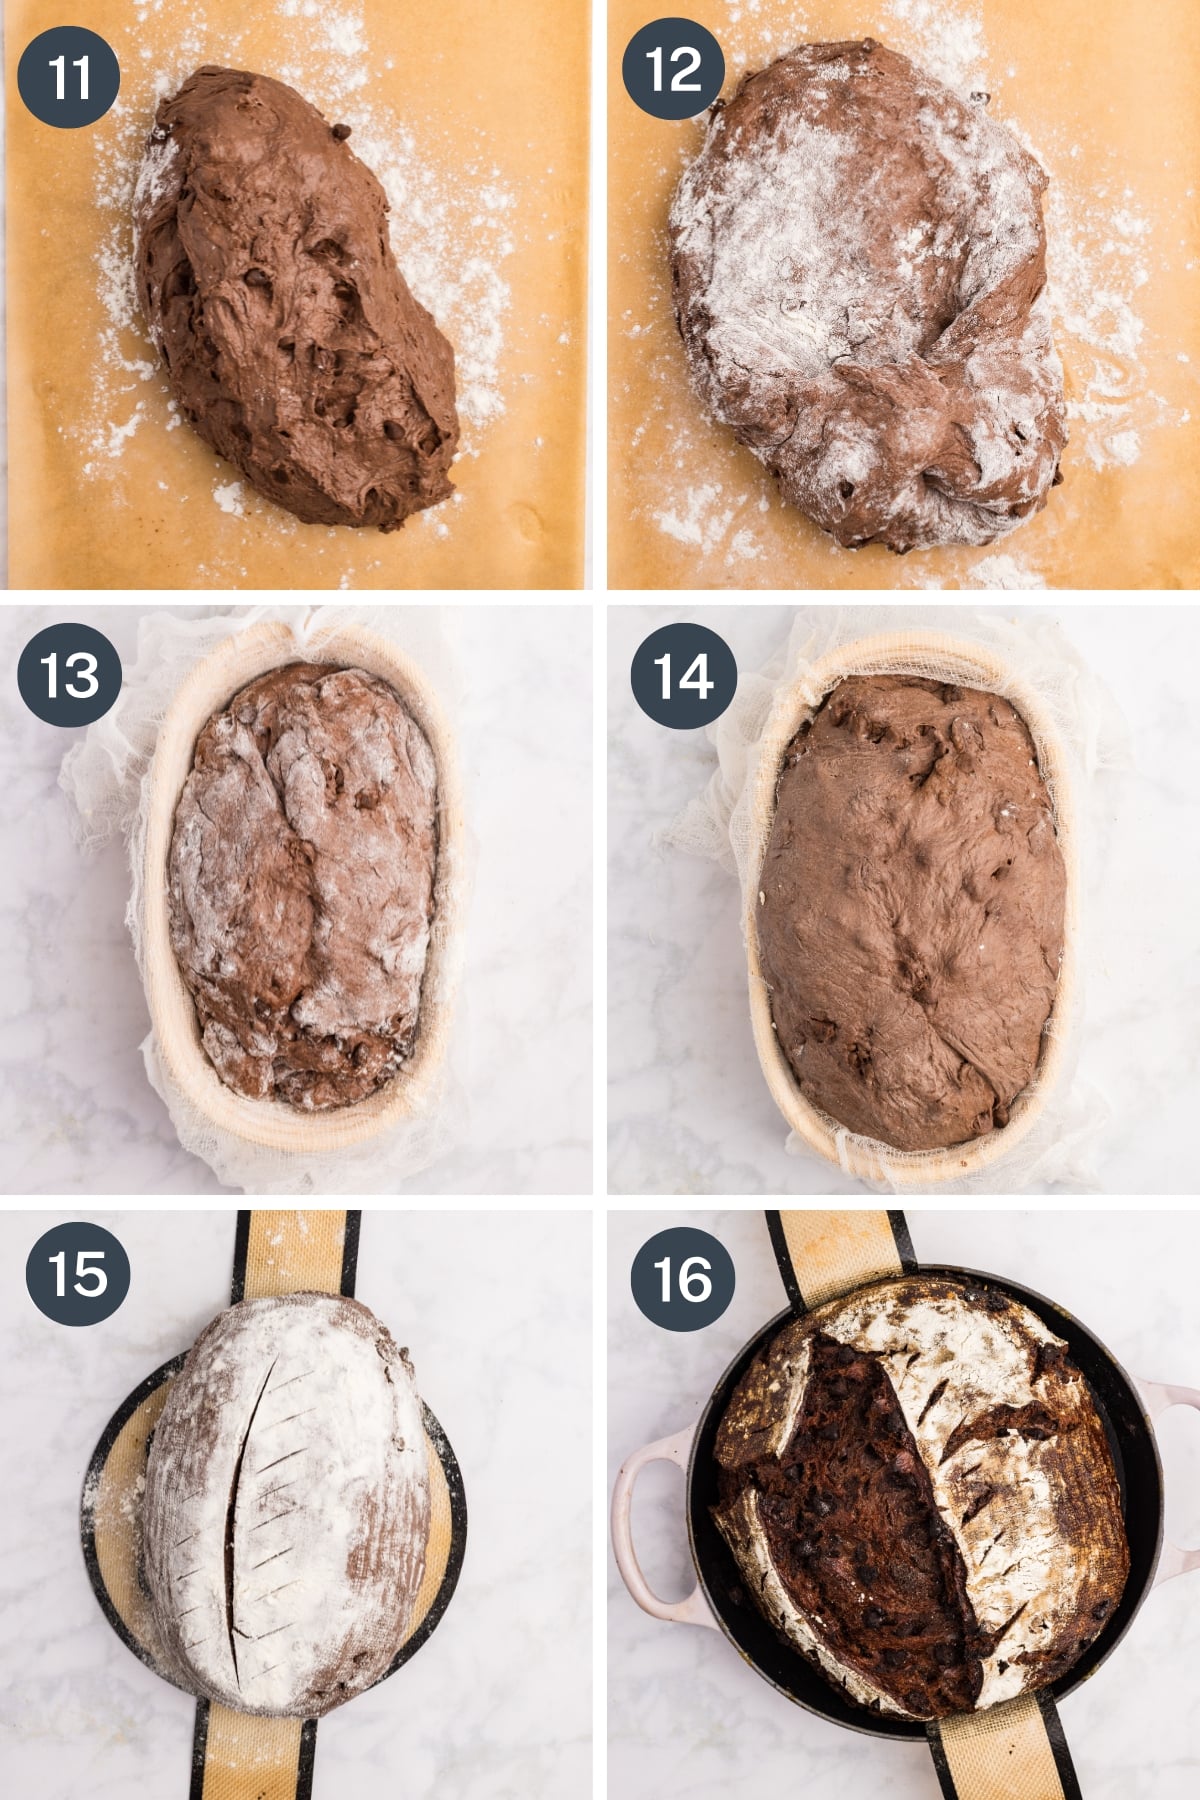
- Once the dough has completed the bulk fermentation, turn it out onto a floured work surface.
- Using the back of your hand, press the dough into a flat rectangle. Tuck in the edges at the bottom of the loaf, and begin rolling it into a loaf by rolling it up and tucking in the edges as you go.
- Place the rolled loaf (seam side UP) in a floured banneton basket (we like rice flour, but all purpose works).
- Cover the shaped loaf and place it in the fridge to cold proof for 8-12 hours.
- Once you're ready to bake, remove the dough from the fridge and let it rest at room temperature for about 1 hour. In the meantime, preheat the Dutch oven in the oven for at least 20 minutes.
- Score the top of the dough using a sharp knife or bread lame. Place it (using a piece of parchment paper or a bread sling) into the preheated Dutch oven and bake as directed in the recipe
Start at 450ºF/230ºC: 25 minutes
Reduce to 375ºF/190ºC: 20 minutes
Try This!
Chocolate Espresso Bread
Add 2 teaspoons of instant espresso powder at the same time you add the flour. This gives it a delicious espresso flavor that enhances the chocolate!
Storing your Sourdough Loaf
- First, let the loaf cool to room temperature (we like to place it on a wire rack).
- Tightly wrap with several layers of plastic wrap (or place in a linen bread bag)
- Keeps well at room temperature for up to 3 days (if wrapped in plastic, 1 day if in a bread bag).
- Can be kept in the refrigerator for up to 4 days, but the bread will become a little more dense or tough.
- To freeze, slice, then wrap tightly with plastic wrap. Place the wrapped loaf in a freezer bag and label. Remove slices as needed.
- Leftover sourdough bread that is too hard for toast can be used to make sourdough croutons, breakfast casserole, bread pudding, or breadcrumbs.
- You can use this chocolate version to make sourdough chocolate bread pudding – yum!
How to Do Stretch and Folds
If you have not performed stretch-and-folds before, this is done by dividing the bowl like a clock.
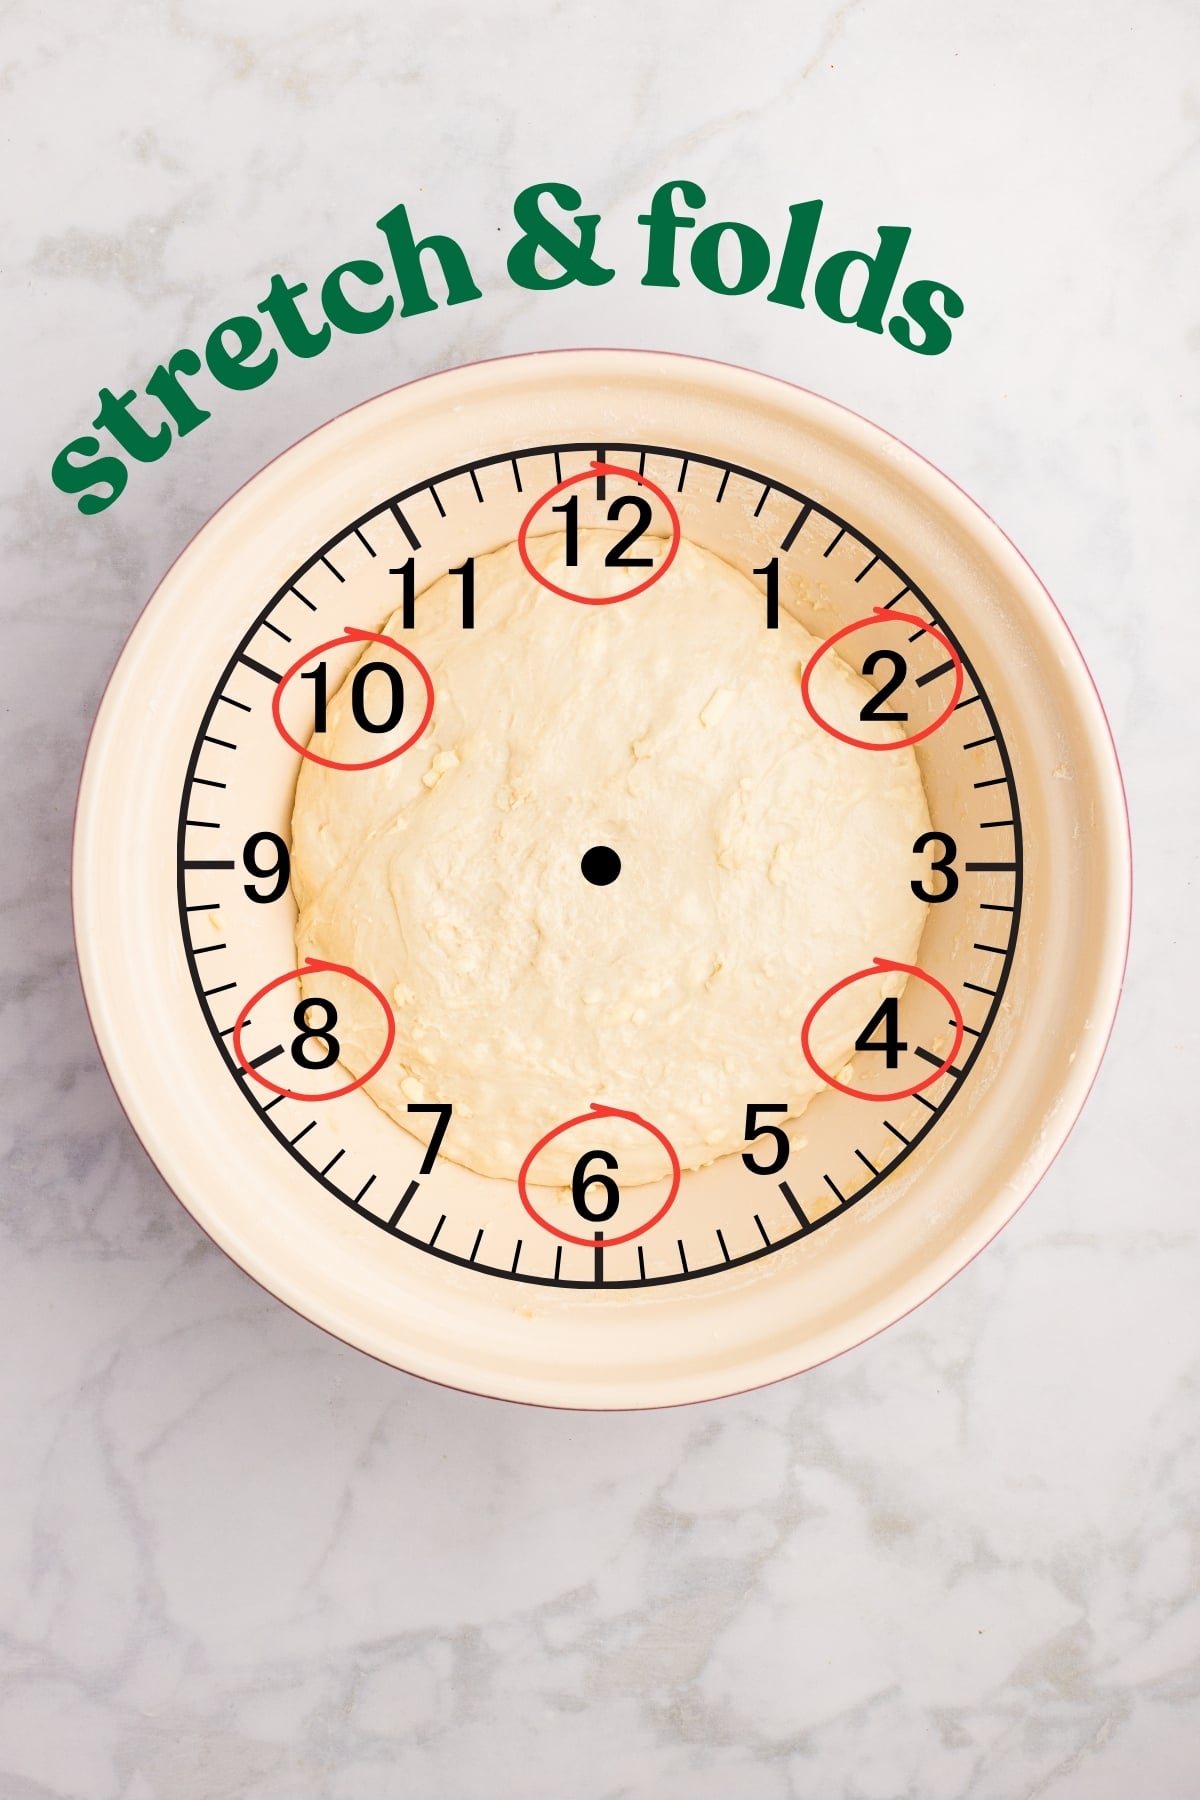
- Start at 12:00 (the top of the bowl), and use your hand to pull up a section of the dough as far as it will stretch without breaking, then fold it over into the middle.
- Repeat this for intervals of the “clock”.
- Depending on the type of dough, you may be able to do this at 12:00, 2:00, 4:00, 6:00, 8:00, and 10:00. If the dough is very thick or stiff, you might only be able to do 12:00, 3:00, 6:00, and 9:00.
This should be repeated every 30 minutes unless otherwise stated in the recipe. The dough will become smoother and more elastic with each series of stretch and folds.
Recipe FAQs
This recipe was tested with less sugar, but we don't recommend reducing the amount listed in the recipe. The sugar is negligible when you consider how many servings (slices) you will divide it into, yet the full amount is exactly how much is needed to balance the bitterness of the cocoa.
This recipe was developed with all-purpose flour and has not been tested with whole wheat flour. If you want to switch some out, you can substitute up to 20% of the total weight of flour with whole wheat (just be sure to measure in grams), and ensure that you use a starter maintained with all-purpose flour.
Yes, but you should follow a recipe specifically developed for it (like this double chocolate sourdough bread). Cocoa changes the hydration level significantly and also requires a small amount of sugar to balance the natural bitterness.
This recipe is developed for an active starter, so we don't recommend using discard in its place. If you are willing to experiment, you can try using discard PLUS active dry yeast, but the fermentation times will be radically different; we recommend only trying if you are a very experienced baker.
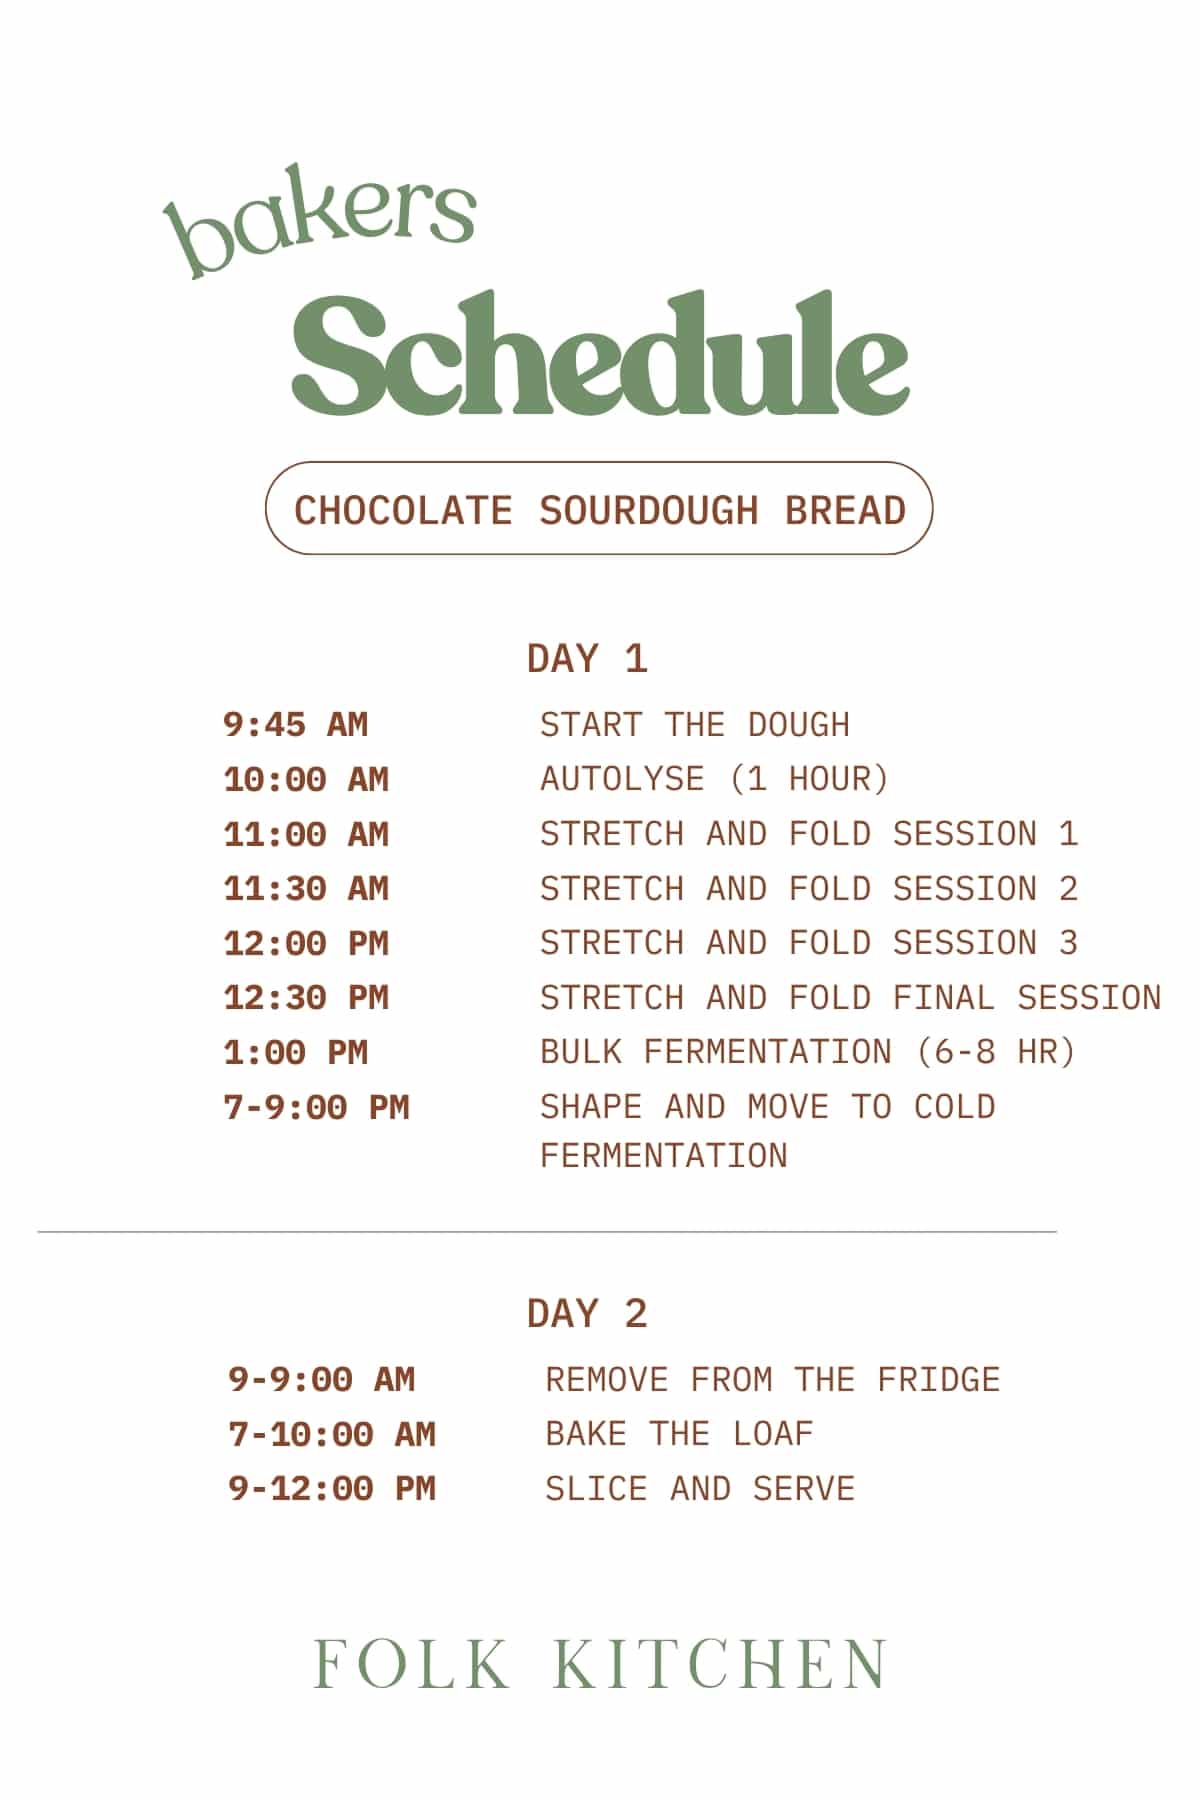
Bakers Schedule
Feel free to save or print the image below to help you visualize and plan your sourdough baking day!
Try These Sourdough Desserts:



If you loved this recipe for chocolate sourdough bread, let me know by leaving a 5-star review in the recipe card or comment below! You can also tag me on Instagram @folkkitchenblog.
📖 Recipe
Chocolate Sourdough Bread
Ingredients
- 100 g active sourdough starter about ½ cup stirred down
- 350 g water warmed to 90-100ºF (32-37ºC)
- 100 g sugar about ½ cup
- 50 g cocoa powder about ½ cup
- 1 teaspoon vanilla
- 10 g salt about 1 ½ teaspoons
- 450 g all-purpose flour about 3 ¾ cups
- 1 cup chocolate chips 150-170g
- 4-6 ice cubes optional; for baking
Instructions
Cook ModeMix the Dough
- In a large mixing bowl, whisk together the warm water and active sourdough starter until dissolved.
- Stir in the sugar and cocoa powder until nearly smooth, then add the vanilla and salt.
- Add the flour all at once and mix with a spatula or dough whisk until no dry bits remain. The dough will look thick and slightly sticky.
- Cover and let rest for 1 hour (this is known as autolyse).
Add Chocolate Chips & Stretch and Fold
- After the dough has rested for 1 hour, sprinkle the chocolate chips over the dough.
- Using slightly wet hands, perform one round of stretch and folds*: this is done by grabbing one edge, stretching it upwards, and then folding it over on itself; rotate the bowl using quarter turns and repeat until all sides are folded and the chocolate chips are incorporated.
- Cover and rest for 30 minutes.
- Repeat this process 4-5 times, every 30 minutes, to build structure.
Bulk Fermentation
- After the final fold, cover the bowl and let it rise in a warm spot for 6-8 hours, or until nearly doubled in size and slightly domed.
Shape the Dough
- Turn the dough onto a lightly floured surface. Gently press into a rough rectangle, releasing any large bubbles. Roll it up tightly into a ball, tucking in the edges as you go.
- Transfer the shaped boule, seam-side up, to a well-floured banneton (or a mixing bowl lined with a floured kitchen towel).
Cold Ferment
- Cover and refrigerate (cold proof) for 8-12 hours. This is a best practice for flavor development, oven spring, and easier scoring.
Prepare to Bake
- Remove dough from the fridge and let it come to room temperature (about 1 hour).
- Meanwhile, place your Dutch oven (with lid) on the lower oven rack and set the oven to 450ºF (230ºC) and allow it to preheat for 20 minutes, until hot.
Score and Bake
- Turn the dough out onto parchment or a silicone mat, seam side down. Score a ½” deep slit across the top or side.
- Carefully transfer to the preheated Dutch oven. Place 4-6 ice cubes around the edges or in the bottom of the Dutch oven, cover, and bake for 25 minutes at 450ºF (230ºC).
- Remove the lid of the Dutch oven, reduce the heat to 375 degrees F (190 degrees C), and bake for an additional 20 minutes until the crust is set and the internal temperature reaches about 200 degrees F (93 degrees C).
- Transfer to a wire rack and cool completely (about 2 hours) before slicing. The cooling time helps the crumb set and prevents gumminess.
Notes
Baker’s Schedule:
Sourdough starter: Be sure to use sourdough starter that has been fed recently and has reached its peak (or near its peak). In a moderate ambient temperature, I like to do this the night before. If your home is VERY warm, try feeding the sourdough at a 2:1 ratio (double the amount of flour). If your home is very cool, you may want to feed 16-24 hours in advance of needing the starter.- 9:45 AM: Begin making the dough.
- 10:00 AM: Begin the autolyse (1 hour rest)
- 11:00 AM: Stretch and fold session 1.
- 11:30 AM: Stretch and fold session 2.
- 12:00 PM: Stretch and fold session 3.
- 12:30 PM: Stretch and fold final session (4).
- 1 PM: Complete the bulk fermentation at room temperature.
- 7-9:00 PM: Shape the loaf and place it in the fridge to cold ferment.
- 6- 9 AM: Remove the bread from the oven and allow to warm at room temperature for 1 hour. Preheat the Dutch oven.
- 7-10 AM: Place the boule in the Dutch oven and bake as directed in the recipe. Cool for 2 hours before slicing for the best results.
Nutrition
Please note that some of my blog posts here at Little Home in the Making may contain affiliate links. If you make a purchase through these links, I will get a small commission at no additional cost to you. See our disclaimer for more information.

Dorothy Bigelow says
This bread is SO good! It's the perfect amount of sweetness, without being TOO sweet, and it's easy to make too. We love it!