


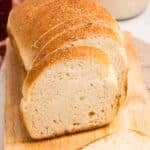


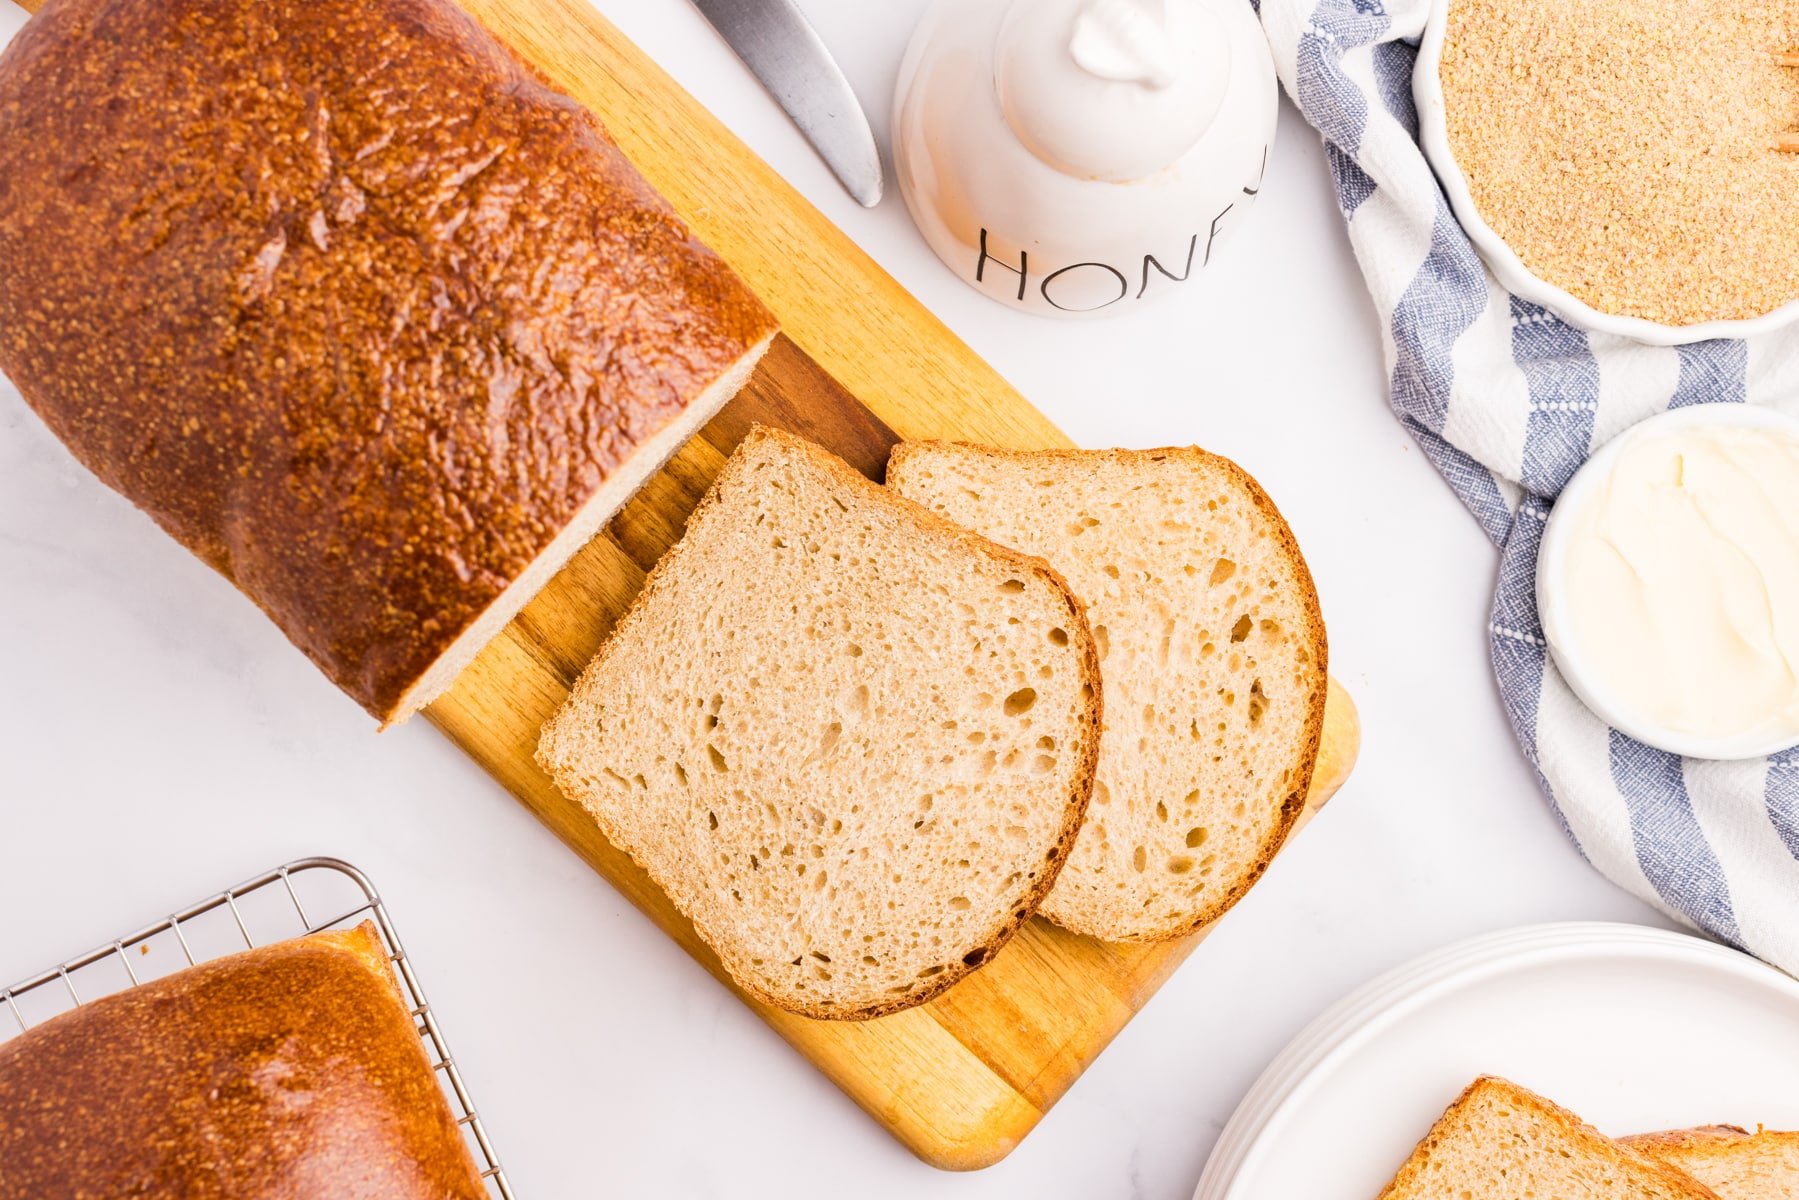
This whole wheat sourdough sandwich bread is the perfect sliceable bread for your lunch box favorites!
Supremely soft, sweetened with honey, and kid-approved, it uses active sourdough starter and an overnight bulk fermentation for the easiest (and tastiest) whole wheat sandwiches.

After sharing my Dutch Oven Sourdough Bread and Sourdough Sandwich Bread recipes, I wanted to bring you a soft and sliceable sourdough whole wheat bread.
This recipe combines whole wheat flour and traditional white flour (unbleached or organic, if preferred) for the perfect nutty flavor and texture for those new to whole-grain breads.
It's just as soft and tender as store-bought breads, but has the benefits of traditionally fermented sourdough loaves. You're going to love it!
Why You'll Love It:
- Easy proofing. An overnight dough rise means that you get the benefits of long fermentation, but it's nearly as easy as traditional yeast breads.
- Whole grains. A blend of whole wheat and bread flour makes soft sourdough sandwich bread that will have them begging for seconds.
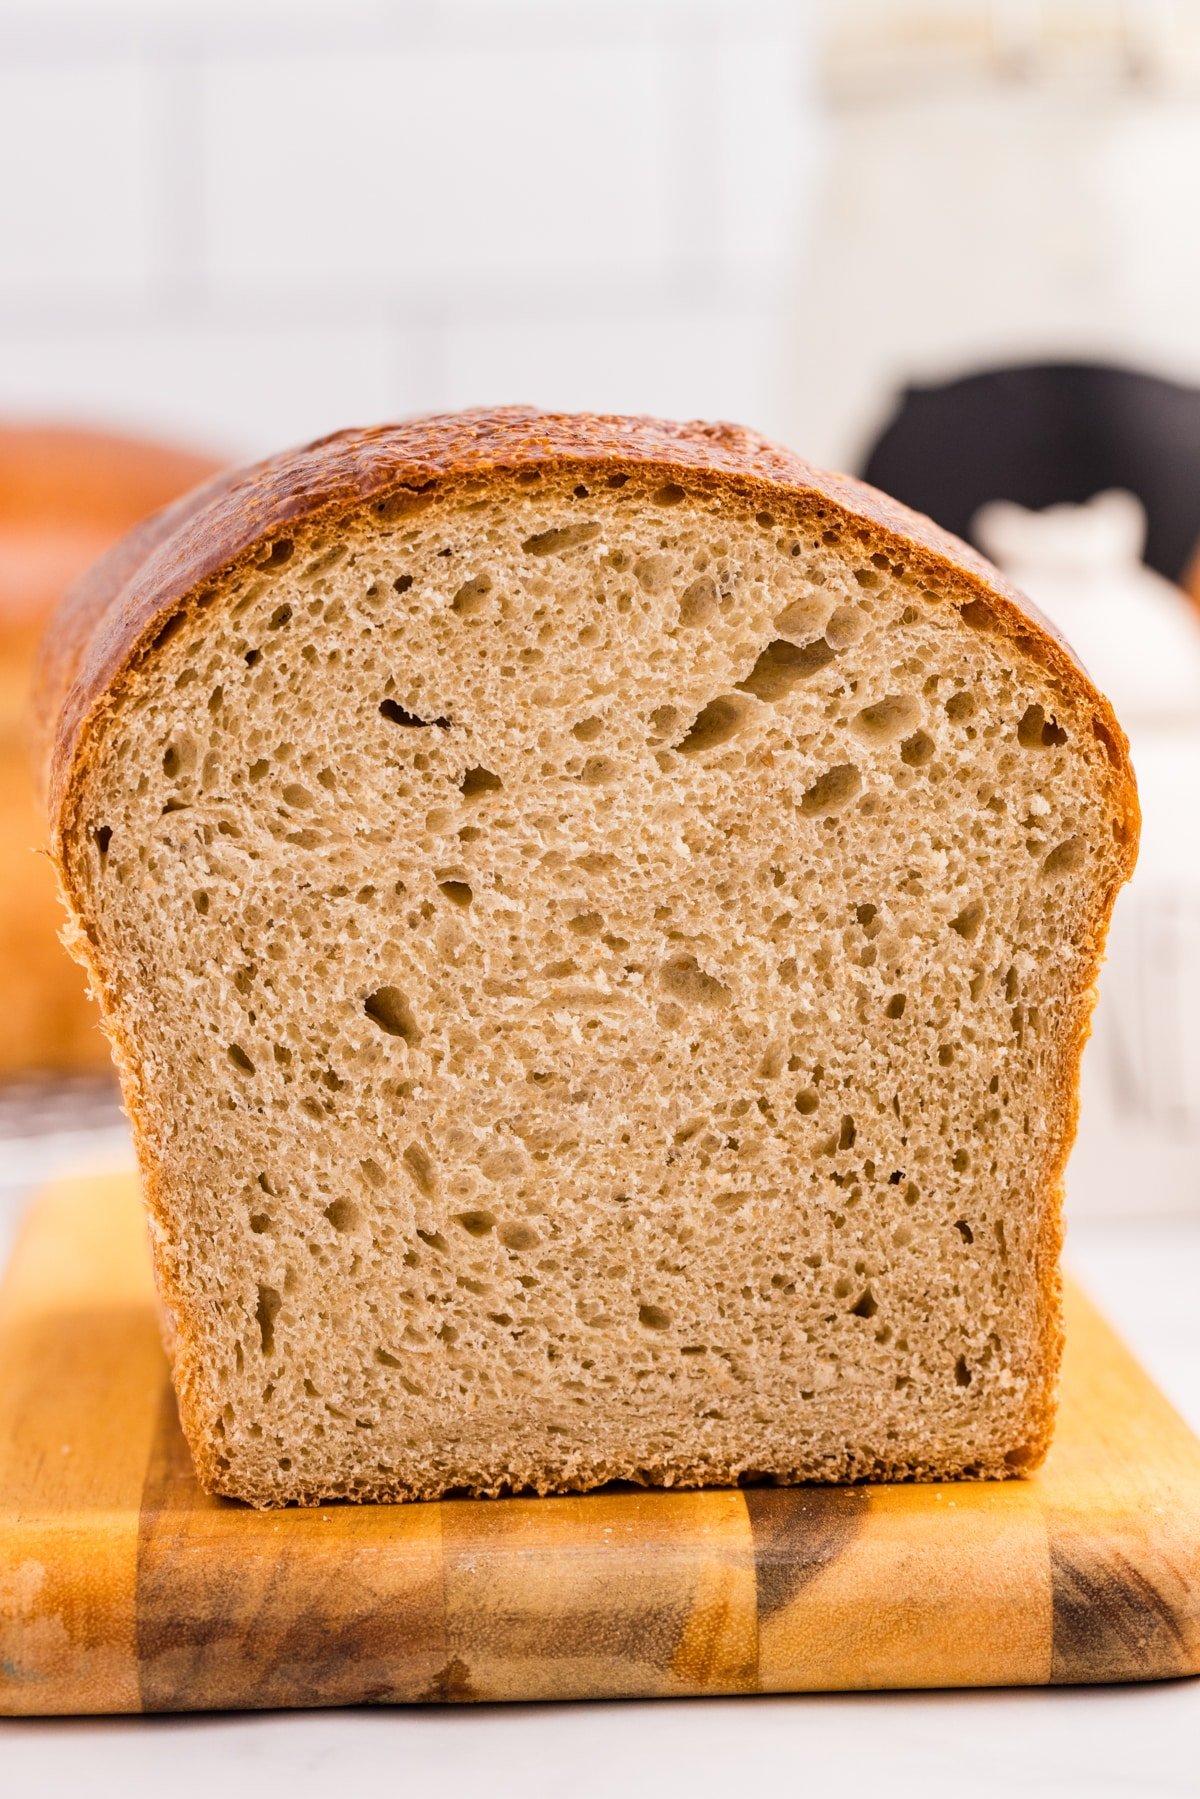
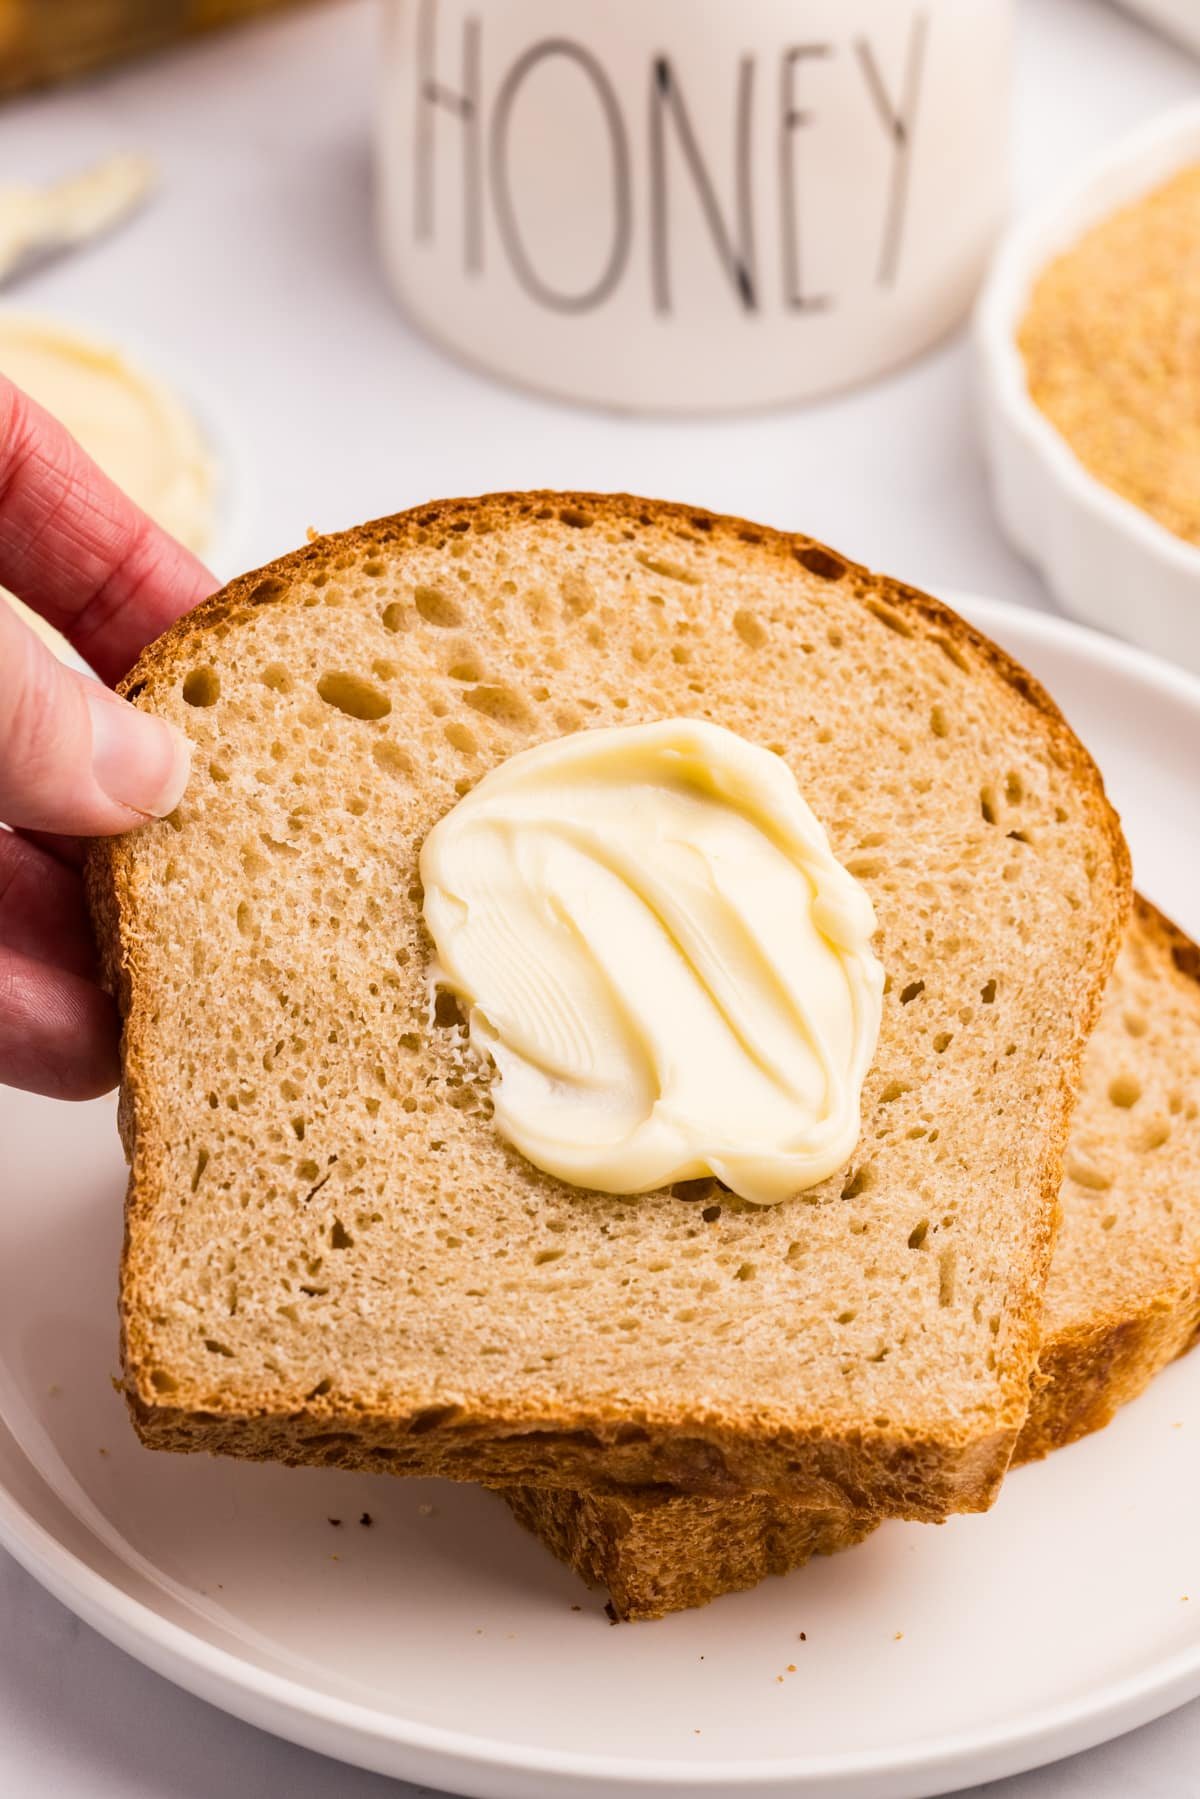
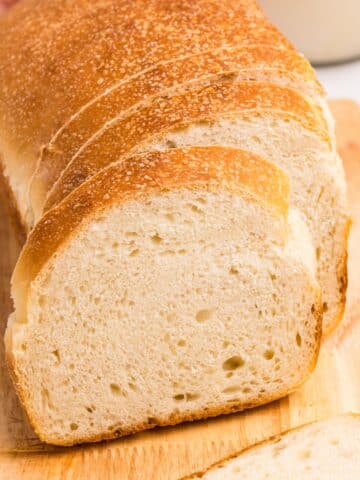
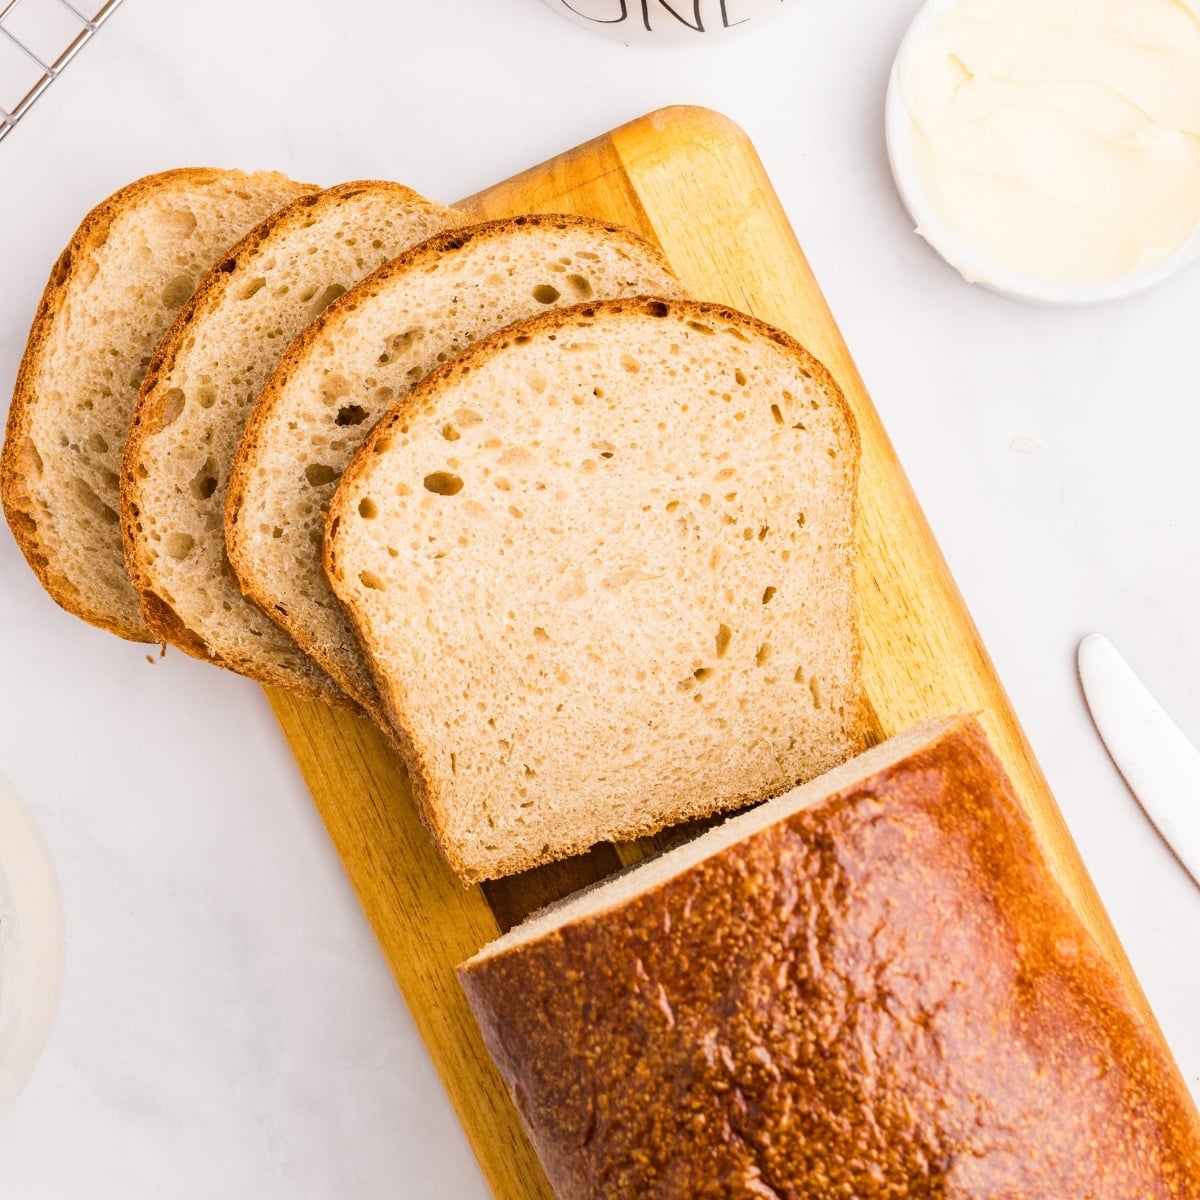
- Sooooo Sliceable. This bread is made in a traditional loaf pan, making it easy to slice for sandwiches, toast, etc. If you are new to sourdough bread, or your kids want their bread to look like everyone else's – start here!
Ingredients
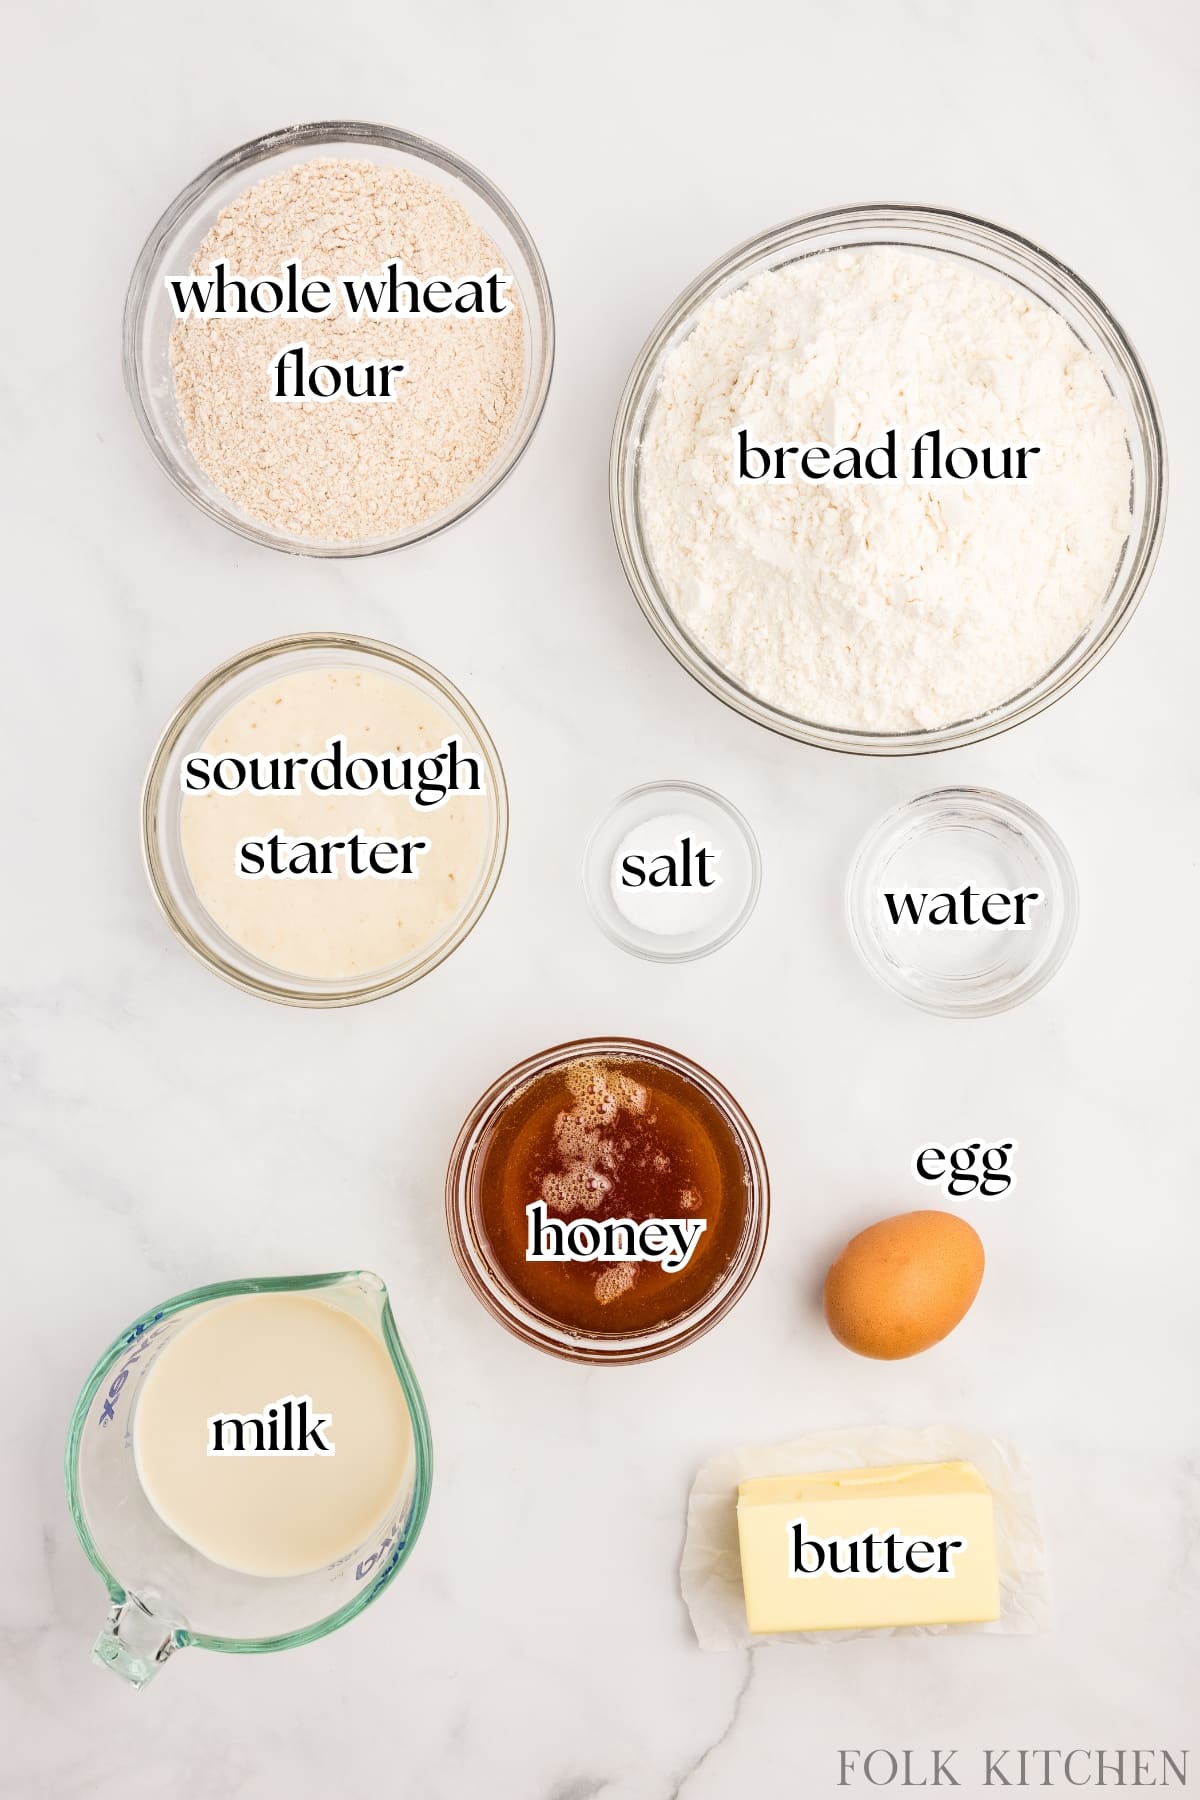
- Sourdough starter: Make sure your starter is active and ready for baking! It's ready when it has reached its peak after feeding (at least double in size).
- Whole wheat flour: We used King Arthur, but you can use whatever brand or type you like best.
- Bread flour (or all-purpose flour): We recommend white bread flour as the extra gluten provides structure. If you don't have bread flour, that's okay! You can use all purpose flour (or make your own bread flour with added vital wheat gluten).
- Milk: Using warm milk as part of our hydration is the key to soft and squishy loaves. It's so good!
- Honey: This adds sweetness and helps to activate the wild yeasts in the sourdough starter.
- Butter: We use unsalted butter to control the amount of salt in the bread, but if you want to use salted butter, you can – just cut the salt by ¼ teaspoon.
- Egg (optional): Used for an egg wash, but is completely optional. Brushing your sourdough loaves with an egg wash gives them a lovely, golden brown color.
You will also need:
- 2 loaf pans (this recipe makes 2 loaves – divide the recipe in half if you only need one loaf)
How to Make Sourdough Whole Wheat Sandwich Bread
Before you get started: Ensure you have 100 grams of active, bubbly starter. For the best results, it should have been fed at least 3 times after removing it from the refrigerator and should be at its peak (about double in size, but before it begins to shrink down).
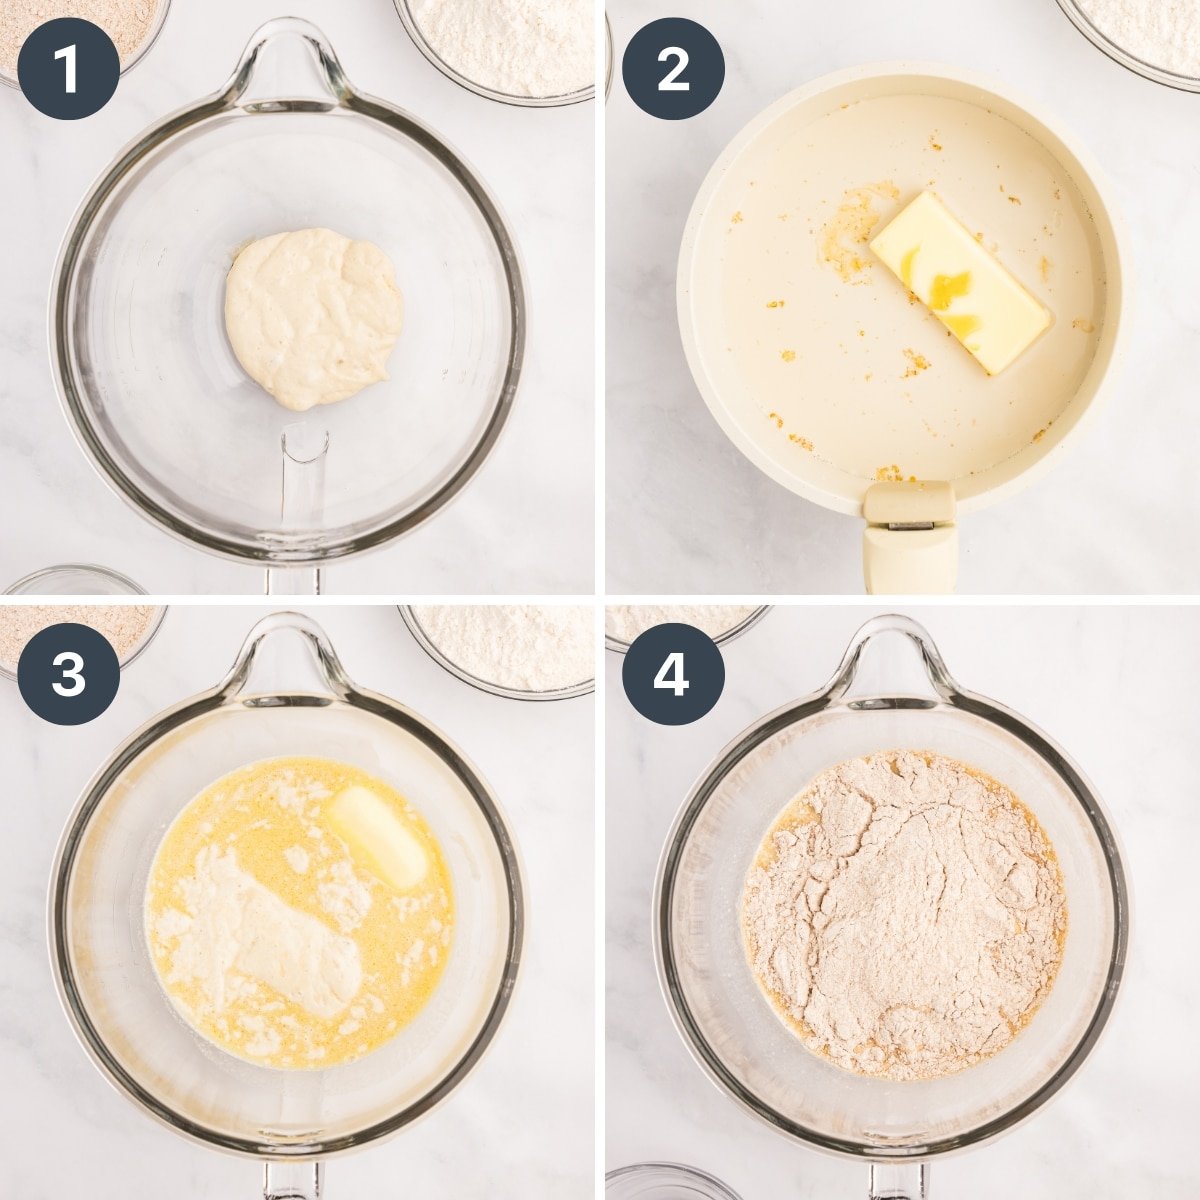
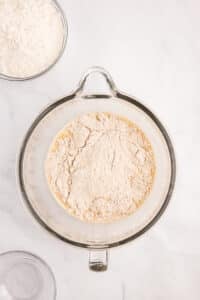
- Add 100 grams (about ½ cup once stirred down) of active starter to the bowl of a stand mixer.
- Meanwhile, heat the following in a saucepan just until warm: milk, butter, honey, and salt. Note that you don't want the mixture to be hot – just warm enough that the butter begins to melt.
- Pour the warm milk mixture over the sourdough starter, whisking as you pour.
- Using the paddle attachment, gradually mix in the whole wheat flour, then 2 cups of the bread flour (or all-purpose flour).
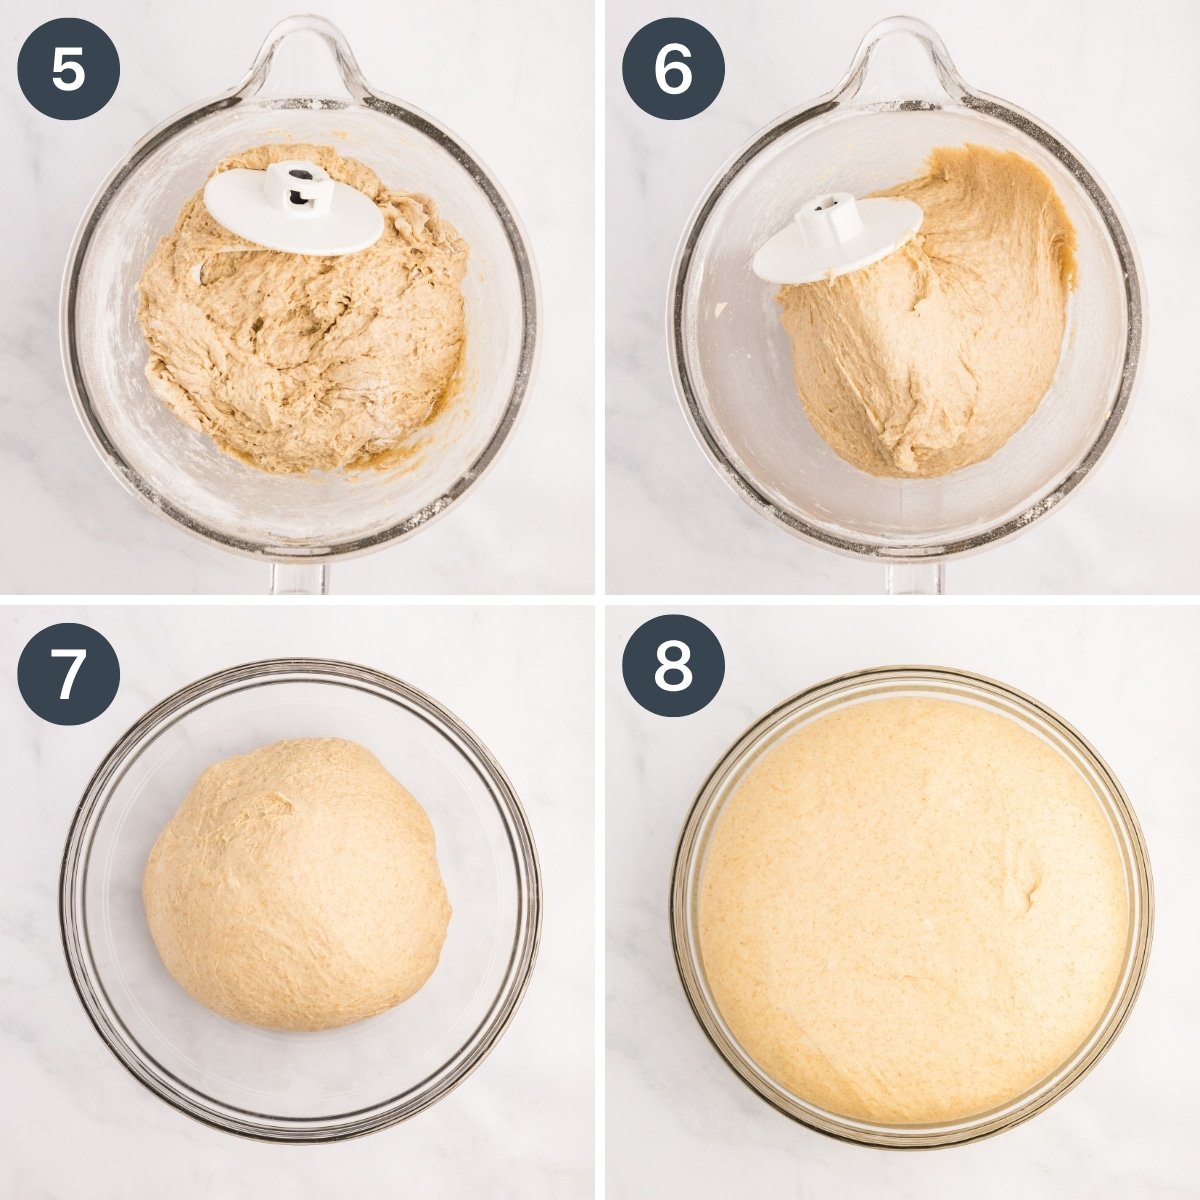
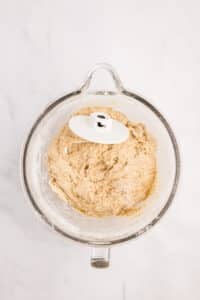
- Switch to the dough hook attachment, and begin adding the remaining 3-4 cups of bread flour (about 600 grams total). You'll know you've added enough when it forms a wet dough, but easily comes away from the sides of the bowl.
- Knead the dough. Knead on medium speed for 3 minutes using your stand mixer, or turn it out onto a lightly floured surface and knead by hand for 5-8 minutes.
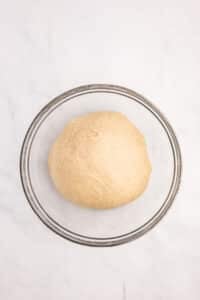
- Lightly grease a bowl with olive oil and place the kneaded dough into the bowl, turning it once to coat the top of the dough.
- Cover the bowl tightly with plastic wrap, a plastic bag, or a damp tea towel.
The Bulk Rise
Allow your bread dough to proof at room temperature for 8-12 hours, or until the dough has roughly doubled in size. But be sure to catch it before it goes TOO far – it is possible to overproof your dough. It should spring back lightly when pressed with a finger.
Shaping the Loaf
The next morning (or 8-12 hours later), your dough should be proofed and ready to be shaped and for a second rise. Don't worry – the second rise won't take long!
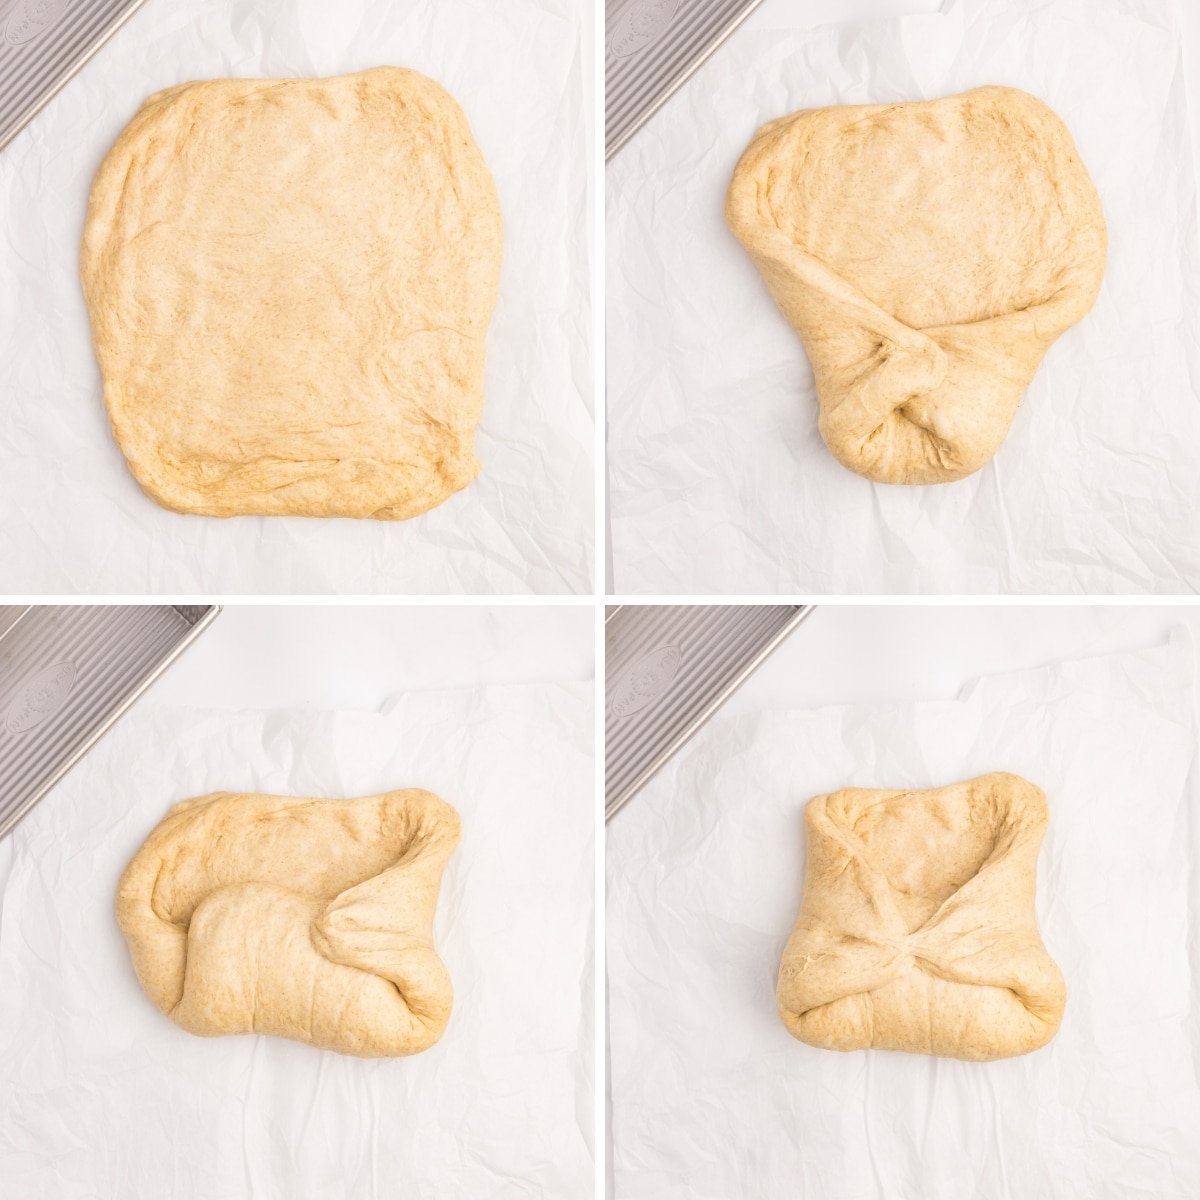
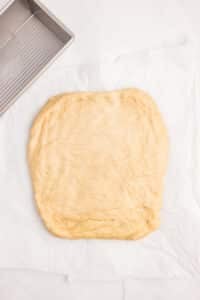
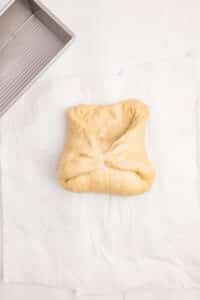
- Use a bench scraper to divide the dough into two halves.
- Flatten one of the dough halves into a rectangle about double the size of your loaf pan.
- Roll the dough up, tucking in the edges as you go.
- Keep tucking and rolling until a loaf is formed.
Baking the Loaf
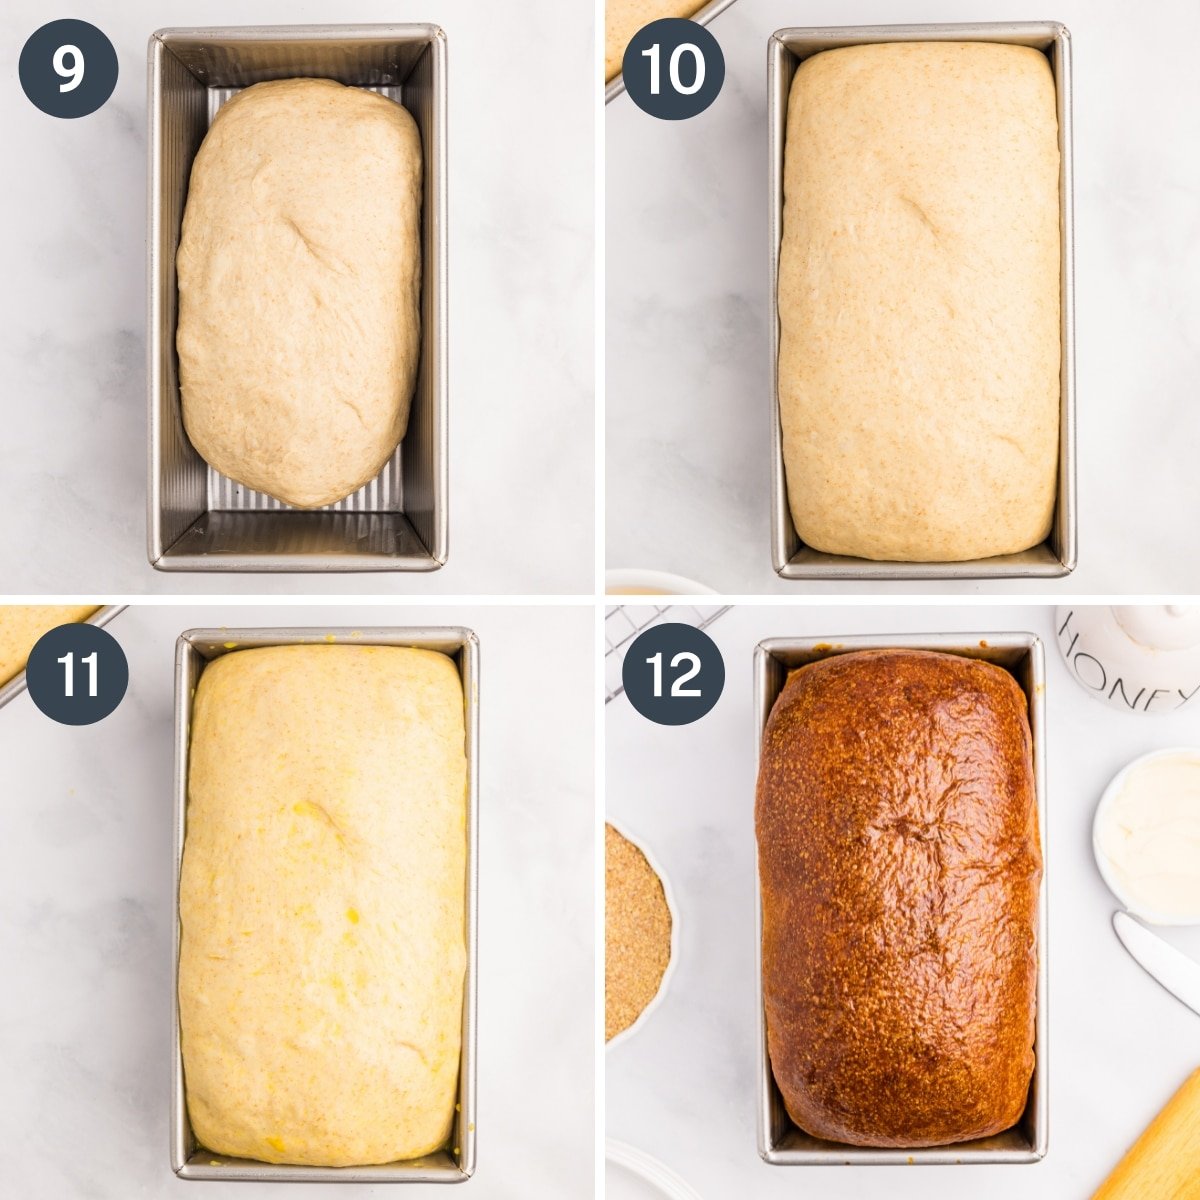
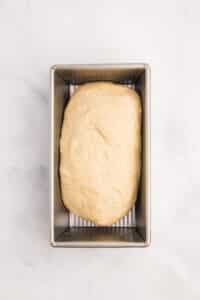
- Place the shaped loaf in a greased loaf pan. Repeat with the remaining half of the dough and a second loaf pan.
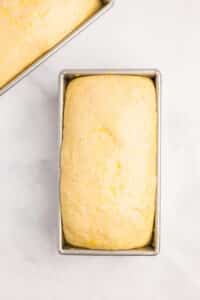
- Lightly cover the loaves and allow them to rise in a warm place for 1 hour, or until slightly puffy and the dough has reached the rim of the pan.
- The egg wash (optional): Whisk together 1 tablespoon of warm water and 1 large egg. Brush the tops of the loaves with the wash using a pastry brush.
- Bake in a 425ºF oven for 15 minutes, then turn down the heat to 350ºF and bake for another 20-25 minutes, or until the top of the loaf is golden brown and the insides have reached a minimum internal temperature of 190-210ºF (88-99ºC).
Cooling the Loaves
Allow the loaves to cool in the pan for 15 minutes, then remove them from the pans and allow the uncovered loaves to cool for at least 15 minutes (although 1-2 hours is best if you can resist) before slicing.
If you plan on eating your bread, wait for it to cool completely before wrapping. This prevents condensation, which causes excess moisture and can lead to mold.
Storing Homemade Bread
- Wait for it to cool completely before wrapping and storing.
- Keep it in a cool, dark place away from heat or moisture.
- We recommend wrapping it in plastic wrap, using a bread bag, or a ziplock bag.
- Linen bread bags work well for boules with hard crusts, but not as well for sandwich loaves such as this one.
- To keep your loaf fresh, only slice as much as you need. This prevents the loaf from drying out too quickly.
- Keeps at room temperature (wrapped tightly) for 2 days, or in the refrigerator for up to 5 days.
- For longer storage, freeze your loaves for up to 3 months. If desired, pre-slice the loaves so you can take one slice out at a time.
Recipe FAQs
Yes, as long as you use yeast too! The sourdough flavor will not be as strong, but you can make a decent sourdough discard whole wheat bread by adding 2 ¼ teaspoons of instant dry yeast (or proof active dry yeast in warm milk and honey). The first rise will be just an hour or so, and the second 30-45 minutes, rather than the long fermentation required for traditional sourdough.
If your sourdough starter is new, not active, or past its peak, your bread may not rise. Another possibility is that you heated the milk and butter mixture too high; once the hot liquid was added to the sourdough starter, it may have killed it. Try again with an active starter that has reached its peak and has had at least 3 feedings after being removed from the fridge.
If your home is very warm or you let your dough go for too long, it may be overproofed and flat. If you baked the loaf and it's flat or dense, you can slice it into cubes and make sourdough croutons. If it's still in its dough form, you can make focaccia or pizza dough.
Yes! If you prefer, you can use maple syrup or granulated sugar in place of the honey called for in this sourdough sandwich bread recipe.
First, make sure that your starter is active. It should be at least 3 weeks old, and should reliably double in size within 12-24 hours after feeding. Use it at its peak – when it has doubled and appears to have room to continue growing. If it has begun to fall back, it has passed its peak. You can still make bread, but you might be frustrated with variable rising times, etc.
More Sourdough Bread Recipes:

If you loved this recipe for whole wheat sourdough bread, let me know by leaving a 5-star review in the recipe card or comment below! You can also tag me on Instagram @folkkitchenblog.
📖 Recipe

Sourdough Whole Wheat Sandwich Bread
Ingredients
- ¼ cup honey 85 grams
- ½ cup active sourdough starter 100 g
- ½ cup unsalted butter 115 g
- 2 cups milk 225 grams
- 1 teaspoon salt 7 g
- 5 - 6 cups bread flour 600 g weight (or all-purpose flour)
- 1 cup whole wheat flour 150 g
For the egg wash (optional):
- 1 large egg
- 1 Tablespoon water
Instructions
Cook ModeBefore you get started:
- Feeding the starter: If you already have 100 grams of active starter, you can disregard the following. To feed your starter, add 20 grams of starter to a mason jar. Next, add 40 grams of all-purpose flour and 40 grams of filtered water. Stir to combine and allow it to sit at room temperature for 8 hours or until it has doubled in size.
Making the dough:
- To a saucepan, add the honey, unsalted butter, milk, and salt. Heat the milk mixture until warm (about 90ºF or 32ºC), or until the butter begins to melt.

- Add the active sourdough starter to the bowl of a stand mixer.
- Add the warmed milk and honey mixture to the bowl of the stand mixer, stirring as you pour to incorporate the sourdough starter.
- Add the whole wheat flour and, using the paddle attachment, mix until it is fully combined with the liquid.
- Add 2 cups of the bread flour and continue to mix. The dough will be very wet.
- Switch to the dough hook attachment and begin adding the remaining all-purpose flour to the dough about ½ cup at a time, mixing in between each addition to incorporate the flour. You’ll know that enough flour has been added when the dough is slightly wet, but easily comes away from the sides of the bowl when it is being mixed.
- Set your stand mixer to medium speed and allow the dough to knead for 3 minutes. You can also do this by hand by turning the dough out onto a clean, dry surface and kneading the dough by hand for 5-8 minutes. You may need some additional flour to prevent the dough from sticking to the counter.
- Turn out the dough onto a clean surface, wipe your mixing bowl clean, and lightly grease it with olive oil or baking spray.
- Transfer the dough to the greased bowl, cover it with a damp tea towel or plastic wrap, and place it in a warm spot for about 8-12 hours or until the dough has doubled in size. We prefer to do it overnight and bake in the morning.


Baking the Bread:
- Prepare 2 loaf pans by lightly greasing the inside and fitting them with parchment paper, leaving a slight overhang on both sides.
- Once the dough has doubled in size, turn the dough out onto a lightly floured surface and cut it in half.
- Shaping the loaves. Flatten one of the pieces of dough into a rectangle about double the size of the bread pan.
- Then roll the dough up, tucking in the edges as you go to shape the dough into a loaf form.
- Place the dough (seam side down) into one of the prepared bread pans. Repeat this process with the other half of the dough.
- Place the loaves in a warm place for about an hour, covered gently, until they are puffy and have risen over the edges of the loaf pans.
- Prepare the egg wash by adding the egg and 1 tablespoon of water to a small bowl. Stir or whisk until well combined.
- Using a pastry brush, brush the tops of the loaves with the egg wash.
- About 45 minutes into the second rise, preheat the oven to 425°F (220ºC).
- Once the oven is preheated and the loaves have risen for about an hour, place the dough in the oven and bake for 15 minutes.
- After 15 minutes, reduce the heat of the oven to 350°F (180ºC) and bake for another 20-25 minutes or until the top is golden brown and the bread has reached a minimum internal temperature of 190-210ºF (88-99ºC).
- Remove the bread from the oven, transfer to a cooling rack (keeping the bread in the bread pan), and allow to cool for 15 minutes.
- Remove the bread from the bread pans and allow it to cool on a cooling rack for at least 15 minutes before cutting into it (although 1-2 hours is best for the crumb).
- Enjoy the sourdough whole wheat bread as a sandwich bread, or toast it with some butter and jam.


Notes
Nutrition
Please note that some of my blog posts here at Little Home in the Making may contain affiliate links. If you make a purchase through these links, I will get a small commission at no additional cost to you. See our disclaimer for more information.


Dorothy Bigelow says
We love this recipe for sandwiches. It has all of the benefits of sourdough fermentation, with a little extra fiber from the whole wheat flour. Perfect for PB&J's and BLT's.