


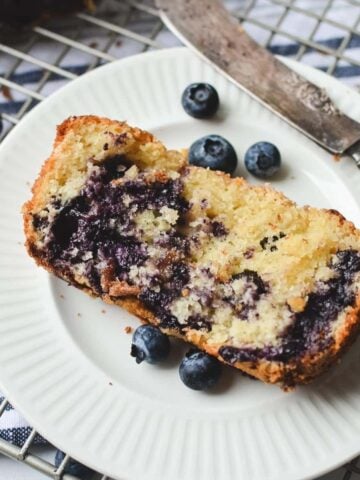
These sourdough scones are sure to become your go-to discard recipe!
They are tender and flaky, with just the right balance of sweetness and tanginess from the sourdough starter. They freeze wonderfully, too.

Do you want to know the secret to the best scones? Well, it's sourdough, of course!
Tender, flaky, buttery, and with a gentle tang from the sourdough starter, these sourdough discard scones are sure to delight everyone who tries them.
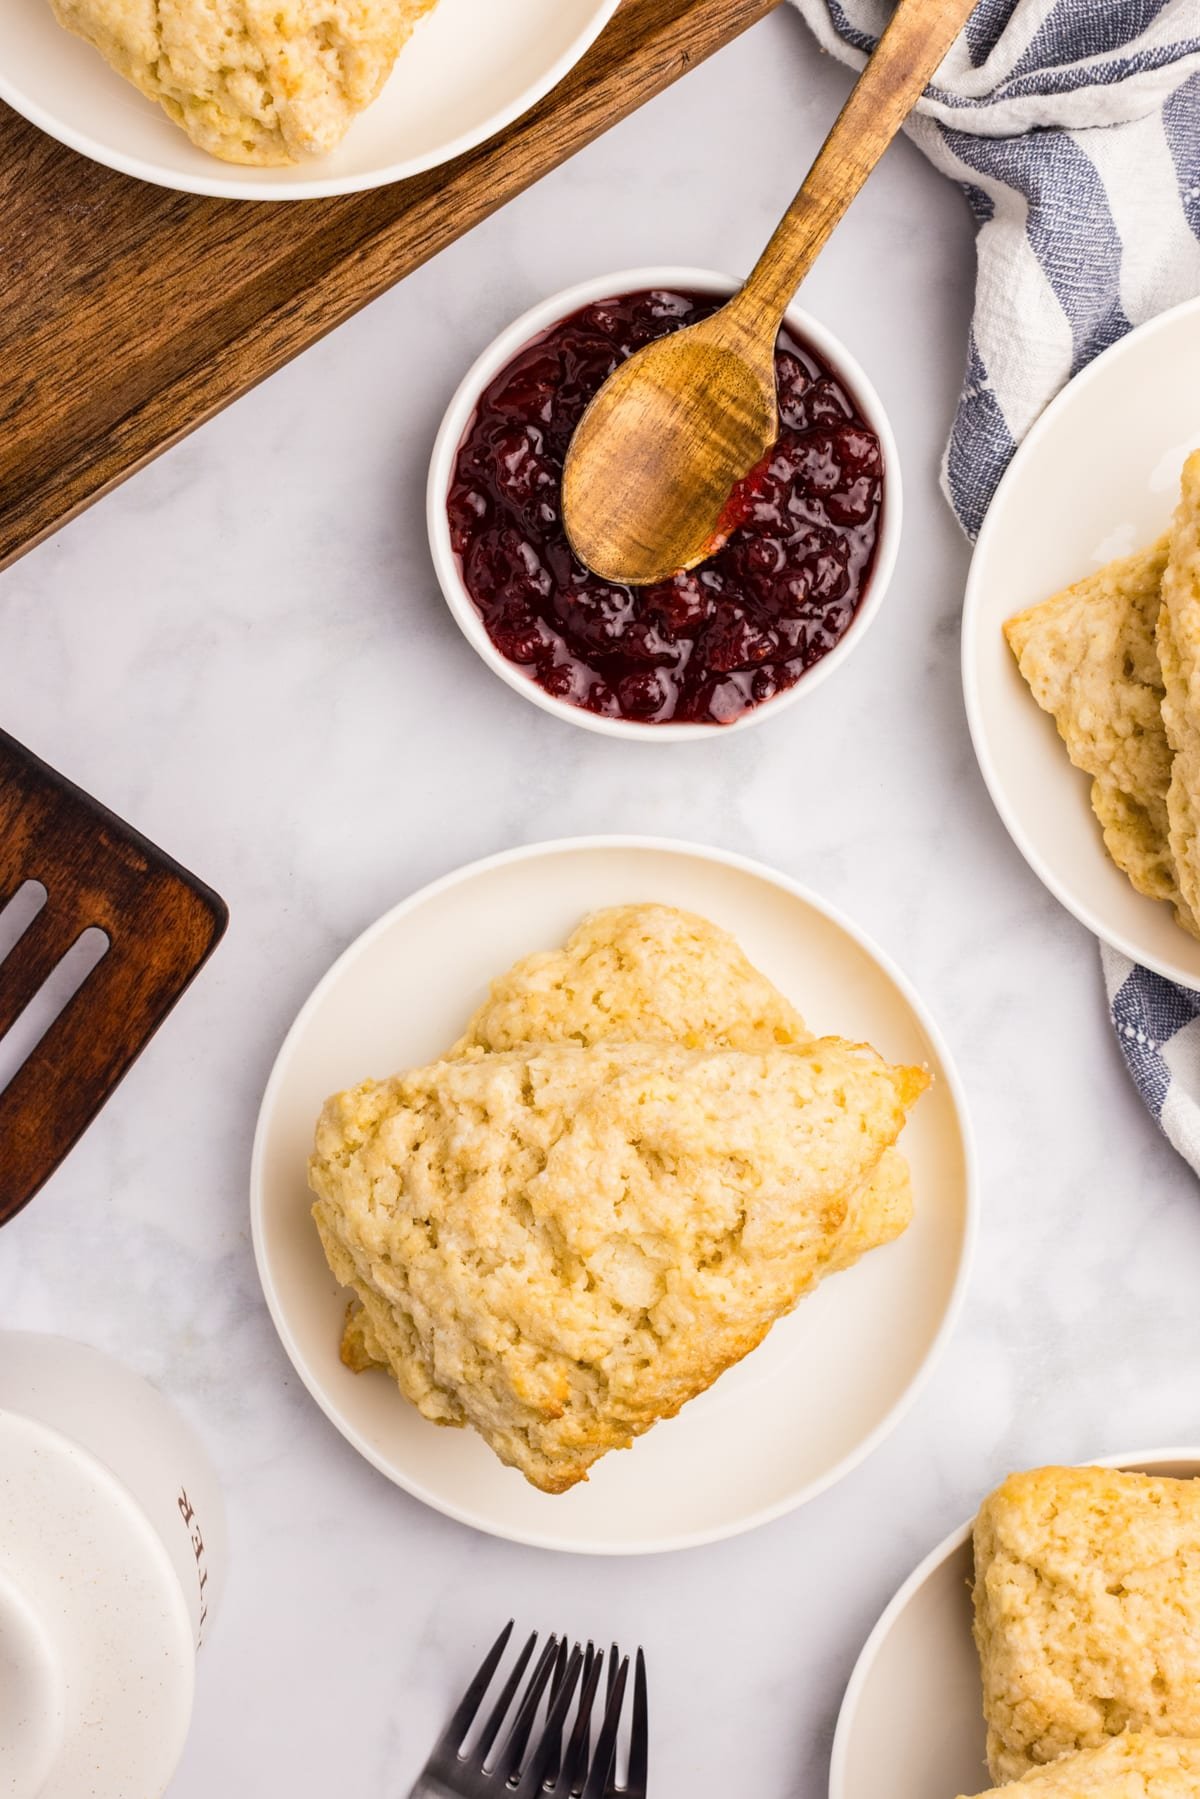
Eat them warm out of the oven, slathered with butter, spread with strawberry jam, or filled with clotted cream. However you serve them, one thing is for sure: you're going to love these tender scones!
Why You'll Love Them:
- Uses leftover starter. Whether you have lots of active starter or extra discard available, this basic scone recipe is the perfect way to put it to good use!
- Tangy and subtly sweet. With just the right balance of tanginess and sweetness, these flaky scones are the perfect addition to a casual brunch or afternoon tea.
- Easy to make. Everything can be made in a large bowl – no mixer or stretch-and-folds needed.
Ingredients
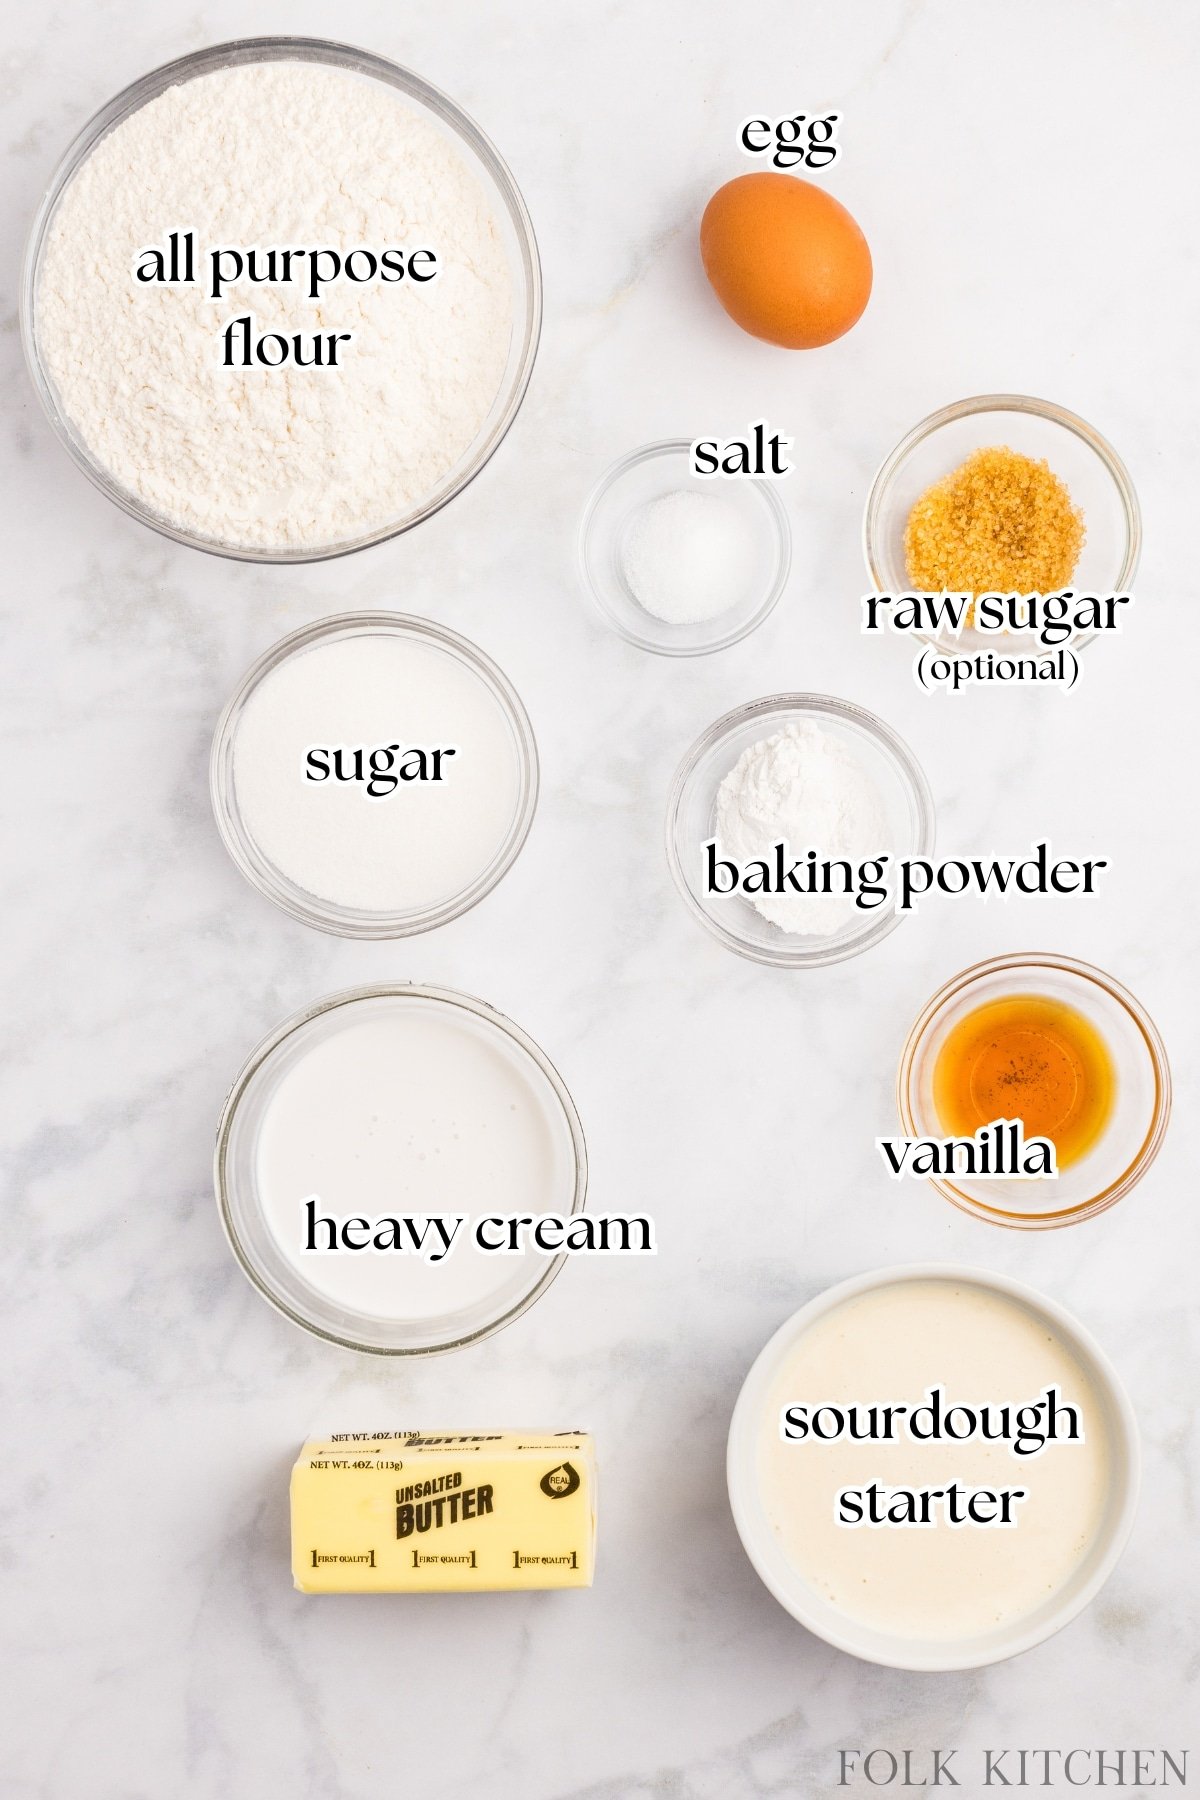
- Sourdough starter: Either a discarded or an active sourdough starter can be used. If using an active starter, stir it down first to release the bubbles.
- Flour: All-purpose flour works great for this recipe! We like to use unbleached, but whatever you have on hand is just fine.
- Sugar: For the best results, use granulated sugar. Organic cane sugar is fine, but we recommend against liquid sweeteners like honey or maple syrup – they make the dough too wet.
- Butter: We tested this recipe with unsalted butter. If you use salted butter, just scale the added salt back a bit.
- Heavy cream: This makes for the most decadent scones! It adds the perfect silky texture.
You will also need:
- Baking powder
- Vanilla extract
- Raw sugar (turbinado or coarse)
- Salt
- Egg
How to Make Sourdough Scones
What happens when you test and transform one of your favorite scone recipes into one that uses extra sourdough discard? Well, you get flaky layers, buttery flavor, and an irresistible texture – that's what!
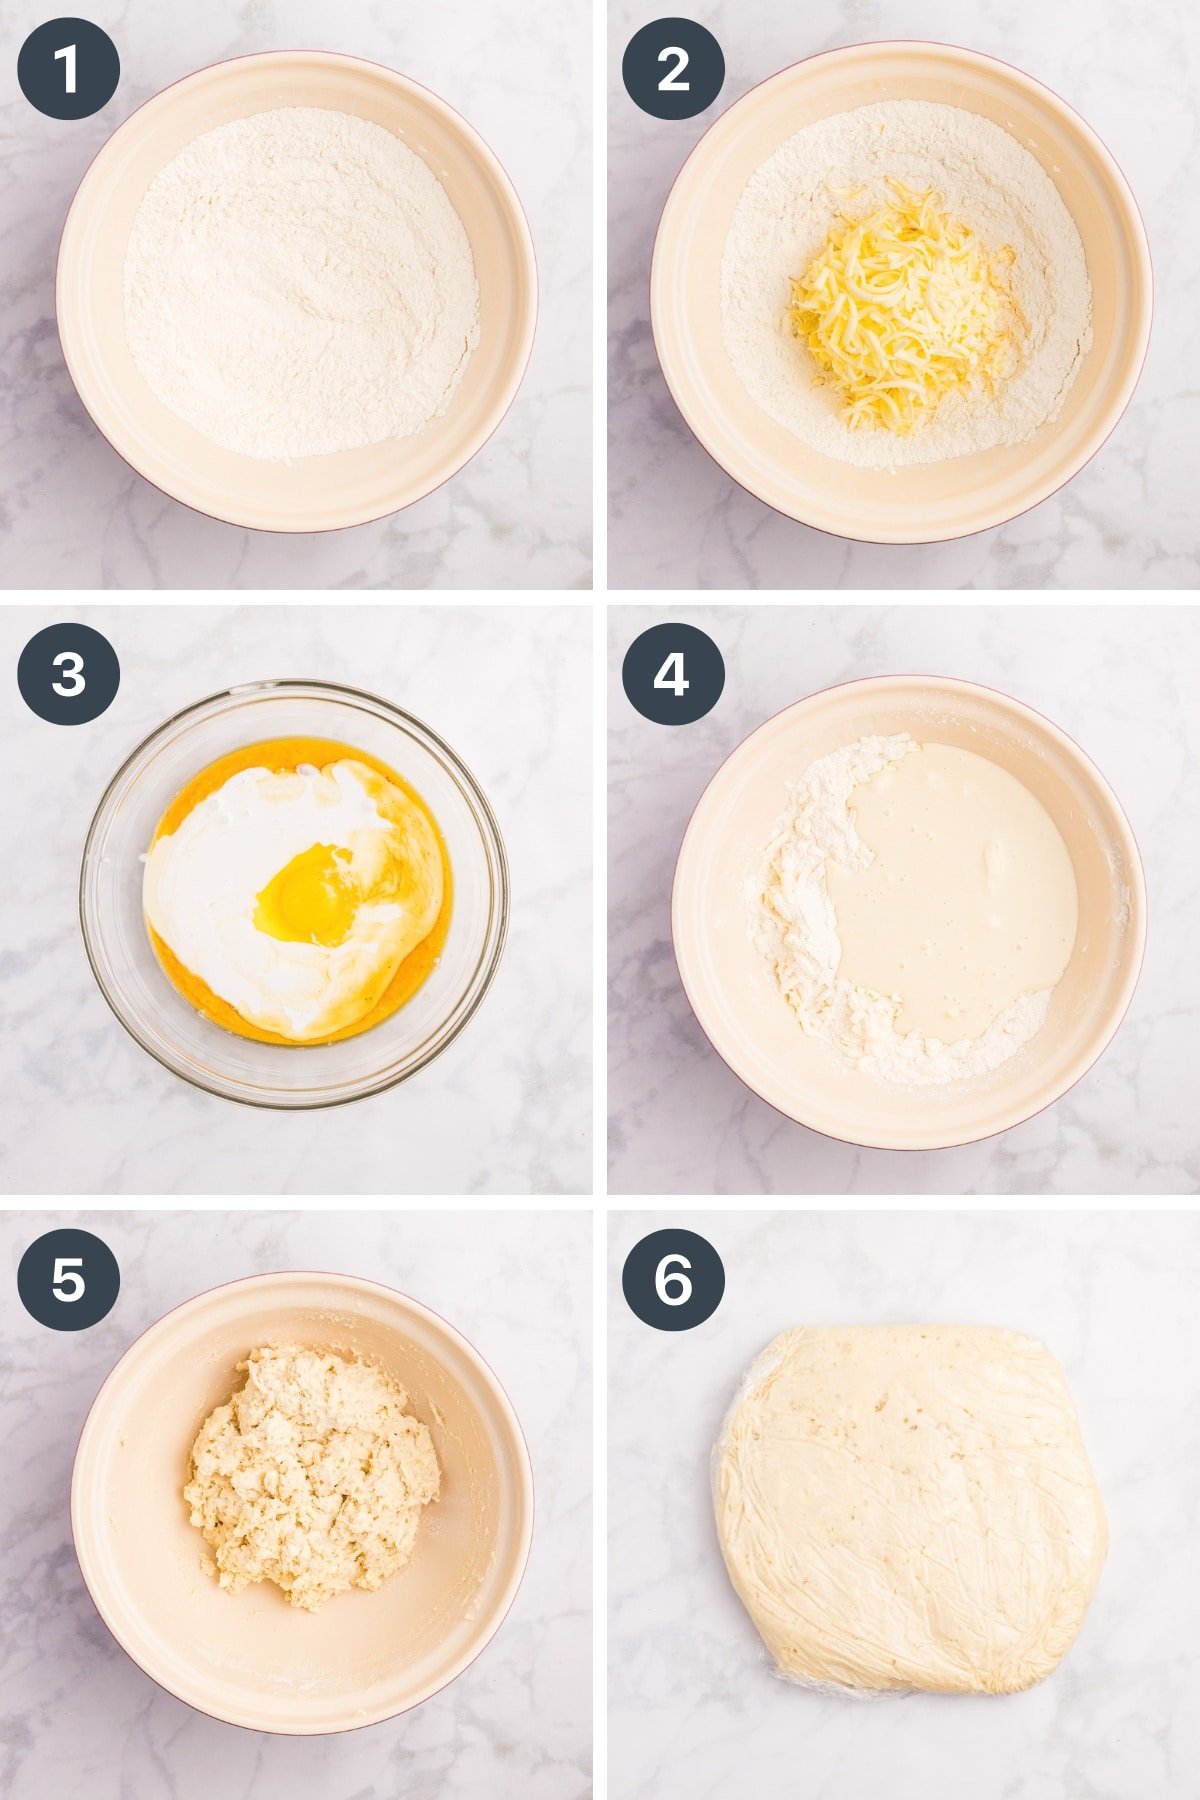
- Whisk together the dry ingredients.
- Using a box grater, grate 1 stick (½ cup) of very cold butter into the flour mixture. Stir.
Note: We recommend freezing and grating your butter with a box grater, but if desired, you can cube it and cut it in with a pastry blender instead. - Whisk together the wet ingredients in a bowl.
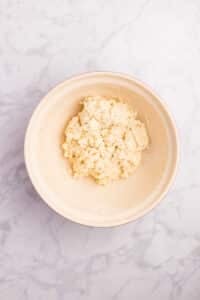
- Add the wet ingredients to the dry ingredients, then add the sourdough starter (or discard).
- Bring it together into a soft and shaggy dough.
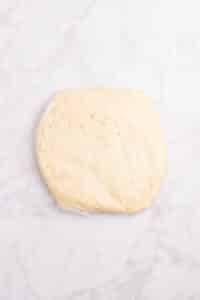
- Pat the scone dough into a circle and wrap it tightly with plastic wrap. Place in the fridge to chill (cold ferment) for at least 30 minutes, but 8-24 hours is ideal.
Top Tip:
Sourdough hydration changes things. You may find the dough very crumbly (or very wet) according to how hydrated you keep your dough. This can be troubleshooted by adding a little heavy cream for a crumbly dough, or a little extra flour for a wet dough.
Shape and Bake
After your dough has cold fermented, you're ready to start baking!

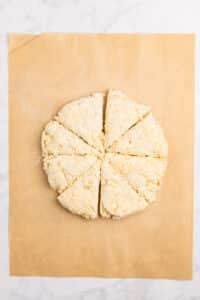
- Pat the dough into a circle and place it on a piece of parchment paper.
- Use a sharp knife or bench scraper to divide the dough into 8 wedges.
- Place the wedges on a parchment-lined baking sheet, spaced out evenly to allow for even airflow during baking. Brush with heavy cream and sprinkle with raw or coarse sugar (if desired).
- Bake in a 425ºF (225ºC) oven for 22-26 minutes, or until golden brown.

Flavor Variations
- Glazed: Skip the raw sugar topping and drizzle with a simple powdered sugar glaze after baking.
- Savory: Reduce the sugar to 1 tablespoon (in the dough) and omit the vanilla extract for a neutral base. Add ham, shredded cheese, chives, etc.
- Your favorite add-ins: Feel free to add in dried fruit, citrus zest, or chocolate chips before chilling – just make sure your add-ins are low moisture (so use lemon zest instead of lemon juice).
Storing Leftover Scones
- Room temperature: Transfer the scones to an airtight container and store at room temperature for up to 2 days.
- Refrigerator: Scones stored in the refrigerator (in a sealed bag or storage container) should keep for up to 5 days. Warm them briefly before serving to help with texture.
- Freezer: Scones can be frozen either after baking or before baking to be cooked at a later date. Baked scones should be cooled first, then frozen for up to 3 months. Reheat before serving.
- Unbaked scones: If you want to bake frozen scones, add about 4-5 minutes to the baking time.
Expert Tips
- Cold ferment as long as you can (but not too long). We found that the ideal chilling time for these scones was at the 24-hour mark, but anywhere from 8-24 hours is a great window. If you're in a rush, they can be baked after just 30 minutes of chilling.
- Chilling is NOT optional. Chilling the dough helps the scones hold their shape in the oven. If you don't chill your dough, your scones are likely to spread out. Cold ingredients are always a best practice with sourdough biscuits and scones.
- Use COLD butter. If possible, freeze your butter before grating. The colder the butter, the more tender and flaky the scone.
Recipe FAQs
Yes! We actually recommend it! Cold fermenting the dough for 8-24 hours will enhance the flavor slightly while keeping the crumb tender.
This is usually caused by the sourdough starter's hydration or inaccurate measurements. Everyone keeps their starter how they like it, and your starter may have a higher hydration (or you may maintain a stiff starter). Adding a little extra heavy cream for a crumbly dough (or a little extra flour for a wet dough) can help restore the balance.
Ovens vary wildly, and high heat can cause rapid browning before the insides of the scones are baked through. If you notice your scones browning quickly, tent them loosely with foil to help slow things down.
This can happen if the baking powder has expired or the butter melted before baking (usually due to improper chilling of the dough, or leaving it on the counter for too long). Next time, check the freshness of your baking powder and ensure that you chill the dough adequately.

More Sourdough Discard Recipes:


If you loved this recipe for sourdough discard scones, let me know by leaving a 5-star review in the recipe card or comment below! You can also tag me on Instagram @folkkitchenblog.
📖 Recipe

Sourdough Scones
Ingredients
- 240 grams all purpose flour about 2 cups
- 60 grams granulated sugar ¼ cup
- 9 grams baking powder 1 tablespoon
- 3 grams salt ¼ teaspoon
- ½ cup unsalted butter cold and grated (113g)
- 1 large egg beaten
- 235 grams sourdough discard about 1 cup stirred down
- 1 teaspoon vanilla extract (5 grams)
- 60 grams heavy cream about ¼ cup
For topping (optional)
- 1 tablespoon heavy cream
- 1 tablespoon raw sugar or coarse sugar
Instructions
Cook Mode- Mix the dry ingredients. Add the flour, sugar, baking powder, and salt to a large bowl. Whisk well to combine.
- Add the butter. Add the grated cold butter to the bowl. Using a rubber spatula, gently toss and distribute the butter throughout the flour mixture. Set aside.

- Stir the wet ingredients. In a separate mixing bowl, add the egg, sourdough starter, vanilla extract, beaten egg, and heavy cream.
- Combine the wet and dry ingredients. Add the wet to the dry, using a silicone spatula to gently stir until a soft dough forms. Do not overmix.
- Chill the dough (cold fermentation). Pat the dough into a cohesive disc shape and wrap it tightly in several layers of plastic wrap. Refrigerate (cold ferment) for at least 30 minutes, or overnight (8-12 hours). Fermentation can go as long as 24 hours if desired.
- Prepare the oven. Preheat the oven to 425ºF (220ºC) and line a baking sheet with parchment paper; set aside.
- Shape the scones. Lightly flour your work surface. Unwrap the chilled dough and place it on the surface. Using a bend scraper or knife, cut the disc in half, then into quarters, and then cut each quarter in half to create 8 scones (wedge-shaped).
- Bake the scones. Transfer the scones to the prepared baking sheet, spacing them slightly apart. Brush the tops with heavy cream and sprinkle with raw sugar (if desired).
- Bake for 22-25 minutes, or until golden brown with a minimum internal temperature of 200ºF (93ºC)
- Serve warm, plain, or with butter and jam!


Notes
Nutrition
Please note that some of my blog posts here at Little Home in the Making may contain affiliate links. If you make a purchase through these links, I will get a small commission at no additional cost to you. See our disclaimer for more information.


Dorothy Bigelow says
So flaky and delicious, and we love that they can be made without special equipment or fancy techniques. Great for beginner sourdough bakers.