Instant Pot Chicken Bone Broth
This Instant Pot bone broth gels perfectly every time! Homemade broth is easy, economical, and absolutely delicious.
Print
Pin
Servings: 8 cups
Calories: 14kcal
Equipment
Ingredients
- 2 chicken carcasses or 2-3 pounds of assorted chicken bones
- 8-10 cups water
- 1 onion peeled and quartered
- 2 ribs celery halved
- 2 large carrots peeled and quartered
- 2 tablespoons apple cider vinegar optional
- 2 teaspoons salt (I use Redmond’s or pink salt)
- 1 teaspoon whole peppercorns optional
- 2 bay leaves
- ½ bunch parsley optional
Instructions
Cook Mode- Add the chicken carcasses, onion, carrots, celery, apple cider vinegar (if using), salt, peppercorns, and bay leaves to a 6 or 8-quart Instant Pot. Stir well.

- Add enough water to cover the bones (about 8-10 cups). Do not exceed the max fill line marked on the inner portion of the pot.
- Place the lid on the Instant Pot and set the valve to “sealing.”
- Cook on manual pressure for 2 hours (120 minutes; or use the “Soup” mode if available on your Instant Pot model).
- Once the cook time is done, you may either do a quick pressure release by switching the valve to “venting” OR you can do a natural pressure release by allowing the pot to release pressure naturally. I prefer the natural release as the broth is more clear (versus cloudy) and I find it is more likely to gel. You will know the pressure has been fully released when the pin drops on the lid. Then, you can safely open the lid away from your face.

- Optional: If using parsley, add it to the hot broth and allow it to rest for 10-15 minutes before straining.

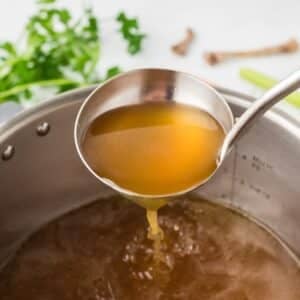
- Fit a large bowl with a fine mesh or stainless strainer. Ladle in the broth in so that the strainer catches the vegetables and bones, while the chicken broth collects into the bowl below.

- Allow the broth to cool completely before tightly wrapping the bowl of broth OR transferring to a glass canning jars.

- If desired, place the broth in the fridge and allow to chill for at least 6 hours, so the fat solidifies at the top and can be removed. Alternatively, you can use the hot broth with the fat in it (or store it with a fat cap), as it’s just a matter of preference!
- Transfer the broth to canning jars or freezer containers for storage. Keep in the refrigerator for 3-5 days, or in the freezer for up to 6 months.
Notes
Adapted from: How to Make Chicken Broth
Previously cooked chicken: I like to use local chicken that I roast at home (try my Dutch Oven Roasted Chicken recipe), but you could even use rotisserie chicken if you wanted to.
Fat cap: If desired, you can store your broth in jars with a fat cap in place. This helps prolong storage slightly, and the fat can be removed before using the broth (or can be included in whatever soup or recipe you're using it in).
Freezing: Transfer cooled and chilled broth to freezer safe containers (like plastic, glass, or silicone molds like Souper Cubes). Label and store for up to 3 months in the freezer.
Slow Cooker Chicken Bone Broth: Cook on "low" for 15-18 hours.
Nutrition
Calories: 14kcal | Carbohydrates: 3g | Protein: 0.4g | Fat: 0.1g | Saturated Fat: 0.02g | Polyunsaturated Fat: 0.02g | Monounsaturated Fat: 0.01g | Sodium: 605mg | Potassium: 82mg | Fiber: 1g | Sugar: 1g | Vitamin A: 2562IU | Vitamin C: 2mg | Calcium: 19mg | Iron: 0.2mg
