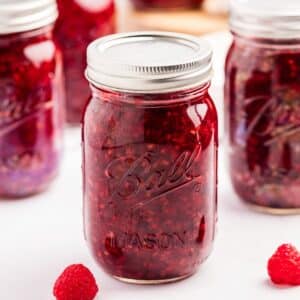
Canning Raspberry Pie Filling
This easy method for canning raspberry pie filling is the best way to preserve your Summer raspberries (or frozen ones). Just 5 Ingredients!
Print
Pin
Servings: 5 pints
Calories: 641kcal
Equipment
- Canning jars lids, and rings (pints (500ml); wide mouth preferred)
- Headspace checker and de-bubbler
- Wide mouth funnel
- Whisk
- Thick kitchen towel
Ingredients
- 2 ⅔ cup sugar
- 1 cup ClearJel cook type, scant
- 3 cups cool water
- 3 tablespoons lemon juice bottled
- 10 ½ cups raspberries fresh or frozen* (thawed if frozen)
Instructions
Cook Mode- Prepare equipment. Wash all canning supplies, jars, lids, and rings in hot soapy water. Sterilize if needed.
- Prepare the jars and lids. Fill the canner about ⅔ of the way with water and bring to a boil. Add 6 pint jars (500ml) and bring to a boil, holding the boil for at least 5 minutes. Turn off the heat and leave in the canner until needed. Add the jar lids to a pot of gently simmering water and keep warm over low heat during the canning process.
- Once the jars have been sterilized, add the sugar and ClearJel to a large heavy-bottomed saucepan. Whisk well, then add in the water and whisk until smooth. If needed, add coloring*** to help improve the appearance of the finished pie filling.
- Bring to a boil over medium-high heat, making sure to stir constantly (it’s very important that you watch this carefully and whisk/stir throughout the process).
- Once a boil is reached, add the lemon juice and whisk well. Boil for 1 minute, stirring constantly.
- Reduce the heat to low and add the raspberries, folding them in gently with a wooden spoon or silicone spatula.
- Increase the heat to medium-high heat and bring to a boil once again, gently stirring the raspberries to prevent clumping or scorching.
- Once a boil is reached, remove from the heat.
- Remove a jar from the hot water (empty any water remaining in the jar) and turn the heat back to “high” to begin the boiling process for the canner once again.
- Fit the jar with a canning funnel, and ladle the pie filling into the jar, leaving a generous 1” headspace (up to 1 ½ inches if using a regular mouth jar****). Remove any air bubbles with a clean butter knife or debubbler tool. Adjust headspace if necessary.
- Wipe the rim of the jar with a clean, damp kitchen towel (or paper towels). Using a magnetic lid lifter, center a warm lid on the jar, then secure a canning ring until it is fingertip tight.
- Place the filled jar in the canner, then repeat with the remaining jars until all of the pie filling has been used up. You should get 5-6 pints.
- Place the lid on the canner and bring it back up to a rolling boil over high heat.
- Once a boil has been reached, process for 30 minutes.
- When the 30 minutes are up, turn off the heat and remove the canner from the element. Remove the lid, and wait 5 minutes.
- After the 5 minutes are up, remove the jars with a jar lifter and place them on a thick kitchen towel. Leave them completely undisturbed for 24 hours.
- After 24 hours, check the seals and remove the canning rings. Wipe down the jars and label them. Any jars that have not been sealed should be moved to the fridge to be eaten right away.
Notes
Adapted from the Ball Complete Book of Home Preserving.
Fresh or frozen raspberries? I like to use frozen raspberries for a few reasons. One is that they are frozen at peak ripeness, so their color is more vibrant and their flavor more pronounced. Another is that they are very inexpensive compared to fresh. Fresh is a great option if they are in season, and you’ve picked some up at a U-pick or if you’ve grown your own.
*Lemon juice: Use store-bought bottled lemon juice instead of freshly squeezed. Bottled lemon juice has to meet certain criteria for acidity, while freshly squeezed juice varies in acidity. A high acidity is part of what makes a recipe like this safe for water bath canning, so it’s important to follow the recipe.
**If using frozen raspberries, thaw them in a large, covered bowl first. Reserve any of the thawed liquid and use it in place in some of the water called for in the recipe. This helps improve the color.
***Adding color: Many people like to add a few drops of blue and/or red food coloring to the sugar, ClearJel, and water mixture. You can boost color naturally by using some tart cherry juice as a portion of the water (around ¼ cup at most), and/or including a few crushed blueberries. If using frozen raspberries I find there is little need to adjust the color.
****Headspace: Many canners find that the headspace requirements for pie filling are not adequate. The recommendation is 1”, but if using a regular mouth jar you may find that the pie filling rises right up to the lid (or you may see siphoning). I recommend using wide-mouth jars, as that is how I’ve managed to get the best results. If using regular mouth jars, instead observe a generous 1” headspace, all the way up to 1.5”.
Storing: The USDA states that home canned food (with a true seal) is good for at least 1 year, while most jar manufacturers say the seal is good for at least 18 months. Many experienced canners maintain that canned foods are good for many years, but the quality will begin to degrade after 1 year. Keep in a cool, dark place (like a basement) for the best results. Never store your home canned goods with the outer ring in place, and discard if the seal is compromised or there is any off smell or growth in the jar.
High Altitudes
- 1,001-3,000 feet: 35 minutes
- 3,001-6,000 feet: 40 minutes
- 6,001-8,000 feet: 45 minutes
- 8,001-10,000 feet: 50 minutes
Nutrition
Calories: 641kcal | Carbohydrates: 160g | Protein: 3g | Fat: 2g | Saturated Fat: 0.1g | Polyunsaturated Fat: 1g | Monounsaturated Fat: 0.2g | Sodium: 13mg | Potassium: 393mg | Fiber: 17g | Sugar: 118g | Vitamin A: 84IU | Vitamin C: 70mg | Calcium: 69mg | Iron: 2mg
